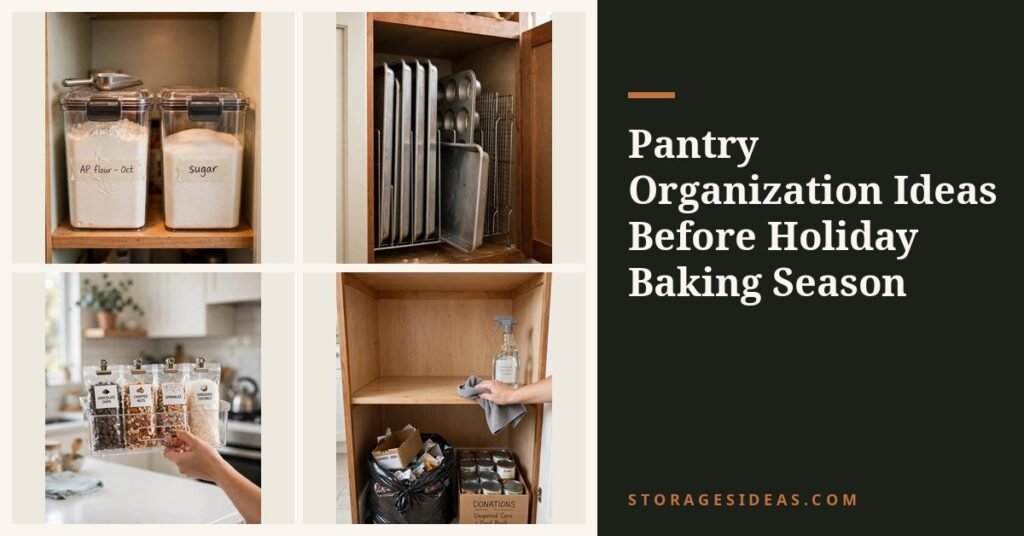
The holiday baking rush starts the first week of November, and grocery prices on flour, sugar, butter, and chocolate chips creep up as Thanksgiving gets closer.
If you restock and reorganize once, right now, in mid-October, you get two wins: you buy at today’s prices, and every recipe from pumpkin pie to Christmas cookies starts from a pantry that actually works.
This is your holiday baking pantry organization plan: 12 ideas with exact container sizes, the 10-minute tests that tell you what to toss, and a zone map built for a real 24-inch-deep shelf. Do the whole thing in one afternoon and you won’t touch the pantry again until January.
Why Holiday Baking Breaks an Ordinary Pantry
A normal pantry is stocked for everyday cooking: a half bag of flour, three half-used spice jars, a baking soda box that has been open since spring.
Holiday baking triples the load in a week, you need flour, granulated sugar, brown sugar, powdered sugar, leaveners, vanilla, chocolate chips, nuts, pie filling, and evaporated milk all at once, and all findable at 7 a.m. while the oven preheats.
The failure mode is always the same: stale leaveners give you flat pie crusts, dead spices make gingerbread taste like cardboard, and the half-used bag of flour on a 24-inch-deep shelf gets shoved to the back where you buy a duplicate instead of using it. our kitchen storage ideas guide
The fix isn’t buying more. It’s purging what won’t work, decanting what spills, and mapping the shelf so baking day runs on autopilot. It comes down to three things: freshness (old ingredients sabotage the best recipes), visibility (if you can’t see it, you’ll rebuy it), and reach (every-bake-day items live up front).
The 12 ideas below cost less than one wasted grocery run.
1. Decant the Big Two: Flour and Sugar Deserve Airtight Homes
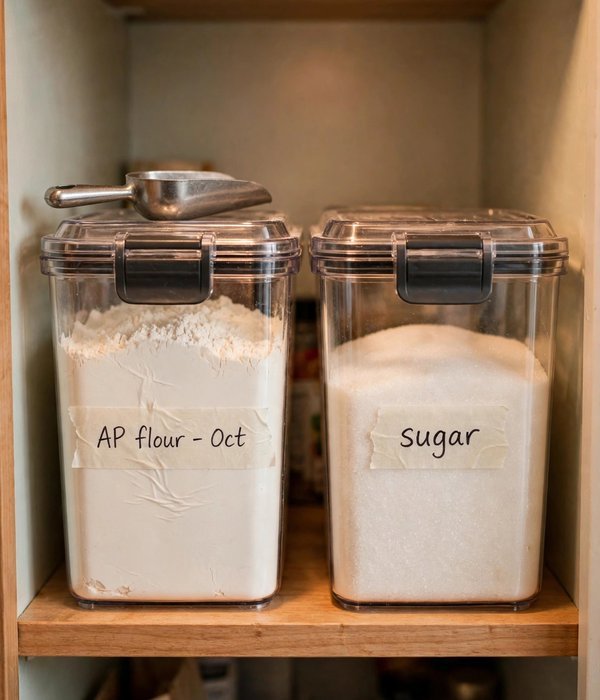
Paper flour bags tear, can’t reseal, and invite pantry moths and weevils straight through the folds. Decant once into airtight containers sized to the bag, fresh, visible, pest-proof.
A 5-pound bag of all-purpose flour holds about 19–20 cups and needs a container of at least 4 quarts (1 gallon / 128 fluid ounces), a 5-to-6-quart container is the sweet spot because it leaves room to get a measuring cup in and out.
A 4-pound bag of granulated sugar fits a 2.5-quart container; a 2-pound bag of brown sugar needs about 1.5 quarts, and brown sugar stays soft only if the lid seals tight (toss a small terra cotta disk in, soaked 15 minutes, to keep it from turning into a brick).
Quick decanting cheat sheet (save this one):
- All-purpose flour, 5 lb → 5–6 qt airtight container, silicone gasket lid
- Granulated sugar, 4 lb → 2.5 qt airtight container
- Brown sugar, 2 lb → 1.5 qt container + terra cotta disk
- Powdered sugar, 2 lb → 2 qt container (clumps in humidity)
- Baking soda/powder → keep in the box, inside a 0.5–1 qt airtight jar
Tips for best results: buy square containers, up to 25% less wasted space side by side, and they stack. Insist on a flip-lock or clamp lid with a visible silicone gasket, and label the fill date.
Watch out: don’t leave a half-bag behind in a too-small container, the orphaned bag is what draws pests. Measure shelf height first (most shelves sit 12–16 inches apart).
2. Audit Your Spices: If It Lasts Longer Than Last Thanksgiving, It’s Out
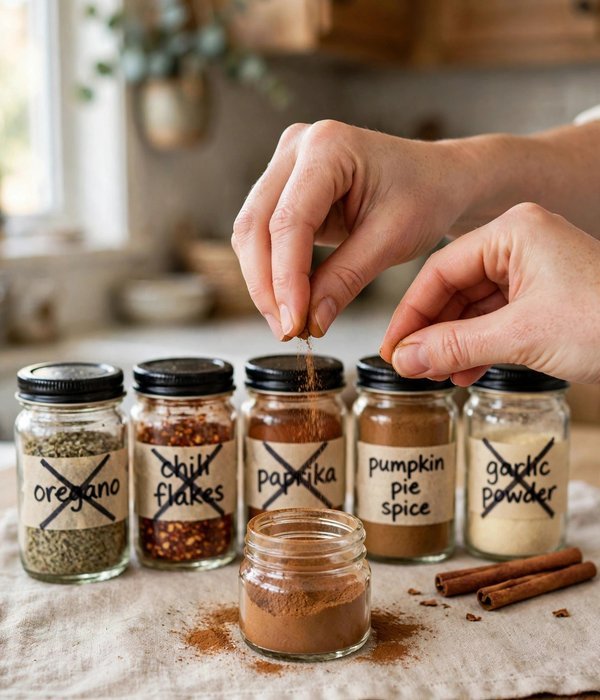
Ground spices lose their volatile oils steadily from the day they’re ground, and holiday baking is where you notice it, gingerbread made with 2-year-old cinnamon tastes dusty, not warm.
USDA FoodKeeper guidance puts the real windows at: ground spices 6–12 months at peak (up to 18 months usable), dried herbs 1–2 years, whole spices 2–3 years, and blends like pumpkin pie spice 6–12 months. Old spices won’t hurt you, but they won’t flavor anything either, and using triple the amount to compensate throws recipes off.
The pre-season audit takes 10 minutes: pull every baking spice, check the date, and smell-test anything without one.
Where it works best:
- Rub a pinch between your fingers: if the aroma hits you immediately, it stays; if it’s faint or dusty, it goes. Color fading is the same verdict.
- Keep whole cinnamon sticks, nutmeg, and cloves, they keep 2–3 years, and freshly grated nutmeg has roughly double the aroma of pre-ground.
- Toss ground ginger, allspice, and pumpkin pie spice older than 12 months; these are the workhorses of holiday baking and they fade fastest.
- Move spices off the shelf above the stove if that’s where they live, heat and steam halve their life. A dark drawer or door rack under 70°F doubles it.
- Buy small jars for the season’s key players (pumpkin pie spice, ground cloves) instead of the bulk size you’ll never finish.
- Write the month and year on new jar lids with a paint marker so next October’s audit takes 2 minutes.
3. Test Your Leaveners Before They Flatten Your Pie Crust
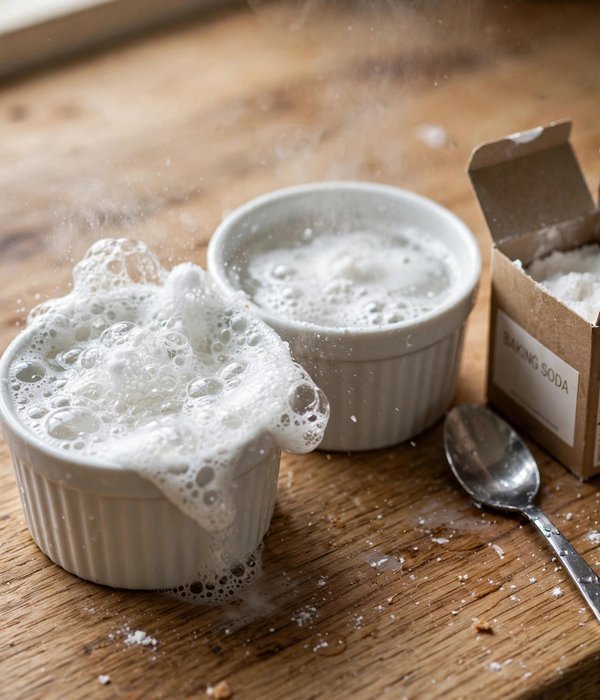
Baking powder and baking soda are the single most common cause of failed holiday bakes, and they fail silently, the box looks fine, the date looks fine, but the chemistry is dead. Once opened, both lose strength within about 6 months because every exposure to humid air starts the reaction early.
An unopened box lasts roughly 2 years for soda and 1 year for powder, but nobody remembers when they opened theirs. So test, don’t guess: for baking soda, put 1/4 teaspoon in a cup and add 2 teaspoons of white vinegar, it should fizz up vigorously within seconds.
For baking powder, put 1 teaspoon in a cup and add 1/3 cup of hot tap water, it should bubble actively and immediately. No reaction, weak fizz, or a mixture that just sits there means buy a new box before pie week.
Tips for best results: run both tests now, in October, not the night before Thanksgiving. Keep opened leaveners in small airtight jars (a 1-quart mason jar works) rather than the cardboard box, and always use a dry spoon, one damp scoop starts degrading the whole box.
If a test is borderline, use it for pancakes and buy fresh for anything that has to rise high.
Watch out: expired leaveners are still fine for cleaning and deodorizing, label the old box “cleaning” with a marker so it doesn’t drift back into the baking zone. And never test by taste; the vinegar and hot-water tests are faster and actually reliable.
4. Zone the 24-Inch Shelf: Daily, Weekly, and Bulk Lanes
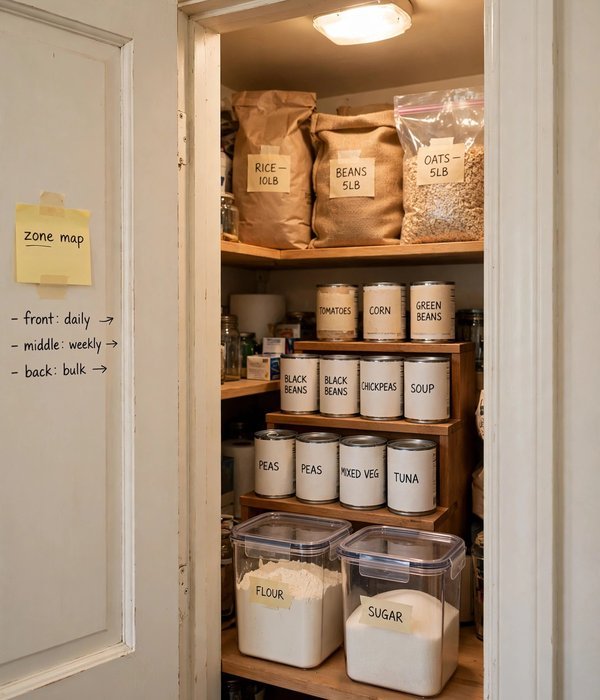
A 24-inch-deep pantry shelf is a blessing and a trap: it holds a lot, but anything past the front 8 inches becomes invisible, and invisible ingredients get rebought or expire. The fix is a zone map, drawn once on a sticky note taped inside the pantry door.
Divide each deep shelf into three lanes by reach: the front 8 inches is the daily lane (flour, sugar, salt, vanilla, baking soda, everything you grab during a bake), the middle 8 inches is the weekly lane (chocolate chips, cocoa, pie filling, evaporated milk, oats), and the back 8 inches is the bulk lane (backup flour, bulk sugar, the 5-pound bag of chips you bought on sale, seasonal-only items like food coloring).
Where it works best:
- Put the zone map at eye level inside the door so everyone in the house restocks to the same system, not just you.
- Use a 3-tier stepped shelf in the weekly lane so the back row of cans sits 4–6 inches higher and stays visible over the front row.
- Keep the daily lane one item deep, and assign each shelf a job: flours and sugars, add-ins and cans, pans and tools. Mixed shelves are where things hide.
- Renters: risers and bins need no screws and leave no marks, so this whole system is deposit-safe.
5. Store Sheet Pans Vertically: Stop the Metal Avalanche
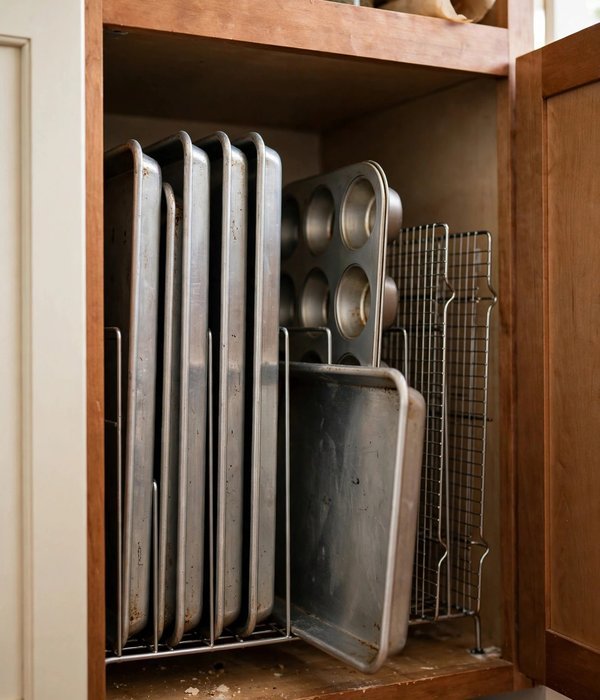
Half-sheet pans (18 × 13 inches), quarter-sheet pans, muffin tins, and cooling racks are the bulkiest things in a baking pantry, and stacked flat they become an avalanche, you pull one pan and five slide off the stack.
Stored vertically, the same five pans take up about 6 inches of shelf width and you can slide one out without touching the others. The mechanism is simple: pans are thin, so their smallest dimension should face out.
Use a vertical file-style divider or a pan organizer with slots roughly 1–1.5 inches wide, or stand them between two tension rods wedged 2 inches apart on a shelf. Keep the dividers at least as tall as the pan’s long side (18 inches for half sheets) so pans can’t tip over the top.
Tips for best results: measure your tallest pan and your shelf height before buying, a standard 18-inch half sheet needs a shelf with at least 19 inches of clearance, or it goes on the bottom shelf where clearance is usually 20–24 inches.
Put muffin tins and cooling racks in the same vertical slot row; mixing pans and tins in one divider actually uses the slots better. If you own cutting boards too, they can share the divider row, same shape, same storage logic.
Watch out: don’t store pans vertically above shoulder height, an 18-inch sheet pan sliding out at face level is a hazard. Heavy cast-iron skillets do NOT go in vertical dividers; their weight will bend cheap wire organizers. Keep cast iron flat and low.
6. Rotate Cans FIFO: First In, First Out, Zero Forgotten Green Beans
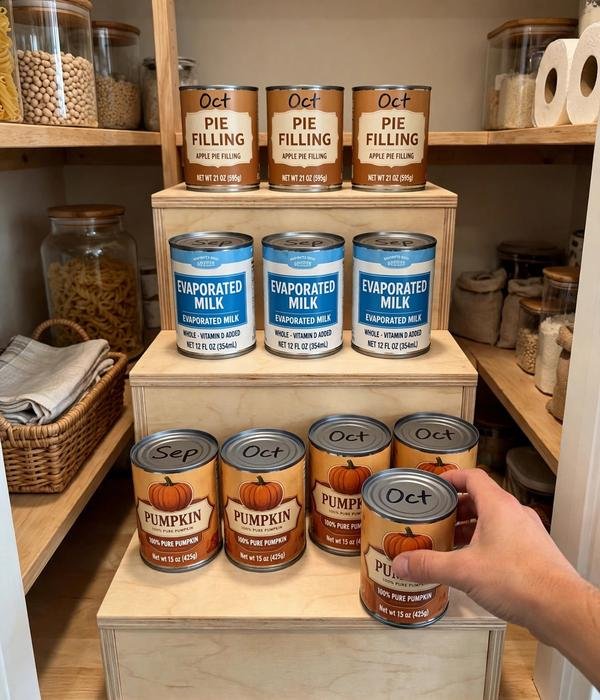
Canned pumpkin, evaporated milk, sweetened condensed milk, and pie filling stay at best quality about 1–2 years, a can of pumpkin from two Thanksgivings ago is past its prime. FIFO (first in, first out) means new cans go in the back and old cans come forward, so you always bake with the oldest stock.
On a flat shelf that fails because restocking means moving every can by hand. A stepped riser fixes it: new cans on the back tier, pull from the front, and the 4–6 inch height difference keeps every label visible.
Where it works best:
- Dedicate one riser to holiday cans only, pumpkin, evaporated milk, condensed milk, cherry and apple pie filling, so the baking stock never mixes with weeknight beans.
- Write the purchase month on can lids with a marker as you unload groceries; it takes 10 seconds and ends the “how old is this?” guessing forever.
- Standard #300 cans (about 4.4 inches tall) fit a 3-tier riser roughly 10 inches wide and 10 inches deep; measure your shelf depth first.
- Pull everything out once in October, check dates, and front-face the oldest, the purge takes 15 minutes and usually surfaces 2–3 cans to toss or use now.
- Stock only what you’ll bake with: for most families that’s 3–4 cans of pumpkin and 4–6 cans of evaporated/condensed milk for the season; donate unexpired extras to a food bank in November.
7. Freeze New Flour for 72 Hours: The Weevil-Proof Entry Exam
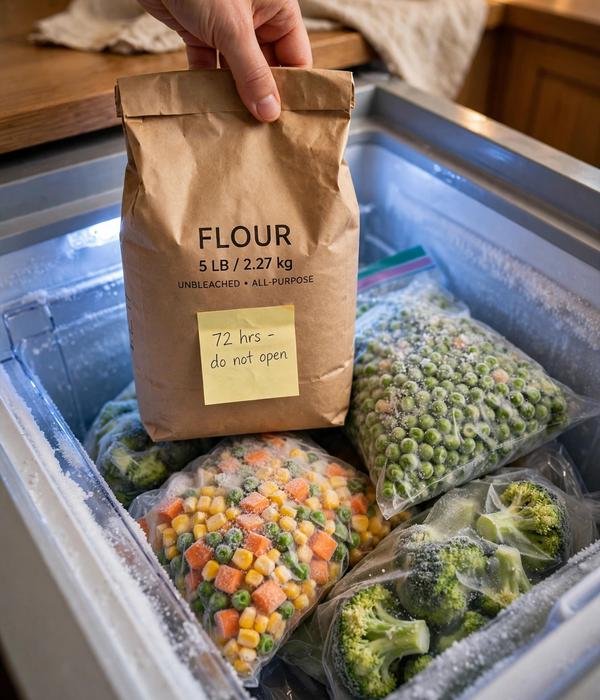
Pantry moths and weevils don’t crawl in from the kitchen, they arrive as microscopic eggs already inside the flour bag from the mill or the store shelf. Freezing kills them before they hatch.
Put the sealed flour bag (or the decanted airtight container, if it fits) in the freezer at 0°F for at least 72 hours, then let it come fully to room temperature before opening, 2–3 hours on the counter, so condensation doesn’t wet the flour.
This one step is the difference between a weevil-free baking season and finding webbing in the flour in December. It works for all-purpose, bread, cake, and whole-wheat flour, and for rice and cornmeal too if you stock them.
Tips for best results: freeze new bags the day you bring them home, before they ever enter the pantry, once eggs hatch in the pantry, you’re cleaning shelves instead of preventing. After the freeze, decant into the airtight container (see point 1) and date it.
Bay leaves tucked on the shelf are a folk remedy, not a solution; the freezer is the solution.
Watch out: whole-wheat flour goes rancid faster than white flour because of its natural oils, even with the freeze treatment, use opened whole-wheat flour within 1–3 months, and store the backup bag in the freezer, not the pantry.
If you already see moths or webbing, the freeze won’t fix an active infestation: toss the affected bags, vacuum every shelf and crack, and wipe shelves with vinegar before restocking.
8. Bin the Baking Add-Ins: Chips, Nuts, and Sprinkles in One Place
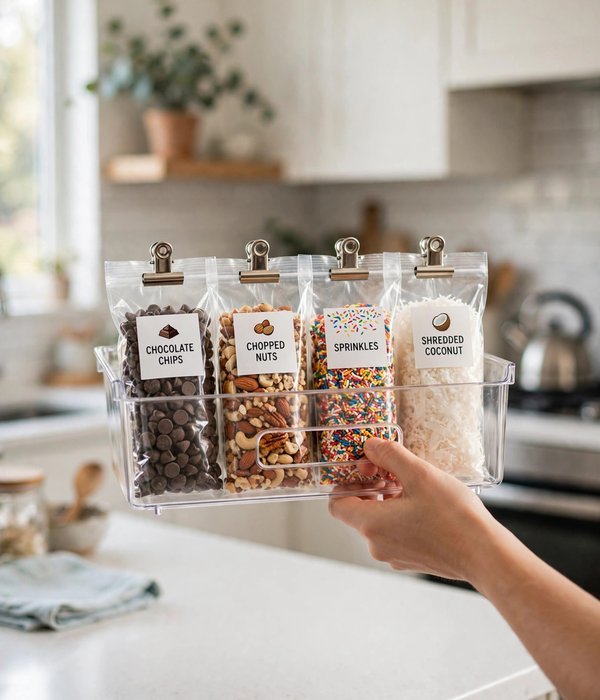
Chocolate chips, chopped nuts, shredded coconut, sprinkles, and dried cranberries are small, numerous, and impossible to find when they scatter across three shelves in half-open bags.
One labeled bin, roughly 6 × 10 × 4 inches, clear so you can see inside, holds the entire add-in collection for most families and lives in the weekly lane of your zone map. The mechanism is containment: small bags can’t migrate, can’t get crushed behind the flour, and can’t spill into the shelf cracks.
When a recipe calls for “a cup of chips and half a cup of nuts,” you carry one bin to the counter instead of making four trips.
Where it works best:
- Clip half-open bags shut and stand them upright in the bin, labels facing out, you’ll see at a glance what needs restocking.
- Nuts go stale fastest (oils turn rancid in 3–6 months at room temp); buy only what the season needs and sniff before baking, rancid nuts smell like old paint. Keep a second small bin for decorating supplies (sprinkles, food coloring, piping tips).
- A bin with a handle or a low cut-out front works best, you grab it one-handed while the other hand holds the mixing bowl.
- Restock the bin right after each grocery run, not “later”, the system only works if the bin is the single home for all of it. Big bakers can split into two bins: one for chocolate, one for everything else.
9. Label and Date Everything: Your Future Self Is Forgetful
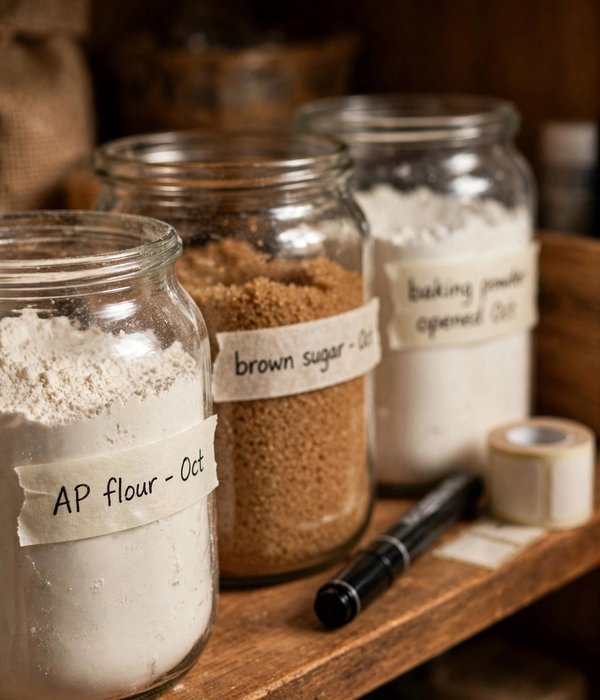
You will not remember when you opened that flour in December, and by January it matters, opened all-purpose flour stays fresh 3–6 months, whole wheat 1–3, and nobody can tell by looking.
The cheapest organizing tool in the kitchen is a marker and a roll of masking tape or dissolvable labels: name, contents, and date on everything you decant, open, or portion. “AP flour, Oct” tells you in February whether it’s still good.
Dissolvable labels (they wash off under hot water) cost a few dollars for a roll of 200 and mean you never scrub sticky residue off a container again. Date the leaveners too, write the open date right on the box so the October test becomes a 10-second glance instead of a chemistry experiment.
Tips for best results: label the front of the container at eye level, not the lid, lids get swapped, fronts don’t. Use one format everywhere (contents + month), so scanning the shelf reads like a list.
Put a marker on a string or a magnetic clip on the fridge so labeling happens at unload time, not “later.” For households with multiple bakers, add initials, “Mom’s almond flour, keep” prevents well-meaning reorganizations from mixing things up.
Watch out: don’t label with the expiration date from the original package, that’s the unopened date. The date that matters is the day YOU opened it. And skip fancy label makers for the pantry; tape and marker are faster, cheaper, and you can rewrite them in seconds.
10. Build a Baking-Day Caddy: Everything Travels Together
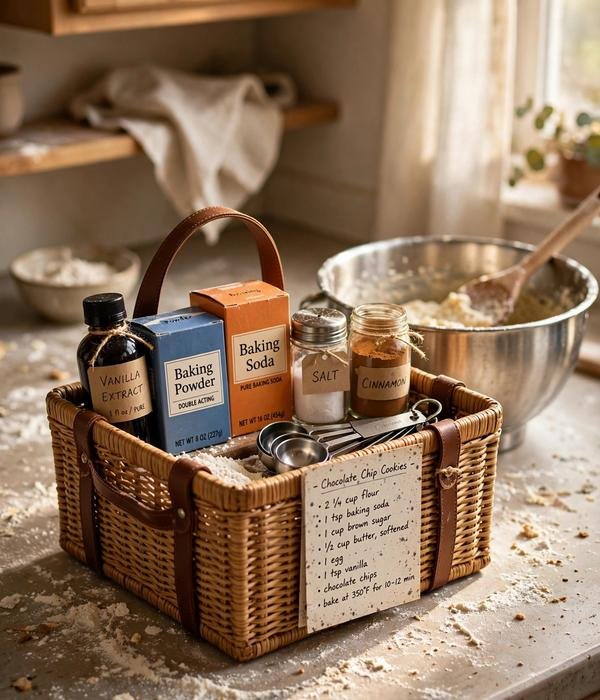
Baking happens at the counter, but the ingredients live in the pantry, so every bake day starts with six trips back and forth. A caddy (a handled tote roughly 10 × 7 × 5 inches, or a small cleaning-style caddy repurposed) holds the session’s essentials: vanilla, baking powder, baking soda, salt, cinnamon, measuring spoons, and the recipe card.
You carry one thing to the counter, bake, and carry one thing back. The mechanism is batching your trips: it cuts the setup and cleanup of a baking session roughly in half, and it means the vanilla never ends up stranded on the counter for a week.
Where it works best:
- Keep the caddy on the daily lane of your zone map, right at the front, if it takes more than one motion to grab, you won’t use it.
- Restock the caddy the same day you bake, while you remember what’s low; an empty caddy is just clutter.
- A caddy with divided compartments keeps the vanilla bottle upright, vanilla leaks are the stickiest mess in the pantry.
- For small kitchens: the caddy doubles as your “baking drawer” if pantry space is truly tight, it can live on top of the fridge or in a cabinet.
- Add a small notepad or a dry-erase strip on the caddy for the running restock list (see point 11) so shortages get captured at the moment you notice them.
- During December, graduate the caddy to a gift-wrap-station style second caddy for cookie decorating supplies, same logic, seasonal contents.
11. Tape the Shopping List to the Pantry Door: One Restock, Done
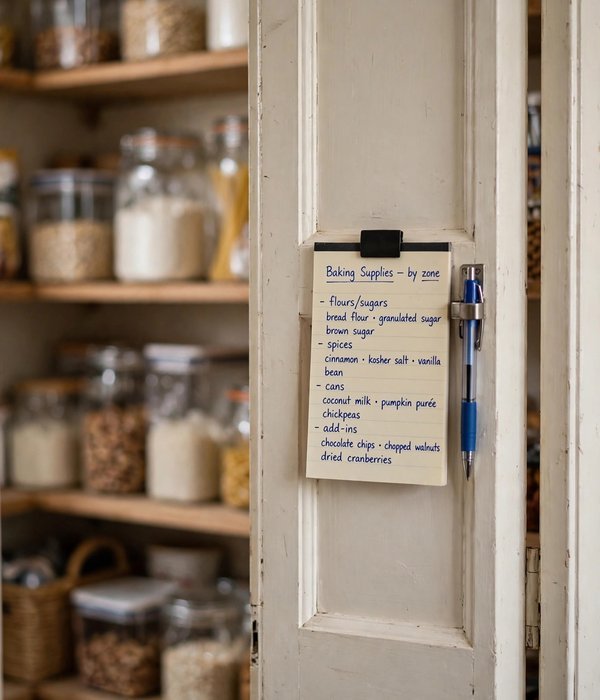
The whole point of organizing in October is to restock once, before the November rush and the price creep, and that only works if the list is complete before you shop.
Tape a running list to the inside of the pantry door (a notepad with a magnet, or a dry-erase board about 8 × 10 inches) and add to it the moment you notice something low, starting now.
By the last week of October, the list is your single pre-Thanksgiving grocery run: flour, sugars, leaveners, spices, cans, chips, nuts, pie fillings, vanilla. One trip, today’s prices, no mid-November emergency run for baking powder at holiday markup.
The door location matters because you see it every time you take something out, which is exactly when you notice it’s low.
Tips for best results: divide the list into the same zones as your shelf map (flours/sugars, spices, cans, add-ins, tools) so one glance tells you which aisle each item is in. Photograph the list before you shop so a lost paper doesn’t strand you. Keep the pen attached, a list without a pen nearby never gets written on.
Watch out: don’t let the list become permanent wallpaper. Wipe it clean after the big restock and start a fresh holiday-season list for December top-ups (butter, eggs, cream cheese, the perishables that don’t belong in this pantry plan). A list nobody clears stops being read.
12. Toss What Won’t Bake Right: The Pre-Season Purge List
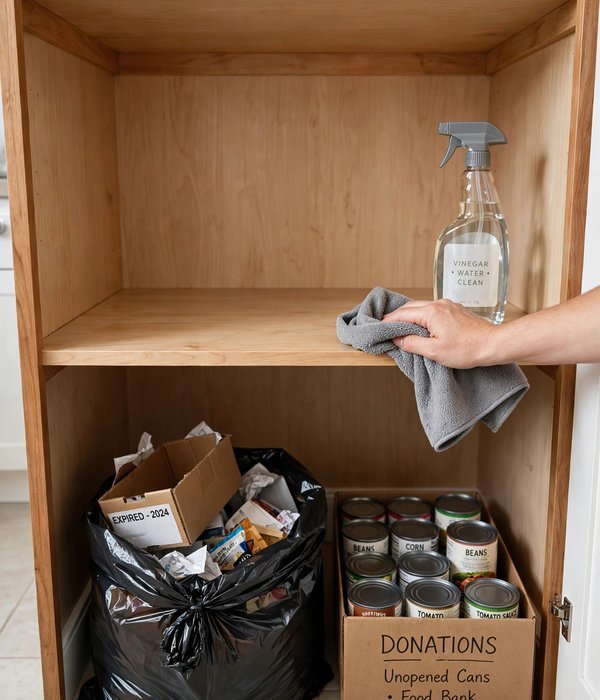
Before a single new bag enters the pantry, take everything out and run the purge. Old ingredients don’t just take up space, they actively sabotage baking, and the holiday season is the worst time to discover it.
Work shelf by shelf with a trash bag and a donation box, and be ruthless: the cost of replacing a $3 box of baking powder is nothing next to the cost of a failed Thanksgiving pie. This is the one time of year when “toss it” is the right organizing advice, because freshness is a baking ingredient.
Where it works best:
- Toss: leaveners that fail the fizz test (point 3); ground spices older than 12 months with no aroma; opened whole-wheat flour older than 3 months; nuts that smell stale or like paint; brick-hard brown sugar; any can dented on the seam, bulging, or past date.
- Keep but move: unopened backups to the back bulk lane; rarely used specialty flours (rye, almond) to the freezer in zip bags. Donate unexpired extras to a food bank in November.
- Wipe each empty shelf with a damp cloth and a splash of vinegar before restocking; 15 minutes now prevents sticky buildup all season.
- Do the purge and the restock shop in the same weekend, and tape an “after” photo of the zones inside the door next to the zone map as the standard to maintain.
Conclusion
Twelve ideas, one afternoon, and a pantry that carries you from Halloween baking through New Year’s cookies without a single emergency grocery run. If you do nothing else, do the three things that actually affect how your baking turns out: decant the flour and sugar into airtight containers, test the baking powder and soda, and purge the dead spices.
Everything else, the zones, the caddy, the vertical pans, makes baking faster and calmer, but freshness is what makes it taste right.
Baker’s shortcut: this weekend, decant the big two and run the two leavener tests. That’s 30 minutes and under $20 in containers if you need them, and it eliminates the two most common holiday baking failures before they happen. Do the zone map and the purge next weekend when you do the big restock shop.
By the time November arrives, your pantry is done, and you get to spend the season baking, not hunting for the vanilla.
Frequently Asked Questions (FAQ)
When should I start holiday baking pantry organization?
Start in mid to late October: purge, test leaveners, and do one full restock shop before November, when prices typically rise and stores get crowded. Starting in November? Do the purge and tests immediately and shop within the week, the system still works, you just pay a little more.
How long does flour last once opened?
Opened all-purpose flour stays fresh 3–6 months airtight in a cool pantry; whole wheat lasts 1–3 months because its oils go rancid. Unopened bags keep about a year. Musty smell or webbing means toss it regardless of date, and freeze new bags 72 hours before they enter the pantry.
Can I store extra baking supplies in the garage to free up pantry space?
Only if it stays cool and dry. Heat and humidity ruin flour, melt chocolate, and degrade leaveners fast, an unheated garage in winter is okay for sealed cans, but flour, sugar, and spices belong inside. The freezer is a better overflow spot than the garage for flour and nuts.
Do I really need to decant everything, or just some things?
Just the fragile-packaging, high-use items: flour, granulated sugar, brown sugar, and powdered sugar are the must-decant four. Spices are fine in jars, canned goods stay in cans, chips live in clipped bags inside a bin. Decanting everything is a Pinterest fantasy; the big four is the practical win.
How do I keep pantry moths out during baking season?
Freeze all new flour, grains, and cornmeal for 72 hours at 0°F before they enter the pantry, that kills eggs already in the bags. Then use truly airtight containers with silicone-gasket lids, wipe spills immediately, and check oldest bags monthly.
Pheromone traps catch adult moths but can’t stop an infestation starting inside a bag, so the freezer step is the one that matters.