
Your bedroom has quietly become the overflow room for the entire house. The coat that missed the closet. The laundry chair.
The shoes that multiplied by the door until they migrated here. The spare linens, the gym bag, the “I’ll deal with it later” box. That’s not a discipline problem, it’s a storage math problem.
A typical small bedroom has maybe 30–40 square feet of floor the furniture doesn’t already own, and every one of these bedroom storage ideas below exists to find space in places you aren’t counting: under the bed, up the walls, behind the door, inside the dead air above your head.
Here is what you’ll get: 30 tested ideas for clothes, shoes, linens and clutter, grouped by the zone they rescue, each with the exact measurements and shopping specs you need to buy the right thing the first time, because this niche rewards people who measure before they shop.
Most ideas here are renter-safe (no screws), and nearly all of them cost under $40 to start.
Measure-first cheat sheet, grab a tape measure and check these five things before you buy anything:
- Floor to bed-frame clearance, measured at the lowest corner (most frames give you 6–7 inches).
- Your interior door thickness (usually 1-3/8 inches) and the gap above the door.
- Dresser drawer depth, front to back (most are 14–18 inches deep).
- Closet rod height and rod-to-floor distance.
- The gap between your bed and the nearest wall, if a hand fits, a 6-inch cart fits.
Why Your Bedroom Became the Overflow Room, and the Bedroom Storage Ideas That Fix It
Bedrooms fill up because they are the path of least resistance. Unlike the kitchen or living room, a bedroom is a low-traffic zone, so it becomes the default landing spot for anything without a home. The mechanics are simple: most bedrooms were designed for sleeping, not storing, so the room’s biggest volumes are invisible ones.
A queen bed covers roughly 33 square feet of floor, and beneath a standard frame sits 6–7 inches of clearance across the full footprint, 15–18 cubic feet of hidden volume, about the size of a small wardrobe, sitting empty.
The fix is a bedroom organization principle, not a shopping list: store by zone, not by category. Clothes you wear daily go within arm’s reach of the closet. Off-season and rarely-used items go to the far zones, under the bed, above the door, up high.
That is why this guide is organized into five zones: Under & Around the Bed, Closet Overflow, Walls & Doors, Dresser & Surface Control, and Seasonal & Sentimental. Within each zone you’ll find ideas for every budget, renter flags on anything that needs screws, and the measurements that decide whether it fits your room.
Supporting these bedroom storage solutions is a habit, not a product: once every item has a zone, the overflow stops.
Under & Around the Bed
Your bed is the largest piece of furniture in the room, and the space beneath it is almost certainly empty. This zone is your renter-safe goldmine: nothing here touches the walls, and everything slides in and out without tools.
1. Rolling Under-Bed Bins with Wheels: Turn Dead Space into a Drawer
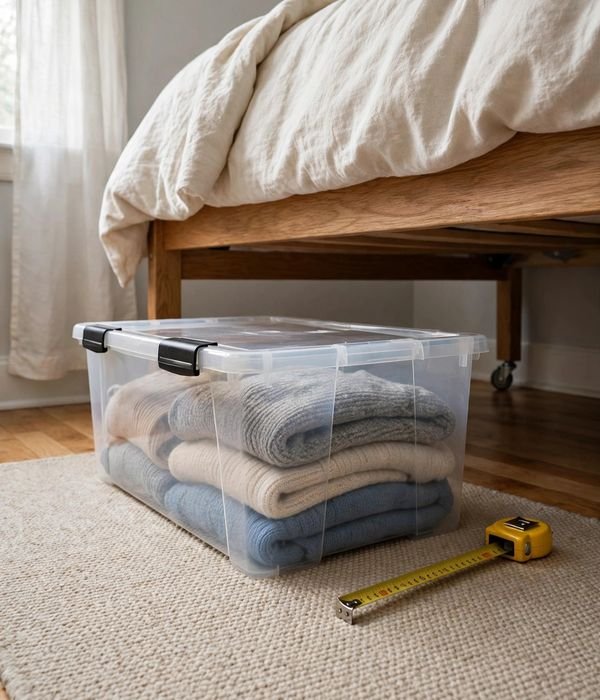
The reason under-bed storage works so well is pure geometry: a standard bed frame clears 6–7 inches of floor space across its full footprint, which is 15–18 cubic feet of volume, as much as a small closet shelf. The reason most people ignore it is access: without wheels, bins jam on carpet and you stop reaching for them.
Wheels are the whole trick. Look for rigid bins about 30 inches long, 17 inches wide and 6–7 inches tall, in the 55–65 liter range, with four swiveling casters and a latching lid that seals out dust. A 2-pack typically costs $25–35.
One bin holds roughly 25 folded shirts or a folded queen comforter.
Do it in 4 steps:
- Measure floor-to-frame clearance at the lowest corner, you need at least the bin’s full height plus 1 inch of slide room.
- Vacuum the floor under the bed and lay down a flat bed sheet as a dust barrier on bare floors.
- Pack by category (one bin: winter sweaters; one: shoes), label the short end facing out.
- Slide bins in wheels-first from the long side of the bed, they glide, you never have to kneel.
2. Bed Risers: Create Clearance Where There Isn’t Any
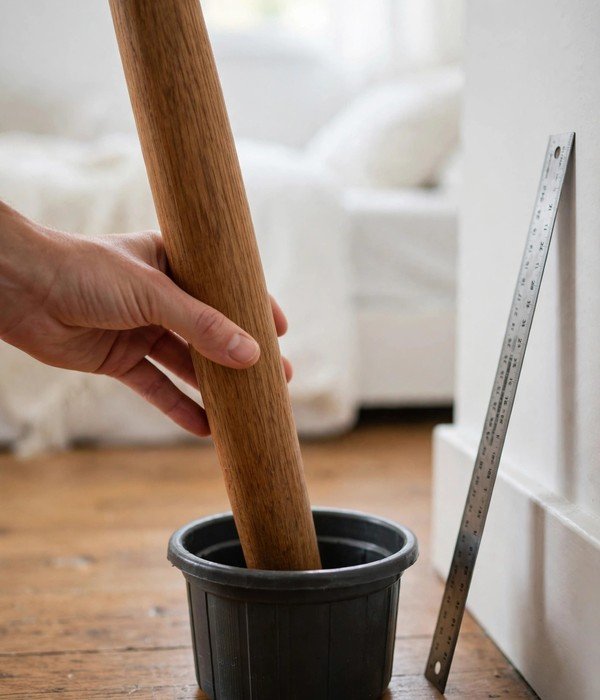
Platform beds and low frames often clear just 3–4 inches, too short for a rolling bin, too tall to ignore. Bed risers solve it by lifting each post 3–8 inches (5-inch and 8-inch heights are the common ones), instantly creating the clearance a storage bin needs.
They are also the cheapest storage upgrade in this guide: a set of four costs $12–20. The mechanism is simple leverage, you are buying vertical inches, and every inch of lift across a queen footprint adds roughly 2.5 cubic feet of storage.
Quality sets are rated for up to 10,000 lbs total load, so a bed plus two adults is comfortably within spec.
Do it in 4 steps:
- Lift one corner at a time with a partner, never try to lift the whole bed alone.
- Seat each riser directly under the bed post, not beside it; the post should nest in the riser’s cup.
- On hard floors, place rubber furniture cups under the risers so the bed can’t walk.
- Recheck that the bed doesn’t rock before you slide bins underneath, then re-measure your new clearance.
3. Vacuum-Seal Bags for Off-Season Clothes: Shrink Winter to a Pancake
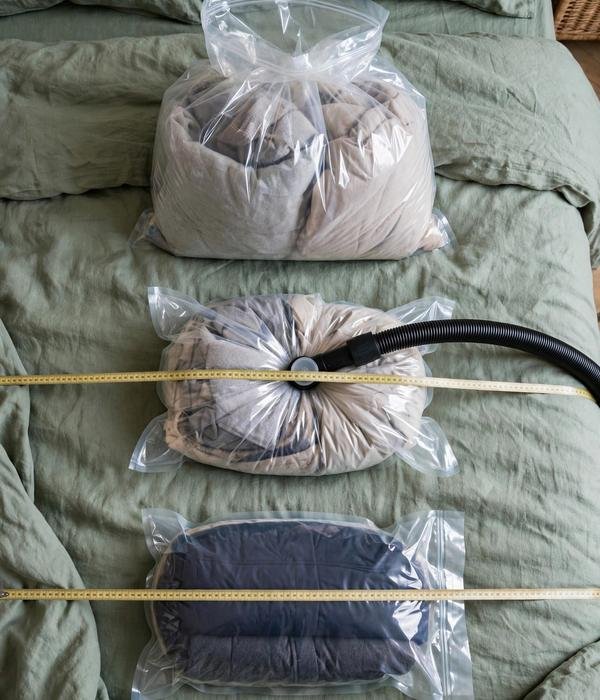
A folded winter coat eats nearly a cubic foot of space. Vacuum-seal bags work by removing the air trapped between fabric fibers, compressing bulky textiles to a fraction of their volume, up to 80% smaller for puffy jackets and bedding, 40–65% for folded clothes.
The bags are cheap ($15–25 for a multi-size set) and need no power beyond your vacuum cleaner’s hose. For under-bed use, choose the flat jumbo sizes that end up 2–4 inches thick when compressed, so they slide into the same clearance your bins use.
Do it in 5 steps:
- Wash and fully dry everything first, sealed damp fabric mildews fast.
- Fold (don’t wad) items so the compressed bag stays flat and stackable.
- Fill each bag to about 80%, overstuffed bags pop their seals.
- Double-zip the seal, press it flat, then vacuum through the valve until the bag stops shrinking.
- Slide the flat bags under the bed label-side out; keep one hand pump handy for re-sealing.
Watch out: skip vacuum bags for silk, leather and down items you love, long compression can set wrinkles in silk and reduce down’s loft. For expensive down, store uncompressed in a breathable cotton bag.
4. A Bed Frame with Built-In Drawers: Storage That Doesn’t Look Like Storage
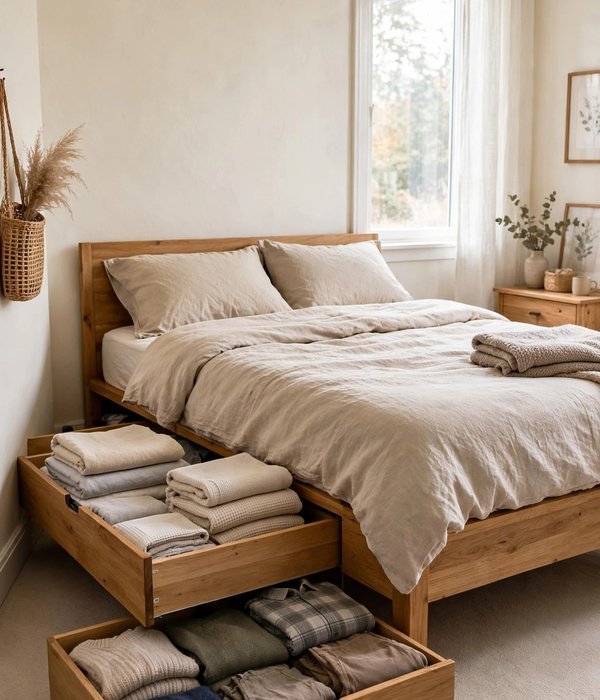
If you are buying a bed anyway, built-in drawer frames beat bins on every axis: the drawers are deeper (typically 8–10 inches), they look built-in, and they never collect dust underneath.
A storage platform bed usually adds 4 drawers, two per side, each roughly 24 inches wide, 30 inches deep and 8 inches tall, which is about 3 cubic feet per drawer. That is dresser-level capacity hidden inside furniture you already own.
Expect to pay $150–300 more than a basic frame for the drawer version, and budget 60–90 minutes for assembly since drawer glides need to be square.
Do it in 4 steps:
- Before ordering, check your room’s clearance: each drawer needs about 26 inches of pull-out space beside the bed.
- Assemble the drawers first and test the glides before the frame goes up, fixing a crooked glide later is miserable.
- Assign one drawer per category (linens, off-season, shoes, misc) and label inside the drawer front.
- Add felt pads to the drawer faces that face your walking path, they take the shin hits.
5. Flat Shoe Boxes Under the Bed: Off-Season Pairs, Out of Sight
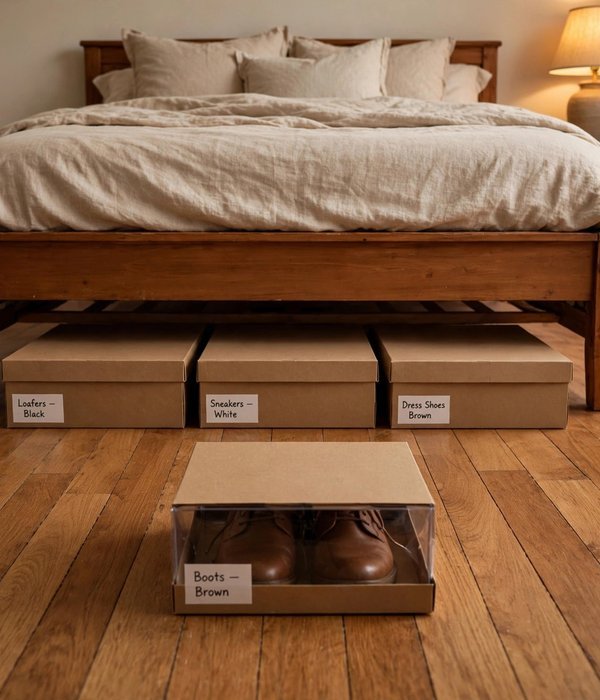
Shoes are the fastest way a bedroom floor turns into an obstacle course, and the pairs causing it are usually off-season ones you don’t need daily. Flat shoe boxes, the kind made for under-bed use at 5–6 inches tall, turn each pair into a labeled file.
The mechanism is stacking efficiency: one pair per box, stored toe-out with a label or photo on the end, means you never unstack six boxes to find the boots. A set of 6–12 boxes costs $15–25, and each holds up to a men’s size 13.
Clear-front boxes are worth the small premium so you can see what’s inside without opening them.
Do it in 4 steps:
- Declutter first: toss or donate anything you haven’t worn in a year, storage should never be a landfill.
- One pair per box, stuffed with tissue or balled socks so the shoes keep their shape.
- Label the short end (the end that faces out) with the shoe type and season.
- Line boxes in two rows under the bed, everyday pairs nearest the bed’s edge.
6. A Storage Headboard: Shelves You Sleep Against
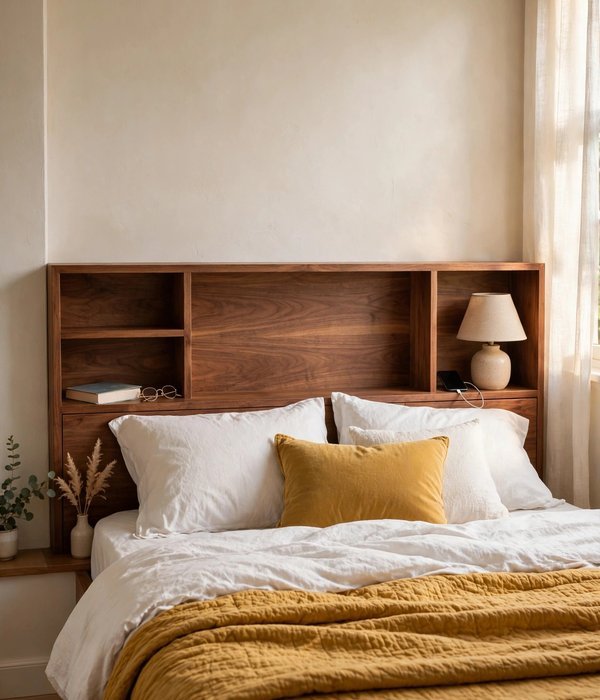
The wall behind your bed is dead space, a headboard with built-in shelves converts it into a nightstand replacement. A storage headboard typically offers 2–3 cubbies per side, each about 12 inches square and 6–8 inches deep: enough for a book, glasses, a phone charger and a small lamp each.
The real win is what it deletes, two nightstands at 15–20 inches wide each frees up over 3 feet of wall space and roughly 5 square feet of floor. Freestanding models ($80–150) just slide behind the bed, which is perfect for renters; wall-mounted ones hold more but need studs.
Do it in 4 steps:
- Measure your mattress top height, the lowest shelf should sit 2–4 inches above the mattress so items are reachable lying down.
- If freestanding, push the headboard flush to the wall and the bed frame flush to it so it can’t wobble.
- Run a small power strip along the back edge before you push the bed in, charging access is the whole point.
- Keep shelves edited: one book, one charger, one decorative item per cubby, nothing stacked.
Closet Overflow
Even a “big” closet overflows, because closets were designed for one thing: hanging. These ideas steal capacity from the air inside and around your closet, the vertical space above the rod, the back of the door, and the inches between hangers.
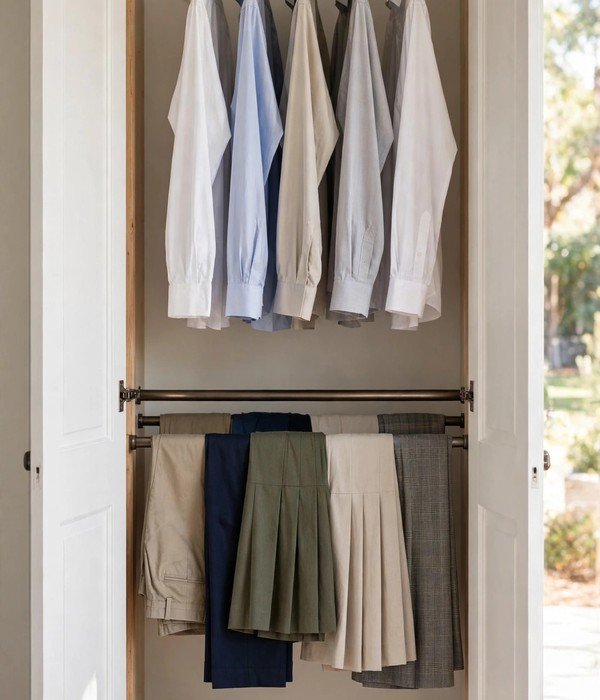
7. A Second Hanging Rod: Double Your Closet Overnight
Most closets hang one rod at about 66 inches, which wastes the lower 40 inches on anything shorter than a dress. A second rod mounted at about 42 inches, shirts and folded pants on top, shirts or skirts below, roughly doubles your hanging capacity for $15–25 in parts.
Tension rods work in narrow reach-in closets (no screws, renter-safe), while a mounted rod on brackets handles 25–50 lbs for a full wardrobe. This is the single highest-capacity-per-dollar closet upgrade there is: you are reclaiming the air the first rod was ignoring.
Tips for best results: mount the lower rod at 42 inches if your shirts average 28–30 inches long, measure your longest shirt first, then add 4 inches for the hanger and drape.
Keep heavy items (coats, jeans) on the original rod and lighter shirts below. Watch out: don’t load a tension rod past its rating (usually 15–20 lbs) or it will bow mid-closet; for a full double-hang, screw into studs or use heavy-duty drywall anchors rated for 50 lbs.
8. A Hanging Closet Organizer: Six Shelves from One Rod
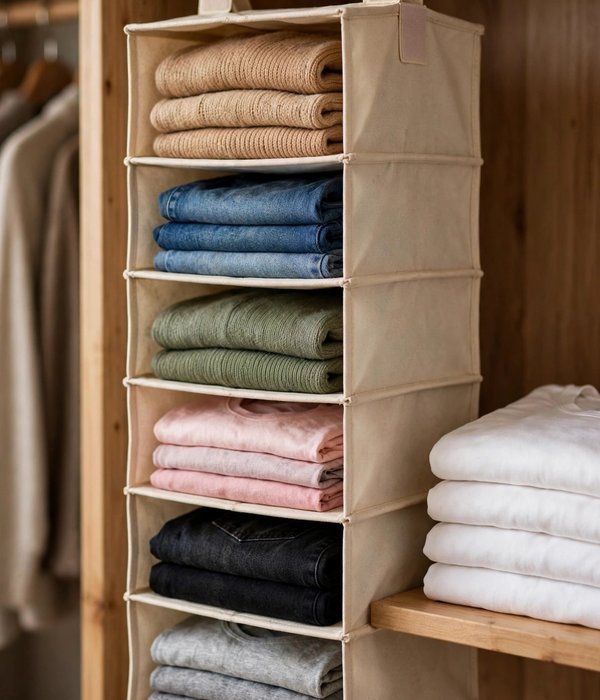
Fabric hanging organizers turn 12 inches of rod width into 5–6 cubbies, each about 12 inches square, the exact size of folded jeans, sweaters and t-shirts. The mechanism is vertical filing: folded clothes live in visible cubbies instead of stacked piles that avalanche every time you pull the middle one.
A 6-shelf organizer costs $12–20, hangs from the existing rod with Velcro straps, and installs in two minutes with zero tools. Folded stacks stay put because each cubby walls off its own column of clothes.
Tips for best results: assign the top cubbies to rarely-worn items and the eye-level cubbies (positions 2–4) to daily wear, you’ll use the organizer 10x more if the daily stuff is at hand height.
Roll t-shirts instead of flat-folding to fit 30% more per cubby. Watch out: fabric organizers sway when overloaded; keep each cubby under 5 lbs and never hang one on a tension rod, the side load will pull it down.
9. Slim Velvet Hangers: Reclaim Rod Space Without Buying Anything Else
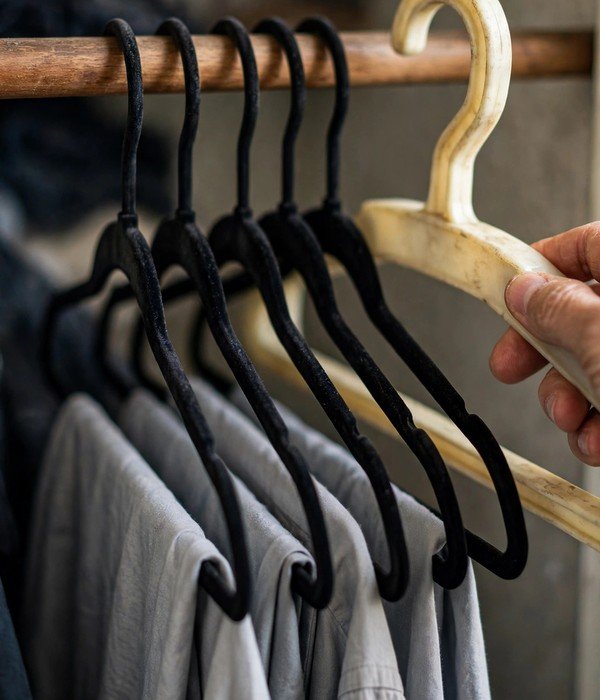
Plastic and wood hangers are 0.5–1 inch thick; slim velvet hangers are about 0.2 inches. Across 30 hangers, that difference frees up roughly 9 inches of rod, room for 4–5 more garments on the same rod.
The velvet coating grips fabric so sleeveless tops and wide-neck shirts stop sliding to the floor, which is half the closet mess in the first place. A 50-pack costs $15–25, and the uniform thin profile makes the closet look instantly tidier, visual calm is a real organizing feature. This is the upgrade to do the same day you declutter.
Tips for best results: buy all one color and style, mismatched hangers undo the visual calm you’re paying for.
Do the swap in one session: as you rehang each item, ask if you’ve worn it in the last year. Watch out: skip velvet hangers for heavy coats and structured blazers, the thin profile can’t support shoulder weight and the velvet can mark delicate fabrics. Keep a few sturdy wood hangers for those.
10. Closet Door Valet Hooks: The Back of the Door Is a Whole Closet Wall
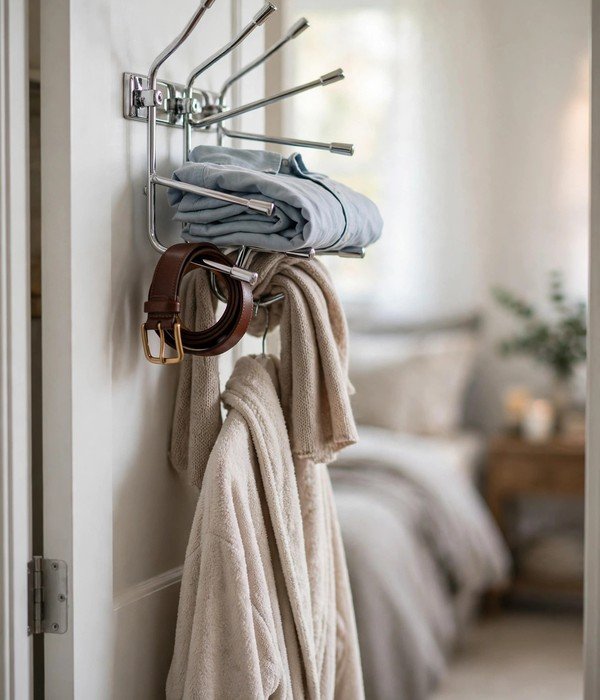
The back of a closet door is roughly 20 square feet of unused vertical real estate. Over-door valet hooks, the multi-arm kind that fold out, convert it into hanging space for tomorrow’s outfit, belts, scarves and robes. Standard models fit interior doors 1.25–2.25 inches thick (most bedroom doors are 1-3/8 inches) and hold 10–20 lbs across 3–5 arms.
At $10–15 with zero installation, this is the fastest idea in the guide: unbox, hook over the door, done. The mechanism is decision offloading, laying out tomorrow’s clothes tonight is why the valet arm exists.
Tips for best results: check the gap above your door first, most over-door brackets need about 1/8 inch of clearance between the door top and the frame.
If the door binds, a thinner bracket or adhesive hooks are the fix. Watch out: keep the load balanced across arms and under the weight rating; a lopsided 20 lbs on a 1-3/8-inch hollow-core door will slowly warp the door or pop the bracket.
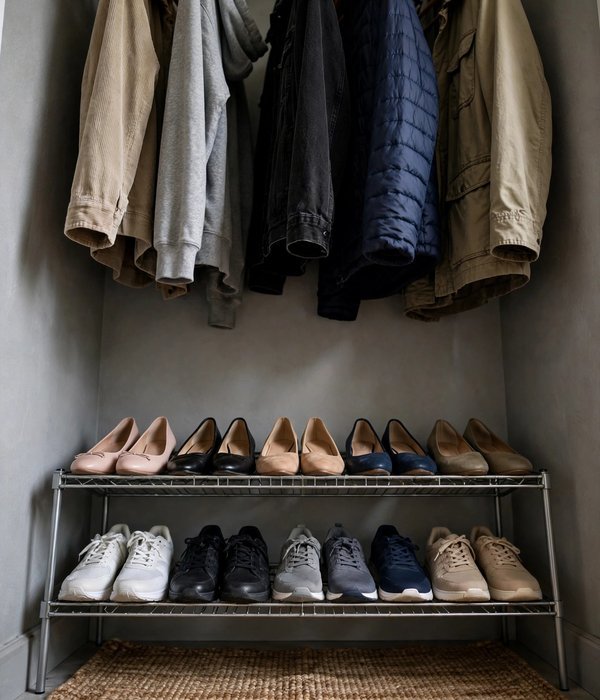
11. A Closet Shoe Rack: Give Every Pair a Parking Spot
Shoes on the closet floor become a pile; shoes on a rack become inventory. Plan on 8–10 inches of width per adult pair (leave a 1-inch gap between pairs), 12–15 inches of shelf depth for sneakers and flats, and 6–8 inches of vertical clearance per shelf, 10–12 inches if you wear heels.
A 24-inch-wide two-tier rack ($15–25) holds 6–8 pairs and fits under most hanging clothes. The mechanism is visibility: when every pair is visible at a glance, you stop buying duplicates of the shoe you already own and buried.
Tips for best results: store shoes toe-out, alternating toe-in/toe-out per row to fit 20% more pairs in the same width.
Keep daily pairs at the front of the bottom tier, you’ll grab them on autopilot. Watch out: wire racks leave marks on soft soles and dusty shelves transfer grime to light-colored shoes; wipe shelves monthly and store white sneakers in their boxes.
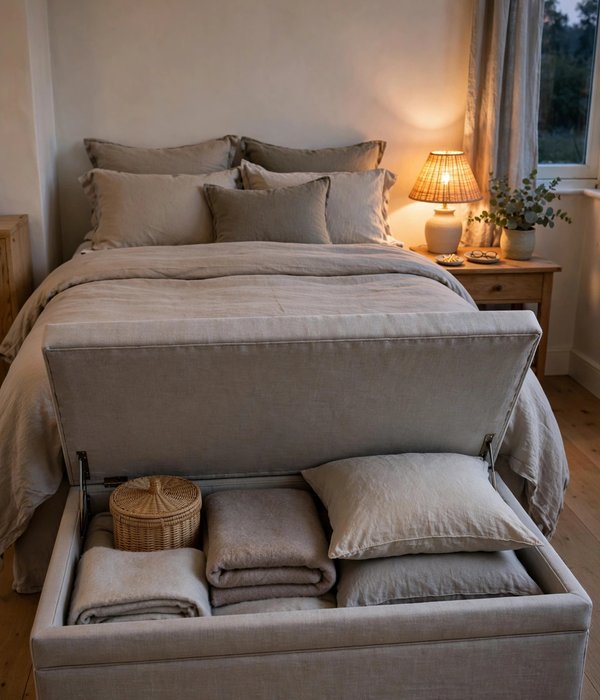
12. A Storage Bench at the Foot of the Bed: Seating That Swallows Blankets
A storage bench does triple duty: seating for dressing, a place to toss tomorrow’s clothes, and 8–12 cubic feet of hidden storage. The standard footprint is about 45 inches wide, 18 inches deep and 18 inches tall, the same depth as a nightstand, so it hugs the bed’s foot without eating the walking lane.
Lift the hinged lid and you’ve got room for spare blankets, off-season pillows or the linens that overflowed the closet. Expect $60–120; check that the seat is rated for at least 250 lbs if you’ll actually sit on it.
Tips for best results: add a felt strip under the lid so it closes silently, you’ll use it twice a day and a slam gets old fast.
Keep a small lidded basket inside for the tiny things that migrate to the bottom (chargers, remotes). Watch out: measure your bed-to-wall gap first, you need at least 24 inches of clearance at the bed’s foot to open the lid fully and walk past.
Walls & Doors: Vertical Bedroom Storage Ideas
Floor space is finite; wall space is not. These ideas move storage upward, onto walls, doors and the dead air near the ceiling, which is the only direction a small bedroom has left.
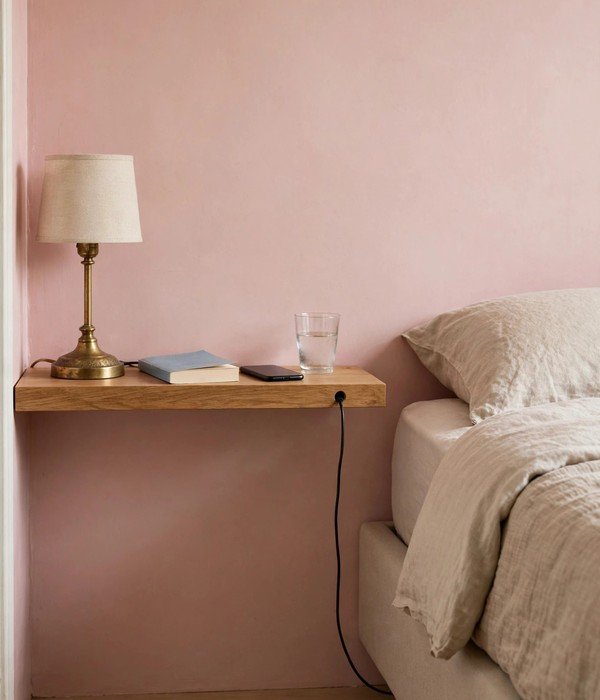
13. Floating Shelves as Nightstands: Delete the Nightstand Entirely
Two nightstands at 15–20 inches wide each consume 3+ feet of wall and about 5 square feet of floor. A pair of floating shelves, 20 inches wide, 8–10 inches deep, mounted at mattress height, does the same job on zero floor space.
The mechanism is cantilever: a shelf rated for 25–50 lbs per pair of stud-mounted brackets holds a lamp, book, phone and water glass with ease. Expect $20–40 per shelf with brackets. Cable management is the make-or-break detail, drill a 1.5-inch grommet hole near the wall for the charging cable and the shelf stays clean.
Where it works best:
- Small bedrooms where nightstands block the walking lane to the closet.
- Bedrooms with outlets behind the bed, run charging up the wall, not across the floor.
- Renters, if you use heavy-duty adhesive shelf brackets rated for 15+ lbs per pair (no screws).
- Guest rooms, where a shelf plus a wall-mounted reading light replaces the whole nightstand setup.
- Next to platform beds, where under-bed storage already handles the big stuff.
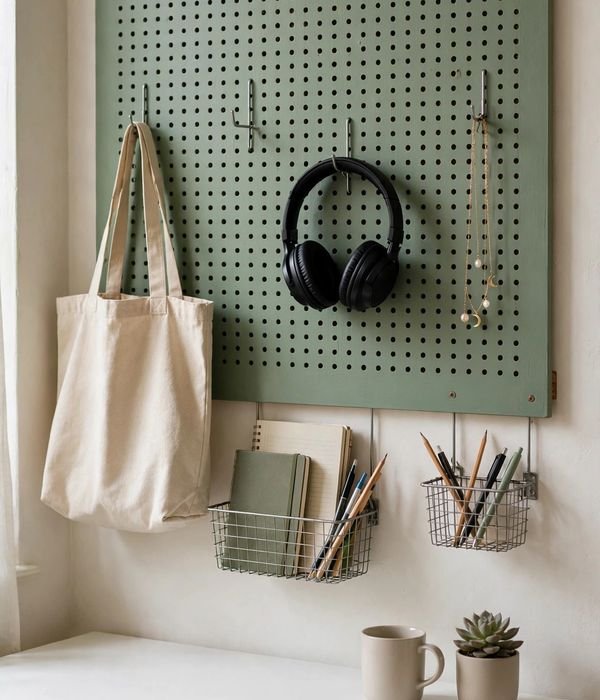
14. A Pegboard or Peg Rail: The Wall That Rearranges Itself
A 48-by-32-inch pegboard panel turns a blank wall into reconfigurable storage: hooks, baskets and shelves that move wherever the week’s needs are. Standard pegboard has holes on 1-inch centers; individual hooks hold 2–5 lbs and a well-mounted panel carries 25–50 lbs total.
The mechanism is adaptability, unlike fixed shelves, the layout evolves when your stuff does, which is why craft rooms and workshops use it and bedrooms should too. A panel with a starter hook set costs $25–45. Paint it the wall color and it reads as decor, not hardware.
Where it works best:
- Above a desk or vanity, for bags, headphones, jewelry and small baskets.
- Inside a closet’s side wall, for belts, scarves and ties in dead space.
- Bedrooms that change use often (guest room by day, office by night), the layout moves with you.
- Renters, with a freestanding pegboard panel leaned in a corner or hung on two adhesive hooks.
- Small spaces where one wall must serve three purposes at once.
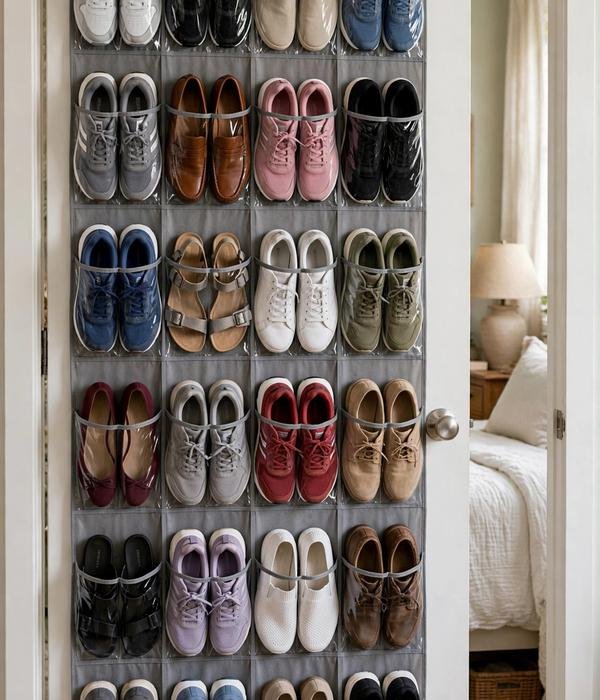
15. An Over-Door Shoe Organizer: 24 Pairs on Zero Floor
Over-door pocket organizers are the highest pair-per-dollar shoe storage in existence: a 12-by-53-inch hanging panel with 24–36 clear pockets holds a pair per pocket, that’s your whole collection on the back of a door. Pockets fit shoes up to about men’s size 11–12. At $8–15, it’s also the cheapest.
The mechanism is transparent inventory: clear pockets mean you see every pair, so the buried-shoe duplicate purchase stops. It works on bedroom doors, closet doors and bathroom doors alike.
Where it works best:
- Bedrooms with no closet floor left, where a rack won’t fit.
- Kids’ and teens’ rooms, low pockets are reachable for small kids.
- Off-season pairs: dedicate one organizer to sandals, another to boots.
- Small items beyond shoes: each pocket also holds socks, belts, sunglasses or chargers.
- Renters, the whole thing hangs over the door and leaves no mark.
16. A Behind-Door Hook Rack: Bags, Robes and Tomorrow’s Jacket
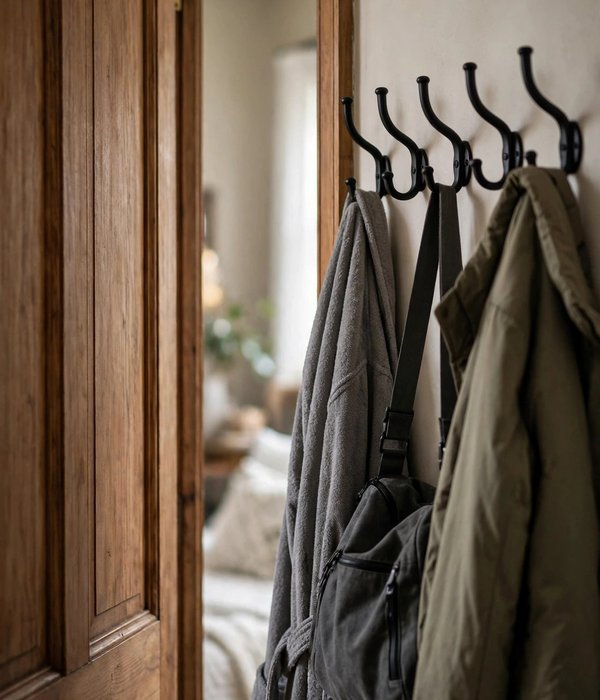
The 4-inch gap behind an open door is wasted space with a door in front of it. A row of 5–8 hooks mounted on the wall behind the door (or an over-door multi-hook rack) converts it into the home for robes, tomorrow’s jacket, gym bags and purses.
Heavy-duty over-door racks hold 20–30 lbs total across steel hooks, enough for a loaded backpack and a winter coat. Wall-mounted rows ($12–20) hold more but need screws into a stud; over-door versions ($10–18) are fully renter-safe. The mechanism is grab-zone logic: the things you reach for on the way out live at the door, not in the closet.
Where it works best:
- Small bedrooms where the closet is full of clothes and bags have nowhere to live.
- Entry-adjacent bedrooms, the door hooks become the room’s drop zone.
- Robes and pajamas, which never belong in a dresser anyway.
- Gym bags and backpacks that otherwise live on the floor by the bed.
- Two-hook minimum: one for “tomorrow,” one for “this week.”
17. A High Shelf Above the Door or Bed: Store in the Dead Air
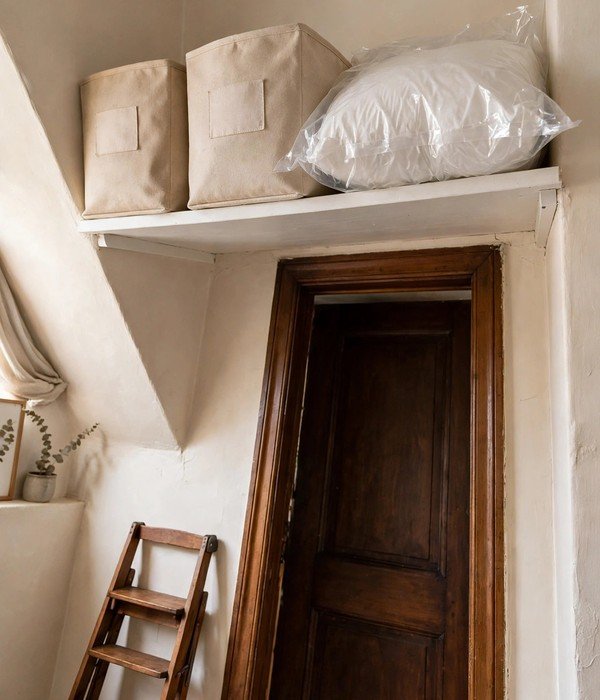
The 12–18 inches of wall between the top of a doorframe and the ceiling is dead air in almost every bedroom, and it’s perfect for the flat, light, rarely-needed stuff: luggage, seasonal decor bins, spare pillows in vacuum bags. A 10–12-inch-deep shelf spanning the door’s width holds 2–3 labeled bins and costs $20–35 with brackets.
The mechanism is frequency zoning: items you touch twice a year belong in the hardest-to-reach spot, freeing prime zones for daily items. Label the bins on the end that faces the room.
Where it works best:
- Above the bedroom door, for luggage and travel gear you use a few times a year.
- Above the bed’s headboard wall, for decorative storage boxes that double as decor.
- Small closets with high ceilings, the same shelf inside doubles dead-air capacity.
- Renters, with heavy-duty adhesive shelf brackets rated for the load (keep bins under 10 lbs each).
- Seasonal rotation: winter blankets up high in summer, summer gear up high in winter.
18. Corner Shelves: The Corners You’re Ignoring Are Storage
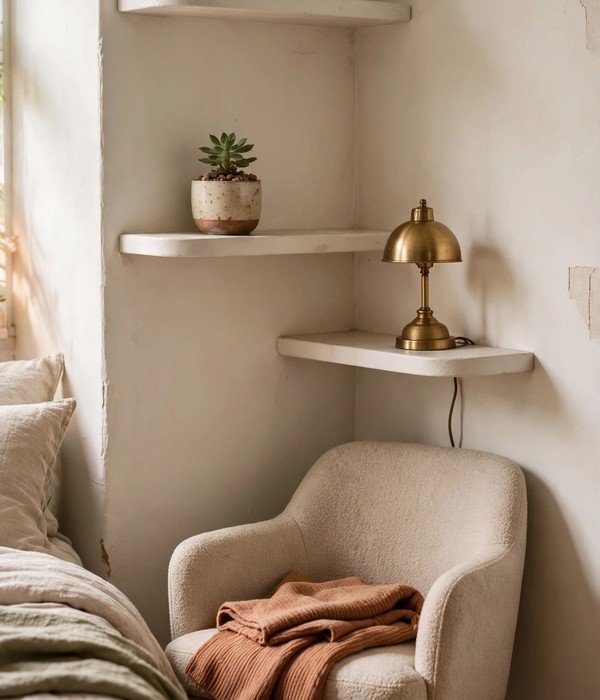
Every bedroom has four corners and almost no one stores in them. A corner is typically 24–36 inches of unused wall meeting at 90 degrees, a corner shelf unit or a tall narrow bookcase tucked into one converts it into 4–6 shelves of display and storage.
Floating corner shelves ($20–35 for a set of 3) each hold 10–15 lbs and are ideal for books, plants and the small things that colonize dresser tops. The mechanism is geometry: corners are the least-used wall in any room, so storage there changes nothing about how you move through the space.
Where it works best:
- Beside the bed in place of a nightstand, stacked 3-high for lamp, book and charger.
- Opposite the closet, for the bag and accessory overflow.
- In kids’ rooms, for trophies, books and the collections that need a home.
- Above-desk corners, where two walls of shelving meet without eating desk space.
- Small bedrooms where a full bookcase would block a walking lane but a corner won’t.
Dresser & Surface Control
The dresser top is where clutter goes to breed. These ideas organize what’s inside the drawers and reclaim the surface above them, because a clear dresser top makes the whole room feel bigger.
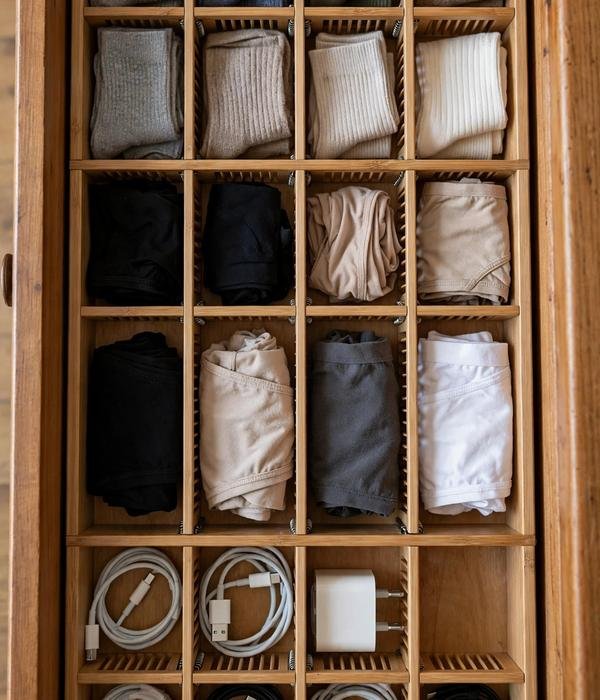
19. Drawer Dividers: End the Junk Drawer Forever
Drawers fail because they’re open fields, socks migrate, chargers tangle, and everything becomes one layer of chaos. Dividers turn a drawer into a grid of compartments so every category has walls. Spring-loaded bamboo dividers ($12–20 for a set of 4) expand to fit drawers 17–22 inches wide and install in seconds; honeycomb inserts subdivide each section further.
The mechanism is boundaries: when a category has edges, it can’t sprawl, and putting things away becomes a one-motion drop instead of a decision.
Do it in 4 steps:
- Empty the drawer completely and wipe it out, you’ll find things you forgot you owned.
- Sort into piles by category (socks, underwear, chargers, misc) and discard or relocate the strays.
- Set dividers to make one compartment per category, sized to the pile, big piles get big compartments.
- Put the daily-wear categories in the top drawer and the rarely-used ones at the bottom.
20. File-Folding: Fit 50% More in the Same Drawer
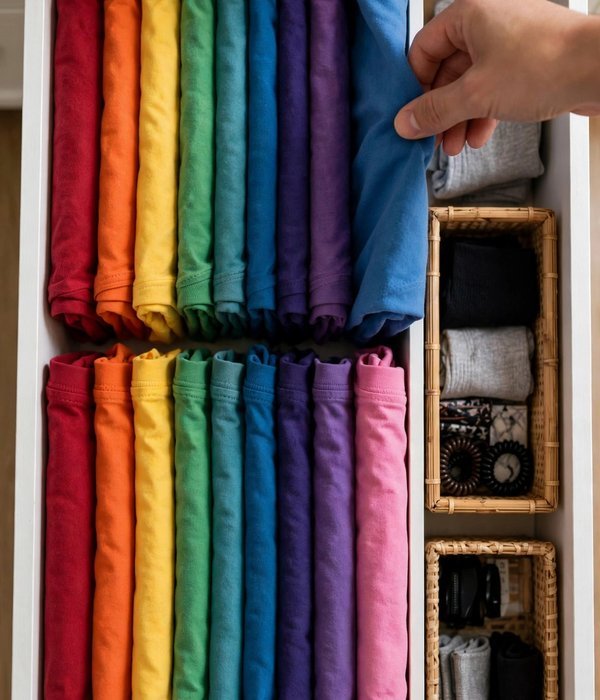
Flat-stacked clothes hide everything below the top item, so you own shirts you never wear because you never see them. File-folding stands each garment upright like files in a drawer, so every item is visible from above.
The technique works because most dresser drawers are 14–18 inches deep and 4–8 inches tall, exactly the dimensions a folded “file” needs to stand. Fold each item into a rectangle roughly 4 inches tall, pack the files snugly side by side, and a standard drawer holds 25–35 t-shirts where a flat stack held 15.
No products to buy; the method is free.
Do it in 5 steps:
- Fold each garment into thirds, then fold the rectangle to about 4 inches tall, it should stand on its own.
- Start with one drawer and convert it fully before moving on, partial systems collapse.
- Pack files tightly enough that they support each other but loosely enough to pull one out.
- Use small boxes or dividers as bookends at the row ends so the files don’t topple.
- Maintain it: refold goes back in the same slot, every time, no exceptions.
21. A Dresser-Top Valet Tray: One Home for the Daily Carry
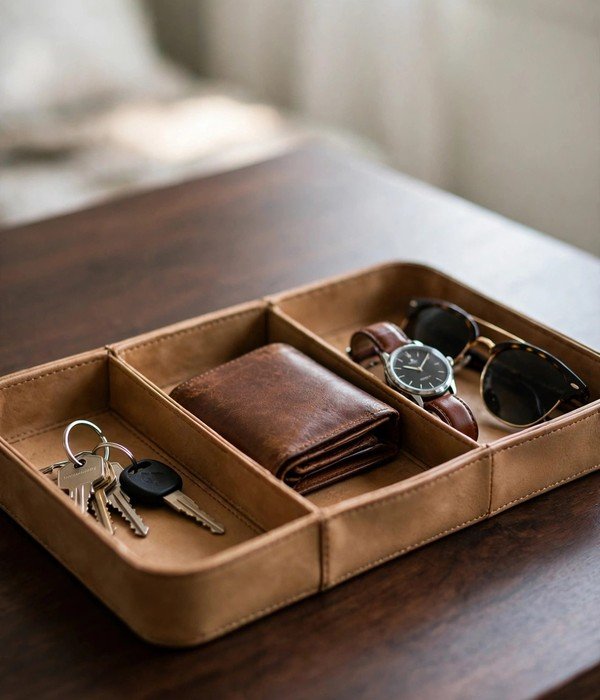
Keys, wallet, watch, sunglasses, loose change, the daily carry migrates to whatever flat surface is nearest, which is why the dresser top is always cluttered. A valet tray (typically 10 by 14 inches, $15–30 in leather, wood or metal) gives those items one defined landing zone.
The mechanism is a corral: items with a tray stay in the tray, and the tray’s edges stop the slow spread across the whole dresser. Choose one with 2–3 compartments so small items (rings, earbuds) don’t hide under big ones.
Do it in 3 steps:
- Clear the entire dresser top and wipe it down, start from zero, not from “mostly clean.”
- Place the tray on the side of the dresser nearest the door, that’s where the daily carry lands.
- Adopt the rule: if it fits in the tray it stays; if it doesn’t, it lives somewhere else. Everything else on the dresser top gets a home or gets moved.
22. A Nightstand with a Drawer and Charging Port: Tame the Cord Nest
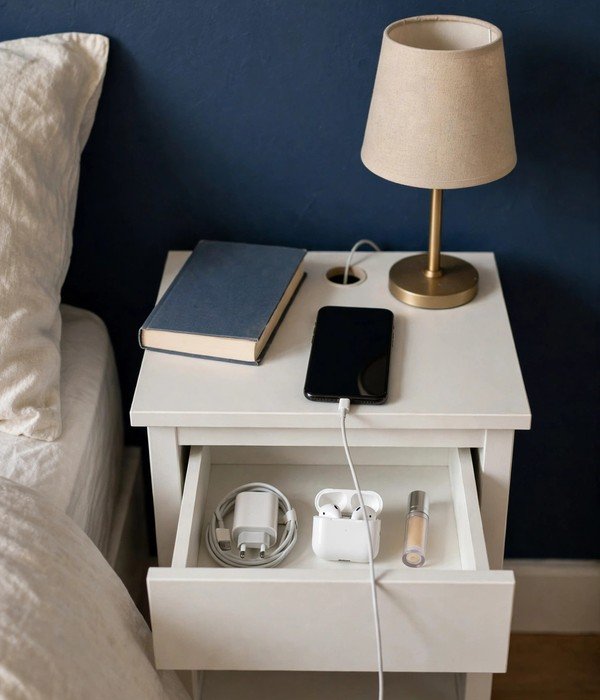
A nightstand without a drawer is just a shelf that collects clutter; a nightstand with a drawer plus a built-in charging port solves two problems at once. The standard nightstand is 15–20 inches wide and 24–28 inches tall, top surface roughly level with the mattress top, which fits a lamp, a book and a water glass.
The drawer (typically 4–6 inches tall) swallows the charger, earbuds, meds and the paperback; a cable grommet or built-in USB port in the back panel keeps cords from draping across the floor. Expect $40–80 for a solid small nightstand with these features.
Do it in 4 steps:
- Measure from your floor to the top of your mattress, buy a nightstand within 2 inches of that height so reaching over is natural.
- Run a short power strip or USB hub to the outlet behind the nightstand before pushing it into place.
- Thread charging cables through the grommet or back cutout, leaving just 6 inches of cable on top.
- Assign the drawer: top section for nightly items (lip balm, meds), back section for the rarely-needed (spare charger, manual).
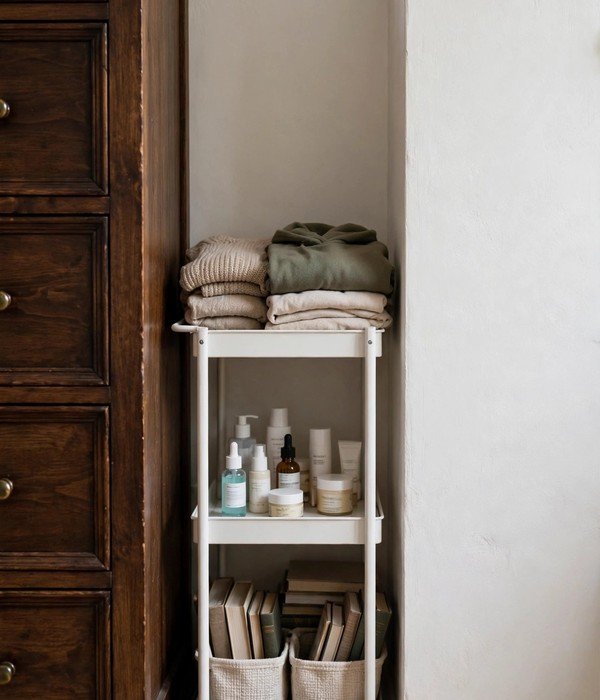
23. A Slim Rolling Cart Beside the Dresser: The 6-Inch Gap Is Storage
Almost every bedroom has a dead gap, between the dresser and the wall, or the bed and the dresser, that’s 5–8 inches wide and completely unused. Slim rolling carts are built exactly for this: about 6 inches wide, 15 inches deep and 30+ inches tall, with 3–4 tiers.
Each tier holds folded clothes, accessories, books or skincare, roughly the capacity of one dresser drawer, on wheels. At $20–35, it’s the cheapest “new drawer” you can buy, and it pulls out for full access and tucks back invisibly.
Do it in 3 steps:
- Measure the gap at its narrowest point (baseboards count), you need the cart’s width plus 1 inch of roll room.
- Assign tiers by frequency: daily items on the top tier, weekly in the middle, rarely-used at the bottom.
- Add small bins or cups on each tier so narrow items don’t fall through the cart’s open sides.
Watch out: top-heavy carts tip when you yank them out, pull from the middle tier, not the top, and keep the heaviest items on the bottom tier.
24. A Tiered Tray or Lazy Susan on the Vanity: Stop the Sprawl
Vanities and dresser tops fail because small items spread in two dimensions with nothing to contain them. A 3-tier tray or a 10–12-inch lazy Susan stacks that footprint vertically, the same items in one-third the surface area, and the rotation means nothing hides behind anything else. A tiered metal tray costs $15–25; a bamboo lazy Susan about $12–20.
The mechanism is vertical compression plus visibility: every item stays reachable and every item stays seen, which is the entire battle on a vanity.
Do it in 3 steps:
- Gather every small item from the vanity/dresser top into one pile, the full inventory, no hiding.
- Discard dried-out, broken and duplicate items (this step usually removes a third of the pile).
- Arrange survivors on the tiers by routine order: daily items on top, weekly in the middle, occasional at the bottom.

Seasonal & Sentimental
These are the items that don’t fit any daily system: holiday clothes, guest bedding, keepsakes, luggage. They need a different rule, stored by season and by sentiment, in the far zones, with strict capacity limits so the sentimental doesn’t eat the practical.
25. Vacuum Bags for Guest Bedding: A Linen Closet in a Flat Pack
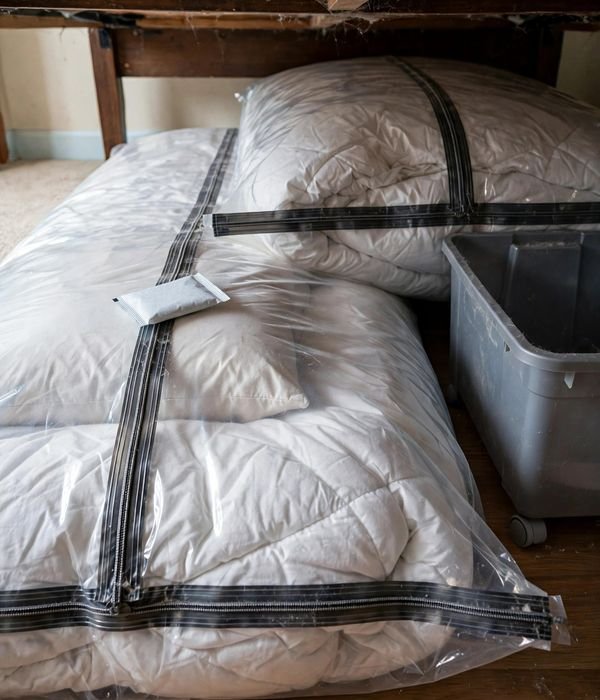
Spare bedding for guests, a second duvet, extra pillows, sheet sets, is bulky, used rarely, and exactly what vacuum bags were made for. Compressing a queen duvet and two pillows cuts their volume by up to 75–80%, turning a closet-shelf hog into flat packs 3–4 inches thick that slide under the bed or onto a high shelf.
Use the jumbo sizes (roughly 40 by 28 inches before compression), $15–25 for a multi-pack, and always choose bags with a double-zip seal, single zips leak air within weeks and your flat pack slowly re-inflates.
Tips for best results: wash and bone-dry bedding before sealing, trapped moisture is the only real enemy. Slip a dryer sheet inside for freshness on the next use. Store the compressed packs flat, never folded, or the seal creases and leaks. Watch out: don’t vacuum-seal memory foam pillows or toppers long-term, sustained compression can permanently reduce their loft.
Store foam items in a breathable cotton bag instead.
26. A Seasonal Clothing Rotation System: Two Wardrobes, One Closet
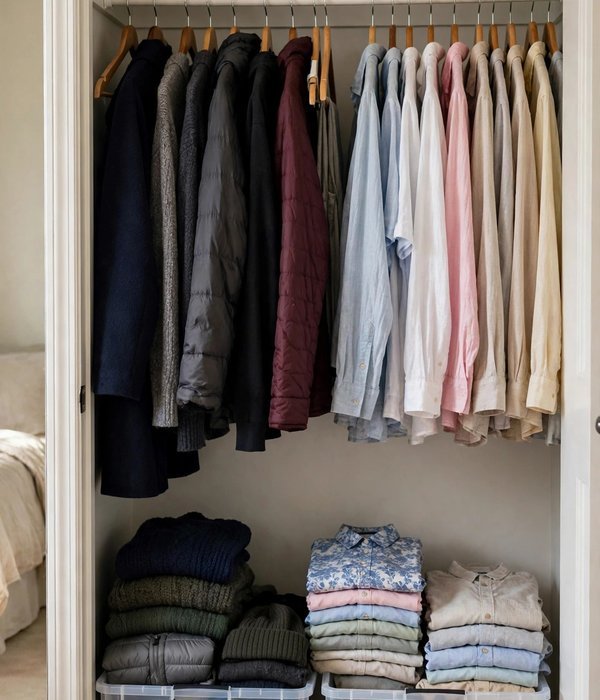
Nobody needs parkas and swimsuits accessible at the same time, yet most closets try. A seasonal rotation keeps only the current season in the prime zones and moves the rest to far storage, under the bed, high shelves, labeled bins.
The mechanism is access economics: roughly 20% of your clothes get 80% of the wear, so the off-season 80% should occupy the cheapest space in the room. Twice a year, spend an hour swapping: pull the far-zone bins, rotate contents, relabel.
Use 18-gallon totes (about 24 by 18 by 15 inches, $8–12 each), two totes typically hold one person’s off-season wardrobe.
Tips for best results: do the swap when the weather actually turns, not on a calendar date, you’ll never second-guess a piece. Wash everything before it goes into storage; a year-old stain sets permanently.
Keep a “maybe” bag during the swap and donate it unopened if you never reach for those items next season. Watch out: cedar blocks and lavender sachets deter moths in wool storage, but mothballs are a health hazard in bedrooms, skip them.
27. The One-Bin Memory Rule: Keepsakes with a Capacity Limit
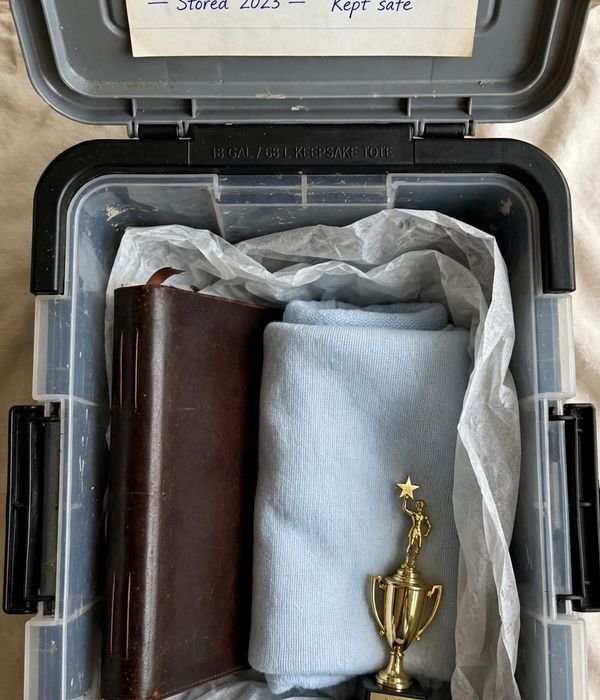
Sentimental items are the hardest storage problem because they have no natural limit, the box grows until it eats a closet. The one-bin rule fixes it with a hard capacity: one 18-gallon tote per person (or per kid) for keepsakes, roughly 24 by 18 by 15 inches. When the bin is full, something leaves before something new goes in.
The mechanism is forced curation: a fixed volume turns “keep everything” into “keep the best,” which is what you’ll actually want to revisit. Label it clearly and store it in a far zone, high shelf, under bed, top of closet.
Tips for best results: photograph bulky keepsakes (kids’ art, trophies) and keep the photo, the memory survives, the volume doesn’t. Use acid-free tissue for anything you truly want to last decades.
Review the bin once a year; sentiment fades on some items and the space is precious. Watch out: never store keepsakes in cardboard in basements, attics or garages, humidity and pests destroy paper and fabric. Climate-controlled bedroom zones only.
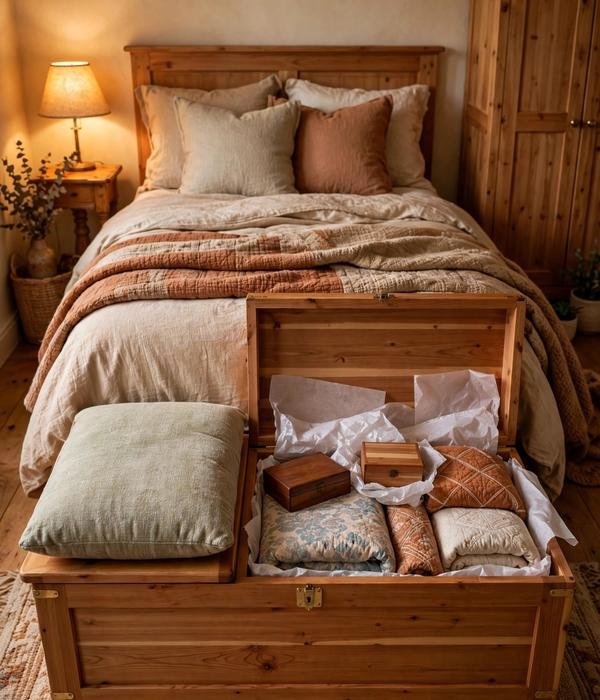
28. A Storage Trunk at the Bed’s Foot: Keepsakes That Look Like Furniture
A trunk or cedar chest at the foot of the bed hides 10–15 cubic feet of keepsakes, quilts and memory items inside something that looks like decor. Standard trunks run 36–48 inches wide, 18–20 inches deep and 18–24 inches tall, sized to sit against a queen or king foot without blocking the walking lane.
Cedar lining naturally repels moths and absorbs moisture, which makes it the right material for fabric keepsakes. Expect $80–150 for a solid cedar chest; add a cushion on top and it becomes the room’s extra seat.
Tips for best results: line the bottom with acid-free tissue before loading fabric keepsakes. Keep a simple inventory list taped inside the lid, you’ll forget what’s in there within a year.
If the trunk sits on carpet, add furniture glides so you can pull it out to clean behind it. Watch out: antique trunks often have lids that slam, add soft-close hinges or a lid support ($8–12) if kids are in the house.
29. Over-Closet-Shelf Luggage Storage: Park the Suitcases Up High
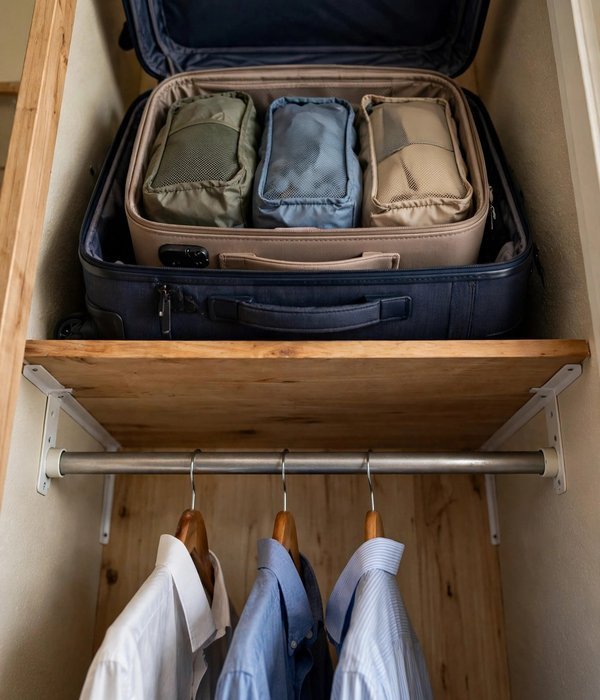
Luggage is the definition of far-zone storage: bulky, used a few times a year, and miserable anywhere accessible. The shelf above most closet rods, usually 12–18 inches of vertical space and the closet’s full depth, fits 2–3 nested suitcases perfectly.
Nest smaller bags inside larger ones (a carry-on inside a checked bag) and the whole set occupies one shelf section. If the closet lacks the shelf, a $20–30 freestanding over-door luggage rack or a high wall shelf does the same job. The mechanism is nesting efficiency: stored nested, three suitcases take the space of one.
Tips for best results: slip a dryer sheet in each suitcase to keep them fresh between trips. Store packing cubes and toiletry kits inside the luggage so travel gear lives in one place.
Label nothing, nested luggage is self-evident. Watch out: check the shelf’s weight rating before loading, a loaded large suitcase can hit 40–50 lbs, and wire closet shelving sags under that. Reinforce with a plywood board under the shelf if it flexes.
30. A Bed Skirt (or Tailored Cover): Hide the Storage, Keep the Room Calm
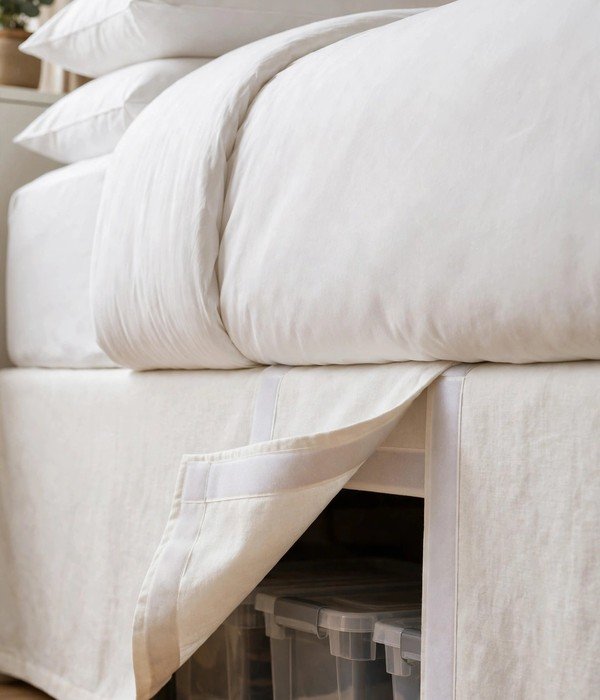
All that under-bed storage only works visually if you can’t see it. A bed skirt or tailored bed cover hides bins, bags and boxes behind a clean line, and the visual calm is functional, not just pretty: visible clutter raises the room’s perceived messiness even when everything is organized.
Standard drop lengths are 14–18 inches (measure floor to mattress top and buy the drop that matches); wraparound styles with Velcro panels ($25–45) let you lift one side to reach bins without removing the whole skirt. For platform beds with no clearance, a cover that reaches the floor turns the bed base itself into a clean plinth.
Tips for best results: choose a machine-washable fabric, bed skirts collect dust and pet hair at floor level. Wraparound styles beat traditional gathered skirts for storage access: one Velcro panel lifts, bins slide out, panel drops back.
Match the skirt to your bedding color family so it reads as one piece. Watch out: extra-long skirts pool on the floor and get vacuumed up or chewed by robot vacuums, keep the hem 1 inch off the floor.
Conclusion
Thirty ideas, five zones, one principle: store by zone, put daily items in prime space and everything else in the far zones. If this guide feels like a lot, start with the zone that’s failing hardest in your room, under the bed for most people, and work outward.
You don’t need all 30; you need the 6–8 that match your room’s actual geometry, which is why the measure-first cheat sheet at the top matters more than any single product.
Biggest win per dollar: a $15 set of bed risers plus two rolling under-bed bins (about $30) buys you 15–18 cubic feet of sealed, wheeled, labeled storage, roughly a closet’s worth, for under $50 and twenty minutes of work. Nothing else in this guide returns that much space per dollar, and it’s fully renter-safe.
Start there, then double-hang your closet rod, and the overflow stops.
The bedroom organization system that lasts is the one you can maintain in five minutes a day: far zones for the seasonal, prime zones for the daily, and a home for the daily carry. Measure first, buy once, and the bedroom stops being the overflow room.
Frequently Asked Questions (FAQ)
What are the best bedroom storage ideas for a small room with no closet?
Start with the zones that don’t need a closet: under-bed bins or vacuum bags for off-season clothes, a slim rolling cart for the gap beside the dresser, and wall-mounted shelves or pegboard for daily items.
If there’s truly no closet, a freestanding garment rack ($30–50, about 60 inches wide) plus a dresser covers most wardrobes, treat the rack as your “closet zone” and the dresser as your folded zone.
How much clearance do I need under my bed for storage bins?
You need at least 6 inches of floor-to-frame clearance for standard under-bed bins, and rigid rolling bins need 7–10 inches to slide freely. Flat vacuum-seal bags work with as little as 4 inches.
Measure at the lowest corner of the frame, floors slope, and if you’re short, a $15 set of bed risers adds 3–8 inches of clearance in minutes.
What are the best bedroom storage ideas for renters who can’t drill?
Over-door hooks and pocket organizers, tension-rod double hanging, adhesive shelf brackets rated for 15+ lbs, freestanding storage benches and rolling carts, and bed risers with rolling bins, none need screws. For anything adhesive, clean the surface with rubbing alcohol first and let it cure the full time on the package (usually 1 hour minimum) before loading it.
How do I store shoes in a small bedroom without a shoe rack?
Allow 8–10 inches of width per adult pair and store off-season shoes in flat under-bed boxes (one pair per box, labeled on the end). For daily pairs, an over-door pocket organizer holds 24+ pairs on zero floor space. If you buy a rack later, a 24-inch-wide two-tier model holds 6–8 pairs and fits under most hanging clothes in a closet.
Do vacuum storage bags really save space, and are they safe for clothes?
Yes, they compress bulky bedding and jackets by up to 75–80% and folded clothes by 40–65%, because they remove the air trapped between fibers. They’re safe for cotton, synthetics and everyday bedding, but skip them for silk, leather and expensive down, which can lose loft or set wrinkles under long compression.
Always wash and fully dry items first, and use double-zip bags so the seal holds.
How can I keep my dresser drawers organized long-term?
Divide every drawer into compartments with spring-loaded dividers ($12–20 for a set), then file-fold clothes upright so each item is visible from above, a standard drawer holds 25–35 file-folded t-shirts versus 15 flat-stacked.
The system survives only if every category has its own compartment and you put things back in the same slot; do a 5-minute drawer reset weekly until it’s habit.
Where should I store off-season bedding in a small bedroom?
In the far zones: vacuum-sealed flat under the bed, in labeled 18-gallon totes on a high closet shelf, or on a shelf above the bedroom door.
Wash and bone-dry everything before sealing, add a dryer sheet for freshness, and never store bedding in cardboard or unsealed bags in humid spaces, sealed bins or vacuum bags only, or the bedding comes back musty.