
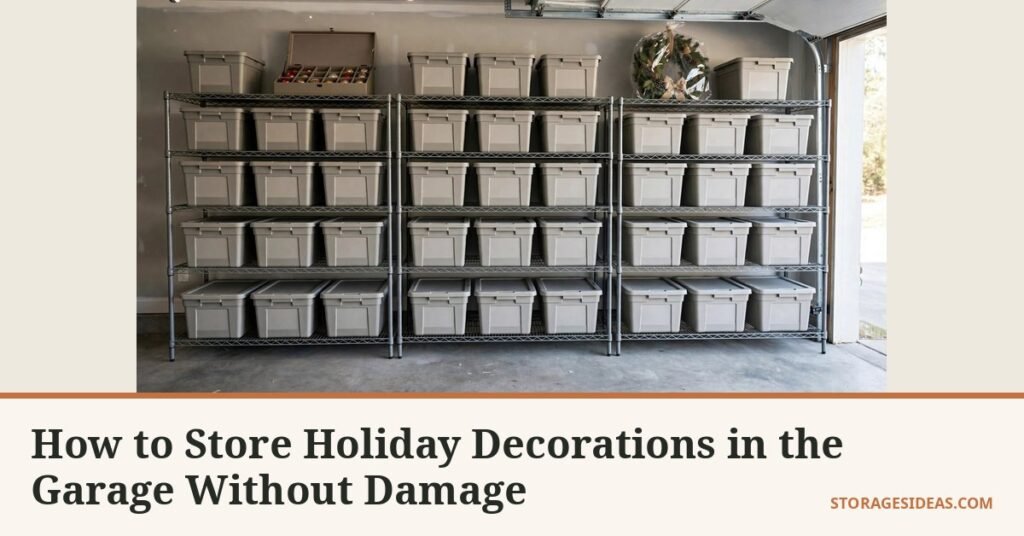
Every January I open my garage and find the same wreckage: a crushed cardboard box of ornaments rattling like broken glass, candles sweated into puddles, and string lights fused into one hopeless knot. Last year I lost three heirloom ornaments and a $90 lighted garland in a single box.
That box cost me nothing to pack and over a hundred dollars to replace.
The garage is the best place in the house to store holiday decorations, it has the vertical space and out-of-the-way corners a small home desperately needs. But a closed garage runs 10 to 30 degrees hotter than outside air, routinely hitting 120 to 140°F in summer, while concrete floors wick moisture straight into cardboard.
This guide gives you the 8-step system that works: sort and purge first, zone the garage by heat and moisture, ban the items that can’t survive garage conditions, then pack everything in sealed hard bins sized to the job.
Do it once, in the order below, and every holiday starts with decorations that look exactly like they did when you packed them away.
Why Garages Destroy Decorations (and How This System Prevents It)
Heat is the number-one killer, and it’s invisible. A closed garage sits through 11 months of temperature swings, and the damage is chemical, not cosmetic. Adhesives holding ornaments together soften and fail around 110 to 120°F.
Paraffin candles slump near 100°F and liquify by 120°F. Printed photos, electronics, and lithium batteries are all rated well below what an unventilated garage hits on a 95-degree afternoon, and poorly ventilated attics run even hotter, 140 to 160°F. Your garage is not room-temperature storage.
Moisture is the second killer. Concrete pulls groundwater up through capillary action, so anything sitting directly on the slab absorbs dampness from below. Cardboard wicks it up the flutes, softens, and becomes rodent nesting material. Sealed plastic bins stop the wicking, but only when they’re sealed and sitting on something, not on concrete.
The third killer is stacking physics. Fabric ornament boxes crush under hard totes stacked on top. A hard-sided ornament box with hollow-board reinforcement handles about 50 pounds stacked above it; a basic fabric box folds flat by season two. Soft containers go on top shelves where nothing stacks above them. Hard totes go on the bottom.
The fix is a system, not a product: declutter first so you’re not paying to store junk, map the garage into heat zones so fragile items sit in the coolest spot, use sealed hard containers, elevate everything 4 inches or more off the concrete, and label every bin.
The eight steps below follow the order I use in my own garage every January.
1. Sort and Purge Before You Pack a Single Bin: Cut the dead weight first
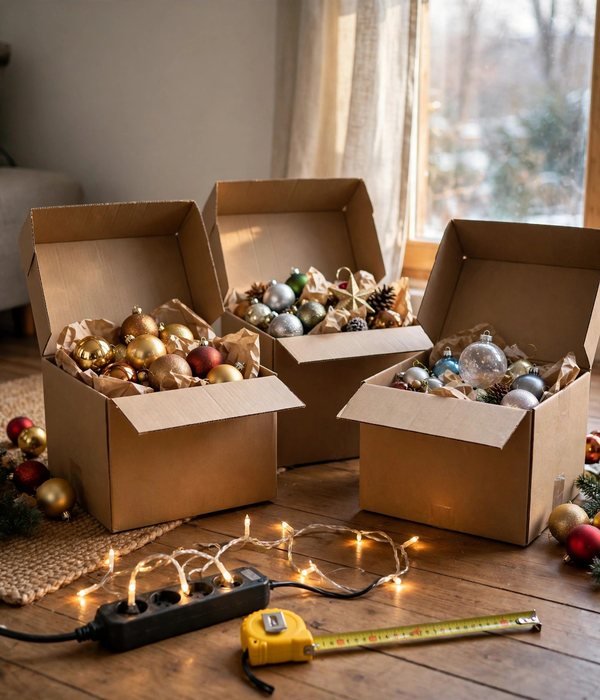
Packing is not the same as storing, and the most expensive bin in your garage is the one holding decorations you never hang. Sort everything into keep, donate, or trash before a lid closes on anything.
The mechanism is simple: fewer items means fewer bins, which means bins fit on shelves instead of stacked on the floor, less crushing, less moisture exposure, less hunting next December. People skip this from decision fatigue, so use fast rules instead of deliberation.
What you can do with it:
- Test every light strand before packing, if more than a third of the bulbs are dead, recycle the strand (LED strands cost under $15)
- Toss ornaments with broken hanger loops you haven’t fixed in two years, you’re not fixing them next year either
- Donate duplicates while they’re still seasonal enough for a thrift store to display
- Keep one “maybe” tote (18-gallon max), when it’s full, the maybes compete with each other
Tips for best results: Purge in the room where decorations were displayed, not in the garage, once it’s in the garage, it’s “stored” and you’ll keep it. Watch out: never donate food-scented items (cinnamon wreaths, dried-orange garlands), they attract pests. Bag those for the trash.
2. Zone Your Garage by Heat and Moisture: Put each bin in the right spot
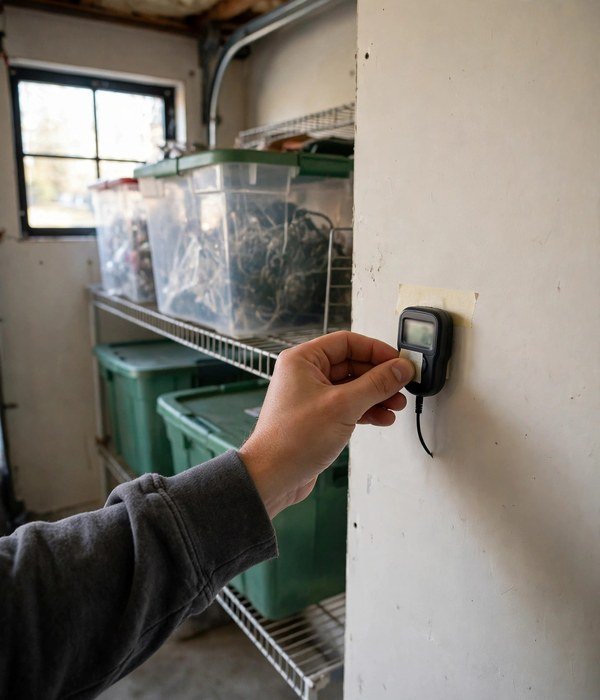
Most people store decorations wherever there’s an empty floor patch, which lands ornaments in the hottest corner and candles against the sun-baked west wall.
Your garage is not one uniform environment: the afternoon-sun wall can run 20 degrees hotter than the interior wall, the spot above the water heater is humid, and the corner under the garage door is where rain blows in. Mapping zones takes 20 minutes and prevents the slow, invisible damage category.
The wall your garage shares with the house is almost always the coolest surface, use it for ornaments and wreaths.
Steps to zone your garage:
- On a hot afternoon, tape a cheap thermometer in five spots: the house-shared wall, the sun-facing wall, beside the garage door, the ceiling, and floor level mid-garage
- Check after 3 hours, coolest is Zone A, hottest is Zone C; Zone C gets only latching hard totes with durable items, nothing fragile
- Look for white mineral stains on the concrete (efflorescence), moisture wicks up there; never set bins directly on those spots
- Put shelving in Zone A first and fill outward; re-check the map yearly
Tips for best results: Stick-on hygrometers cost a couple of dollars and confirm which spots are humid, not just hot. Watch out: never store decorations above the garage door opener motor or water heater vent, exhaust heat and vibration shorten ornament adhesive life.
3. Know What Must Never Go in the Garage: Ban the heat-sensitive items first

This is the non-negotiable step that saves more decorations than any product. Certain items cannot survive garage conditions, and no bin changes that, a sealed bin inside a 135-degree garage is still 135 degrees inside. Hard plastic buffers temperature swings by an hour or two at most; it does not insulate.
Memorize this list before buying a single bin: candles (paraffin slumps near 100°F, liquifies by 120°F), real photographs and photo ornaments, electronics and battery timers (lithium batteries degrade rapidly above 113°F and become a fire risk), lighted display control boxes, wax-dipped or adhesive-backed items, and aerosols, which expand and can burst in heat.
These live in an interior closet, under a bed, or on a basement shelf, inside the conditioned envelope of the house.
What you can do with it:
- Pull candles out of mixed boxes during the January sort, they get packed with ornaments by accident
- Remove batteries from every timer, snow globe mechanism, and musical ornament, batteries corrode in heat and leak acid that etches glass
- Keep wrapping paper and gift bags indoors too, garage humidity curls paper and mildew eats gift boxes
- Store aerosols in the laundry room, never near the furnace or in the garage
Tips for best results: Label your “indoors only” bin clearly, HOLIDAYS – INSIDE – CANDLES/PHOTOS/ELECTRONICS, so nobody “helpfully” moves it to the garage. Watch out: this applies even to insulated garages; if it hits 120°F in July, the ban holds.
4. Wrap Ornaments in Divided Ornament Boxes: Give every ornament its own slot
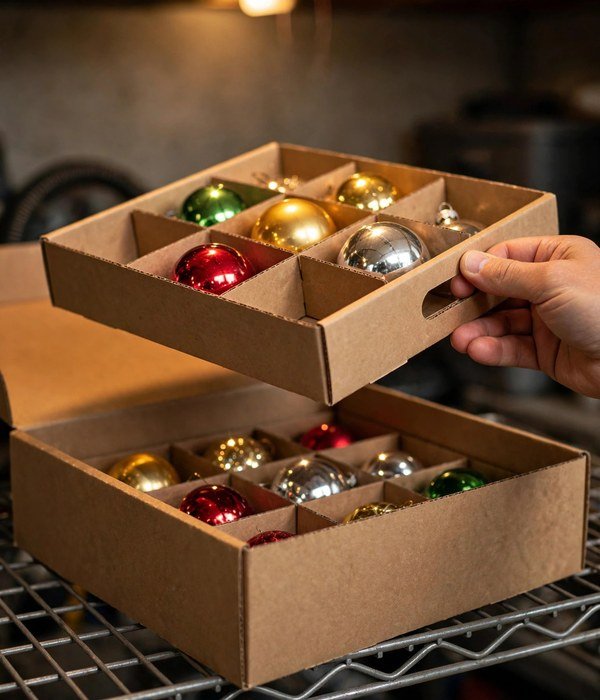
The January box of shattered ornaments happens because ornaments were packed touching each other with no dividers. Glass and ceramic break from point impact, one hard shake of the bin and two ornaments crack against each other. Individual 3-inch compartments keep every ornament physically separated no matter how the box is handled.
A dedicated ornament box with removable dividers is the single best purchase in this system: a 64-ornament box (about 13.5 × 13.25 × 13.25 inches) runs roughly $0.35 to $0.50 per slot; the double-wide 128 box (about 26 × 13.5 × 13.25 inches) doubles capacity at about the same per-slot cost.
Get the hard-sided version with hollow-board reinforcement, it handles up to 50 pounds stacked on top; basic fabric folds flat after one season. Adjustable dividers matter more than total count if your ornaments are mixed sizes.
What you can do with it:
- Count your ornaments before buying, a half-empty 128 box wastes shelf space a 64 wouldn’t
- Wrap heirlooms in tissue inside their slot for double protection
- Collect ornament hooks in a zip bag taped inside the lid, loose hooks scratch glass all year
- For 4-inch-plus ornaments, buy the 36-slot large-compartment box instead of cramming them into 3-inch grids
Tips for best results: Stand the box upright like a book on the top shelf, lid latched, with nothing stacked above it. Watch out: fabric ornament boxes are not waterproof, in a damp garage, upgrade to the hard plastic version with the same 64-slot layout.
5. Box Everything in Gasket-Sealed Hard Totes: Size the bin to the job
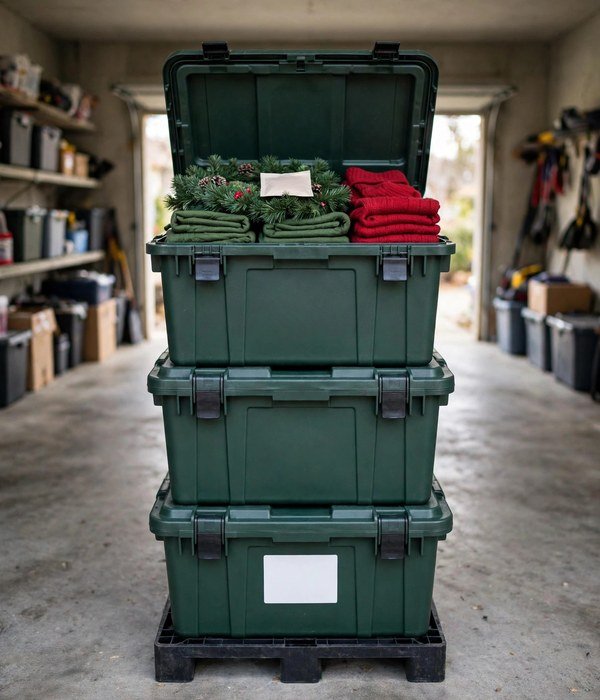
Cardboard is rodent nesting material with a return address. What keeps decorations safe in a garage is a hard plastic shell with a latching, gasket-sealed lid: it blocks dust, moisture migration, and mice, and survives being stacked three high. Snap-on lids pop loose when a bin shifts; latching gaskets stay sealed.
The workhorse is the 18-gallon tote, roughly 23.5 × 18.3 × 16.1 inches, big enough for garlands, stockings, and tree skirts, small enough that a full bin stays under 40 pounds and one person can lift it onto a shelf. (The Walmart Sterilite variant runs a touch smaller at 22.6 × 17.3 × 15.5 inches, measure before assuming two brands stack.) Bigger is not better: a full 30-gallon tote tops 60 pounds, so it ends up on the floor where moisture and stacking damage live.
Use multiple 18-gallon totes instead, under $10 each in multi-packs.
Steps to pack a tote correctly:
- Heaviest on the bottom (ceramic figures, tree stands), lightest on top (tinsel, stockings)
- Fill dead space with crumpled tissue, items that can’t shift can’t collide
- Drop a rechargeable 40-gram silica gel pack on top before closing
- Latch every latch until it clicks, an unlatched latch is an unsealed bin
- Label front AND one short end with a paint pen: contents + year
Tips for best results: Buy one brand and size so they stack perfectly, mixed brands rock and slide. Watch out: clear totes let in light that fades dyed fabrics and painted surfaces over years; in a garage with windows, prefer opaque.
6. Wind String Lights So They Survive the Year: No more tangled knots
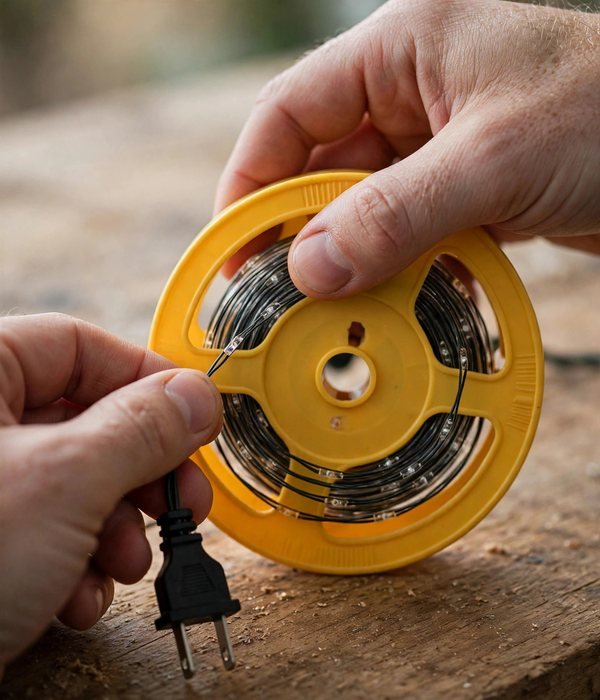
String lights die in storage from kinked wire and crushed sockets. Every tight kink is a stress point where copper fatigues; every crushed socket is a section that goes dark. Even tension on a rigid winder is the fix: no bend tighter than the winder’s curve, wire never crossing itself under pressure.
A flat plastic reel winder (under $10) holds a 50- to 100-foot strand. Wrap from the plug end so you can test next year without unwinding, even overlapping loops, not figure-eights, tail secured with painter’s tape marked with length and location (“porch, 60 ft”).
Store wound reels standing on edge in their own 18-gallon tote, like vinyl records, never flat under heavier items, which crushes sockets.
What you can do with it:
- Test while winding: more than a third of bulbs dead means recycle the strand, not the winder
- Bundle that strand’s extension cords and timers in the same tote, one bin per display next December
- Fold icicle or net lights in wide 12-inch accordion loops and zip-bag them before boxing
- Keep LED and incandescent strands in separate totes, old incandescent insulation is brittle and deserves one careful handling
Tips for best results: Wind in the room where the lights hung, at takedown, carrying a loose bundle to the garage “to wind later” is how tangles are born. Watch out: never wrap around cardboard or a hanger; sharp edges cut insulation and the flexing bundle collapses into a knot.
7. Bag Wreaths and Garlands So They Keep Their Shape: Protect the full, fluffy silhouette
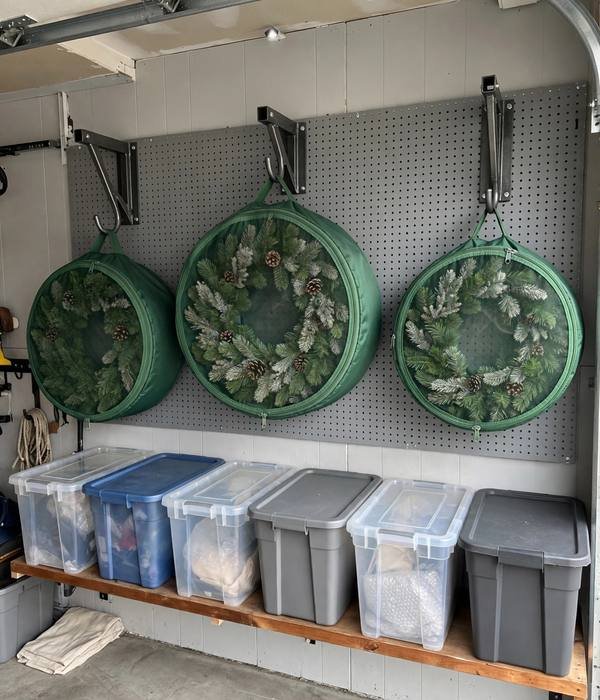
Wreaths lose their shape from compression under weight. Artificial greenery is thin plastic branches held by friction and memory; stack anything on a bagged wreath and the branches take a permanent set, so next December it looks deflated on one side.
The fix is a rigid-sided container the wreath stands in, not lies under, gravity holds branches in their natural downward drape when the wreath hangs or stands upright, and flattens them under top pressure. A round zippered wreath container (24-inch for standard, 30-inch for oversized) is about 7 inches deep, enough for a full artificial wreath without compressing branches.
Measure your wreath’s widest diameter first, a 28-inch wreath crammed into a 24-inch bag takes the damage you’re preventing. Hang bagged wreaths on wall hooks or stand them upright like wheels. Never stack bins on top; never lay flat.
What you can do with it:
- Coil garlands at least 18 inches in diameter, tighter coils kink branch wires permanently
- Hang multiple wreath bags on heavy-duty hooks in Zone A, wall space is free, zero-shelf-footprint storage
- Add tissue between flocked or glitter wreaths and the bag wall so glitter doesn’t transfer
- Photograph each wreath fluffed before bagging, it’s your re-fluffing reference next year
Tips for best results: More than three wreaths? A rolling or wall-mounted wreath rack pays for itself in one season of not re-fluffing. Watch out: never reuse the thin store bag the wreath came in, it tears within a year and gives zero crush protection.
8. Elevate, Label, and Lock Out Pests: The final layer that protects everything
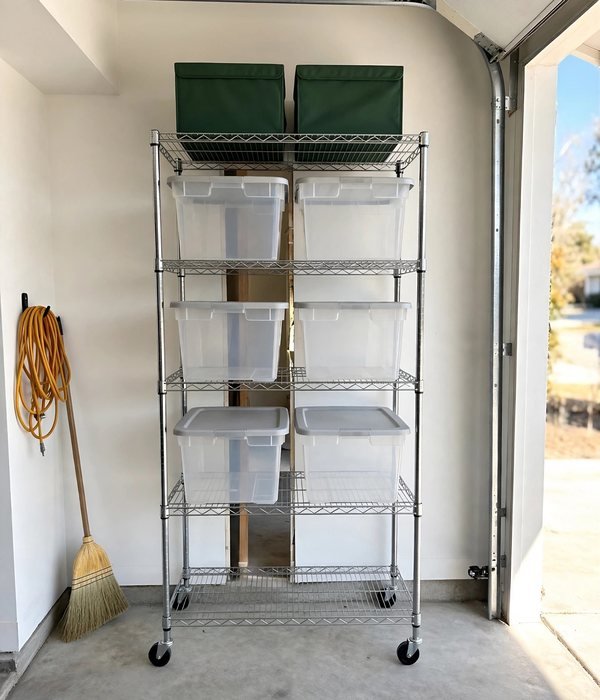
Everything above fails if bins sit directly on concrete. Concrete wicks groundwater upward, so a bin on the slab sits in a permanent damp microclimate, cardboard softens, fabric mildews, and mice nest behind the bin. Elevating just 4 inches breaks the capillary path and removes the hiding spot.
Use plastic or pressure-treated pallets (standard 40 × 48 inches, 4 to 5 inches tall, often free behind big-box stores) or wire shelving with the lowest shelf 4 inches off the floor. A 4-tier wire shelf (36 × 14 × 54 inches) holds six 18-gallon totes for under $60. Nothing touches the slab.
Steps to finish the job:
- Position pallets or shelving in Zone A first, fill cool-dry storage before spilling into warmer zones
- Heaviest bins on the bottom shelf; ornament boxes and wreath bags on top, nothing above them; leave a 2-inch air gap to the wall to stop condensation
- Label front and one end: HOLIDAY – contents – year packed (white paint pen reads for a decade)
- Photograph the finished wall, it’s your January map and December shopping list
Tips for best results: our complete garage organization guide covers the full zone layout this system plugs into. Watch out: peppermint oil and ultrasonic repellents aren’t reliable, the sealed hard bin is the control. If you see droppings, set snap traps outside the storage area and check the garage door seal.
For the rest of your garage, these garage wall storage ideas get bins off the floor entirely, and this tool storage system keeps everything else organized around your holiday zone. For the decorations themselves, our Christmas decor guide covers the small-apartment side of the same collection.
Conclusion
Non-negotiable step: Do exactly one thing from this guide: move every decoration out of cardboard into latching, gasket-sealed hard totes, and get every bin at least 4 inches off the concrete. Cardboard on concrete is how ornaments shatter, candles melt, and mice move in.
The 18-gallon latching tote (~23.5 × 18.3 × 16.1 in, under $10 each in multi-packs) is the workhorse; the divided ornament box (64 or 128 slots) is the specialist purchase; the wreath container is the shape-saver. Those three containers and 4 inches of air are the system.
Do the January sort once, zone the garage once, and it runs itself for a decade, next December opens with labeled bins in the order you need them, and nothing broken, melted, or nested in.
Frequently Asked Questions (FAQ)
Can I store Christmas decorations in the garage if it gets really hot?
Yes, if you pick the right items and the right spot. Artificial greenery, glass ornaments in divided boxes, and plastic figures handle garage heat fine in sealed hard bins. Exclude anything that melts, warps, or degrades near 120°F, candles, photos, electronics, batteries, adhesives, and store those in an interior closet.
Zone the garage and put bins on the wall shared with the house, the coolest surface in the building.
What is the best container for storing holiday decorations in the garage?
A latching hard plastic tote with a gasket-sealed lid, in the 18-gallon size (roughly 23.5 × 18.3 × 16.1 inches). The gasket blocks dust, moisture, and mice; the latches stay closed when bins shift; and 18 gallons stays liftable when full. Buy one brand so they stack cleanly.
For ornaments specifically, use a divided ornament box (64 or 128 slots), individual compartments are what prevent breakage.
How do I keep mice out of my holiday decoration bins in the garage?
Use hard plastic bins with latching lids, mice chew through cardboard and fabric in minutes but leave sealed hard plastic alone when there’s no food scent inside. Remove anything food-scented (potpourri, cinnamon sticks, dried-fruit garlands) from decoration storage entirely. Elevate bins 4 inches off the concrete on pallets or shelving.
Don’t rely on peppermint oil or ultrasonic devices; the sealed bin is the actual control.
How do I store Christmas lights so they don’t tangle?
Wind each strand on its own rigid winder in even overlapping loops, starting from the plug end so you can test next year without unwinding. Tape the tail with the length and location marked. Store wound reels standing on edge in a dedicated 18-gallon tote, like vinyl records, never flat under heavier items, which crushes sockets.
One winder per strand; doubling strands recreates the tangle.
Should I store decorations in the attic or the garage?
The garage wins. Poorly ventilated attics reach 140 to 160°F, hotter than garages, which destroys adhesives, candles, and electronics faster. The garage is easier to access, easier to zone by temperature, and easier to keep bins off the floor.
Apply the same rules either way: sealed hard bins, 4 inches off concrete, fragile items in the coolest zone, heat-sensitive items indoors.
How far in advance should I organize holiday decoration storage?
Do it at takedown in January, not in November. Sorting, purging, and packing in January means every item is in your hands anyway, you handle each decoration once instead of twice. It also finishes the system before the garage hits summer heat, and next December starts with labeled bins instead of a repacking project.
Most collections take 3 to 4 hours including the purge.