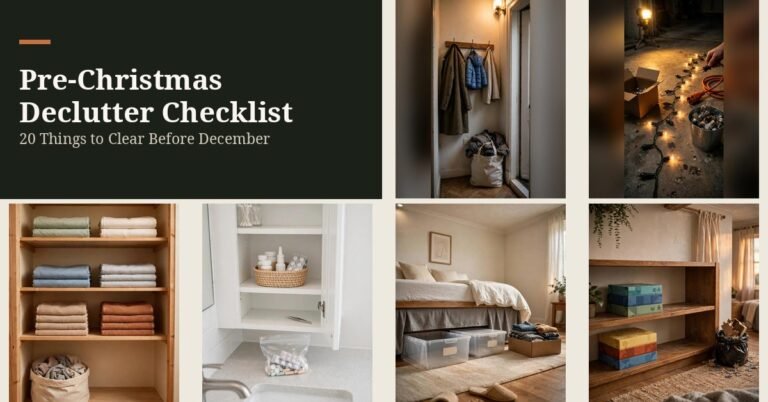

If you’re wrapping Christmas gifts on the dining table again this year, it’s time for a gift wrapping station. A station is just one grab-and-go zone where paper, tape, scissors, ribbon, and tags live together, so wrapping a gift takes minutes, not a full table takeover.
Build it before December, not during it. Set up your station in November, buy your paper and ribbon early, and wrap gifts as they arrive instead of facing a mountain of boxes on Christmas Eve. If you’re stashing gifts away from curious kids, our gift organization and hiding ideas guide pairs perfectly with this one.
This guide gives you 12 gift wrapping station ideas built for small homes, renters included. Every idea lists exact sizes, what to buy, and the January storage footprint, because a Christmas station is only a good deal if it disappears cleanly after the season.
Costs run from about $10 for a drawer divider set to $90 for a fold-down desk, and most ideas here need zero new floor space. Pick the one that matches your home, and wrapping stops being the chore that eats your December.
Why a Gift Wrapping Station Saves Christmas in a Small Home
Without a station, every wrapped gift is a three-room expedition: paper rolls live in the closet, scissors are in the junk drawer, tape is wherever it landed. You clear the table, you hunt supplies, you wrap one gift, you put it all back. In a small home, that cycle repeats for every single present.
A gift wrapping station fixes it by turning the supplies into one portable or pinned-down zone. Everything you need is in reach at once, so a gift goes from unwrapped to done in about five minutes. Small homes benefit most, because the station borrows dead space instead of claiming floor you don’t have.
Build it in November, when gift lists are still short and craft-store shelves are full. Buy your paper once, load the station, then wrap as gifts arrive. December-you gets ten quiet minutes per gift instead of one frantic Christmas Eve marathon.
The station essentials checklist (build this first, then pick a station below):
- 3–4 rolls of paper, 30 in wide (one solid, two patterns, one kraft)
- Two rolls of tape, one always disappears mid-season
- Sharp scissors, reserved for paper only
- 2–3 spools of ribbon plus a spool of curling ribbon
- Gift tags and a fine-tip pen for names
- Tissue paper for box lining, gift bags for awkward shapes
1. Rolling 3-Tier Cart Station: the closet-ready wrap hub
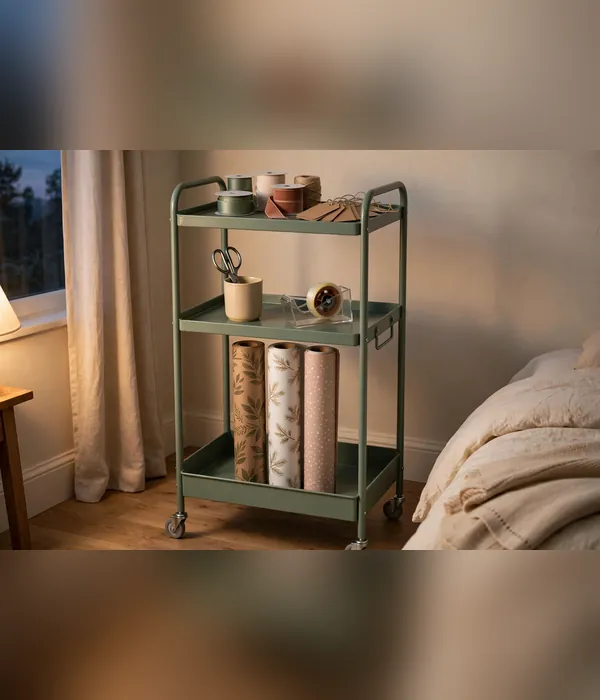
A 3-tier rolling cart is the closest thing to a wrapping room you can own in a small home. The classic craft-cart footprint runs about 18 × 26 inches, the best-selling budget cart is even smaller at 13¾ × 17¾ in, so it fits beside the bed, in a hallway nook, or inside a standard 24-in-deep closet.
The mechanism is wheels plus vertical tiers. Thirty-inch rolls stand upright in the bottom tier (a 31-in-tall cart clears them), tape and scissors live in cups on the middle tier, and ribbon spools and tags ride on top. Wheel the whole station to wherever you’re wrapping, lock the casters, and every supply is at elbow height.
Shop a steel cart with lockable casters rated for at least 40–50 lbs total; the typical price band is $30–$50. Fully renter-safe: nothing mounts, nothing screws in. When the season ends, wheel it into a closet or laundry corner, it stores fully loaded, so next November it rolls out ready.
Where it works best:
- Bedrooms and hallways: the cart parks in a 2-foot corner, then rolls to the bed for wrapping
- Renters and dorms: zero wall damage, and it moves house to house with you
- Night-before wrappers: roll it out, wrap, roll it away, no setup or teardown
- Shared closets: the slim width slips between hanging clothes
- January storage: rolls into the closet or laundry corner fully loaded, no teardown needed
2. Over-the-Door Wrap Organizer: the zero-footprint hanger
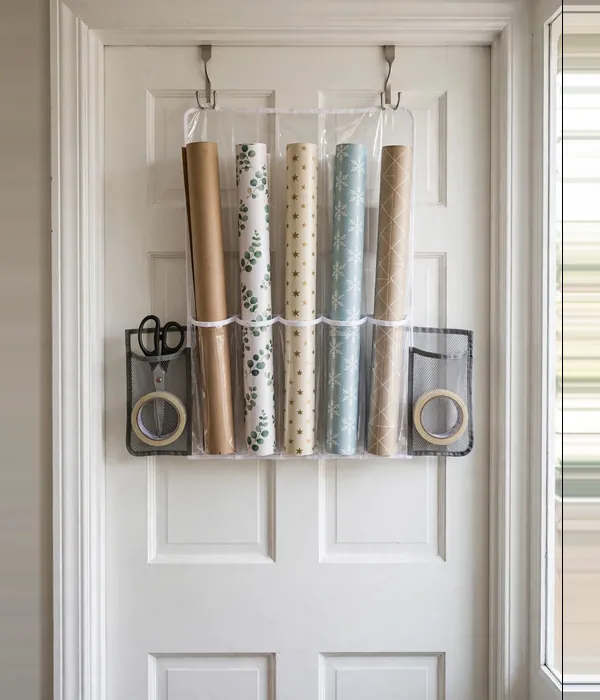
The back of a door is the most wasted real estate in a small home, and an over-the-door wrap organizer claims all of it. Clear pockets and tall roll slots hold 30-in paper rolls upright plus tape, scissors, ribbon, and tags, a full station on a surface that was holding nothing.
The hooks fit standard interior doors 1-3/8 in thick and most thicker doors up to about 2 in, and nothing screws in, so renters are fully covered. Shop sturdy metal hooks rather than thin wire, and a version with a reinforced bottom insert so it hangs flat. The typical price band is $15–$25 for a 5-pocket version holding 6–10 rolls.
Watch the weight: keep the total under 30–40 lbs, heaviest rolls in the bottom pockets, or the hooks strain and the door won’t latch. Anchor the bottom corners with adhesive tabs so the organizer doesn’t bang the door every time it moves.
Set it up in an afternoon:
- Measure the top of your door, if it’s over 2 in thick, shop extended hooks before you buy.
- Hang both hooks, seat the organizer, and load the bottom pockets with rolls first for stability.
- Fill the side mesh pockets with scissors, tape, and pens; keep ribbon spools in a deep pocket.
- Press adhesive tabs on the bottom corners so nothing swings or thuds when the door moves.
- In January, leave it on the laundry-room door or lift it off and lay it flat under a bed, zero teardown.
3. Pegboard Wall Station: the craft wall that wraps
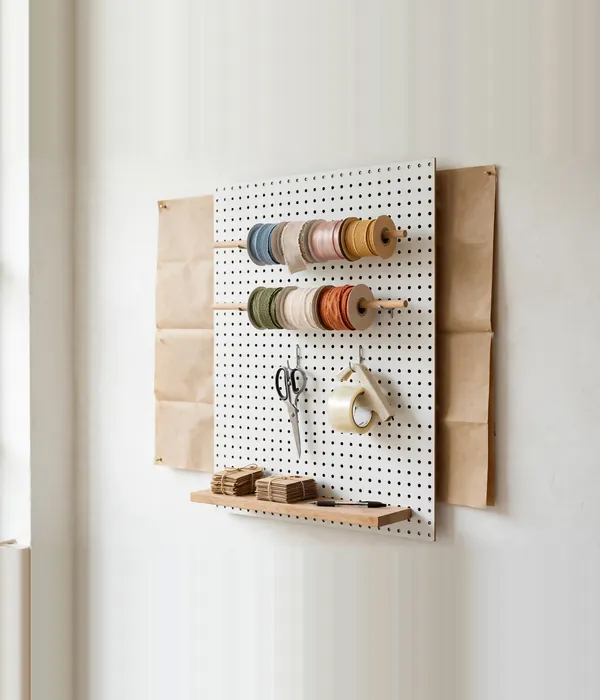
A 24 × 36 in pegboard turns one wall into a wrap command center. Ribbon spools slide onto short dowels so they unspool without tangling, scissors and tape guns hang on hooks at eye level, and a small shelf holds tags and pens. Every tool is visible, and nothing gets buried in a drawer.
This is a wrapping station diy project in the best sense: one panel, a dozen hooks, two dowels, and an afternoon. But it’s a screw-into-the-wall job, into studs or with proper wall anchors, so it’s for homeowners, not renters. Renters can lean a freestanding pegboard panel on a dresser for about 80% of the effect with zero holes.
January is this idea’s best feature: it never comes down. Leave the hooks up and it becomes a year-round craft wall, sewing station, or tool board. If you must remove it, the panel lifts off French cleats and slides behind a wardrobe at under 1 in thick.
Where it works best:
- Craft and sewing households that already own the supplies, the wall just organizes them
- Spare rooms and home offices with one free wall near a table
- Pattern collectors: dowels hold a dozen ribbon spools where you’d actually see them
- Shared living spaces: everything hangs flat and reads as intentional decor, not clutter
- January storage: it stays up as a craft wall, the rare station with no teardown at all
4. Closet-Rod Hanging Kit: the pocket organizer that folds flat
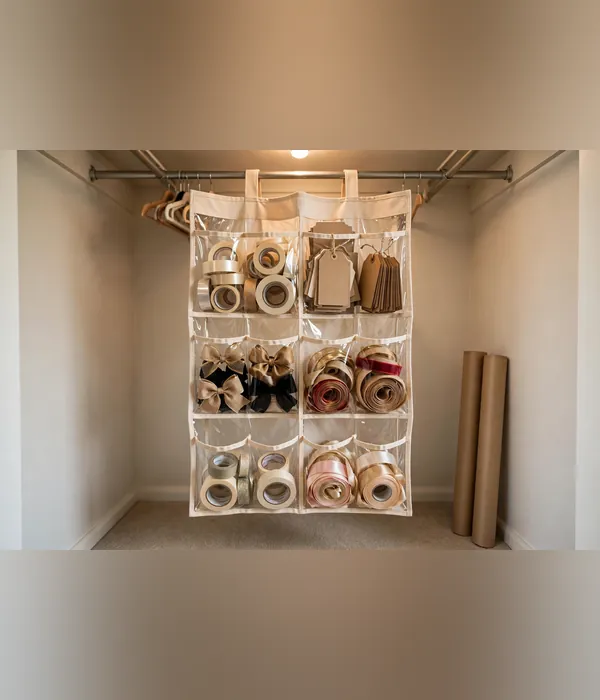
A hanging closet organizer, the kind sold for shoes, makes a stealth wrapping station inside the closet you already own. Double hooks drape it over a standard 1¼-in closet rod, and the clear pockets sort tape, tags, bows, and ribbon by type while 30-in rolls lean beside it in the closet corner.
The win is fold-flat storage: in January it collapses to about 1 in thick and tucks onto a closet shelf, so the whole station vanishes without needing a spare bin. Fully renter-safe, nothing mounts, and the clear pockets keep small supplies visible so you never buy a third roll of tape.
One limitation: pockets won’t hold full-size rolls, so pair it with rolls standing in the closet corner or behind the door. The typical price band is $15–$30 for a 10-pocket reinforced version with stiffened shelves that don’t sag.
Set it up in an afternoon:
- Clear one closet-rod section about 24 in wide, it hangs from a standard 1¼-in rod.
- Drape the organizer on its double hooks and insert the stiffening boards so pockets hold shape.
- Assign pockets by job: tape and dispensers up top, tags and pens in the middle, ribbon and bows low.
- Stand 30-in rolls upright in the closet corner next to the organizer.
- In January, empty it, fold it flat, and slide it onto a closet shelf, done.
5. Under-Bed Station Bin: the dust-free hidden kit
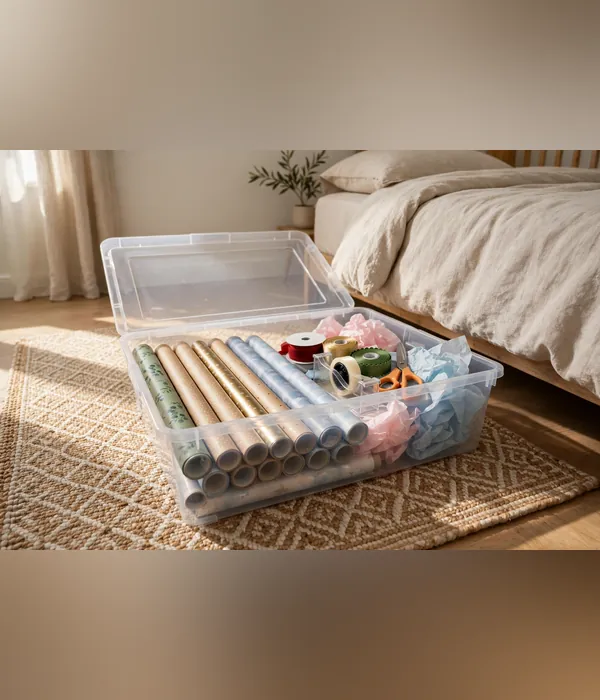
The space under the bed is the biggest hidden compartment in a small home, and a 41-qt under-bed bin turns it into a wrapping station that never appears in a photo of your living room. At roughly 34 × 17 × 6½ in, it swallows 30-in rolls laid straight, plus tape, scissors, ribbon, and gift bags.
Measure first: you need about 7 in of bed clearance for the bin to slide freely. Latching lids keep everything dust-free for eleven months, and wheeled versions roll out one-handed when it’s time to wrap, the typical price band is $12–$20. Two bins side by side double the kit without claiming any visible space.
January storage is the whole point of this one: the bin just slides back under the bed, fully loaded. It is the station and the off-season storage in one box, no closet space claimed, ever.
Where it works best:
- Studio apartments where the bed is the only hidden storage in the house
- Guest rooms that double as the wrapping room in December
- Dust-sensitive households, the latching lid keeps supplies clean all year
- Homes with toddlers: the kit lives out of reach and out of sight
- January storage: slides back under the bed, the station never needs a second home
6. Fold-Down Wall Desk Station: the December wrapping desk that vanishes
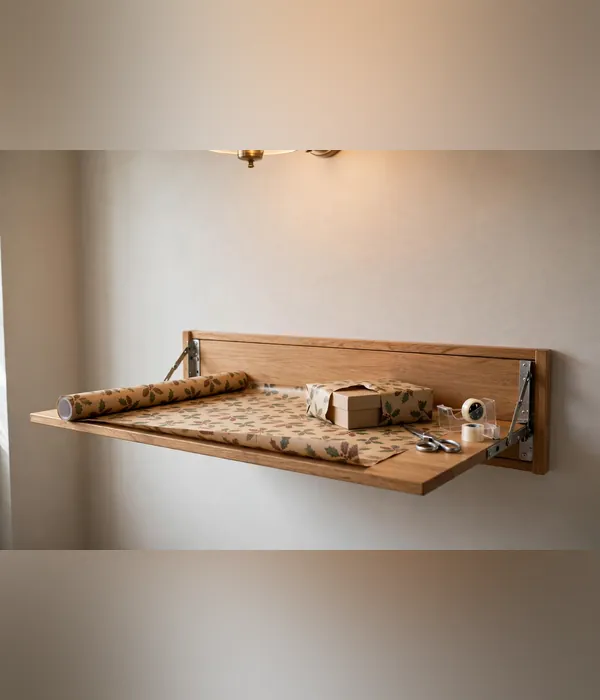
Big boxes need a real cutting surface, and a fold-down wall desk gives you one that vanishes. A 30 × 20 in surface drops down to counter height for wrapping, then folds flat against the wall, about 4 in deep, when the last gift is done.
This is the most committed wrapping station diy on the list: mount the bracket into studs (never drywall anchors alone), at 36-in counter height so you can cut paper standing up. Rated brackets hold 25–50 lbs, and the typical kit price band is $40–$90.
When it’s folded up, the underside doubles as a shallow display shelf for December decor. In January, fold it flat and it reads as wall paneling, the station footprint drops to zero without removing a single screw.
Set it up in an afternoon:
- Pick a stud wall near an outlet, a small lamp makes evening wrapping far easier.
- Mount the bracket at 36 in high, level, into at least two studs.
- Add a small wall basket beside it for tape, scissors, and the pen.
- In December, fold it down and load it; keep 30-in rolls in a bin underneath.
- In January, fold it up and style it as a shelf, the station disappears into the wall.
7. Dresser-Top Corner Station: the one-tray takeover
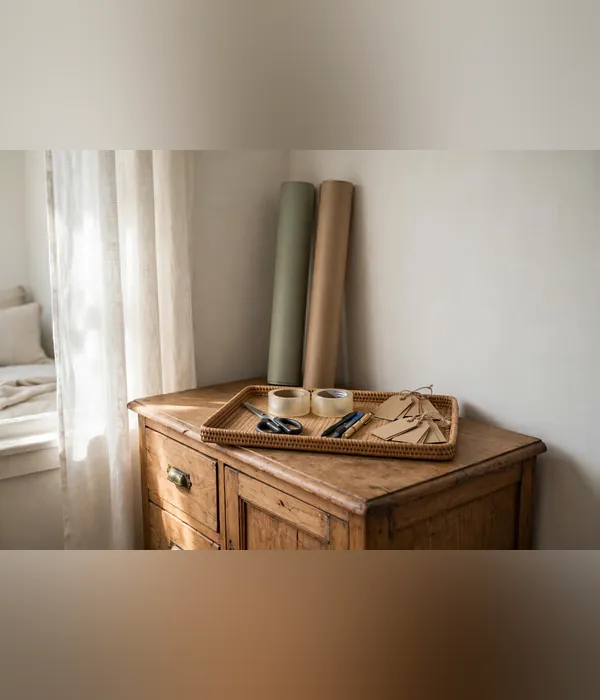
No new furniture, no wall space, no floor space: the dresser-top corner station claims a 24-in corner of a dresser you already own. A shallow tray, about 18 × 12 in, corrals scissors, tape, pens, and tags so tools stop migrating around the house, while rolls stand in the corner behind it.
The mechanism is containment, not storage. Wrapping fails in small homes because supplies scatter across rooms; one tray with a lip keeps the whole kit inside a two-foot zone you can carry to the bed or table. A lidded tray doubles as the January container for the small supplies.
Zero new footprint, zero cost if you repurpose a serving tray, and fully renter-safe. In January, the tray nests into the dresser drawer and the rolls go back to the closet, the corner is a dresser corner again.
Where it works best:
- Bedrooms where the dresser is the only free surface in the room
- Minimalists who refuse to buy single-purpose holiday furniture
- Wrapping on the bed: the tray carries the whole kit there in one trip
- Shared dressers: one corner is a negotiable claim, a whole room is not
- January storage: the tray nests in the drawer, the corner returns to normal
8. Tiered Countertop Organizer: the kitchen-corner compromise
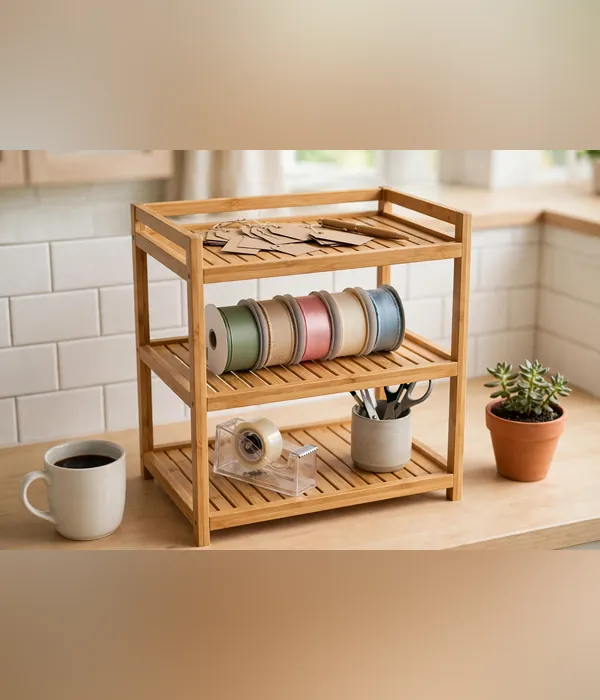
When every closet is full and the dresser is claimed, the kitchen counter corner is still free. A 2- or 3-tier countertop organizer, the kind sold for spices, becomes a compact wrapping station: tape and scissors on the bottom tier, ribbon spools on the middle, tags and pens up top.
This is a compromise station, honestly: 30-in rolls won’t fit on it, so rolls live in the closet or behind a door while this holds the tools. But it keeps the working kit visible and within arm’s reach, which is what actually gets gifts wrapped on weeknights instead of “someday.”
Shop a sturdy metal or bamboo stand about 12–15 in tall; the typical price band is $15–$30. In January it moves to a laundry shelf as a supply caddy or becomes a desk organizer, either way, it keeps working.
Set it up in an afternoon:
- Claim a 12-in counter corner that isn’t the food-prep zone.
- Bottom tier: tape dispenser plus scissors standing in a cup.
- Middle tier: ribbon spools laid on their sides so they don’t roll off.
- Top tier: gift tags, a pen, and a few small gift bags.
- Stash rolls behind the nearest door; in January the stand relocates to the laundry room.
9. Gift-Wrap Armoire Nook: the tall-roll hideaway
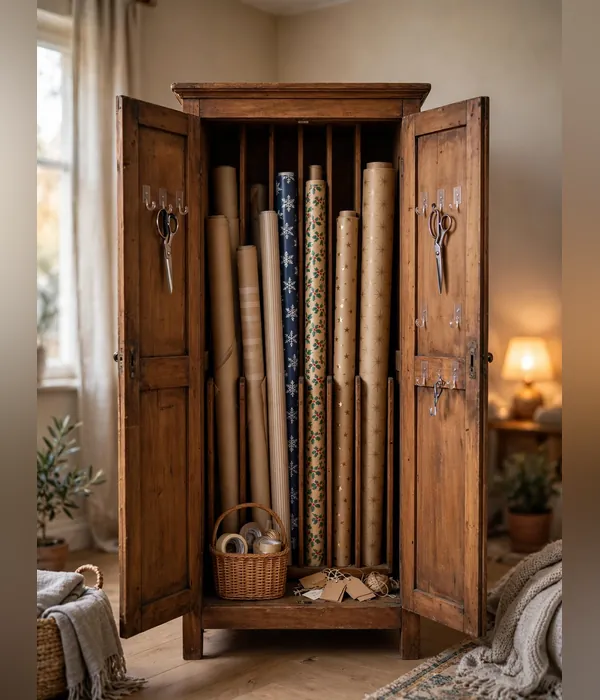
A narrow armoire, even a 15-in-wide corner of one, hides a full wrapping station behind closed doors. Add vertical roll slots 40 in tall and standard 30-in rolls stand upright with room to spare; oversized and jumbo rolls fit too, which most organizers on this list can’t claim.
The magic is the doors: close them and the mess vanishes, which makes this the station for people who wrap in shared living spaces. Stick adhesive hooks inside the doors for scissors, and park a small caddy on the armoire floor for tape and tags. A battery-powered LED strip inside makes evening wrapping easy.
Renter-safe, and the furniture may already be in your home. In January, nothing moves, the armoire simply becomes year-round gift-supply storage, rolls and all, waiting behind closed doors.
Where it works best:
- Living rooms and shared spaces where wrapping supplies can’t sit out
- Jumbo-roll buyers: 40-in-tall slots swallow rolls that defeat every other organizer
- Households that wrap in bursts, open the doors, wrap five gifts, close the doors
- Small homes short on closets: a freestanding armoire adds the closet you lack
- Gift-bag collectors: the deep armoire floor holds bags and tissue the pockets can’t
- January storage: nothing moves, it becomes the year-round gift-supply armoire
10. Tabletop Fold-Out Board: the once-a-year wrapping table
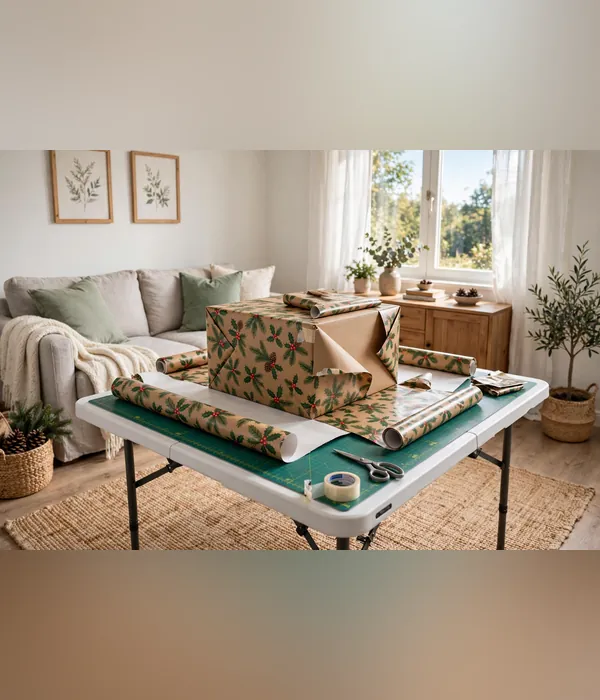
Some gifts, bikes, dollhouses, the box the TV came in, need a full-size surface. A 36 × 20 in folding table is the once-a-year wrapping table: it sets up in the living room for the big-wrap session, then folds to under 2 in thick and slides behind any door.
At 20 in deep it’s a true cutting surface for 30-in paper, and standard 29-in table height saves your back versus floor-wrapping. The typical price band is $30–$60 for a plastic-top folding table, and renters are welcome, nothing mounts.
Storage is the selling point: behind a door, between the washer and dryer, or flat under a bed. The January footprint is a 2-in slice of dead space that holds a full-size wrapping surface.
Set it up in an afternoon:
- Set the table near good light, wrapping big boxes in dim rooms wastes paper.
- Lay a cutting mat or an old sheet on top to protect the surface.
- Wrap the oversized gifts in one session, assembly-line style: cut, fold, tape, repeat.
- Fold the table flat and slide it behind a door when the session ends.
- January through November, it doesn’t exist, a 2-in slice behind the door.
11. Drawer Station: the divider drawer that holds everything
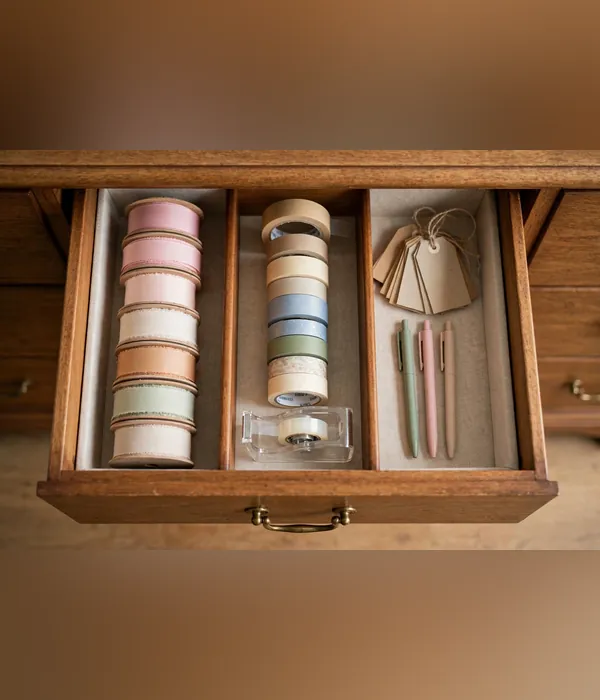
One deep drawer, 18 to 21 in deep, the kind in a dresser or a wide nightstand, holds a complete wrapping kit with room to spare. Adjustable dividers split it into lanes: ribbon spools in one, tape and dispensers in another, tags and pens in a third.
The drawer is the tidiest station on this list because closing it ends the visual clutter instantly. Thirty-inch rolls won’t fit in most drawers, so stand them in the closet above or beside the dresser, the drawer handles everything small. Line it with a tray liner so scissors and tape dispensers don’t scratch the wood.
Dividers run $10–$20 in the typical price band; the drawer itself is free if you can spare one. In January, nothing moves: the drawer stays a gift-supply drawer all year, which means next November needs zero setup.
Where it works best:
- Tidy-minded wrappers who can’t relax with supplies sitting out
- Dressers with one deep drawer to spare, the station hides in furniture you own
- Small gift lists: if most gifts fit in shirt boxes, the drawer holds nearly everything
- Households with curious pets, a closed drawer beats an open cart
- January storage: nothing moves, it stays a gift drawer year-round
12. Wrapping Paper + Station Combo: the one-zone wrap center
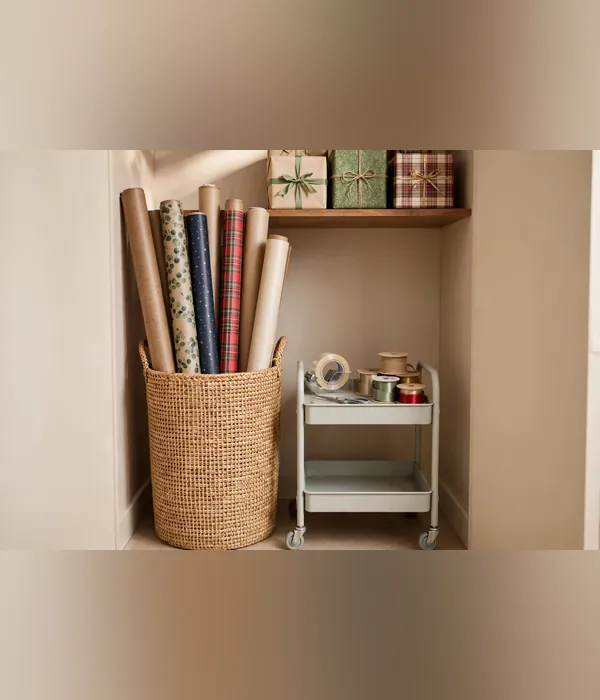
The best station fails if the paper lives three rooms away. The combo idea is simple: pair your station with dedicated wrapping-paper storage, our wrapping paper storage ideas guide covers the full system, and keep rolls and tools in ONE closet zone.
One shelf or one closet section holds it all: rolls vertical in a bin or slots, the tool kit (cart, tray, or drawer caddy) beside them. When everything shares a zone, wrapping starts in seconds and cleanup is a single trip instead of a scavenger hunt. Label the zone’s edge with washi tape so the whole household respects it.
In January, the whole zone becomes the off-season gift center, add birthday paper and the station never truly retires. One zone, one trip, twelve months of the year.
Set it up in an afternoon:
- Pick one closet shelf or section and measure it, the zone has to fit your rolls.
- Store rolls vertically, following the paper-storage guide linked above.
- Park your tool station, cart, tray, or bin, in the same zone, beside the rolls.
- Add a small “outgoing” spot for wrapped gifts waiting to be hidden.
- In January, top up tape and tags once, close the door, the zone is done until birthdays.
Conclusion
Every idea above works because it borrows space instead of demanding it. Pick the one that matches where you actually wrap: a cart if you move around, a drawer if you crave tidy, a door or rod kit if closets are your only free real estate.
Best station for small homes: the rolling 3-tier cart (point 1). It needs no screws, fits a 2-foot corner, holds full-size 30-in rolls upright, and stores itself in a closet fully loaded. Wrapping goes from a December ordeal to a ten-minute task, and nothing about it reads as holiday clutter to a landlord or a guest.
Once the station is set, stock it with our organization gifts picks and see Christmas decor ideas to get the rest of the house ready. Wrap as you buy, and enjoy a calm December.
Frequently Asked Questions (FAQ)
What is the best gift wrapping station for a small apartment?
The rolling 3-tier cart wins for most apartments: no screws, roughly an 18 × 26 in footprint, and it stores fully loaded in a closet. If your closets are full, the over-the-door organizer needs zero floor space at all. Either way, keep rolls and tools in one zone so wrapping starts in seconds.
How early should I set up my wrapping station?
Set it up in November, before the shopping starts. If the station is ready when gifts arrive, you’ll wrap in ten quiet minutes each instead of facing a Christmas Eve marathon. Waiting until mid-December means competing for picked-over paper and ribbon, so early November is the sweet spot.
What size wrapping paper rolls fit these small-space stations?
Standard 30-in-wide rolls fit every idea on this list, that’s the size most Christmas paper comes in. If you buy oversized or jumbo rolls, the armoire nook (point 9) with 40-in-tall slots is your safest bet, and the fold-out table (point 10) gives you the cutting surface to handle them.
Can I build a wrapping station without drilling into walls?
Yes, ten of the twelve ideas here are renter-safe. The cart, over-the-door organizer, closet-rod kit, under-bed bin, dresser tray, countertop stand, fold-out table, drawer, armoire nook, and paper-plus-station combo need zero screws. Only the pegboard and fold-down desk require wall mounting.
Where do I store the station after Christmas?
That’s the January test every idea here passes. Carts roll into closets, door organizers stay put or lay flat under beds, bins slide back under the bed, and the desk and table versions fold to a few inches thick. Keep paper and tools in one zone and January storage is a single trip, not a project.