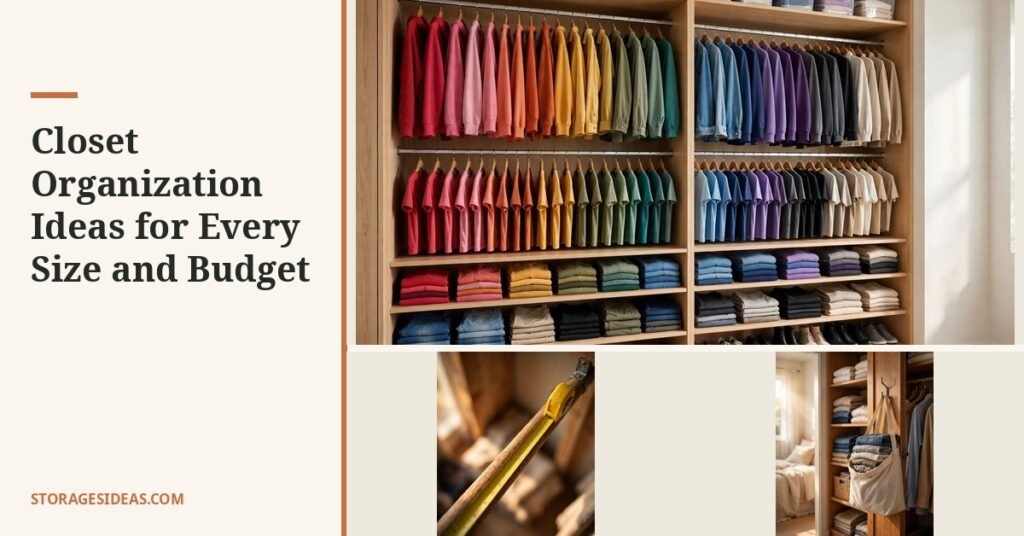
Before you buy a single bin, grab a tape measure: your closet’s problem is measured in inches, not bins. Plan on a minimum of 24 inches of rod space per person per wardrobe season, 48 inches if you keep a full year-round wardrobe on one rod.
Packed rail, that’s about 12 shirts, 10 folded-over pants, 7 dresses, or 5 structured jackets per foot of rod. If your share of the rod is under 24 inches, no organizer on earth will fix the closet, you need rotation (point 28), not more product.
This pillar collects 30 closet organization ideas that actually hold up under a tape measure: exact rod heights (40 and 80 inches for double-hang), shelf depths (12 to 16 inches), spacing for shoes (6 to 7 inches) and boots (15 to 18 inches), hanger math (0.2-inch slim velvet vs 1-inch wood), and load ratings that keep your rods on the wall.
They are grouped in five sections, Rod Space, Shelves & Cubbies, Shoes & Accessories, Doors & Walls, and Small & Rental Closets, and every idea is flagged for renter-safety, because most closets can’t be drilled into. These ideas cover the closet itself; for everything stored outside it, see bedroom storage ideas for the rest of the room.
Why Your Closet Fails at the Rod, Not at the Door
Most closets look full because of a geometry problem, not a stuff problem. A standard single rod wastes two zones at once: the 30-plus inches of dead air above the rod and below the hems, and the side walls, which usually run 12 to 24 inches deep and hold nothing.
Closet organization ideas that work in a small space all attack those two zones, they stack hanging vertically (double-hang), claim the side walls (hooks, rails, pegboard), and reclaim the air under shelves (baskets) and above eye level (seasonal storage).
The second failure is hanger bulk. Mixed chunky hangers eat inches silently: a wooden hanger is roughly an inch thick, a slim velvet one about 0.2 inches, and across 60 hangers that’s over 30 inches of rod, an entire person’s seasonal wardrobe, handed back for the price of a hanger pack.
Small-space closet storage is mostly this kind of arithmetic: nothing here requires a renovation, and almost nothing requires tools, but everything requires measuring first.
Save-worthy: closet measurement cheat-sheet
- Single rod: 64–66 inches from floor; long-hang (dresses/coats): 66–72 inches of clear space below the rod
- Double-hang: lower rod at 40–42 inches, upper rod at 80–84 inches (needs at least an 84-inch ceiling)
- Rod length: minimum 24 inches per person per wardrobe season; count 1 inch per shirt, 1.25 inches per pants, 2–3 inches per dress or jacket
- Shelf depth: 12–16 inches; shelf spacing: 12 inches for folded clothes, 6–7 inches for shoes, 15–18 inches for boots
- Hanger thickness: slim velvet ≈ 0.2 inches (5–7 lb load) vs wood ≈ 1 inch (10–15 lb load); brackets eat 2–4 inches of rod
- Over-door organizers fit doors 1.25–1.98 inches thick; most hold 40–90 lbs total
Rod Space
The rod is the most expensive real estate in your home, measured in inches. Win here first.
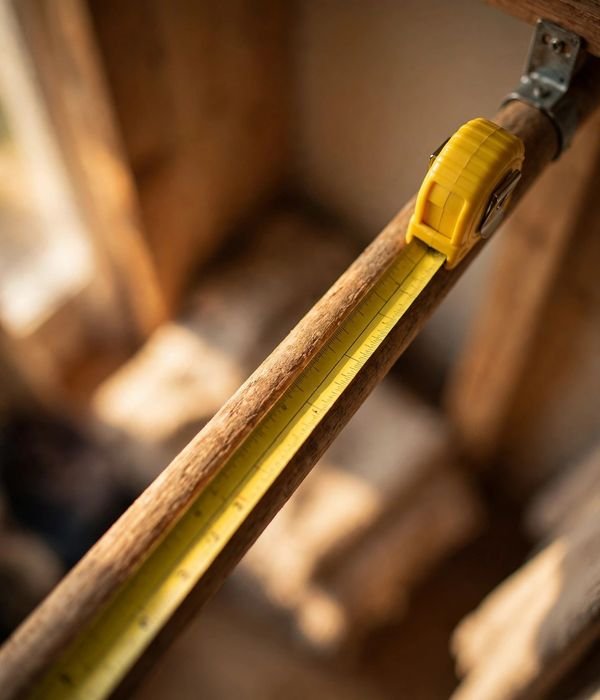
1. Measure the Rod Before You Buy Anything: capacity math first
Every closet plan starts with one number: usable rod inches. Measure bracket-to-bracket, not the full closet width, because brackets and end caps eat 2 to 4 inches.
Then budget the rod like money: count about 1 inch per shirt or blouse, 1.25 inches per pants or skirt folded over a bar, and 2 to 3 inches per dress, blazer, or suit. A 48-inch usable rod therefore holds roughly 40 shirts or a realistic mixed wardrobe of 25–30 pieces.
That math is the mechanism behind every idea below: once you know your inches, you know whether you need more rod (double-hang), less bulk (slimmer hangers), or rotation (seasonal swap).
Tips for best results: Measure the rod center-line to the floor as well, you need 40 inches of clear hang for shirts and 66+ for long items. At the store, do the count in your head: 24 one-inch hangers need 24 inches of rod.
Watch out: Don’t count the rod that sits inside a corner turn, where two runs meet, garments collide and roughly 24 inches of one run is effectively dead. Also, rods longer than 4 to 5 feet need a center support bracket or they sag; check before you load it.
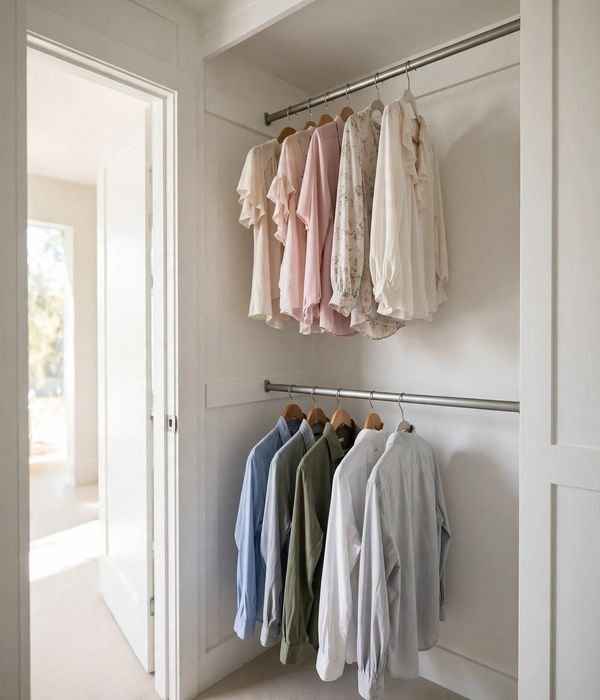
2. Double-Hang at 40 and 80 Inches: the overnight capacity doubler
Double-hang is the single highest-ROI closet move in existence: a second rod below your existing one at 40 to 42 inches from the floor, with the top rod at 80 to 84 inches, literally doubles short-hang capacity overnight.
Shirts, blouses, folded pants, and short skirts all hang fully in the 40 inches between the two rods; the upper row handles the second half of the wardrobe. This is why how to organize a closet in 8 steps puts the rod layout before any product decision.
Tips for best results: Leave 39–40 inches between the two rods so hangers swing freely and hems don’t brush the rod below. Put daily-wear items on the lower, more reachable rod and less-worn pieces up top.
If your ceiling is below 84 inches, cheat the upper rod down to 76–78 inches and accept slightly shorter hangs, it still doubles capacity.
Watch out: Long dresses and coats can’t live in a double-hang section; keep one long-hang zone (point 4). Also verify the ceiling: an upper rod at 80–84 inches plus hanger hooks needs roughly 88 inches of total clearance, or you’ll be fishing hangers with a reacher.
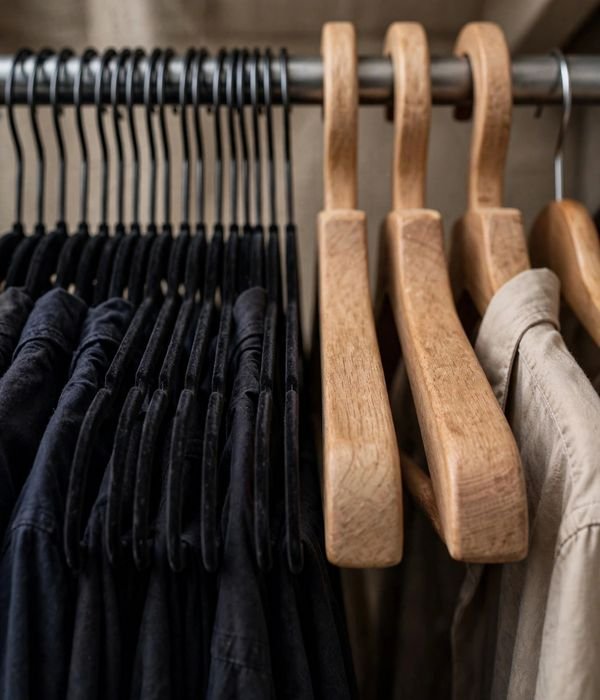
3. Swap Every Hanger for Slim Velvet: free up 30 inches for $15
A wooden or chunky plastic hanger is roughly an inch thick; a slim velvet hanger is about 0.2 to 0.25 inches, and multiplied across 50–60 hangers, that difference hands you back 25 to 35 inches of rod, close to a 25 percent capacity gain.
The velvet flocking is the mechanism that makes it work at that density: clothes can’t slide and bunch the way they do on smooth plastic, so the packed rail stays packed. A 30-pack of slim velvet hangers typically runs under $20, the cheapest inches in this entire guide.
Tips for best results: Match hanger width to the garment, 16 to 17 inches for shirts, wider contoured hangers for suit jackets. Buy one full set rather than mixing types; mixed hanger collections are what re-create the bulk problem. Cascade hooks on the necks (point 6) stack with this perfectly.
Watch out: Slim velvet hangers are rated only 5 to 7 pounds each. Heavy wool coats, leather jackets, and structured blazers belong on 10–15-pound-rated wooden hangers or they’ll bend and sag. Cedar wood versions also repel moths, worth it for stored wool.
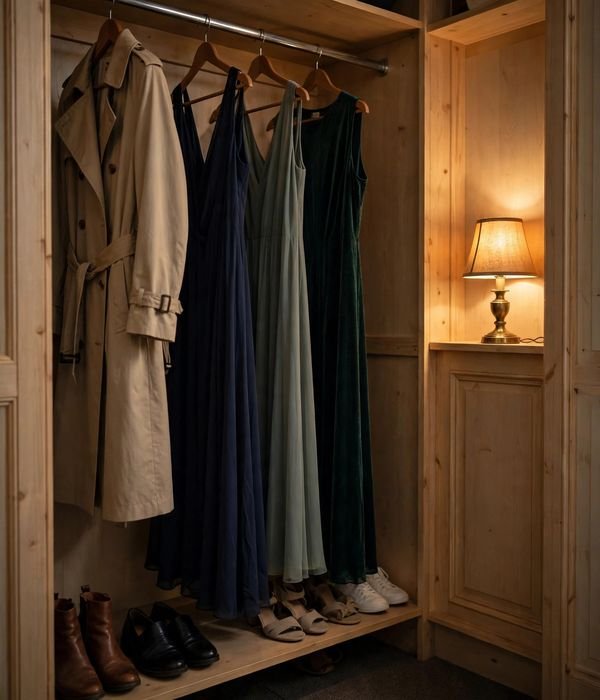
4. Keep One Long-Hang Section at 66–72 Inches: protect the long pieces
Dresses, maxi skirts, trench coats, and robes need one thing: 66 to 72 inches of uninterrupted clear space below the rod. The most common double-hang mistake is converting the entire closet and leaving long items crumpled at the bottom of a short section.
Reserve one end of the rod, even just 24 inches of it, as a long-hang zone, and keep the rod there at 66 to 68 inches from the floor so hems clear the floor or a shoe shelf below.
Tips for best results: Slide long items to the end of the rod nearest the door; that end usually has the most vertical clearance. In a reach-in, one 24-inch long-hang bay holds about 8–12 dresses. If you own more than a dozen long pieces, dedicate a full half of the closet and shrink the double-hang section to the rest.
Watch out: Don’t let the long-hang zone creep. Audit it twice a year, it silently becomes the “everything long I was too tired to fold” zone. Anything with a train or beading goes in a breathable garment bag in this section, never crushed behind winter coats.
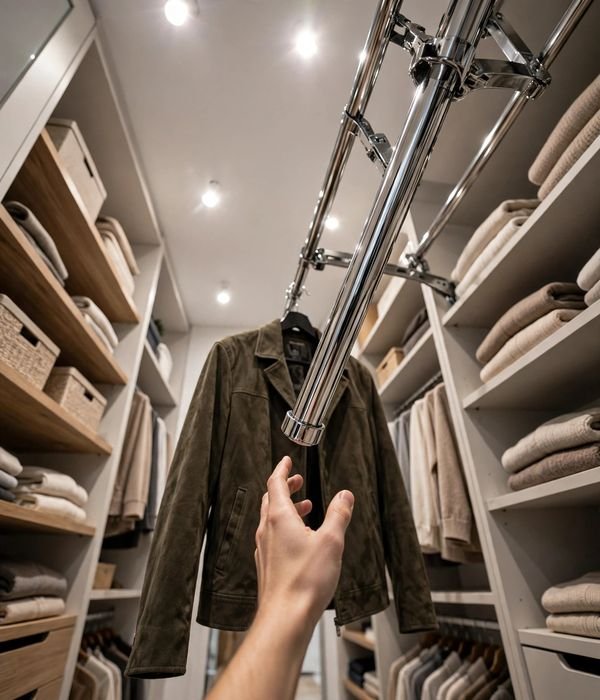
5. Install a Pull-Down Closet Rod: use the air you can’t reach
In closets with ceilings 8 feet or higher, the 12 to 18 inches of rod between 84 inches and the ceiling is wasted because most people can’t reach it.
A pull-down rod fixes the reach, not the space: it mounts where the high rod would go and swings down and forward on a lever, bringing seasonal or occasional clothes to you. Typical units are rated 20 to 30 pounds and span up to about 34 inches, a whole second wardrobe that lives in dead air.
Tips for best results: Load it only with lightweight items, blouses, shells, off-season jackets, since the lever gets hard to lift near max rating. Mount into studs or use the manufacturer’s heavy-duty anchors; this is one of the few closet upgrades that demands solid mounting.
Measure your closet width first: units come in fixed widths, and the 24-to-34-inch range fits most reach-ins.
Watch out: This one needs screws into solid backing, so it’s not renter-safe. Skip it in rentals and use a sturdy step stool plus top-shelf storage (point 12) for the same dead air instead.
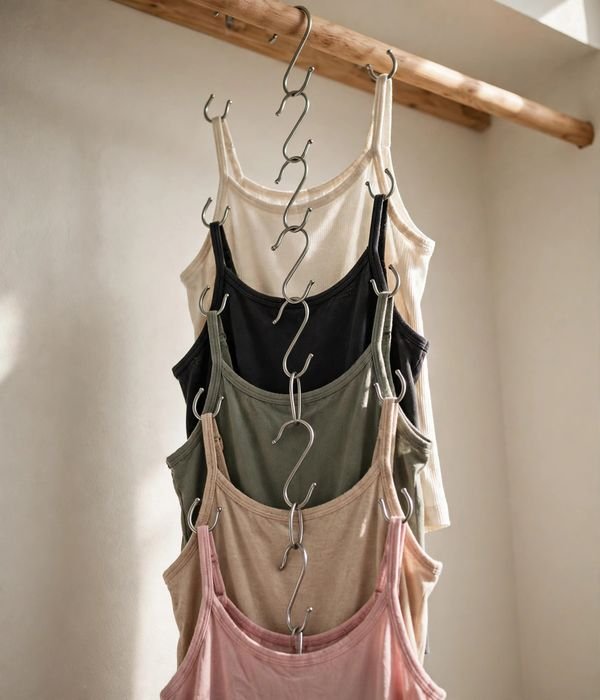
6. Use Cascading Hooks and Multi-Tier Hangers: stack vertically, not sideways
Cascading hooks and multi-tier hangers exploit the vertical inches below a single hanger: one hook on the rod carries 4 to 6 garments stacked downward, using roughly one hanger’s width of rod. The mechanism is simple, garments hang in a vertical chain, and each one’s 1-inch thickness stacks in space that was dead air.
Best use: tank tops, camisoles, scarves, or a week’s worth of work shirts pre-staged Monday to Friday.
Tips for best results: Put the heaviest garment at the top of the chain and the lightest at the bottom so the stack hangs straight. Multi-tier pant hangers with swing arms are the premium version, each tier swings out for access. Reserve cascades for same-category groups (all tanks, all scarves) so you grab without unstacking.
Watch out: Don’t cascade heavy items, wet denim or stacked blazers will exceed a single hook’s grip and drag the chain sideways. And never use cascading hooks as a way to avoid the 24-inch rule: stacked clutter you can’t see is clutter you’ll rebuy.
Shelves & Cubbies
Shelves turn dead air into assigned homes. The rules are all dimensions.
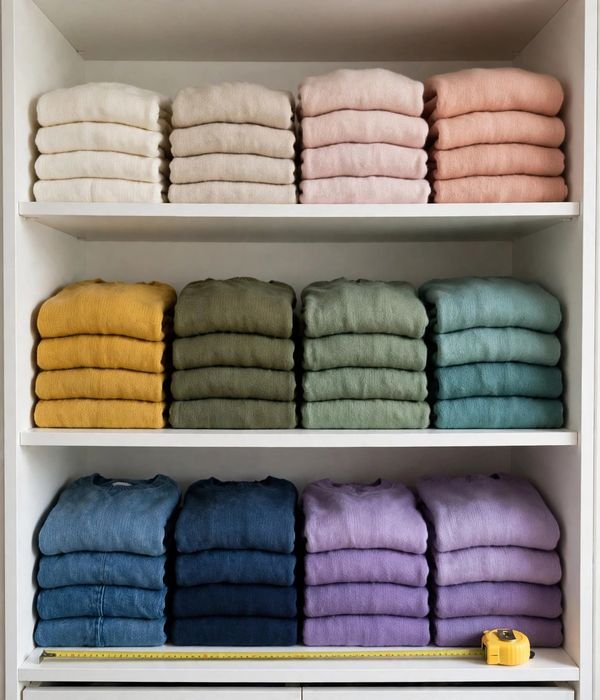
7. Size Shelves 12–16 Inches Deep: the folding sweet spot
Closet shelves wider than 16 inches create a dark abyss where folded stacks go to die; narrower than 12 inches and sweaters hang over the edge. The 12-to-16-inch depth is the sweet spot because it fits one folded garment stack (about 10–12 inches wide) with a finger of clearance, and it matches the depth of most fabric cube bins.
Spacing matters as much as depth: give folded clothes about 12 inches of clear height between shelves, shoes 6–7 inches, boots 15–18 inches, and handbags 14–16 inches.
Where it works best: above the rod as the top shelf (deep storage for luggage and seasonal bins); as a side tower beside the rod in a reach-in; stacked 3–4 high in the 24-inch dead corner where rods can’t turn.
What you can do with it: one 36-inch-wide run of three 14-inch-deep shelves holds roughly 18–24 folded garments, file-folded so you can see every item; the same run at 6-inch spacing becomes a 12-pair shoe wall; slide fabric cubes into any run for instant drawers.
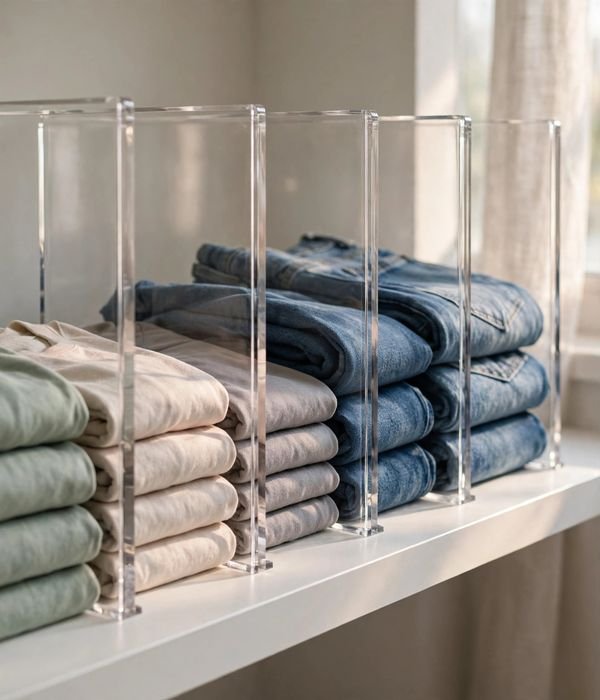
8. Add Shelf Dividers: stop the leaning tower of sweaters
Stacks lean because nothing stops them. Acrylic or wire shelf dividers, simple L-shaped panels that clip or screw to a shelf, split a long run into 10-to-12-inch bays, and each bay becomes a category (tees, sweaters, jeans). The mechanism is containment: a stack can’t migrate sideways, so it stays file-folded and visible instead of slumping into its neighbor.
No-drill clip-on versions grip shelves 10–12 inches deep and cost a few dollars each.
Where it works best: deep top shelves where stacks are tall and lean-prone; linen and sweater storage; kids’ closets where categories must survive small hands.
What you can do with it: divide one 48-inch shelf into four bays, daily tees, workout wear, sweaters, jeans; assign each family member a bay in a shared closet; use tall 12-inch dividers for handbags and clutches stood upright like books.
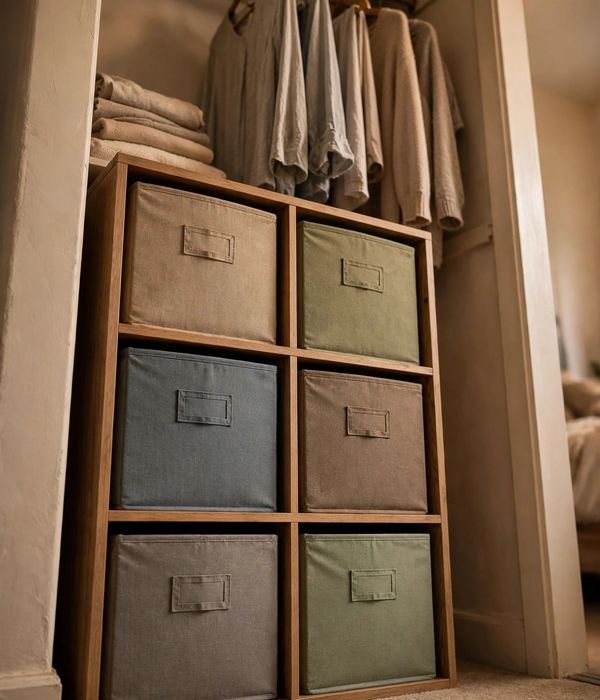
9. Build 12×12-Inch Cubbies: the one-size drawer
A 12×12-inch cubby opening is the universal module of closet storage because it fits the standard 11-to-13-inch fabric cube bin, the closest thing closets have to a drawer.
A 6-cube unit (about 24 inches wide, 36 inches tall) slides into the dead end of most reach-ins or stacks under a single rod, and each cube swallows a category: socks, underwear, tees, scarves, gym clothes, accessories. Pull-out bins mean no digging: you see the label, pull the bin.
Where it works best: under a raised single rod (point 4’s long-hang zone leaves floor space below hems); the end wall of a walk-in; a nursery or kids’ closet at child height, for full walk-in layouts see walk-in closet organization layouts.
What you can do with it: label each cube by category with clip-on label holders; keep one empty “inbox” cube for laundry-day triage; use rigid canvas cubes (not flimsy non-woven) if the cube will be pulled daily, they hold shape for years.
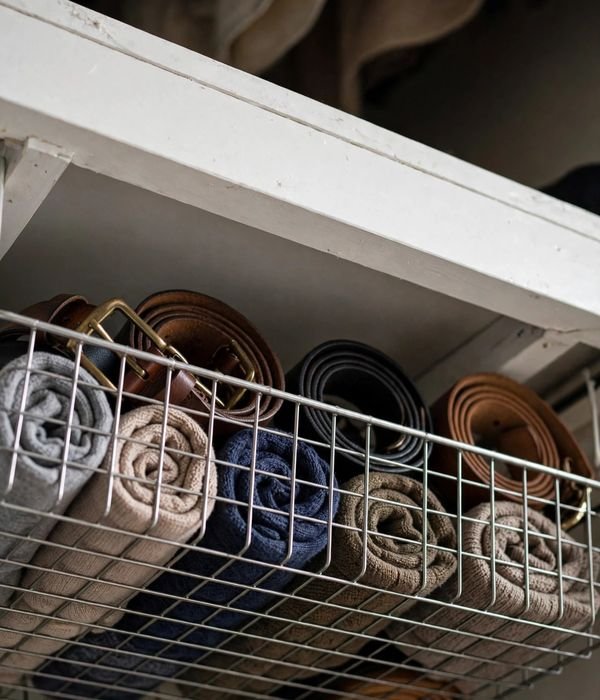
10. Hang Under-Shelf Baskets: steal the air below the shelf
Between any shelf and the items on it sits 3 to 6 inches of dead air. Wire under-shelf baskets slide onto the shelf above and hang down into that gap, no screws, no tools, turning wasted clearance into a home for socks, belts, sunglasses, or folded tees.
Most fit shelves 10–12 inches deep and drop about 5 inches, so they work under nearly every standard closet shelf.
Where it works best: under the top shelf above the rod (accessories at eye level instead of a step stool); under pantry-style linen shelves; in a coat closet under the single shelf for gloves and hats.
What you can do with it: sort one basket per person in a shared closet; keep a “donate” basket permanently hung, when it’s full, the bag goes out; store off-season accessories (winter scarves in summer) in the highest basket so prime space stays seasonal.
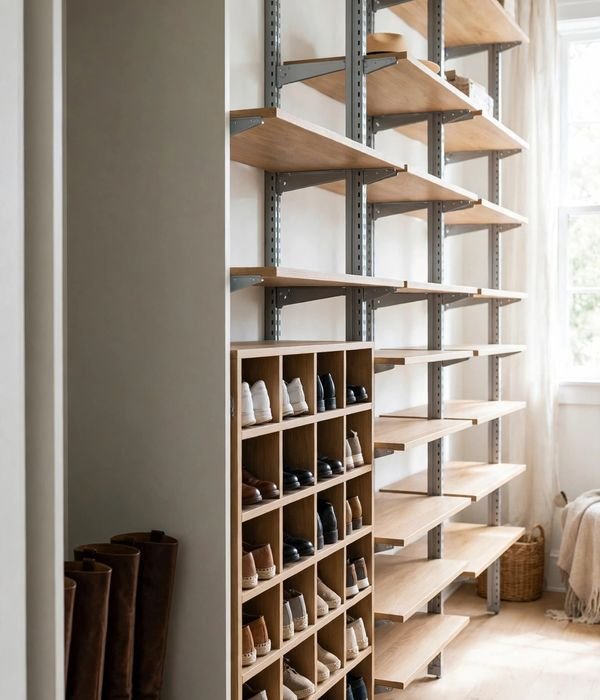
11. Go Adjustable Where You Can: spacing beats more shelves
Fixed shelves lock you into one spacing forever; adjustable shelves let the spacing follow the contents. The rule from the cheat-sheet, 12 inches for folded clothes, 6–7 for shoes, 15–18 for boots, only works if you can move the shelves.
A simple track-and-bracket system (two vertical tracks, brackets every few inches) costs little more than fixed boards and pays for itself the first time your shoe collection changes.
Where it works best: walk-ins and wide reach-ins where zones change with seasons; kids’ closets, lower the shelves as the child grows; boot storage, where one tall bay replaces three wasted short ones.
What you can do with it: set one tall 18-inch bay for boots at the end and tight 7-inch bays for flats beside it; re-space in November for boots and in May for sandals; leave one adjustable shelf empty as flex space, the closet equivalent of a junk drawer, but intentional.
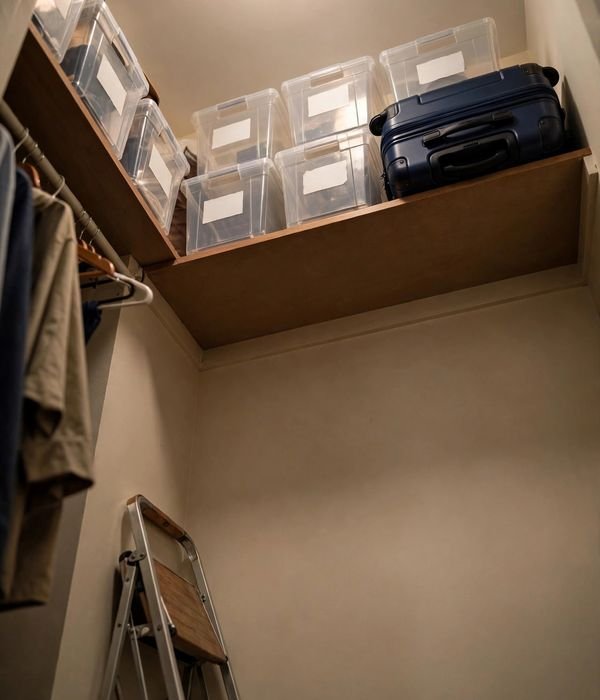
12. Claim the Top Shelf: seasonal and rarely-used only
Everything above about 72 inches is the hardest space to reach and therefore the most wasted, which makes it perfect for the things you touch twice a year. The top shelf rule is simple: if you haven’t touched it in 60 days, it can live up there.
Luggage, off-season bedding, holiday decor bins, and the garment bags holding formal wear all belong here, in labeled bins so you can identify them from the floor.
Where it works best: above a double-hang (the shelf at 84+ inches is prime seasonal territory); in entry closets for the “guest” bedding and air mattress; in kids’ closets for outgrown clothes waiting to be passed down.
What you can do with it: use clear or labeled bins, opaque mystery bins on a top shelf never get opened; keep a folding step stool in the closet (not the garage) or the top shelf becomes a write-off; rotate the bins at each season change so the current season always lives at reachable height.
Shoes & Accessories
Shoes and accessories are the clutter multiplier, small items, huge mess. Give each a measured home.
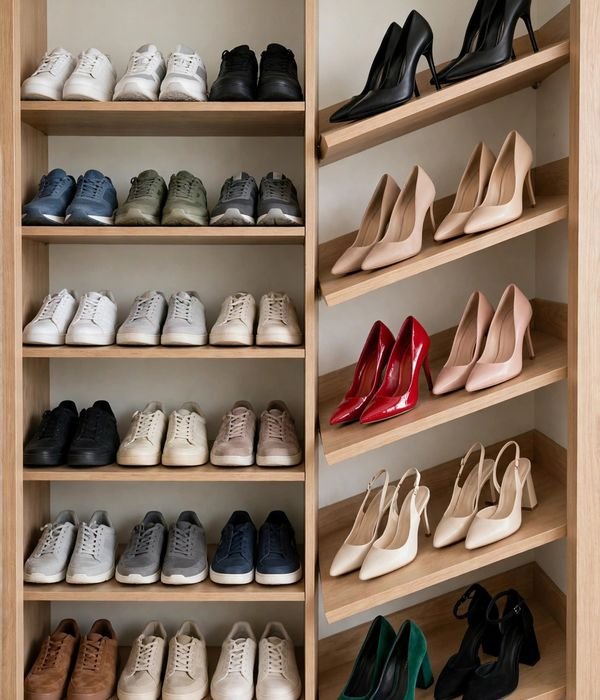
13. Pick Flat vs Angled Shoe Shelves: match the shelf to the shoe
Flat shelves stack the most pairs per inch; angled shelves display them so you actually wear what you own. The measurement that decides is spacing: 6 to 7 inches between shelves fits women’s flats, sneakers, and low heels, while boots need 15 to 18 inches.
Count pairs honestly, the average adult owns 15–20 pairs, and a single 36-inch shelf at 7-inch spacing holds about 6 pairs side by side, so a 3-shelf tower handles one person’s daily rotation.
Mini-steps:
- Measure your tallest daily shoe (heel height + shoe body) and add 1 inch, that’s your minimum shelf spacing.
- Dedicate one 15–18-inch tall bay for boots at the end of the run; cramming boots into short bays is how shafts get crushed.
- Store the 4–6 pairs you wear weekly at eye-to-knee height and push occasion shoes higher or lower.
For a full deep-dive on footwear layouts, see closet shoe storage ideas.
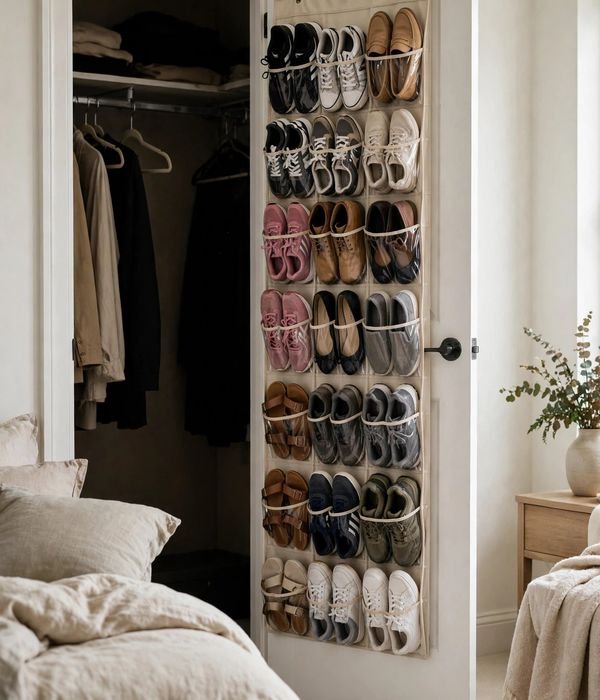
14. Hang an Over-the-Door Shoe Organizer: 20 pairs in zero floor inches
An over-the-door organizer turns the back of the closet door into a 20-to-30-pair shoe wall using zero floor and zero shelf inches.
Standard units run 64–73 inches tall and 19–22.5 inches wide, hang on 3–4 padded metal hooks, and hold 40–90 pounds total depending on build, check the rating, not just the pocket count, because loaded boots get heavy fast.
Mesh pockets breathe, which suits gym shoes and damp climates; clear vinyl pockets let you spot the pair you want without touching anything. Either way, you’re converting roughly 14 square feet of door into storage that costs zero floor space.
Mini-steps:
- Measure your door thickness, most hooks fit doors 1.25 to 1.98 inches thick; interior closet doors are usually fine, but verify.
- Choose clear pockets if you need to see shoes (great for kids) or mesh for airflow (better for gym shoes).
- Load heavy boots at the bottom pockets and light flats up top so the organizer hangs straight.
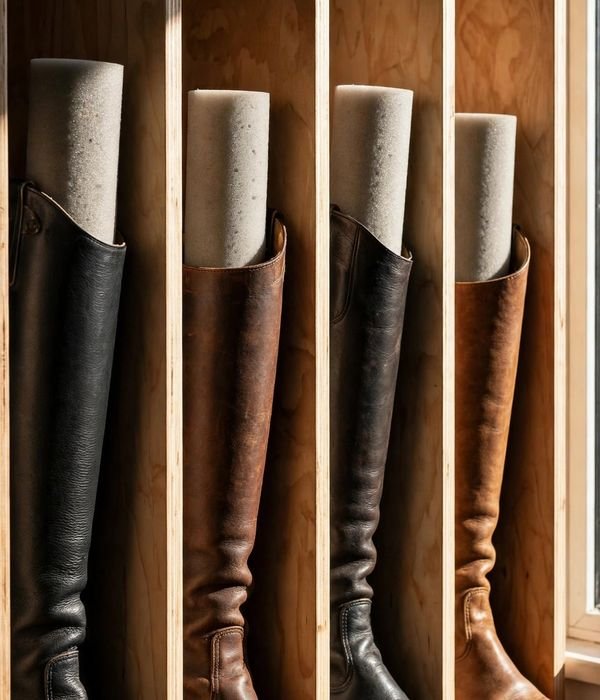
15. Store Boots Upright With Shaft Keepers: stop the flop
Boot shafts flop, crease, and eat shelf space when they collapse, and a collapsed pair takes the footprint of two. Shaft keepers (foam pool-noodle style inserts or inflatable shapers) hold boots upright in a 15–18-inch tall bay so each pair stands in its own 6-inch-wide slot.
Upright boots also show you what you own, which is the real win: hidden boots get replaced by duplicate boots.
Mini-steps:
- Measure your tallest boot shaft and set one shelf bay to that height plus 2 inches.
- Insert a keeper in each boot before shelving, cut pool noodles to shaft height for a near-free version.
- Line boots up heel-to-toe, alternating direction, to fit 5–6 pairs per 36-inch shelf.
- For tall rain boots, add a second keeper or a rolled magazine inside the calf, the goal is a straight shaft with no fold line. Never store boots folded at the ankle “temporarily”: the crease sets within weeks and never fully irons out of leather.
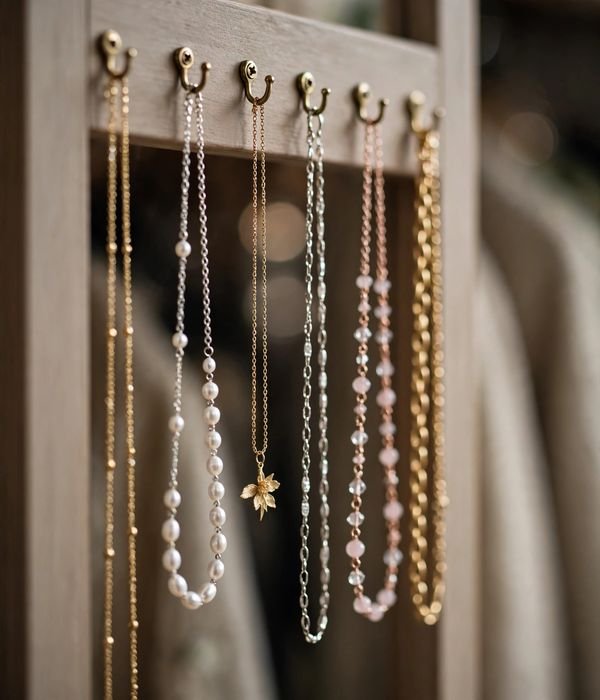
16. Hang Necklaces on a Pull-Out Hook Strip: end the tangle
Necklaces tangle because they’re stored touching. A wall-mounted hook strip, a pull-out belt-and-tie rack, or even a row of adhesive hooks inside the closet door gives each necklace its own 2–3 inches of separation, and separation is the entire mechanism. Chains hung vertically can’t knot; chains piled in a box always do.
Adhesive hooks rated 1–3 pounds are plenty for necklaces, this is one of the lightest jobs in the closet. Space hooks 3 inches apart so pendants don’t overlap and scratch each other.
Mini-steps:
- Mount a hook strip at eye level on the inside of the closet door or a side wall, inside the door keeps them hidden and dust-free.
- Hang one necklace per hook, clasps closed, longest chains on the end hooks where they won’t catch neighbors.
- For travel or deep storage, thread each chain through a drinking straw before boxing it, zero tangles, nearly zero cost.
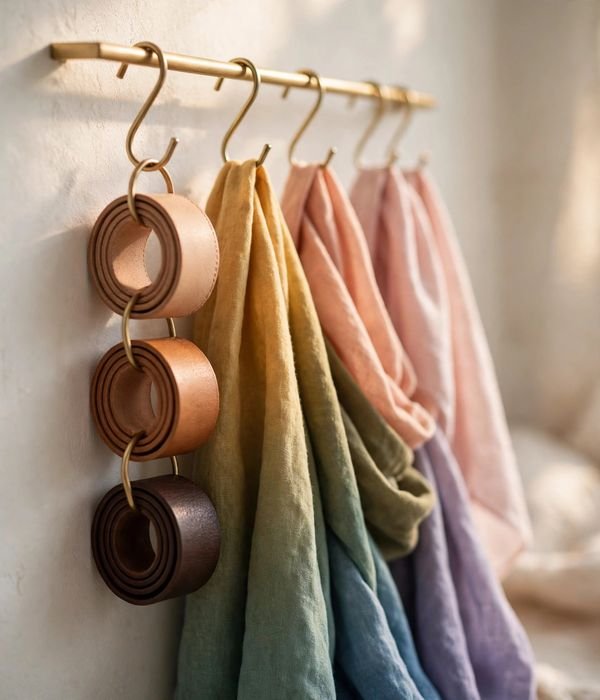
17. Corral Belts, Scarves, and Ties on One Rail: the 24-inch accessory bar
Belts coiled in a drawer become a knot; scarves folded in a stack become invisible. A single 24-inch rail, a towel bar, a pull-out tie rack, or a tension rod mounted inside the closet, gives every belt and scarf a hanging slot.
Rolled belts on hooks, scarves draped over the bar, ties on a rotating rack: everything visible, everything grabbable in one motion.
Mini-steps:
- Mount the rail on the inside of the closet door or the dead 6-inch strip of side wall beside the rod.
- Roll belts instead of folding them, a rolled belt hangs on a hook without creasing.
- Drape scarves over the bar grouped by weight (light silks together, heavy wools together) so nothing slides off.
- If you don’t want to mount anything, loop scarves through a multi-ring shower-curtain ring on a hanger, one scarf per ring. It uses a single hanger’s width of rod and costs almost nothing.
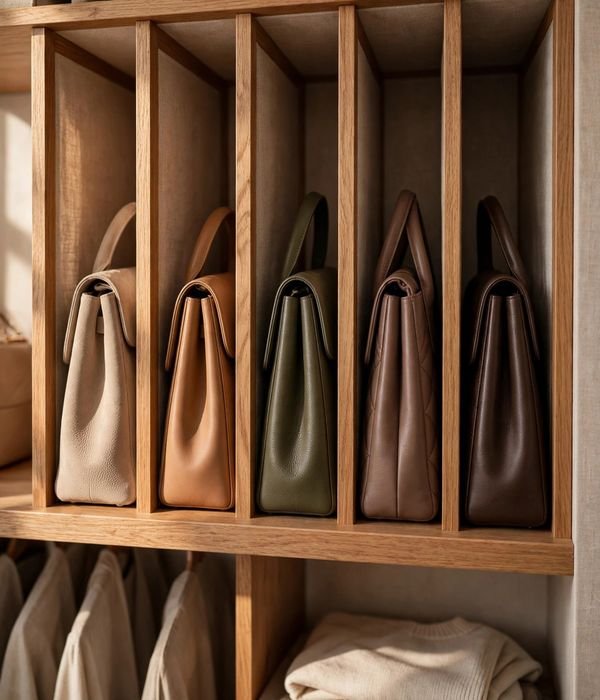
18. File Purses Upright Like Books: 14–16 inches of clearance
Purses stored stacked become a crushed pile; purses stored upright, spine-out like books on a shelf, stay shaped and visible. The real enemy is the stack: three bags piled up means the bottom one deforms and the top one slides off.
Filed upright, each bag keeps its shape and you can see every option at a glance, which ends the “I have nothing to carry” problem. You need 14 to 16 inches of shelf clearance for medium bags, and shelf dividers or bookends keep them from flopping sideways.
Stuff structured bags with tissue or a rolled tee so they hold their shape between uses.
Mini-steps:
- Clear one shelf bay to 14–16 inches of height, the top shelf or a dedicated cubby works.
- Stand bags upright with dividers every 4–6 inches, handles tucked inside.
- Keep the 2–3 daily bags at grab height and archive occasion clutches higher; rotate by season.
- Store each bag inside its dust bag on the shelf, a bag in its dust bag stays clean and holds its shape far longer than one collecting closet dust.
Doors & Walls
The door and the side walls are free square footage. Use them before buying anything that sits on the floor.
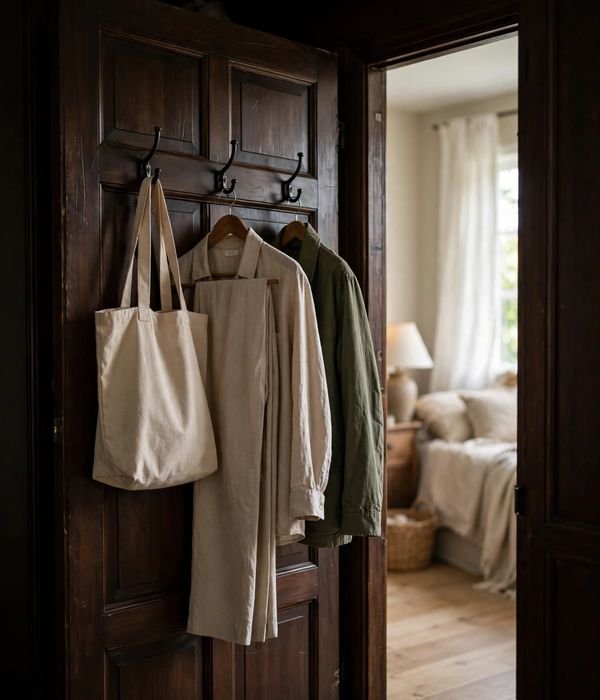
19. Put Hooks on the Back of the Door: tomorrow’s outfit station
The inside of the closet door is 20+ square feet of unused storage sitting at arm’s height. A row of 4–6 sturdy hooks, over-the-door or adhesive, becomes the staging zone for tomorrow’s outfit, the gym bag, or the jacket you’re actually wearing this week.
The mechanism is friction reduction: if the outfit is staged, mornings skip the closet excavation entirely.
Tips for best results: Use hooks rated at least 5 pounds each, a loaded tote or wet jacket will defeat a bargain hook. Space hooks 6–8 inches apart so items don’t overlap. If the door is hollow-core (most interior doors are), prefer over-the-door hooks to screws, which can punch through.
Watch out: Check the door still closes, thick hooks plus a bulky coat can block the swing. And adhesive hooks need a 1-hour cure after cleaning the surface with rubbing alcohol; hang weight too early and they’ll be on the floor by morning.
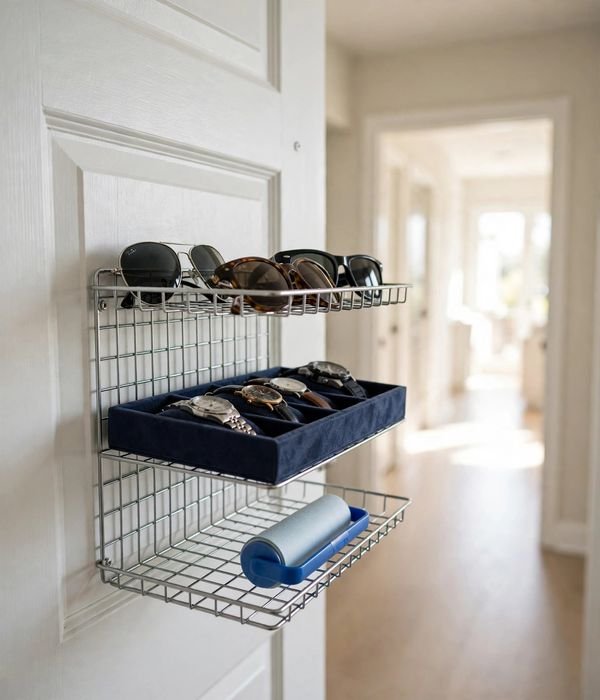
20. Mount a Slim Rack Inside the Door: small items, zero footprint
A slim over-the-door wire rack, 4 to 6 inches deep, holds the small-item chaos (sunglasses, watches, hair tools, sewing kit, lint roller) that otherwise colonizes every flat surface. Because it’s only a few inches deep, it doesn’t interfere with hanging clothes, and everything sits at eye level behind the door.
Tips for best results: Measure the gap between the door and the nearest hanging clothes before buying, most closet doors clear a 4-inch-deep rack, but verify. Choose a rack with a top lip or raised edges so items don’t walk off when the door swings. Dedicate one tier as the “out the door” tray: keys, badge, sunglasses.
Watch out: Don’t load it with anything heavy, most door racks are rated 10–15 pounds total. Heavy items belong on shelves; this rack is for the light, losable stuff. If the door has panels or a mirror that interferes, mount the rack on the wall right beside the closet instead, same eye-level logic, zero door-swing issues.
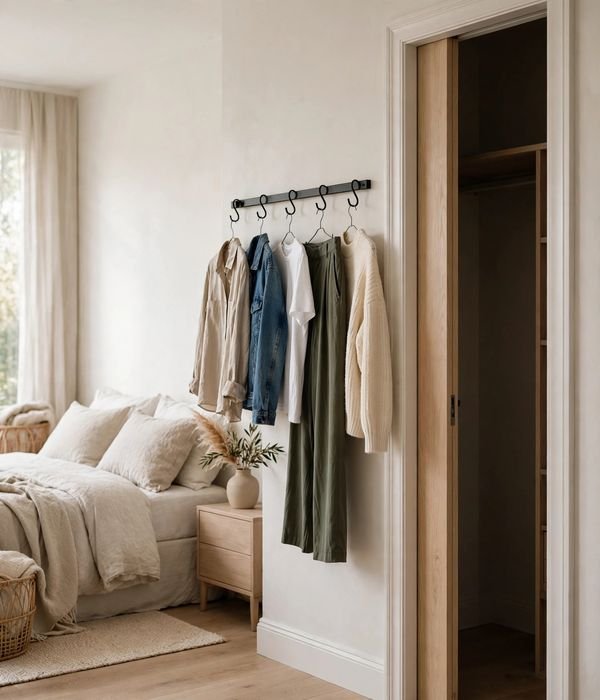
21. Add a Wall Rail Beside the Closet: the 6-inch dead strip
Between most closet door frames and the nearest wall sits a 6-inch strip of dead wall that holds nothing. A simple wall-mounted rail with S-hooks claims it for tomorrow’s outfit, robes, or the handbag rotation.
A 24-inch rail with 6 S-hooks costs little, installs with two screws (or heavy-duty adhesive mounts in rentals), and keeps daily items out of the closet entirely, which keeps the closet itself cleaner.
Tips for best results: Mount at 60–66 inches so garments hang clear of the floor. Use it as the “active wardrobe” zone: the 5–7 items in current rotation live here, everything else stays in the closet. In a bedroom, this rail doubles as decor, hang the prettiest pieces facing out.
Watch out: Keep the rail’s load under its rating (adhesive mounts typically 7–15 pounds total). This is a staging zone, not storage, if more than 7 items accumulate, some belong back in the closet.
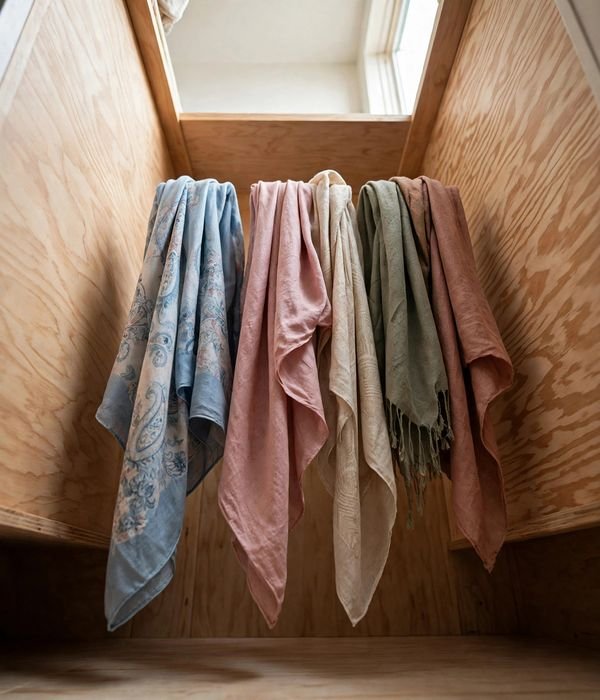
22. Use a Tension Rod as a Low Accessory Rail: no-drill hanging
A spring tension rod wedged between the closet’s side walls, or between a wall and a shelf tower, creates an instant low rail for scarves, belts, or kids’ clothes with zero holes. Typical closet tension rods hold 10–20 pounds depending on span: shorter spans hold more, wide spans hold less. It’s the fastest renter-safe rod you’ll ever install.
Tips for best results: Measure the span and buy a rod rated for at least 5 pounds more than you plan to hang. Twist to extend until the rubber ends compress firmly, then give it a hard tug test before loading. For kids’ closets, mount one at 30–36 inches so small children can reach their own clothes.
Watch out: Tension rods slip on slick painted surfaces under load, a small square of shelf liner under each rubber end fixes it. Never hang anything you can’t afford to have fall; this is for light accessories and kids’ clothes, not the winter coat collection.
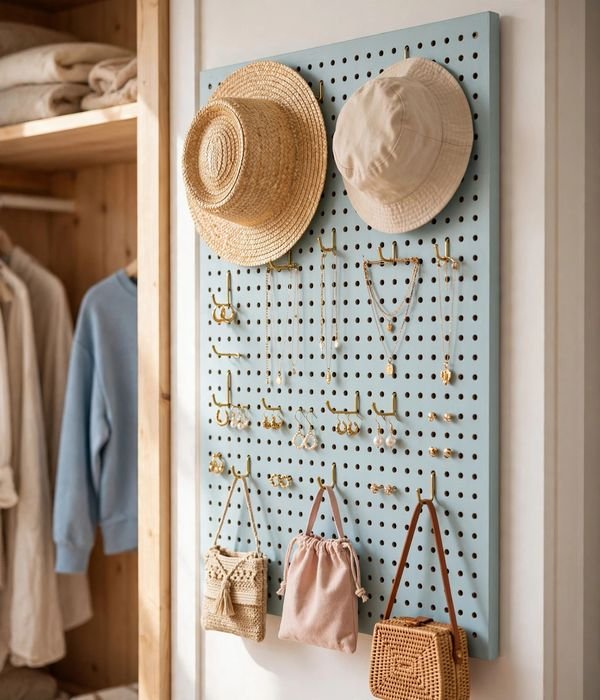
23. Hang a Pegboard on the Side Wall: customizable by the inch
A 2×4-foot pegboard on the closet’s side wall turns dead wall into fully rearrangeable storage: hooks, small shelves, and bins move as your needs change. Jewelry, sunglasses, belts, hats, and small bags each get a hook, and the layout re-configures in minutes when seasons change. Frame it or paint it the wall color and it looks built-in, not craft-room.
Tips for best results: Mount with a 3/4-inch spacer frame behind it so hooks have clearance to seat. Use locking pegboard hooks (they have a small tab that grips), standard hooks walk out under daily use. Plan the layout on the floor first: group by category, heaviest items lowest.
Watch out: Pegboard needs screws into studs or anchors for real loads, in a rental, use the heavy-duty adhesive-mount version and keep loads light, or skip to the tension-rod trick (point 22). For every no-drill workaround in the book, see closet organization hacks that cost next to nothing.
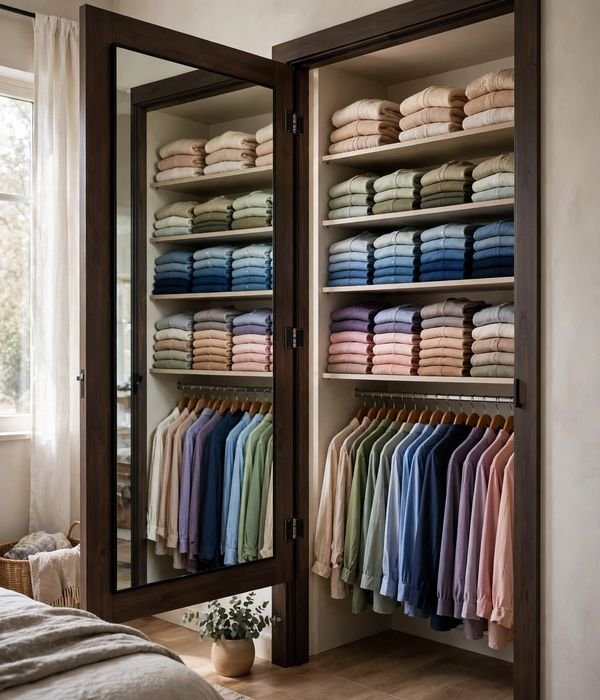
24. Add a Full-Length Mirror Inside the Door: depth you can see
A full-length mirror on the inside of the closet door does double duty: it’s the outfit check, and it visually doubles the closet’s depth, which makes a small reach-in feel far less cramped. An over-the-door mirror hanger needs no tools; an adhesive-mounted acrylic mirror is lighter and renter-safe.
Either way, mount it at a height where you see head to shoes, center around 60 inches.
Tips for best results: Choose a shatterproof acrylic mirror for door mounting, glass mirrors are heavy and risky on a moving door. If the door is too narrow, mount the mirror on the wall beside the closet instead. Wipe it weekly; a dusty mirror in a dark closet is just a gray rectangle.
Watch out: Don’t mount a heavy glass mirror with adhesive strips alone, most strips top out around 10–15 pounds and a glass full-length mirror exceeds that. Over-the-door hangers rated for the mirror’s weight are the safe no-drill choice.
Small & Rental Closets
Tiny closets and no-drill leases aren’t a dead end, they’re a different game, played in inches.
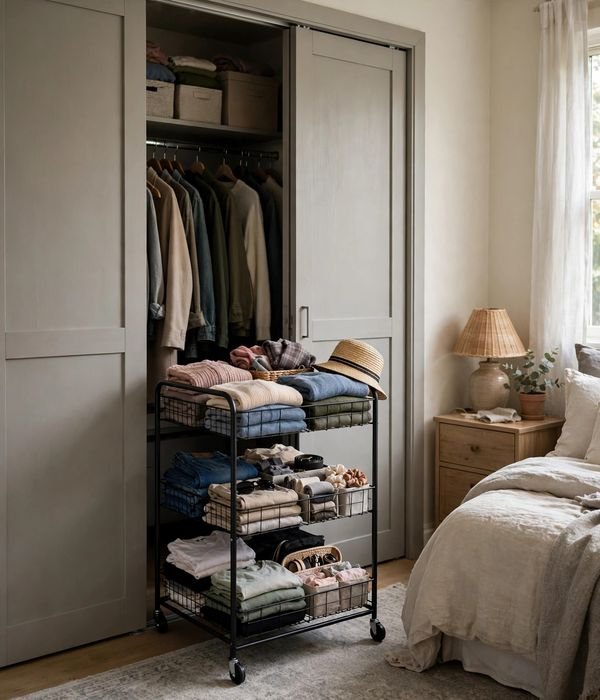
25. Treat Sliding-Door Closets as Front-Facing: pull-out beats reach-in
Sliding and bi-fold doors only ever reveal half the closet, so deep side zones become black holes. The fix is front-facing storage: pull-out drawers, rolling carts, or a narrow rolling shelf unit that slides out into the room.
A 6-inch-wide slim rolling cart, the kind made for gaps beside fridges, fits the dead side zone of most reach-ins and pulls out with everything visible.
Where it works best: bi-fold door closets where one side is always blocked; sliding-door closets deeper than 24 inches; the 6–8-inch gap between a dresser and the wall.
What you can do with it: park the cart in the blocked half and pull it out to shop it like a drawer; use one cart per category (accessories, folded tees, underwear); label the cart’s top edge so the category reads at a glance.
Measure the reveal first: most sliding doors expose only 24–30 inches at a time, so size the cart to fit through that opening, not the full closet width.
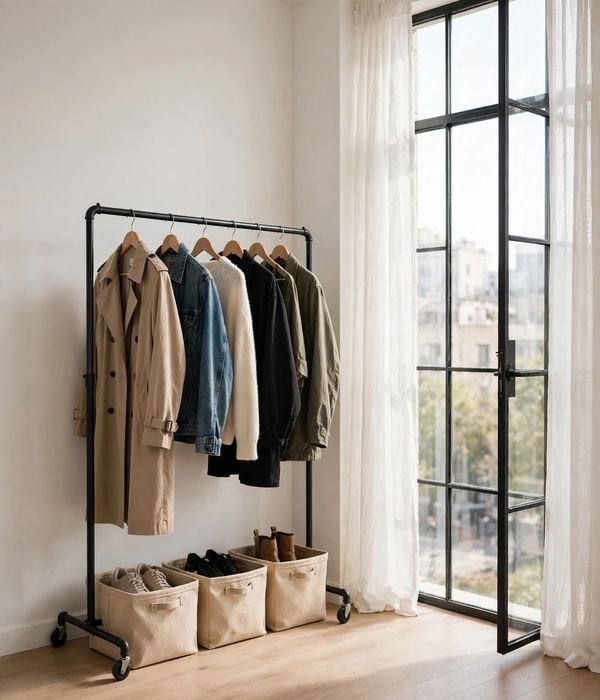
26. Add a Freestanding Garment Rack: the no-closet closet
No closet, or a closet that’s really a cupboard? A freestanding garment rack, 48 to 60 inches wide, single or double rail, is a complete closet that needs zero installation. Heavy-duty single-rail racks hold 40–70 pounds; choose one with a lower shelf for shoes and locking casters so it rolls where you need it.
It won’t win beauty contests, but it wins the “my room has no closet” problem outright.
Where it works best: studio apartments with token closets; guest rooms that double as offices; kids’ rooms where the built-in closet is toy storage now.
What you can do with it: keep the rack to one rail and curate it, a double-rail rack stuffed full looks like a clothing store exploded; use matching slim hangers so it reads intentional; tuck shoe bins on the lower shelf to finish the “closet” illusion.
Anchor any tall rack to the wall with a furniture strap, a loaded garment rack is top-heavy and a genuine tip risk, especially with kids around.
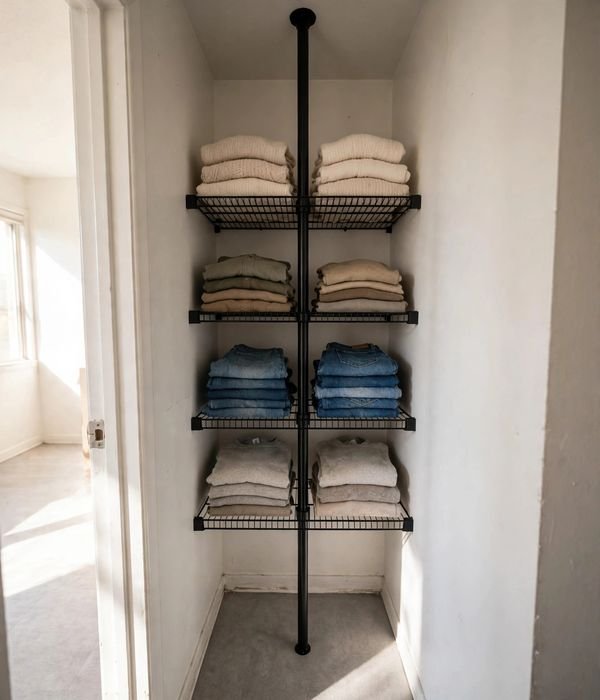
27. Build a No-Drill Tension Tower: shelves without a single hole
Floor-to-ceiling tension pole systems, spring-loaded poles that wedge between floor and ceiling, carry shelves, rods, and hooks with zero drilling. A two-pole tower with 4–5 shelves fits a 24-inch-wide closet end and holds folded clothes, shoes, and bins; add a rod attachment and it becomes a second hanging zone.
Everything adjusts by sliding, so the layout evolves with your wardrobe.
Where it works best: rentals with a strict no-holes lease; dorm rooms; the dead end of a reach-in where a shelf tower can’t be screwed in.
What you can do with it: put daily-wear folded items at waist-to-eye height and relegate rarely-used items to the top shelf; combine with under-shelf baskets (point 10) to double each shelf’s yield; check the pole’s tension monthly, seasonal humidity shifts can loosen the grip.
Most systems top out around 200–250 pounds total when properly tensioned, plenty for folded clothes, but don’t park the dumbbell collection there.
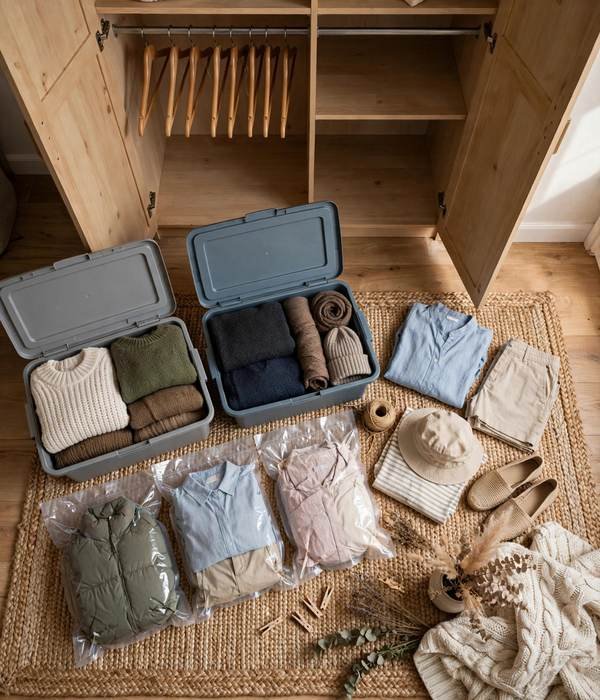
28. Rotate Wardrobes by Season: the 24-inch rule pays off
Remember the intro math: 24 inches of rod per person per wardrobe season. If your closet holds less than that per person, the answer isn’t more product, it’s fewer clothes in the closet at once.
Pack the off-season wardrobe into labeled bins (vacuum bags for bulky knits, breathable bins for wool, never vacuum-seal wool long-term), store them on the top shelf, under the bed, or in a hall closet, and swap at the season change.
Where it works best: any closet under 48 inches of rod per person; climates with real winters or summers; small apartments where the entry closet can host the off-season bins.
What you can do with it: do the swap in one 2-hour session twice a year, trying to rotate piecemeal never finishes; use the swap as the declutter trigger (point 30); keep a written inventory on top of each bin so you don’t rebuy what you already own.
For layouts built around small footprints, see small closet layout ideas and the live guide to small closet organization ideas that work in inches, not feet.
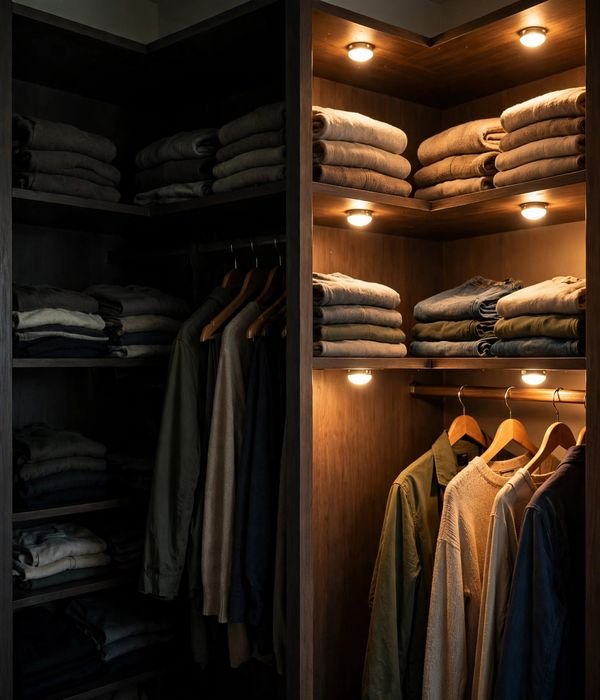
29. Light the Closet With Battery Puck Lights: see what you own
The average reach-in closet has one dim bulb or none, and dark corners hide clothes you already own, which you then rebuy. Battery puck lights (3-packs for under $15) stick anywhere with adhesive, run months on a set of batteries, and motion-sensor versions turn on when the door opens. Light is organization: you can’t maintain categories you can’t see.
Where it works best: deep reach-ins with a single overhead bulb; closets with dark paint or no window nearby; under-shelf spots where the rod area falls into shadow.
What you can do with it: stick one puck under each shelf and one on the side wall at rod height; choose motion-sensor models so you never think about switches; replace batteries at each season swap (point 28) so the lights never die mid-winter.
Pick warm-white (3000K) pucks, they flatter clothes and skin tones, while cool-white makes everything look gray. One 3-pack covers a reach-in; grab the 6-pack for a walk-in.
30. Run the One-In-One-Out Declutter Sweep: the only system that holds
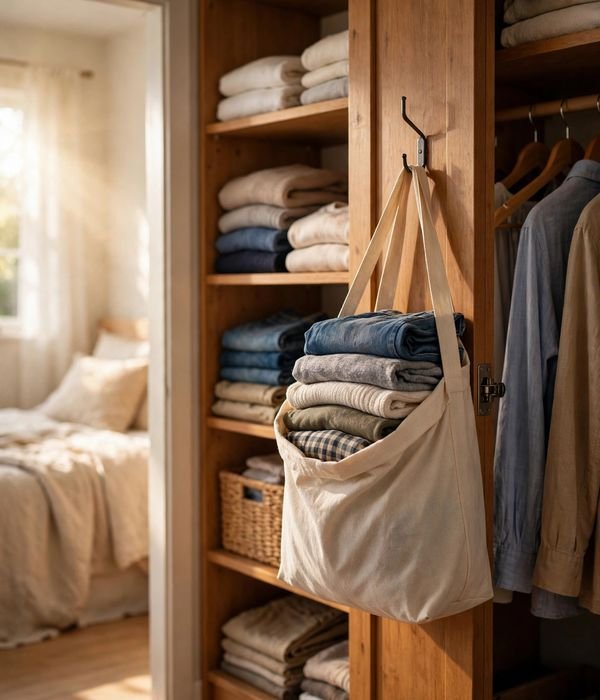
Every organizer eventually fills, that’s physics, not failure. The one-in-one-out rule is the maintenance system: every new item that enters the closet triggers one old item leaving (donate, sell, or textile recycle). Pair it with a permanent donate bag hung on a hook (point 19’s door hooks are perfect): when the bag’s full, it goes out that week.
Where it works best: shared closets where two wardrobes compete for inches; kids’ closets, where growth makes the rule automatic; any closet that’s been “organized” three times and filled up three times.
What you can do with it: keep the donate bag visible, hidden bags never fill; do a 10-minute monthly sweep with a timer, not a weekend overhaul; apply the rule to hangers too, a new 10-pack in means the 10 oldest wire hangers go to recycling.
Make the rule household-wide: kids’ closets get it too, tied to growth spurts instead of shopping trips.
Conclusion
Thirty ideas, one tape measure: closet organization is arithmetic, not shopping. Measure the rod, budget it at an inch per shirt and two to three per jacket, double-hang where the ceiling allows, claim the side walls and the door, and rotate by season when the inches run short.
Renters can do nearly all of it, tension rods, adhesive hooks, over-door organizers, and freestanding racks need no landlord’s permission.
Best under $50: if you buy one thing, make it a 30-pack of slim velvet hangers (usually $15–$25). Nothing else under fifty dollars hands you back 25-plus inches of rod overnight, it’s the cheapest capacity in this entire guide, and it makes every other idea work better because a slim, uniform rail is easier to see, slide, and maintain.
Pair it with a $10 over-the-door hook set and you’ve rebuilt the two highest-traffic zones of any closet for the price of a pizza night.
Start with the rod math today, measure bracket to bracket, count your inches, and let the numbers tell you whether you need a second rod, slimmer hangers, or a season rotation. The closet stops feeling small the moment every inch has a job.
Frequently Asked Questions (FAQ)
How many inches of closet rod space do I need per person?
Plan on a minimum of 24 inches of rod per person per wardrobe season, so 48 inches for a full year-round wardrobe on one rod. If two people share a 48-inch reach-in, you’re each at the seasonal minimum, which means seasonal rotation isn’t optional.
Count roughly 1 inch per shirt, 1.25 inches per pants, and 2–3 inches per dress or jacket when you do the math.
What height should closet rods be?
For a single rod, 64–66 inches from the floor suits mixed wardrobes; allow 66–72 inches of clear space below for long dresses and coats. For double-hang, set the lower rod at 40–42 inches and the upper at 80–84 inches, which needs at least an 84-inch ceiling.
If your ceiling is lower, drop the upper rod to 76–78 inches and keep hangs shorter.
Do slim hangers really save space, or is it marketing?
They really save space, with one caveat. Slim velvet hangers are about 0.2 inches thick vs roughly 1 inch for wood, across 50 hangers that’s 25+ inches of rod back, around a 25 percent capacity gain. The caveat: they’re rated only 5–7 pounds each, so keep wooden hangers (10–15 pounds) for heavy coats and structured blazers.
Which closet organization ideas work in a rental where I can’t drill?
Tension rods between side walls, over-the-door hooks and organizers, adhesive-mounted hook strips (clean with rubbing alcohol, cure 1 hour), freestanding garment racks, and floor-to-ceiling tension pole towers, all need zero holes. Avoid pull-down rods and pegboard, which need solid screw mounting.
When in doubt, the no-drill rule is: if it holds more than 15 pounds, it probably needs a screw.
How do I stop necklaces from tangling in the closet?
Give every necklace its own hook with 2–3 inches of separation, chains hung vertically can’t knot. A hook strip inside the closet door works perfectly. For a deeper system with travel solutions and drawer options, see ideas, jewelry storage ideas that stop tangled necklaces.
How deep should closet shelves be?
12 to 16 inches deep is the sweet spot, it fits one folded stack with clearance and matches standard fabric cube bins. Space shelves about 12 inches apart for folded clothes, 6–7 inches for shoes, 15–18 inches for boots, and 14–16 inches for handbags.
Deeper than 16 inches and items disappear into the back; shallower than 12 and stacks overhang.
What is the cheapest way to double my closet space?
A double-hang rod (a second rod at 40 inches, often under $20 as a no-drill hanging rod) literally doubles short-hang capacity overnight, if your ceiling allows 80+ inches for the upper rod. If it doesn’t, the cheapest win is the slim-hanger swap plus a ruthless declutter: those two together routinely free 30+ inches of rod for under $25 total.