
Last December I taped twenty cards straight to the living room wall. Scotch tape, four corners each, straight rows. It looked festive for about six hours.
Then the corners curled, two cards slid to the floor, and the tape left pale patches I found in January. The cards deserved better, and the wall did too.
This christmas card display roundup does it differently. Every idea below holds your cards where they belong, keeps walls and doors damage-free, and survives a whole season of new arrivals. Ten ideas, four surfaces, zero tape disasters.
Why Every Holiday Card Display Ends Up Chaotic
Cards do not arrive all at once. They trickle in over three to four weeks, and each new one needs a spot that did not exist yesterday. That slow trickle is why taping them up as they come always turns into a patchwork.
The second problem is size: most folded cards are 5 by 7 inches, photo cards run 4 by 6, and square cards sit somewhere between. A display that fits one size awkwardly holds another. Planning for the range keeps every card readable instead of overlapping like a badly fanned deck.
This list solves both. Wall ideas borrow vertical space you were not using, door ideas turn a surface into storage, and table ideas sit on shelves and mantels you already own. your main Christmas decor ideas pairs with these when you want the bigger picture, so start with your emptiest surface.
One more rule before you pick. Count last year’s cards and add a third: that is the capacity you actually need. Most of these ideas hold 12 to 24 cards, so matching the number before you hang anything is what keeps the whole thing tidy through New Year’s.
1. Twine and Mini Clothespin Garland: The Easiest Christmas Card Display
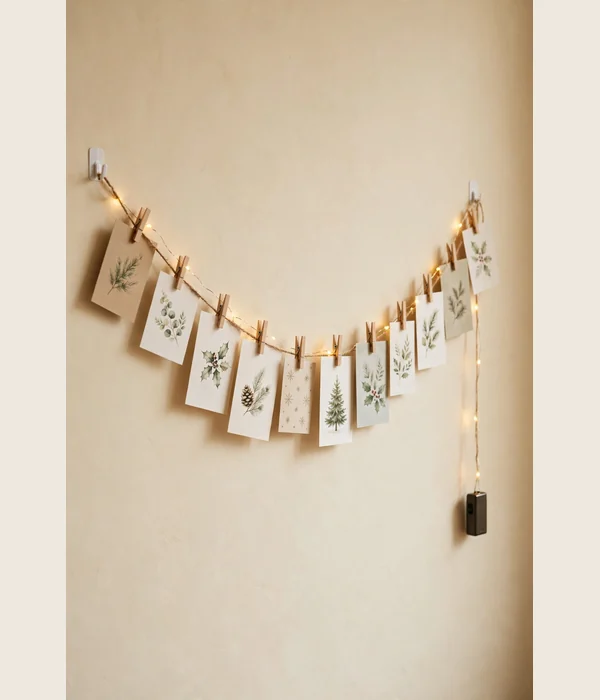
Two adhesive hooks, one length of jute twine, and a pack of mini clothespins turn a blank wall into a card display that grows with the mail. A standard Christmas card weighs under an ounce, so even a 6-foot strand with 15 cards pulls less than a pound total. The hooks carry the weight, not the wall.
Medium utility hooks are rated for 3 pounds each, about ten times what a full strand weighs. Clean the spot with rubbing alcohol first, press the strip base firmly for 30 seconds, then wait a full hour before hanging. That cure time is what keeps the strips holding through a warm, radiator-heated December.
Where it works best:
- Hang one strand per 12 to 15 cards. A 6-foot twine run at about 5 feet from the floor holds 12 cards with an inch of air between each.
- Use two hooks per strand, set 5 feet apart. Medium hooks rated at 3 pounds each give you six times the weight of a full strand.
- Clip each card by one corner so it tilts slightly. The casual angle looks intentional and keeps cards from bunching.
- Start new cards at the center and work outward. The display fills symmetrically instead of stacking up on one side.
- Drape a battery fairy-light string along the twine for evenings. A 20-light strand adds almost no weight to the hooks.
Watch out: keep twine at least two feet from heat vents, because rising heat dries adhesive strips and shortens their hold.
2. Washi-Tape Grid: Flat Cards, Zero Holes
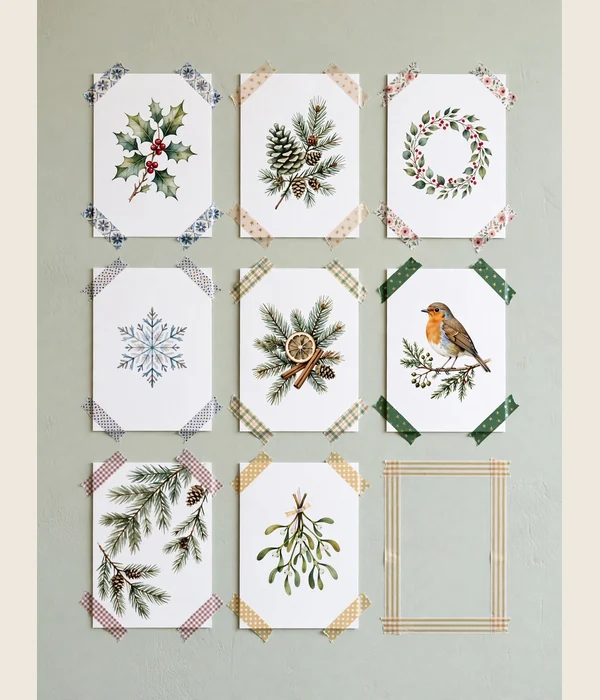
Washi tape is low-tack by design, so it peels off painted drywall cleanly where masking tape or packing tape pulls paint and leaves residue. Two 2.5-inch strips on each card’s top corners hold it flat all month. The trick is the grid: even gutters of about 1.5 inches between cards keep the wall looking arranged instead of scattered.
One roll of washi tape runs 15 millimeters wide by 10 meters long and costs about $3 to $6, enough for 40 cards with tape to spare. It bonds best on satin or eggshell paint, which most living rooms have. Flat or matte paint is riskier, so test one strip behind a door first.
- Map your grid with faint pencil dots. For 5 by 7 cards, mark rows 7.5 inches apart and columns 6.5 inches apart.
- Press two tape strips to the wall at each mark, crossing slightly so they form a shallow V.
- Hang cards as they arrive, newest at the top row first. Every card lands in a planned slot, so nothing drifts.
- Leave empty slots in each row for late arrivals. A planned gap looks deliberate; a card squeezed in later does not.
Tips for best results: press the tape, then smooth the card on from the top edge down so no air pockets form underneath.
3. Ribbon Memo Board: Cards Tuck Under, Never Pinned
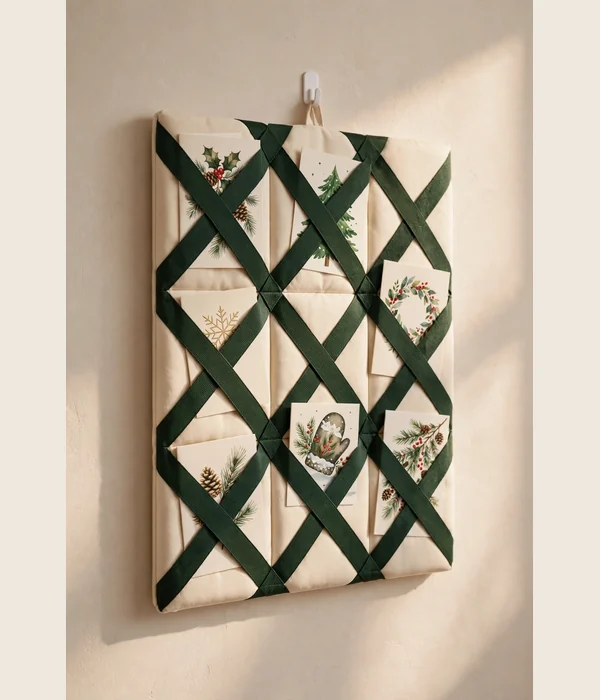
A ribbon memo board turns card display into a storage habit. The diagonal lattice of ribbon creates diamond pockets, and each card slides under two ribbons and stays put. No clips to lose, no tape to fail, and the board lives on after December as a note and photo board.
A 18 by 24 inch board holds about 12 cards with room to breathe. Build one from a stretched canvas, a yard of batting, and 1.5-inch grosgrain ribbon for roughly $15 to $20 in materials. The finished board weighs under 2 pounds, so one medium hook rated at 3 pounds hangs it safely.
Where it works best:
- Space ribbons 4 inches apart on the diagonal. That spacing creates diamonds sized for 5 by 7 cards.
- Staple ribbon ends around the back of the board, then cover the back with a felt panel for a clean finish.
- Tuck cards under the ribbon, never pin through them. Cards stay pristine for anyone who saves them.
- Choose deep green or cranberry ribbon. It reads Christmas without a single ornament.
- Hang the board at eye level near the entry. Guests see the cards the moment they walk in.
Watch out: do not hang the board over a couch or bed. Adhesive hooks can fail on textured or dusty paint.
4. Over-the-Door Pocket Organizer: Cards Get Their Own Slots
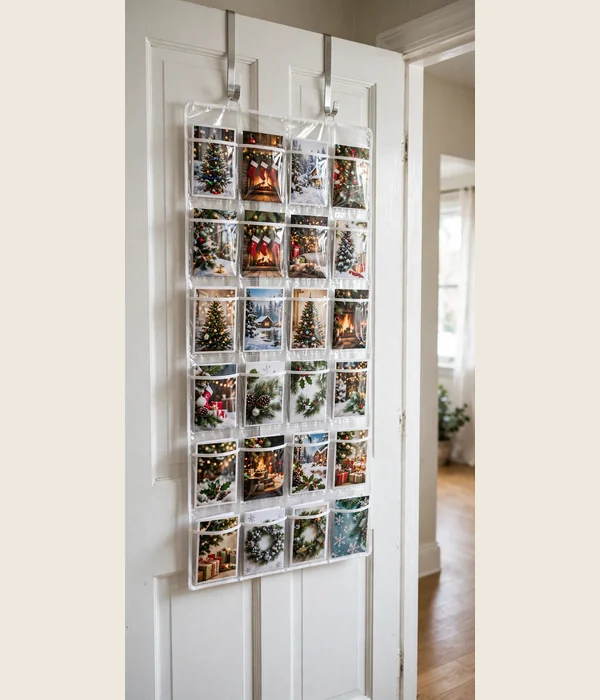
The back of a door is wasted surface until you hang pockets on it. A 24-pocket clear organizer gives every card its own slot, so cards stand upright, stay flat, and never slide. The clear fronts mean each card’s photo shows through, and you can sort by week or by sender as they arrive.
Look for an organizer about 15 inches wide by 60 to 63 inches tall with three adjustable metal hooks. The hooks fit standard interior doors 1.4 to 1.7 inches thick, and the whole unit installs in under five minutes with no tools. Expect to pay $13 to $25.
- Hang the organizer on a door you pass daily, like the pantry or bedroom door. Eye-level pockets get read; low pockets get ignored.
- Slip each card into its own pocket, photo facing out. One pocket holds one card, so nothing bends.
- Reserve the top two rows for photo cards and the bottom rows for folded cards. The display reads like a gallery wall.
- When a pocket row fills, start the next one down. The organizer visibly grows, which is part of the charm.
Tips for best results: if the door swings hard, anchor the bottom corners with two small adhesive strips so the pockets do not swing.
5. Wire Wreath Card Holder: Your Door Does Double Duty
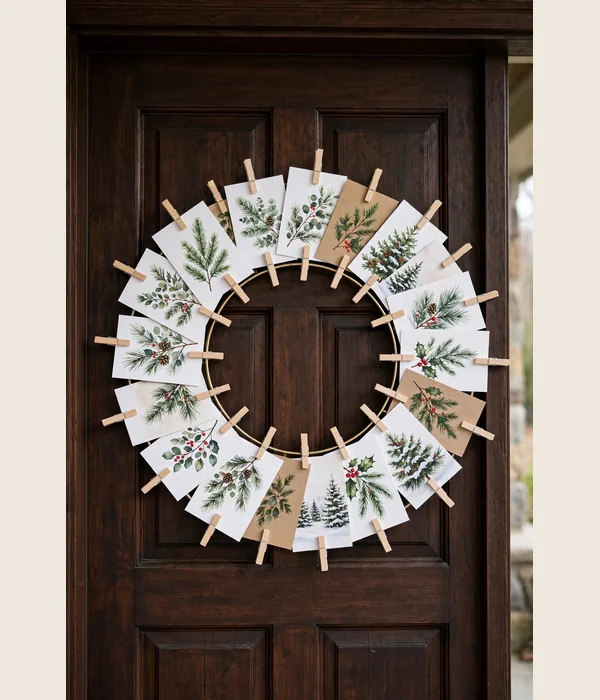
A wreath shape turns your cards into a decoration instead of a pile. Clip cards around a wire wreath frame and they radiate like a real wreath, face out, and take up zero shelf or floor space. It reads as intentional holiday decor, which keeps it off the clutter radar.
Start with a 12-inch metal wreath frame, the flat ring kind, plus a pack of mini wooden clothespins. The frame holds 15 to 18 cards around its ring, each overlapping its neighbor by about an inch. A basic over-door wreath hanger supports 5 to 10 pounds, far more than cards weigh.
Where it works best:
- Hang the empty wreath on the door first, then clip cards around it. Building it in place keeps the spacing even.
- Clip each card at the ring, not the tip. Cards stay secure when the door opens and closes.
- Alternate card directions around the ring. The slight zigzag keeps the wreath full on every side.
- Use the same clothespin style all the way around. Mismatched clips are the one thing that cheapens the look.
- For more renter-safe surfaces, our apartment Christmas window decor guide shows the same no-drill thinking.
Watch out: keep cards clear of the door handle’s swing path, or the closest cards will get clipped every day.
6. Countertop Card Spinner: The Mail Sort That Never Falls Over
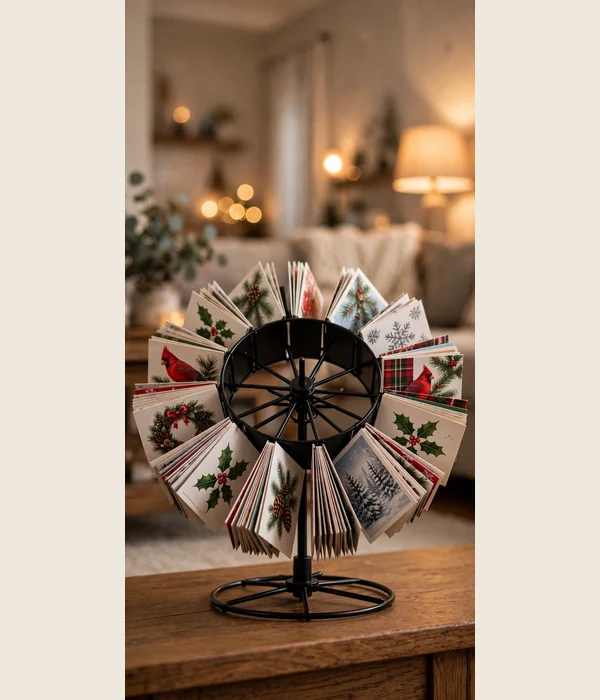
A rotating card spinner borrows the idea from shop counters and turns your mail pile into a display. Twelve pockets around a weighted base spin to show every card’s face, and the whole thing sits on a console table, sideboard, or kitchen counter. Nothing tapes, nothing leans, nothing falls.
Countertop greeting card spinners stand about 7 inches tall with a 4-inch base and sell for roughly $15 to $20. Each of the 12 pockets holds 2 to 3 cards, so one spinner handles 24 to 36 cards. That covers most households without a second unit.
- Set the spinner on a flat surface with 10 inches of clearance around it. The base needs a full spin without knocking anything.
- File each card photo-side out as it arrives. Grouping by week keeps the newest cards at the front.
- Stand tall cards in the back pockets and short cards in front. The height steps make every card visible.
- Spin it once a week and rearrange. Cards that arrived early still get seen instead of buried at the back.
Tips for best results: place the spinner where mail gets opened, because the display only works if cards go straight in.
7. Mantel Wire Holders: A Card Village on the Shelf
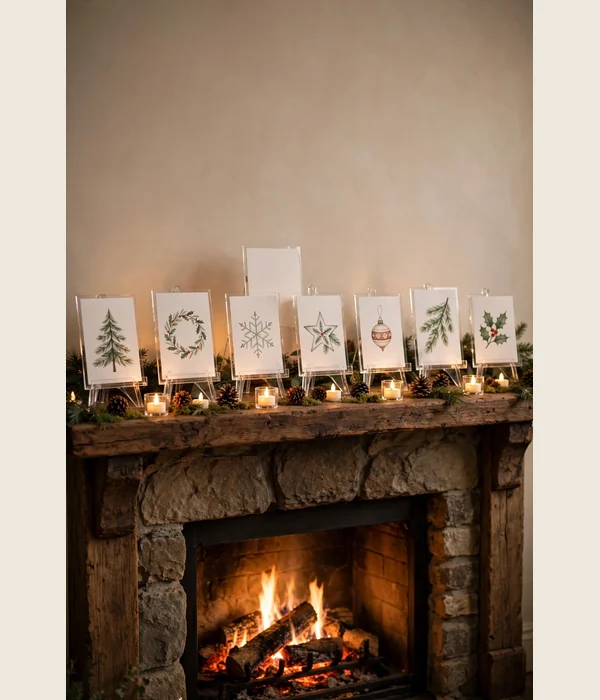
Mini card holders turn a mantel into a little skyline of cards. Each holder grips one card upright, and a row of them along the shelf looks like a tiny village, especially mixed among garland or candles. The cards stay at standing height where people actually look, instead of flat in a stack.
Clear acrylic mini easels stand 5.3 inches tall and support cards up to 7 inches, so full-size Christmas cards fit. Packs of 12 to 24 cost about $10 to $15. A 48-inch mantel fits 8 to 10 holders with breathing room between each.
Where it works best:
- Place holders 4 to 5 inches apart along the mantel. The spacing keeps cards from tipping into each other.
- Mix holders with small pinecones or battery candles. The cards read as part of the decor, not an afterthought.
- Put photo cards in the center and folded cards at the ends. The strongest images anchor the middle.
- Swap in new cards at the ends, not the middle. The center composition stays stable all season.
- Use a second row of holders behind for overflow. Two staggered rows hold 20 cards on a standard mantel.
Watch out: keep holders 6 inches from real candles. Card stock and open flame are a bad combination.
8. Framed Wire Panel: Lean, Clip, Done
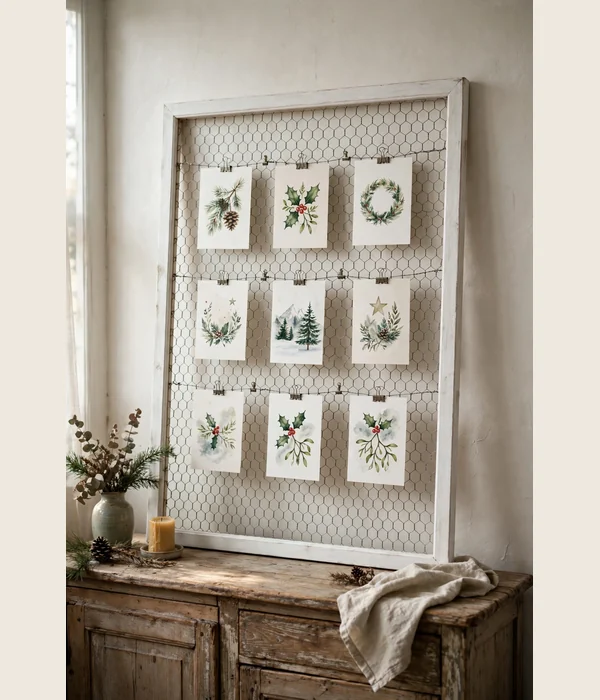
A wire panel in a frame looks like a shop display and works like one. Staple chicken wire across the back of a 16 by 20 inch frame, lean it on a sideboard or console, and clip cards wherever they fit. The whole build takes twenty minutes and costs less than a takeout dinner.
You need a wood frame with an opening of at least 14 by 18 inches, a half-inch hex chicken wire panel, and 20 mini clips. Staple the wire taut across the back of the frame, trim the edges, and the panel is done. Total cost runs $15 to $20, and the finished panel holds 16 to 20 cards.
- Choose a frame with a 2-inch-deep rabbet so the wire sits behind the face. Shallow frames let the wire bulge forward.
- Cut the wire 1 inch larger than the opening on all sides. The overlap gives staples something solid to bite.
- Staple every 2 inches around the back, pulling the wire taut as you go. Loose wire sags and cards slide.
- Lean the panel against the wall at a slight tilt on a console table. Clip cards on in a rough grid, newest first.
Tips for best results: spray the finished frame matte gold or white before adding wire. The paint upgrade costs $5 and doubles the look.
9. Tabletop Card Ladder: Cards Beside the Tree, Not in It
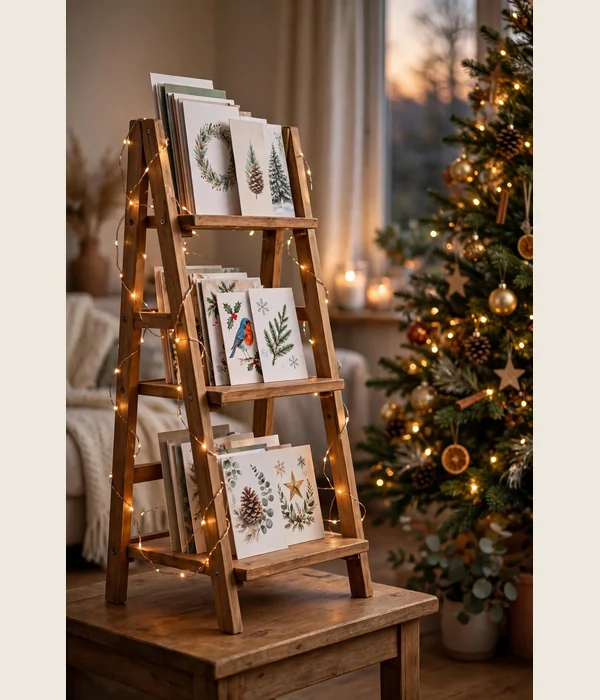
A small ladder shelf beside the tree keeps cards visible without burying them in branches. Cards lean against each rung at a readable angle, and the tiered shape means every card shows, even in the back. The ladder doubles as a plant stand or book nook after the holidays.
Tabletop wooden ladder shelves run about 24 inches tall by 12 inches wide with three tiers, each 4 inches deep. They cost roughly $20 to $30 and hold 5 to 7 cards per tier. That is 15 to 21 cards in a footprint smaller than a dinner plate.
Where it works best:
- Set the ladder on a side table within 3 feet of the tree. The cards read as part of the tree zone without touching it.
- Lean cards against the back rail of each tier. The rail stops them from sliding forward.
- Put the tallest cards on the bottom tier. The eye reads the biggest cards first.
- Alternate folded cards and photo cards down the tiers. The mix keeps the ladder from looking like a catalog.
- Tuck a string of battery fairy lights through the rungs. The light makes the cards glow in the evening.
Watch out: anchor the ladder’s base if the table wobbles. A leaning card avalanche in January is nobody’s idea of fun.
10. Banister Garland Clips: Cards Ride the Stair Rail
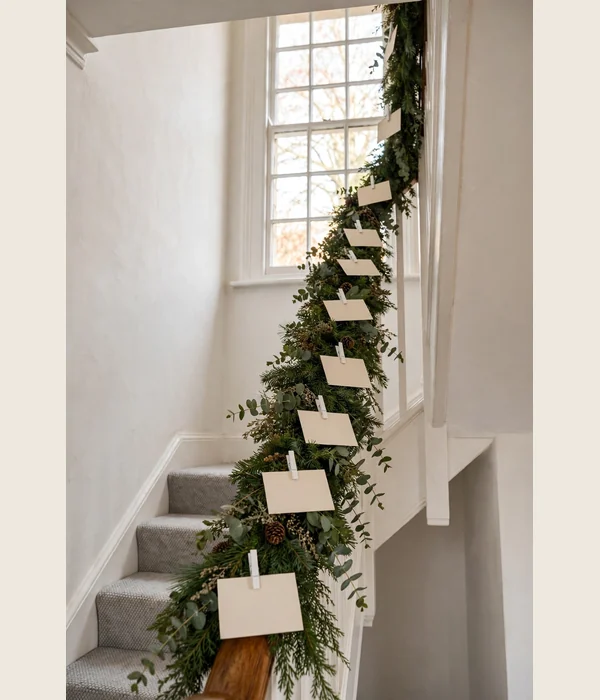
If you hang garland on the banister, you already have a card display waiting to happen. Clip cards along the garland every few inches and they join the greenery like ornaments that happen to be from people you love. The stairs become a card gallery everyone walks past.
A 9-foot garland on a standard banister holds 15 to 18 cards clipped about 6 inches apart. Mini clothespins in green or white disappear into the foliage. A bag of 50 pins costs about $5, and the garland itself is something most houses already own.
- Hang and fluff the garland on the banister first. Cards clip best to full, even greenery.
- Clip each card by its top corner to a sturdy garland branch. The slight tilt keeps cards from sliding down the rail.
- Space cards 6 inches apart and alternate sides of the garland. Even spacing keeps it looking arranged.
- Remove the pins before packing the garland away in January. Forgotten pins rust and stain the foliage.
Tips for best results: clip cards on the upward-facing side of the garland so they are readable as people climb the stairs.
Watch out: keep cards above toddler hand height on the lowest rail, because little hands pull.
Conclusion
If you buy nothing else, get the twine, the hooks, and the mini clothespins. It is the cheapest idea here, and it is the only one that stretches as the mail piles up. Start with one strand in early December and add a second when the first fills.
The one to skip: taping cards straight to painted walls, because even painter’s tape can lift fresh paint. Bare tape leaves residue that shows in daylight. Every display above exists because that method fails, so pick any one of them and your walls survive January intact.
Want the rest of the house this calm? our minimalist Christmas decor ideas keep the whole season simple. And start early: a display hung the first week of December has room for every late arrival.
Frequently Asked Questions (FAQ)
What is the best christmas card display for renters who cannot use nails?
If your lease bans holes, go with adhesive hooks plus twine or a pocket organizer on the door. Medium adhesive hooks hold 3 pounds each and peel off cleanly with the stretch-release tab. If the walls are textured, skip adhesive entirely and use the door organizer or a tabletop option instead.
How many cards should I plan to display?
Count the cards you received last year, then add a third for growth. Most households land between 15 and 25. If you regularly get more than 25, pick the two ideas with the most capacity, the pocket organizer and the card spinner, because one display that overflows looks worse than two tidy ones.
Will washi tape really not damage my painted walls?
If the paint is satin or eggshell and fully cured, low-tack washi tape peels off cleanly in almost every case. If your paint is flat or matte, or the room was painted within the last month, test one strip behind a door for a week first. If the test strip leaves any mark, switch to hooks or a freestanding display.
How do I keep cards from curling over the month?
Curling comes from humidity swings and from hanging cards by a single point. If your room runs humid, tuck cards into pockets or holders instead of clipping them. If you clip them, hold each card at two corners rather than one, because two attachment points resist the curl that one point invites.
What should I do with cards that arrive after my display is full?
If your display fills, add a second strand or spinner rather than squeezing cards into tight spaces, because squeezing is what turns a display into clutter. If you would rather not add anything, rotate the earliest cards into a keepsake box and give their slots to newcomers. The display stays full and tidy either way.