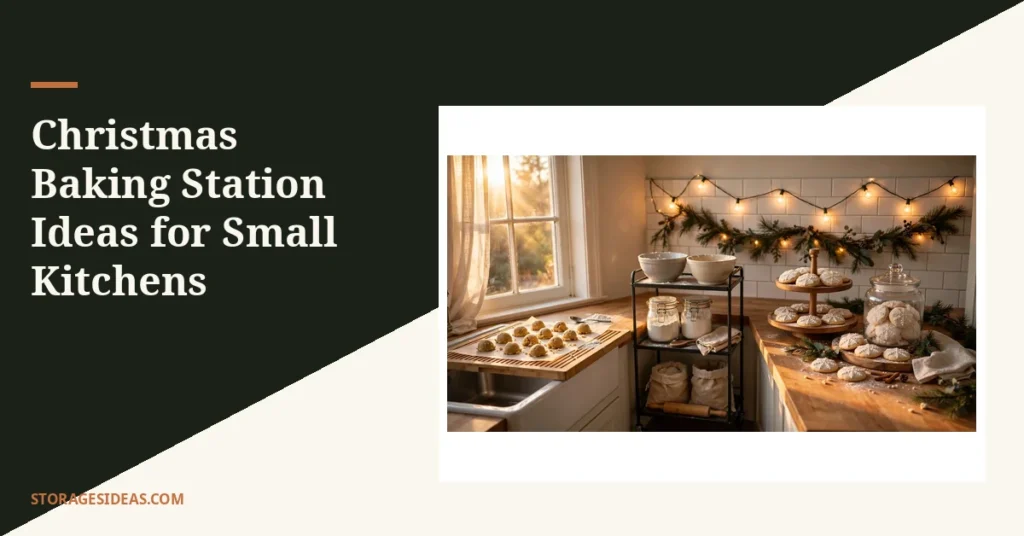
Every December the same thing happens in my kitchen. The garland goes up, the ceramic village lands on the counter, and the one stretch of prep space I had disappears under holiday decor. By the time I mix the first batch of cookie dough, I am chopping on top of the stove and cooling trays on the washing machine.
The mistake is treating decoration and baking as two separate projects fighting for the same two feet of counter. The fix is a christmas baking station: one small zone where mixing, storage, and serving live together, so December baking stops eating your kitchen. These 9 ideas fit real small kitchens, with measurements to check before you spend a dollar.
Why a Christmas Baking Station Beats a Bigger Kitchen
A baking station works because it shrinks your workflow instead of your recipe list. Mixing, ingredient storage, and cooling all happen inside one zone, so you stop walking the length of the kitchen with floury hands. In a small kitchen, fewer steps beat more square feet every time.
December is the stress test. Cookie swaps, teacher gifts, and party trays triple your baking volume in four weeks, right when holiday decor steals counter space.
A station answers both problems: it corrals the clutter into one zone and turns part of it into the decor itself. A tiered stand of cookies and a glowing garland need no extra styling.
You do not need new cabinets or a remodel to get one. Most of the ideas below cost under $60, need no tools beyond a screwdriver, and pack flat in January. If you want the look to carry past the kitchen, these Christmas decor ideas extend the theme room by room.
Mixing Zone
1. The Rolling Baking Cart: A Mixing Station That Parks Anywhere
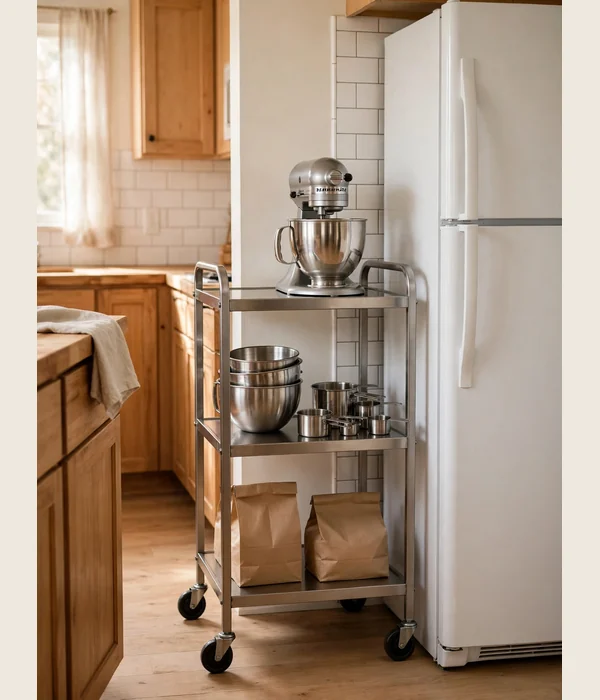
A three-tier rolling cart is the closest thing to a second counter you can buy for thirty dollars. Park it beside your main counter on baking day and it holds the mixer, the bowls, and the ingredients in one rolling column. Roll it into a closet or pantry corner when you are done, and your kitchen is a kitchen again.
The well-known RASKOG measures 13 3/4 inches wide, 17 3/4 deep, and 30 3/4 tall, slim enough for the dead gap beside most fridges. If you plan to park a stand mixer on top, check the shelf rating first. Look for at least 20 kg (44 lb) per shelf, which steel carts near 24 x 14 x 31 inches meet.
Where it works best:
- Beside the fridge: the 13 to 14-inch width of a RASKOG-style cart fits the dead gap most fridges leave.
- In a galley kitchen: park it at the run’s end to add 2 square feet of counter on baking days.
- Near the oven: roll it over when batches come out, then tuck it back; lock the casters under a hot tray.
- In a pantry doorway: stage cooling racks and ingredient bins there on heavy baking days.
- Against a dining wall in December: it doubles as a cookie-tin and gift-wrap station between bakes.
2. The Over-the-Sink Board: Your Secret Second Counter
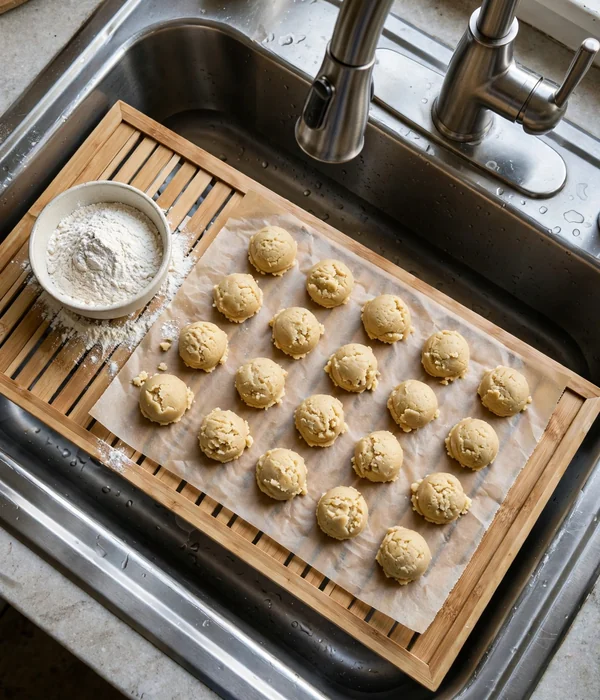
In a small kitchen the sink is dead space for half the day, and a board that spans it hands you back two to three square feet of prep surface. Measure your sink’s outer rim before you shop. A standard single basin opening runs about 22 by 18 inches.
In December that space is worth more than any gadget.
Over-sink bamboo boards in sizes like 20 by 14 inches sell for roughly $37, with non-slip feet that grip the rim. The budget pick is a roll-up stainless rack, about 18.7 by 15.35 inches for under $12, which doubles as a trivet for hot trays straight from the oven. Keep bamboo away from the stove; it scorches above about 400°F.
Where it works best:
- Single-basin galley kitchens: the board turns the basin into a rolling and cooling surface for a full batch.
- Beside the mixer: stage shaped cookies on parchment here while the oven preheats.
- Baking marathons: cover half the sink for prep and leave the other half open for rinsing bowls.
- Apartments with shallow counters: this is the cheapest real pastry workspace you can add without remodeling.
- After the bake: wipe it down and use it as the serving ledge for the cookie tray.
- Small double sinks: size a board to one basin and keep the other half free for washing.
3. The Wall-Mounted Drop-Leaf Table: Fold-Down Space When You Need It
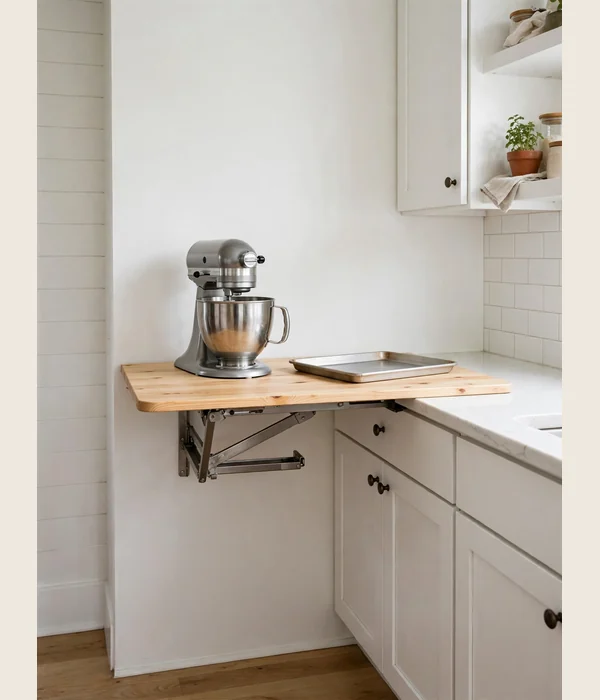
A drop-leaf table screwed to the wall is a counter on demand and a flat wall the rest of the year. Common sizes run 28 to 32 inches wide and 18 to 24 deep open. A typical pine model is 31.5 by 23.62 inches, rated to 100 lbs, around $56.
Mounted at 36 inches it lines up with standard counters, so a sheet pan slides straight across. The bracket folds flat in seconds, and closed it sticks out barely 3 inches. Fair warning: this is the one idea here that is not renter-friendly, since it needs screws into studs.
Fold it down only on baking days and the wall stays clear for the other eleven months. Some models add a small shelf or chalkboard on the underside, which turns the folded table into December decor. If you own your place, this is the closest a small kitchen gets to an island.
Tips for best results:
- Find the studs before you drill; drywall alone will not hold 100 lbs of mixer and dough.
- Mount the top at exactly 36 inches so trays slide across from the existing counter.
- Pick a locking bracket, not just a hinge, so the top cannot fold mid-knead.
Watch out:
- Keep it 24 inches from the stove; steam and heat warp thin pine tops over time.
- Budget $43 to $80 for the table plus anchors, and skip particle board in steamy kitchens.
Storage Zone
4. The Airtight Canister Tower: Flour and Sugar Always Within Reach
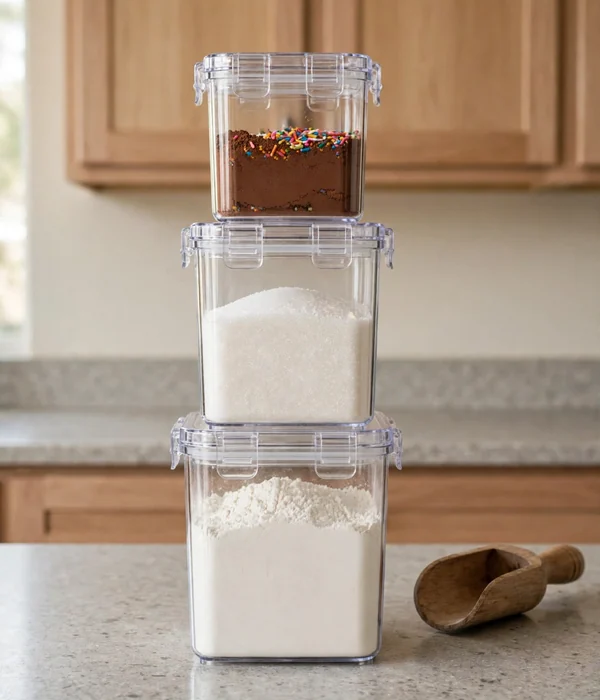
Baking season doubles your flour and sugar runs, and the bags tear, spill, and go stale halfway through December. A stack of square airtight canisters turns a cabinet shelf or a cart tier into a tower where every staple is visible and scoopable.
Size by weight: a 4.4-quart canister holds a full 5-pound bag of flour, a 2.7-quart fits 5 pounds of sugar, and a 1.7-quart covers powdered sugar or cocoa. Singles run about $16 to $19 each. Clear bodies show at a glance what needs restocking before the next bake.
Buy the set once and it serves every December after this one.
If your pantry shelves are shallow, these narrow pantry storage ideas solve the depth problem. Keep the tower where you mix, not deep in the pantry; every step you save gets used in December.
- Measure the shelf first; canisters run 6 to 10 inches tall, so confirm clearance before buying.
- Decant one staple at a time and label the lid. Flour and powdered sugar look identical through plastic.
- Put flour and granulated sugar in the big 4.4-quart size, cocoa and powdered sugar in 1.7-quart.
- Refill straight from the bag over the sink to catch the inevitable spill.
5. The Cabinet Shelf Riser: Double Your Baking Pan Storage
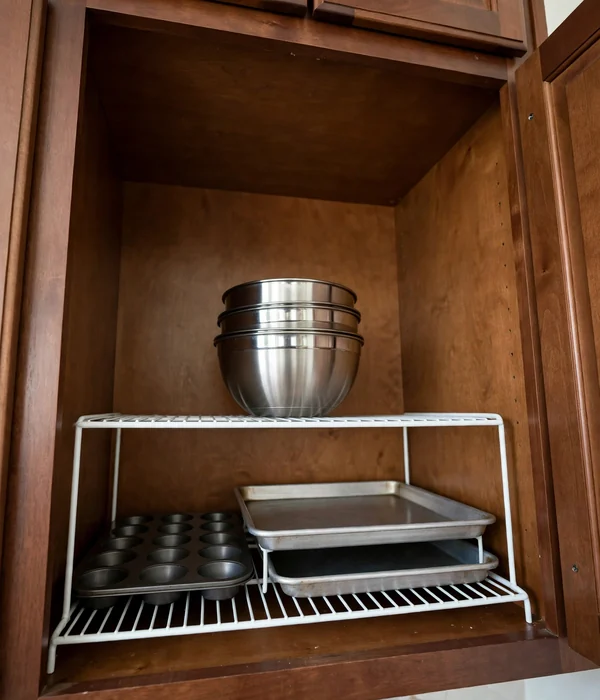
Most cabinets waste the top half of every shelf, and a metal shelf riser reclaims it. A basic 15 by 10 by 6-inch riser costs about $14; expandable models stretch 12.6 to 20.5 inches long and adjust to 5.3, 7.3, or 9.3 inches tall.
That is enough for a stack of half-sheet pans on most cabinet shelves. Stack two risers and you get three levels, which is how small kitchens beat big ones.
Extended, these risers hold up to 30 lbs, which covers mixing bowls, baking dishes, and tins with room to spare. The open wire design keeps everything visible, which matters in December when you are hunting the springform pan. Measure twice and leave 1 to 2 inches of clearance above your tallest item.
Where it works best:
- Above the fridge: that deep, awkward cabinet becomes two usable levels for seasonal pans.
- In a base cabinet: bowls below, baking dishes above, and nothing nested five deep.
- Beside the sink: sheet pans stand upright and dry instead of leaning in a wet pile.
- On open shelving: the wire riser looks tidy and doubles display space for pretty tins.
- Inside the pantry: cookie cutters and decorating tips get their own level above the flour.
- Under the coffee station: mugs up top, baking extracts below, everything in one glance.
6. The Over-the-Door Tool Basket: Cutters and Wraps Off the Counter
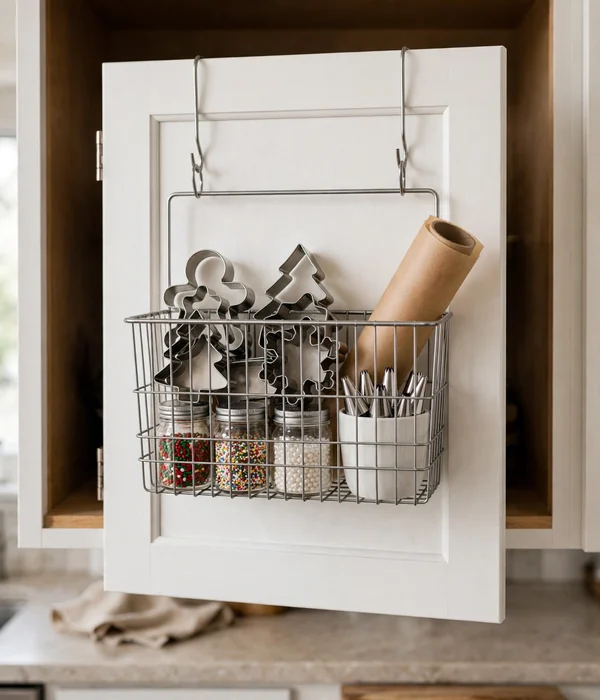
Cookie cutters, piping tips, parchment rolls, and sprinkles are small, numerous, and always in the way. An over-the-door wire basket moves all of it onto the inside of a cabinet door, which is otherwise dead space. A typical steel unit measures about 10.25 inches wide, 14 tall, and 5.3 deep, hangs tool-free in seconds, and costs under $15.
Sort by task: cutters in one basket, decorating supplies in another, wraps and bags in a third. Because everything hangs in the open, you stop buying duplicate star cutters every December. Hang it on the base-cabinet door nearest your mixing spot so tools travel one step.
This is the fastest win in the whole list: under fifteen dollars, no tools, done in a minute. If it does not suit your doors, a 12-inch under-shelf basket (about $19 for two) hooks onto any shelf instead.
Tips for best results:
- Keep the load under 10 lbs; heavy jars strain hinges and stop the door closing.
- Corral piping tips and food coloring in small bins inside the basket so nothing slides.
- Hang a second basket on the pantry door for sprinkles and cupcake liners.
Watch out:
- Check hinge clearance first; the basket needs about an inch of gap, and soft-close hinges can bind.
- Skip upper cabinet doors. The weight swings when the door opens and items tumble out.
Serving Zone
7. The Two-Tier Serving Stand: Display That Earns Its Footprint
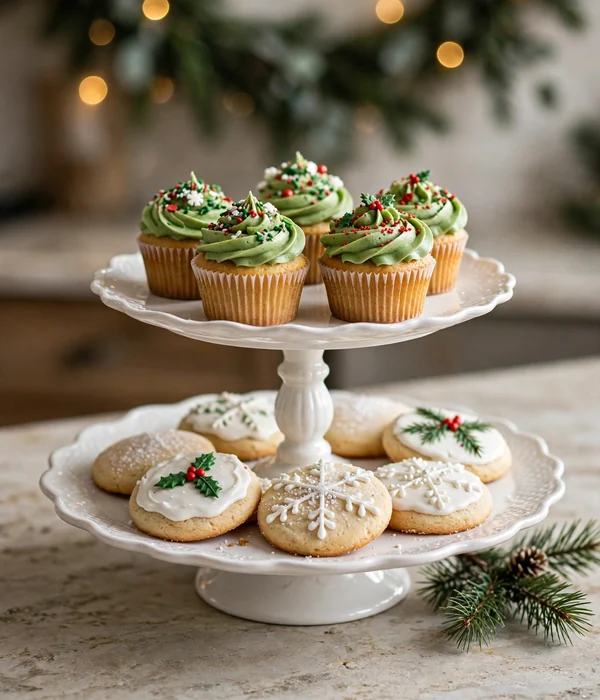
A tiered stand is the one piece of holiday decor that pays rent. It lifts cookies and cupcakes into a vertical display that uses 12 inches of counter instead of sprawling across two feet. A classic 2-tier runs about 12 by 12 by 15 inches; 3-tier versions stack 11.5, 9, and 6.3-inch plates to about 12.8 inches tall.
In a small kitchen it works triple duty: cooling stand during the bake, serving display for the party, and everyday fruit holder in January. To carry the theme to the dining table, see these Christmas table decor ideas for small spaces. Buy one with removable tiers; a fixed tower never fits in a drawer.
The stand also solves the cooling bottleneck that ruins December baking schedules. Hot trays need airflow on all sides, and two tiers cool twice the cookies in the same footprint. By the time the second batch is frosted, the first is boxed.
- Line each tier with a parchment round or doily so frosting never touches the plate.
- Build bottom-up: heavy bar cookies below, frosted cupcakes on top where they will not get crushed.
- Leave one tier half empty at parties; a crowded stand makes guests hesitate to take the last one.
- After the party, keep it on the counter with fruit. It earns its spot year-round.
8. The Wall Rail With S-Hooks: Utensils Up, Drawers Free
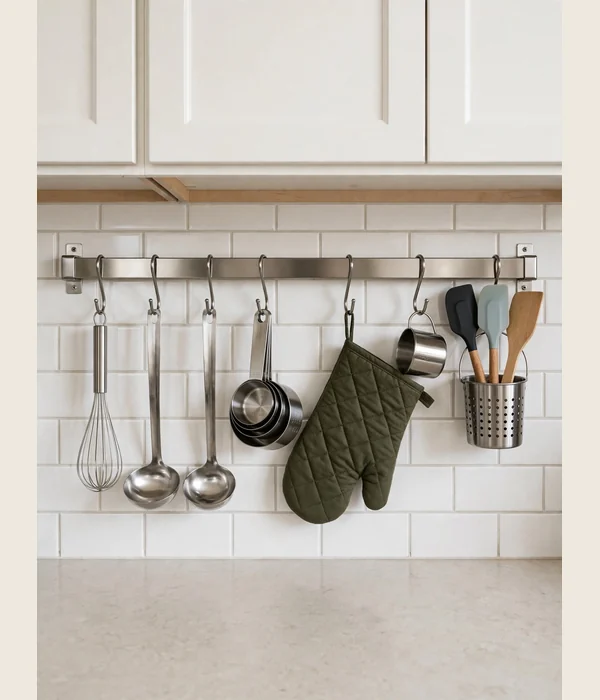
Whisks, ladles, measuring-cup rings, and oven mitts clog the drawer that should hold cutlery. A 22-inch stainless wall rail with S-hooks moves the whole toolkit onto the backsplash and frees a full drawer. The rail costs about $6, hooks run $3 for three, and a matching utensil cup runs about $10.
Mount it in the 18-inch gap between counter and upper cabinets so everything hangs within arm’s reach of the mixer. Stainless wipes clean of flour dust in seconds, which matters more than it sounds in December. Hang the heaviest tools nearest the mounting screws.
A rail also beats a countertop crock in a small kitchen, because a crock eats a 5-inch circle of counter all year. Hooks hold twice the tools in zero counter space. If you hate the industrial look, matte black rails cost about the same.
Tips for best results:
- Mount into a stud or use toggle bolts; a loaded rail can top 15 lbs and drywall anchors pull out.
- Leave 2 inches between hooks so handles do not tangle when you grab one mid-bake.
- Add the matching cup for spatulas; hooks suit mitts and whisks better than flat tools.
Watch out:
- Renters, get written permission first; this needs screws, though holes hide inside a pantry.
- Keep the rail 6 inches from the stove edge; steam and grease coat everything hung too close.
9. The Cookie Jar and Tray: Holiday Decor That Stores the Goods
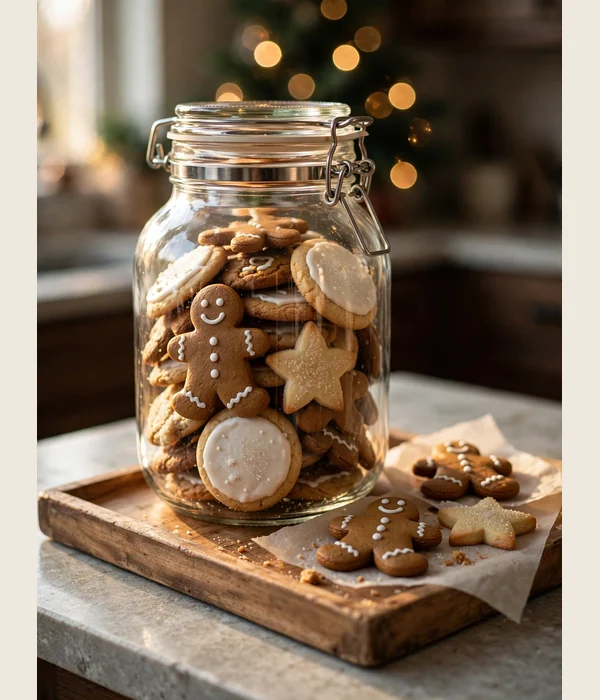
This is the Seasonal cluster rule in action: decor leads, and storage is the angle that makes it ours. A big airtight cookie jar on a festive tray looks like pure Christmas spirit while quietly storing two dozen cookies where they stay fresh. A 1-gallon glass jar with a clamp or gasket lid typically costs under $25.
The gasket matters more than the look: a pretty jar without a seal turns gingerbread soft in two days. Set the jar on an 18 by 12-inch tray to catch crumbs and mark the station’s serving zone on the counter. Refill from the tiered stand as the jar empties so the display never looks picked over.
In January the same jar holds flour, rice, or dog treats, so it never becomes seasonal clutter. That is the test every piece in this station should pass: if it only works in December, it does not earn space in a small kitchen.
- Pick the jar first: it must be truly airtight, with a gasket or clamp lid, not just decorative.
- Size the tray with a 2-inch margin on all sides of the jar so crumbs land on wood, not counter.
- Layer cookies with parchment between flavors so peppermint does not perfume the sugar cookies.
- Park the tray near the coffee maker, not the stove; heat and steam stale cookies fast.
Conclusion
Nine ideas, one rule: give baking a zone and December stops feeling like a kitchen invasion. Start with the piece that removes your biggest bottleneck.
If counter space is the pain, the over-sink board fixes it today. If storage is the pain, the canister tower and riser fix it this weekend.
If you buy one thing: make it the rolling cart. Nothing else in this list creates a whole new work surface, moves it where you need it, and disappears into a closet in January. At around thirty dollars it is also the cheapest square footage you will ever add to your kitchen.
Frequently Asked Questions (FAQ)
What is the smallest kitchen that can fit a christmas baking station?
If you have one 24-inch stretch of counter and a 14-inch gap beside the fridge, you can build one. Park a slim rolling cart in the gap as the mixing zone, span the sink with a board for prep, and keep ingredients in stackable canisters inside the cart. The whole station occupies 4 square feet and rolls away after December.
How do I keep a baking station from eating my only counter?
If counter space is your scarcest resource, build the station off the counter, not on it. Use a rolling cart for mixing, an over-sink board for prep, and a wall rail for tools, so the counter only holds what is actively in use. When a bake is done, everything rolls, folds, or hangs back home in under five minutes.
Is a rolling cart sturdy enough for a stand mixer?
If you buy a steel cart rated at least 20 kg (44 lb) per shelf, then yes, it handles a 5-quart mixer plus a bowl of dough. Lock the casters before you start, and center the mixer on the top shelf rather than the edge. If your cart wobbles on tile, a folded towel under one caster usually fixes it.
What size canisters do I need for holiday baking?
If you bake weekly in December, start with three sizes: a 4.4-quart for a 5-pound bag of flour, a 2.7-quart for 5 pounds of sugar, and 1.7-quart jars for powdered sugar, cocoa, and sprinkles. That covers nearly every cookie recipe without mid-bake refills. If you only bake once or twice, the two big sizes plus one small jar are plenty.
Can I build a baking station in a rental without drilling?
If your lease bans holes, skip the drop-leaf table and wall rail and lean on freestanding pieces. A rolling cart, an over-sink board, stackable canisters, and an over-the-door basket need zero screws and remove without a trace. If you want wall storage anyway, ask your landlord in writing; many approve small anchors in kitchens.
Where do I store the station pieces after Christmas?
If you chose flat-packing pieces, January storage is easy. Fold the drop-leaf table to the wall, roll the cart into a closet or pantry, stack the canisters inside each other, and hang the tiered stand’s plates in a drawer. Keep the cookie jar on the counter with fruit in it; it earns its spot year-round.
What is the cheapest way to add counter space for baking?
If budget is the limit, the roll-up over-sink rack wins at under $12. It spans single basins, holds a sheet pan or dough balls, and rolls into a drawer when you are done. If your sink is a divided double basin, measure; a bamboo board for the larger half runs about $37 and does the same job.
How do I keep cookies fresh in a display jar?
If the jar has a real gasket or clamp lid, cookies stay fresh about a week at room temperature. Layer different flavors with parchment between them so strong flavors like peppermint do not bleed into mild ones. If your jar is decorative with no seal, use it for display only and keep the actual stash in a zip bag inside.