
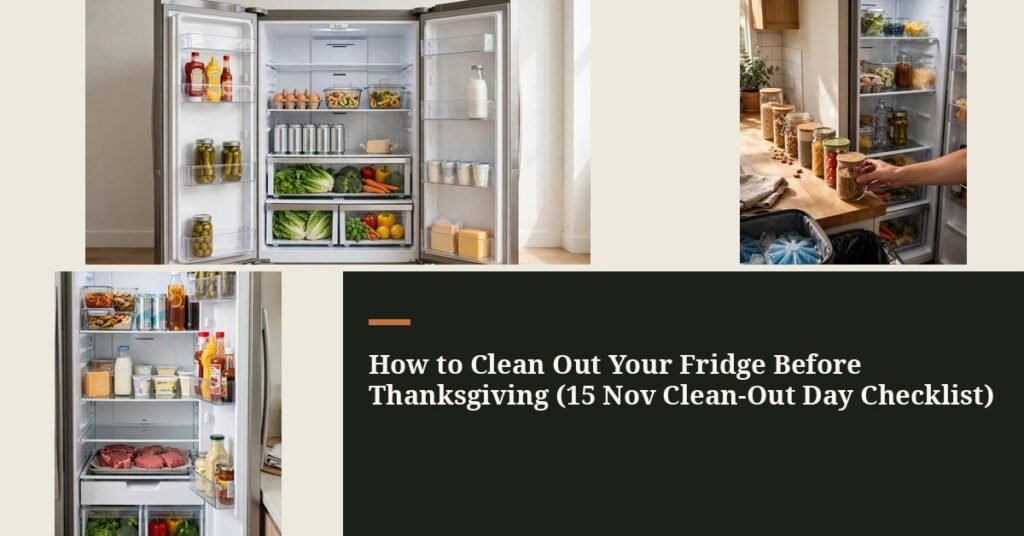
November 15 is Clean Out Your Refrigerator Day, and it could not land at a better moment. Ten days from now, a 16-pound turkey will move into your fridge and claim one full shelf for itself. A week after that, Thanksgiving leftovers will claim another.
If you do a proper fridge clean out before Thanksgiving now, the busiest food week of the year feels organized instead of chaotic.
This is an eight-step checklist, in execution order, and it takes about 90 minutes from first jar to last wipe. You will empty the fridge in safe sections, toss everything past its date using real food-safety timelines, wash every removable part, reset your temperature zones, and finish with a clear shelf plus a turkey thawing plan.
No special tools, just a cooler, dish soap, baking soda, and a five-dollar appliance thermometer.
It is written for a standard 18–22 cubic foot fridge in a small home, but every step scales up or down. Start on November 15, and by the time the turkey arrives, the fridge is ready for it.
Why a Fridge Clean Out Before Thanksgiving Works Best on November 15
Whirlpool’s home economists created Clean Out Your Refrigerator Day in 1999 and deliberately parked it on November 15, eleven days before Thanksgiving. The timing was no accident: it is the exact window when clearing space now pays off twice, once for the holiday groceries going in and once for the leftovers coming out.
Here is the mechanism most people miss. A fridge is not short on space because it is small; it is short on space because 20–30 percent of it is occupied by things that should not be there, condiments opened last spring, jars with a spoonful left, leftovers from a week you barely remember.
Those dead items also block airflow between shelves, and poor airflow creates warm pockets where fresh food spoils faster. A pre-holiday fridge reset fixes both problems at once: it reclaims physical space and restores even cold air circulation.
The second reason is the turkey. A 16-pound bird needs roughly 24 inches of clear shelf width, effectively one whole shelf in a standard fridge, for four days of thawing. You cannot conjure that shelf on the Tuesday before Thanksgiving by shoving things around.
It has to be planned, and planning starts with an empty, clean, correctly zoned fridge.
Do this once, properly, on November 15, and Thanksgiving week becomes a stocking plan instead of a space crisis.
1. Clear It Out, Shelf by Shelf: Keep Perishables Cold While You Work
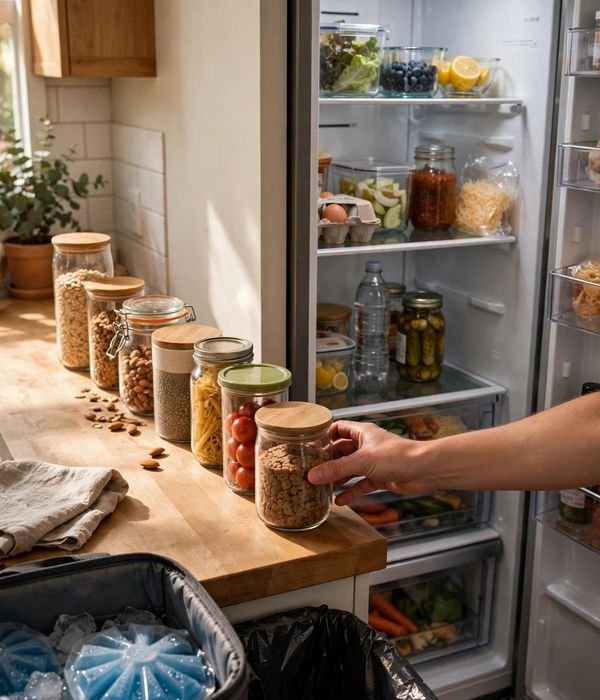
The reason to empty the fridge in sections instead of all at once is food safety, not tidiness. Perishable food, dairy, meat, eggs, opened leftovers, should not spend more than 2 hours above 40°F, so a full unload-and-sort on a warm kitchen counter puts the clock on everything at once.
Working shelf by shelf keeps most of the fridge closed and cold while one section is out, and it turns an overwhelming job into manageable 10-minute chunks.
Set up your stations before you pull anything: a cooler or insulated bag with ice packs for dairy, meat, and eggs; a trash bag for the obvious tosses; and a clear stretch of counter as your sorting zone. Keep a roll of paper towels and a marker with masking tape nearby, you will label things as you go.
- Start with the door shelves. Condiments are the least perishable items, so they can sit on the counter safely while you work.
- Move to the top shelf next, then work downward. Dairy, eggs, raw meat, and opened leftovers go straight into the cooler, do not leave them on the counter “for a minute.”
- Pull out one shelf’s contents at a time and sort on the counter: keep, toss, or not sure.
- For anything you are unsure about, set it in the sorting zone and decide in Step 2. Do not put it back yet.
- Once a section is empty, leave the door open only for that section if your fridge has French doors; otherwise work briskly and close the door between sections.
- When everything is out, you are ready to sort, the fridge stays empty and off-limits until Step 7.
2. Sort and Toss by Real Dates: Reclaim Up to a Third of Your Space

Most of the space you are about to reclaim comes from this step, not from rearranging. Condiments and jars are the quiet space-eaters: they feel permanent, so nobody checks them, and a door shelf of expired bottles can easily eat 6 inches of usable width.
The mechanism is simple, every bottle you toss is a bottle the Thanksgiving groceries do not have to compete with. Use real timelines, not vibes, and when in doubt, throw it out.
- Toss if: mayonnaise or any creamy dressing has been open more than 2 months, opened mayo is the highest-risk condiment in the fridge.
- Toss if: ketchup, cocktail, or chili sauce has been open more than 6 months; barbecue sauce more than 4 months.
- Toss if: salad dressing has been open more than 3 months, salsa or taco sauce more than 1 month.
- Toss if: mustard or Worcestershire sauce has been open more than 12 months, relish more than 9 months, horseradish more than 3–4 months, jams or jellies more than 1 year, olives more than 2 weeks.
- Toss if: any leftovers are older than 3–4 days, or any container has mold, fuzz, an off smell, or a swollen lid, regardless of the date.
- Keep and label: for everything you keep, write the open date on masking tape with a marker and stick it on the bottle. Your future self will thank you every November.
This is also the moment to consolidate: three half-empty mustard bottles become one, and the duplicate hot sauces get a decision. Fewer, fresher bottles beat a museum of almost-empty jars.
3. Pull, Wash, and Dry Every Removable Part: Let the Sink Do the Work
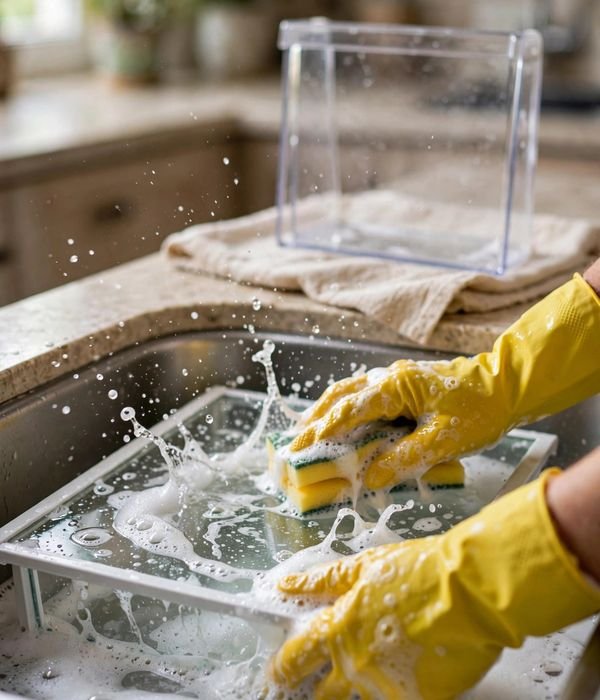
Shelves and drawers collect the spills a wipe-down never reaches, the sticky ring under the jam jar, the dried milk in the drawer track, the mystery crust in the crisper corner. Pulling the parts out and washing them in the sink is faster than scrubbing them in place, because a 10-minute soak does most of the work for you.
Wash them now, while the fridge is empty, and you will never get a better opportunity.
- Lift out every shelf, drawer, and door bin. Most slide straight out; check your manual if one resists, forcing a stuck drawer cracks the plastic runners.
- Fill the sink with warm water and a squirt of mild dish soap, and let the parts soak for 10 minutes.
- Scrub with a soft sponge or cloth. Never use abrasive pads or scouring powder, interior plastics scratch easily, and scratched plastic stains faster next time.
- Rinse thoroughly and stand the parts up to air-dry on a clean towel.
- While they soak, note any cracked bins or warped drawers. A cracked crisper drawer is worth replacing now, before holiday produce arrives.
- Do not put cold glass shelves under hot running water, let them come to room temperature first, or the thermal shock can crack them.
Everything must be fully dry before it goes back in. Trapped moisture between a damp shelf and the fridge wall is how mildew starts, and you will smell it by Christmas.
4. Wipe the Interior Walls and Seals: Kill the Odor Sources You Cannot See
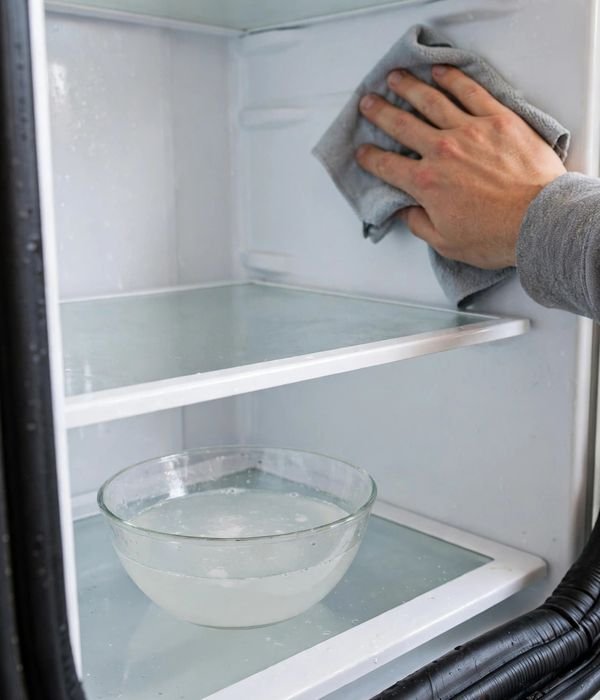
If a fridge still smells after a clean-out, the odor is almost never coming from the food, it is coming from the fridge itself. Door gaskets trap crumbs and moisture in their folds, the drain hole at the back wall clogs with debris, and the drip tray underneath collects what overflows.
Cleaning the visible walls without touching these hidden spots is why the smell always comes back.
Tips for best results: Mix the standard cleaning solution, 2 tablespoons of baking soda per quart of warm water, in a bowl. Wipe every interior wall, ceiling, and floor with a soft cloth wrung out in the solution, then follow with a clean damp cloth to rinse.
Use an old toothbrush dipped in the solution for the gasket folds, the drain hole, and the corners where shelves meet the walls. Pull out the drip tray if your model has an accessible one, wash it with warm soapy water, and dry it before replacing.
Watch out: Never use concentrated bleach, chlorine cleaners, or spray-on chemical cleaners inside the fridge, food absorbs chemical odors and tastes. Skip abrasive cleaners on every surface. And keep water away from the temperature controls and any electrical parts; wring the cloth nearly dry for those areas.
5. Zone Your Shelves for a Standard 18–22 Cu Ft Fridge: Put Every Food Where It Stays Freshest
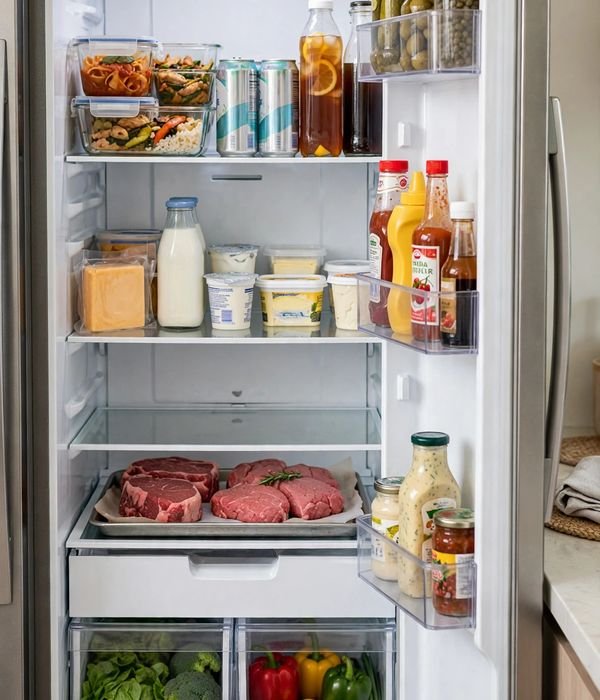
Cold air sinks and the door swings open, so one fridge is really several microclimates, temperatures can vary 5°F or more between the door and the back of the bottom shelf. Zoning puts each food in the spot whose temperature matches it, which adds days to freshness and keeps raw meat drips away from ready-to-eat food.
In a standard 18–22 cubic foot fridge (roughly 28–30 inches of interior width), the map below works for almost every model.
- Door shelves (warmest, often above 40°F): Condiments only, mustard, ketchup, hot sauce, dressings. Never milk or eggs here, no matter how convenient the door bin looks.
- Upper shelves (around 38–40°F): Leftovers, drinks, herbs, and ready-to-eat foods, the items you grab most often.
- Middle shelves: Yogurt, cheese, deli meats, and butter. Stable and easy to see at eye level.
- Lower shelves (coldest, 35–38°F): Milk, eggs, and other dairy that spoils fastest.
- Bottom shelf: Raw meat and poultry, always on a rimmed tray or sheet pan to catch drips, this is also where the thawing turkey will sit in Step 8.
- Crisper drawers: Vegetables in the high-humidity drawer, fruit in the low-humidity one. Keep them about two-thirds full so air still circulates.
Leave a finger-width gap at the back of each shelf. Air has to circulate behind the food to keep temperatures even, packing shelves wall-to-wall creates the warm pockets that spoil produce early.
6. Check the Temperature With a Thermometer: Set 37°F, Not “Medium”
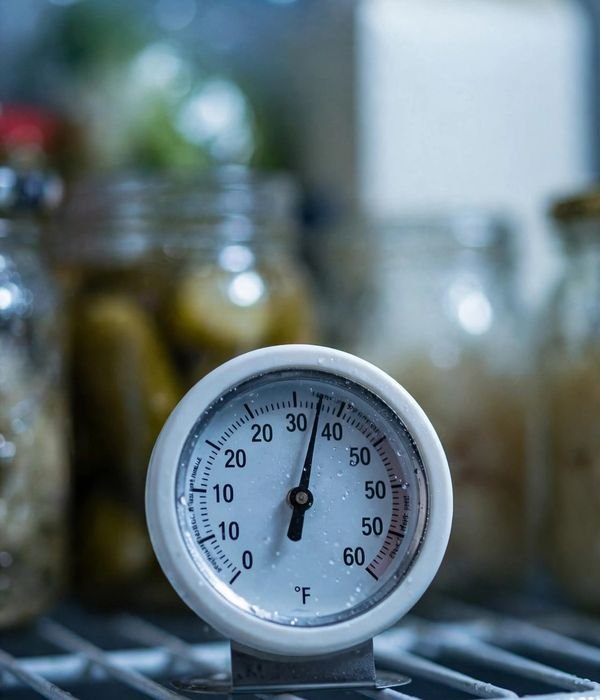
The dial inside your fridge is lying to you, or at least, it is guessing. Most fridge dials are unnumbered or wildly inaccurate, and a fridge set to “medium” can easily be running at 42°F, which puts everything inside it in the bacterial danger zone (40–140°F, where bacteria can double every 20 minutes).
The only reliable check is a five-dollar appliance thermometer, and Thanksgiving week is exactly when you want to know the truth.
Tips for best results: Place the thermometer in the center of the middle shelf, not the door, which runs warmest. Close the door and wait 5–8 minutes, then read it.
The target is 37°F (about 3°C) for the fridge and 0°F (-18°C) for the freezer; the FDA ceiling is 40°F, so 37°F gives you a safety margin without freezing the lettuce. If the reading is off, adjust the dial one notch, wait a full 24 hours, and check again, fridge temperatures settle slowly.
Watch out: Do not set the fridge below 34°F to “play it safe”, milk and produce will freeze and split. Recheck after the fridge is restocked and the turkey goes in, since a full fridge runs a degree or two warmer.
And if your freezer reads above 0°F, move ice cream and long-term items are fine short-term, but get the freezer serviced before you freeze Thanksgiving leftovers in it.
7. Line the Shelves and Neutralize Odors: Make Holiday Spills a 30-Second Cleanup
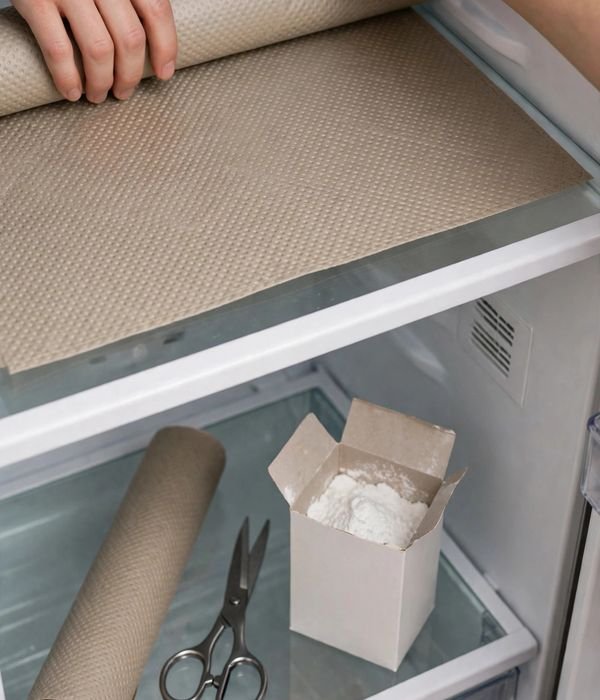
Thanksgiving week is peak spill season, cranberry sauce, pie filling, turkey drips, and a gravy boat that did not survive the transfer. Shelf liners turn every one of those into a lift-and-rinse instead of a scrub-the-glass-shelf ordeal, and they protect the shelves you just washed from the year’s hardest week.
Pair them with odor control now, and the fridge opens fresh every time a guest looks inside.
- Washable EVA fridge liners: The best all-around pick, cut to fit with scissors, wipeable, and a roll covering a full fridge costs about $10–15. Choose the non-adhesive kind.
- Silicone mats: Heavier and grippier than EVA, great for the bottom shelf where the turkey tray will sit. More expensive per shelf but nearly indestructible.
- Dollar-store placemats: A fine budget option for door bins and drawers; replace them when they warp.
- Skip sticky shelf paper: The adhesive bonds to the shelf over time and leaves a residue that is harder to remove than any spill.
- Paper towels as a stopgap: Fine under the crisper or a leaky bottle for a few days, not a long-term liner.
For odors, place an open box of baking soda on the middle shelf and write the date on it, replace it every 30 days. Leave a one-inch gap at the back of each shelf when you lay liners so cold air keeps circulating.
8. Plan the Thanksgiving Restock: Clear One Full Shelf for the Turkey
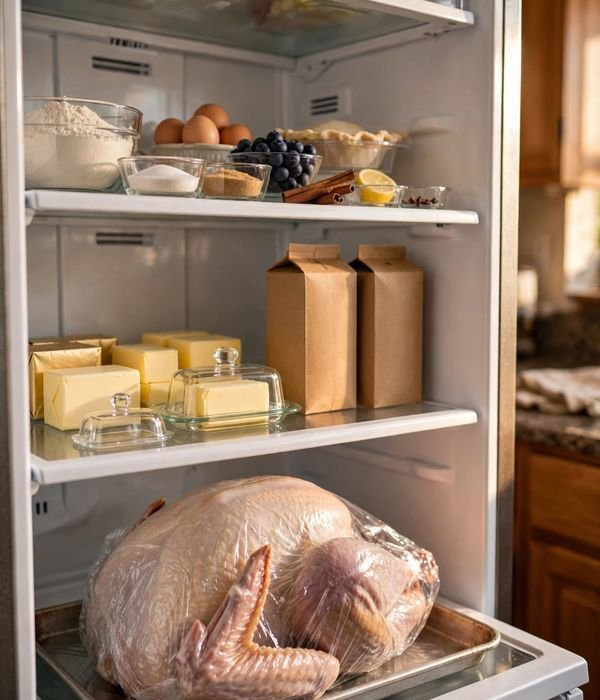
The turkey is the space anchor of Thanksgiving week, everything else in the fridge plans around it. A 16-pound turkey needs about 24 inches of clear shelf width, which is effectively one entire shelf in a standard fridge, and it needs that shelf for four full days of thawing.
Clear it now, on clean-out day, and the rest of the week is just stocking.
- Clear the bottom shelf completely. The turkey thaws on the bottom shelf, never a higher one, so raw juices cannot drip onto food below. Move whatever lives there into its new zone from Step 5.
- Start the thaw on time. A frozen turkey needs about 24 hours per 4–5 pounds in a fridge at 40°F or below. A 16-pound bird needs 4 days, so move it from freezer to fridge on the morning of November 22 for a November 26 Thanksgiving. A 20-pound bird needs 5 days, start November 21.
- Set the turkey on a rimmed sheet pan or tray to catch drips, and keep it in its original wrapper until it is pliable throughout.
- Know the backup plan. A thawed turkey keeps only 1–2 days in the fridge before it must be cooked. If the center is still icy on the morning of the 26th, submerge the wrapped bird in cold water, changing the water every 30 minutes, about 30 minutes per pound, and cook it immediately after.
- Stock around the bird. Butter, broth, pie dough, and fresh herbs go in their zones; heavy casseroles and drinks can wait until the turkey comes out to roast.
- Reserve leftover space now. Thanksgiving leftovers are safe for 3–4 days refrigerated, so keep a stack of containers and one clear upper-shelf section ready. Label everything with the date it goes in.
Conclusion
Ninety minutes, eight steps, and the fridge is no longer the bottleneck of Thanksgiving week. The expired condiments are gone, every shelf is washed, the zones are set, the temperature is verified, and one full shelf is standing by for the turkey.
Non-negotiable step: If you do nothing else on this list, do Step 6, check the temperature with a thermometer. A fridge running at 42°F quietly shortens the life of every fresh thing you buy for Thanksgiving, and no amount of organizing fixes food stored too warm.
The five-dollar thermometer is the single highest-value purchase in this entire checklist, and it takes five minutes.
Do the clean-out on November 15, start the turkey thaw on the 22nd, and Thanksgiving week runs on rails. Next year, the masking-tape open dates you wrote today make this whole job take half the time.
Frequently Asked Questions (FAQ)
Is a full fridge clean out before Thanksgiving really necessary if my fridge looks clean?
If your fridge looks clean, the clean-out is still worth doing, because the problem is invisible: expired condiments, blocked airflow, and a temperature you have never actually measured. If you host every year, make November 15 the annual reset, the open dates you label this year make next year’s pass twice as fast.
Do I need to unplug the fridge to clean it out?
If you are doing the full eight steps, yes, unplug it once the food is in the cooler, and plug it back in when the shelves are dry and restocked. If you only need a 15-minute wipe of one shelf, leave it running and work quickly with the door closed between passes.
Can I use vinegar or bleach to clean inside the fridge?
Stick with the baking soda solution or mild dish soap for routine cleaning, food absorbs chemical odors, and harsh cleaners can damage interior plastics. If you find mold, a diluted bleach wipe followed by a thorough rinse and complete drying is acceptable, but never use concentrated bleach or mix it with vinegar.
How do I fit a 20-pound turkey if my fridge is small?
Clear one full shelf about 24–26 inches wide on the bottom shelf and start thawing 5 days out, since a 20-pound bird needs the full 24-hours-per-4–5-pounds. If the bird genuinely will not fit, pick up a fresh (never frozen) turkey 1–2 days before Thanksgiving instead, or ask your butcher about holding it cold for you.
My fridge still smells after cleaning, what did I miss?
If the walls are clean and the smell persists, check the three hidden spots: the drip tray underneath, the drain hole at the back wall, and the folds of the door gaskets.
If those are clean too, replace the open box of baking soda, it stops absorbing odors after about 30 days, and check whether old ice in the ice maker is the culprit.