Most home organizing projects fail before the first bin is bought. The mistake isn’t the product or the Pinterest board, it’s the order of operations. People organize clutter instead of decluttering first, and end up with a beautiful labeled bin full of expired spices and chargers for phones they no longer own.
This guide covers 50 home organization ideas for every room, built on the opposite approach: declutter first, then contain what’s left. Every idea carries exact measurements, capacities, and load ratings. Renter-safe options and honest “who this doesn’t work for” notes are flagged throughout.
Why Most Home Organization Ideas Fail
Containers don’t create space; they only divide it. A 60-quart bin holds 60 quarts whether it’s tidy or not. Buy bins before clearing the clutter and you store decisions you were avoiding, and pay for the privilege.
The system that sticks: declutter (remove what doesn’t belong), contain (give what’s left a sized home), label (so anyone can put it back), maintain (one-in-one-out, point 17; the 5-minute reset, point 42). Skip step one and the rest just reorganize clutter, more expensively.
🧹 Save-worthy: the declutter-before-you-organize checklist. Pull everything out of the zone before buying a single container. Sort every item once, Keep, Donate, Trash. “Someday” items go in the donate box.
Measure the cleared space, then buy containers that fit it, never the reverse. One new item in means one old item out. Label on day one: an unlabeled bin becomes a mystery box within six months.
Kitchen and Pantry
The hardest-working room in the house. These eight ideas reclaim cabinet air space, door faces, and the gaps between appliances.
1. Cabinet Shelf Risers: Double Every 10-Inch Shelf
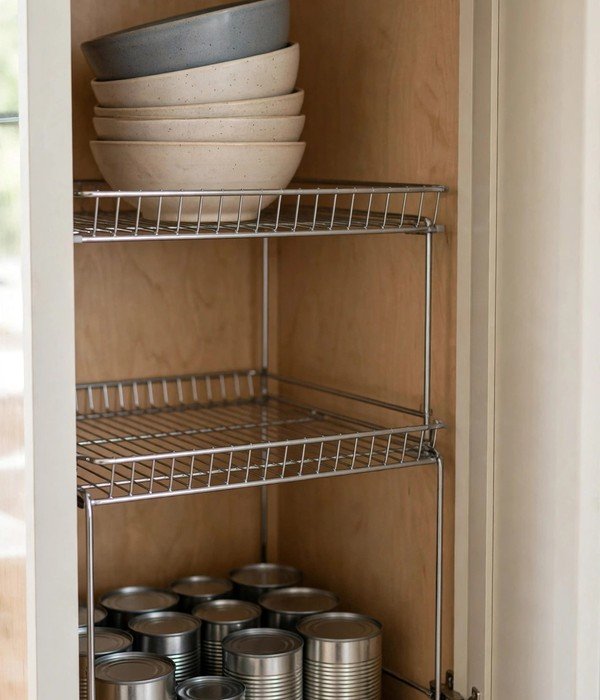
Standard kitchen cabinets are 10 to 12 inches tall inside, and one row of cans uses about 4 inches of that, the rest is wasted air. A wire or bamboo shelf riser creates a second deck inside the same shelf: cans and short jars below, mugs and bowls above, pure vertical division.
A 10-by-14-inch riser costs under $15 and holds 20 to 30 pounds of everyday dishes.
Where it works best:
- Above the coffee station: mugs up top, canisters below
- Pantry shelves: cans on the riser, tall bottles behind it
- Under-sink cabinet: cleaning bottles below, sponges and bags above on a low riser
- Open shelving: bamboo risers read as styling, not storage
- Deep pantry shelves: stack two risers for a three-deck can system
2. Turntables for Deep Cabinets: The Corner Cure

Deep cabinets turn the back six inches into a condiment graveyard. A 10-to-12-inch turntable converts depth into rotation, one spin brings the back row forward, so nothing expires behind the mustard. A 15-inch version suits deep pantry shelves. Choose a model with a raised rim so bottles don’t slide off mid-spin.
Where it works best:
- Corner base cabinets: one 12-inch turntable per oil-and-vinegar zone
- Deep pantry shelves: canned goods and baking supplies, grouped by type
- Under the bathroom sink: cleaning supplies spinning past the pipes
- The fridge: a 10-inch turntable ends the “what’s behind the milk” problem
- Bathroom shelf: vitamins and daily meds spin into reach past the clutter
- Spice zone: one turntable per cuisine keeps bottles grouped and visible
- Under-sink: cleaning supplies spin past the pipes into reach
3. Under-Shelf Clip-On Baskets: Hanging Storage Without Screws
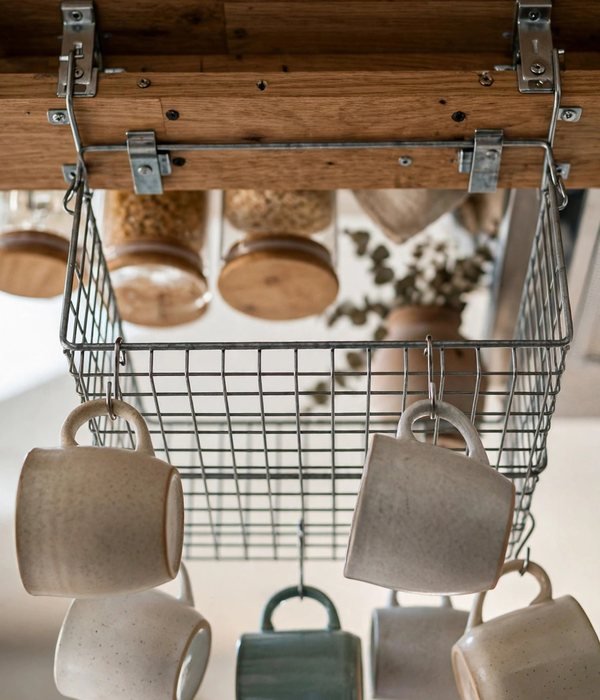
Wire baskets that slide onto existing shelves add a hanging storage deck underneath, no screws, no tools, no landlord permission. The arms grip standard 3/4-inch to 1-inch shelves, and each basket holds 5 to 10 pounds of mugs, produce, or wrapped snacks.
Three of these adds the equivalent of an entire extra shelf, using the 5 inches of air under every shelf that cabinets waste.
Where it works best:
- Under the mug shelf: extra mugs hang by their handles from the basket wires
- Pantry shelves: snack bags and seasoning packets that slide around on flat shelves
- Under a desk shelf: chargers, notebooks, and the headphone case
- Laundry shelf: dryer sheets and stain sticks in arm’s reach
- Closet shelf: handbags and clutches hang by their straps from the wires
4. Slim Gap Cart: 5 Inches Wide, 4 Tiers Deep
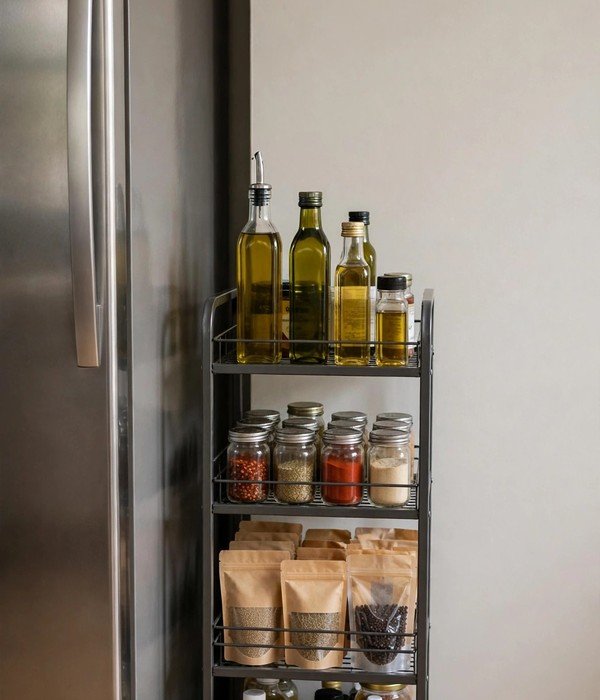
The 5-to-6-inch gap between the fridge and the wall, currently holding dust and one lost magnet, fits a slim rolling cart with 3 to 4 tiers of storage. That’s roughly 2 cubic feet of pantry overflow, spice backups, or cleaning supplies on wheels, invisible from the front.
Standard carts run 5 to 6 inches wide, 15 inches deep, and 28 to 40 inches tall, with a top handle for pulling, gap space is structural dead zone in every kitchen layout. Measure the gap at the floor AND at counter height: walls bow, and a cart that fits at top may jam at bottom.
Where it works best:
- The fridge gap: oils, vinegars, and bulk spice refills
- The toilet-to-wall gap: 4 rolls of TP plus cleaning supplies
5. Over-Cabinet-Door Racks: Storage Inside Every Door

The inside face of every cabinet door is a flat storage surface holding nothing. Slim wire racks that hook over or screw into cabinet doors add 2 to 4 inches of depth for spices, wraps, lids, and cleaning supplies, the small stuff that colonizes countertops.
A standard 18-inch-wide cabinet door holds a 3-tier rack with 12 to 18 spice jars, freeing an entire shelf: door faces are unused real estate you’re already paying for.
Where it works best:
- Upper cabinet doors: spice racks, wrap holders, measuring cup hooks
- Under-sink doors: a narrow caddy for sponges and brushes, off the damp cabinet floor
- Pantry doors: a full-height rack turns the door into a can and snack wall
- Laundry room cabinet doors: detergent pods and dryer sheets within reach
6. Drawer Dividers Sized to the Drawer: Every Utensil Has a Slot
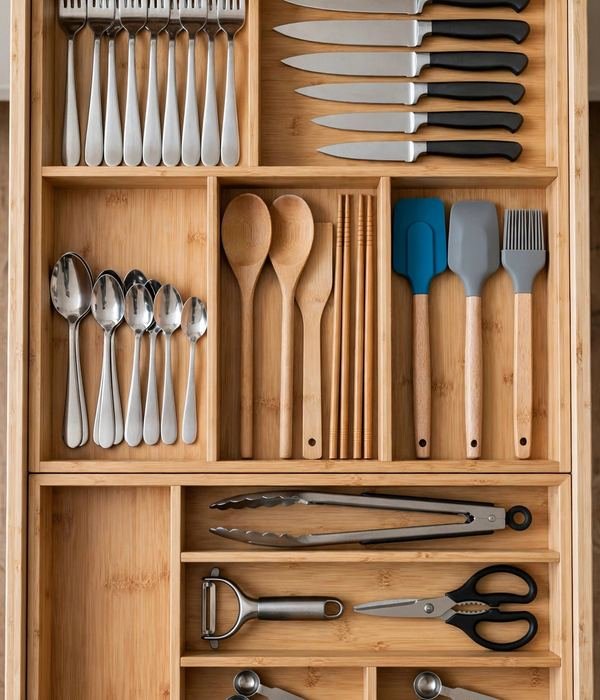
A junk drawer isn’t a personality flaw, it’s an unsized drawer. Expandable bamboo dividers (spring-loaded, fitting 13-to-22-inch drawers) convert one open cavity into 5 to 8 compartments, and suddenly the scissors live in a slot instead of a pile. When every item has a defined home, putting things away takes the same effort as tossing them.
Under $20 per drawer.
Where it works best:
- The kitchen tool drawer: cooking utensils sorted by type, not tangled
- The bathroom drawer: dental, hair, and skincare in three zones
- The office drawer: pens, stamps, and batteries stop migrating into each other
- The “everything” drawer: dividers turn chaos into 8 small honest piles
- Craft drawer: ribbons, tape, and scissors each get a cell
- The entryway drawer: keys, sunglasses, and the spare key stop migrating
7. Painter’s Tape Label System: $4 Labels That Survive the Pantry

Fancy labels fail because categories change, the oat bin becomes the rice bin and now the label lies. Blue painter’s tape plus a thick marker costs about $4, sticks to glass, plastic, and bins, peels off clean, and rewrites in seconds. Relabeling friction drops to zero, so labels stay true as your pantry evolves.
One roll covers roughly 60 bins.
Where it works best:
- Decanted dry goods: flour, sugar, rice, pasta, rewrite when the contents change
- Kids’ snack bins: their name on the bin ends the “that’s mine” wars
- Garage and craft bins: tape labels survive dust and temperature swings
- Linen shelves: sheet-set sizes on the shelf edge end the wrong-bed scramble
- Spice jars: write the date you opened it, so nothing expires silently
8. Decant Into Square Containers: Square Beats Round by 25 Percent
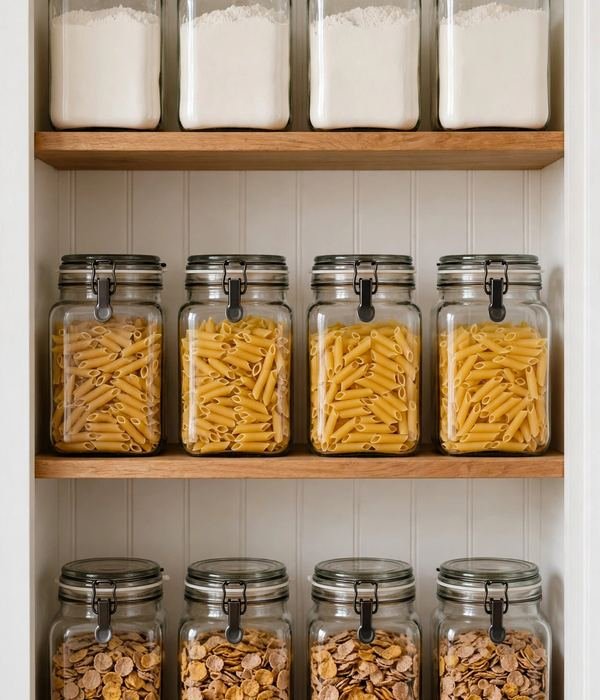
Round canisters waste the corners of every shelf, circles packed in a rectangle leave about 25 percent dead space. Square airtight containers tile edge-to-edge with zero waste, and the seal keeps flour, cereal, and snacks fresh weeks longer than original packaging.
A set of 32-to-64-ounce squares (6 to 10 pieces) replaces the bag graveyard with a visible inventory, and you stop buying duplicates when you can see what you have.
Where it works best:
- Baking supplies: flour, sugar, and oats in 64-ounce squares
- Pasta and grains: tall rectangular canisters fit 12-inch shelf depths
- Snacks: 32-ounce squares the kids can open and reseal themselves
- Pet food and treats: airtight squares beat the half-rolled bag every time
- Cereal and crackers: kids see what’s open and stop opening duplicates
Closet and Clothing
One rod and one shelf waste most of a closet’s volume. These nine ideas multiply capacity two to three times by going vertical, slimming hangers, and giving outflow a permanent home.
9. Double-Hang Rods: Twice the Clothes, Same Closet
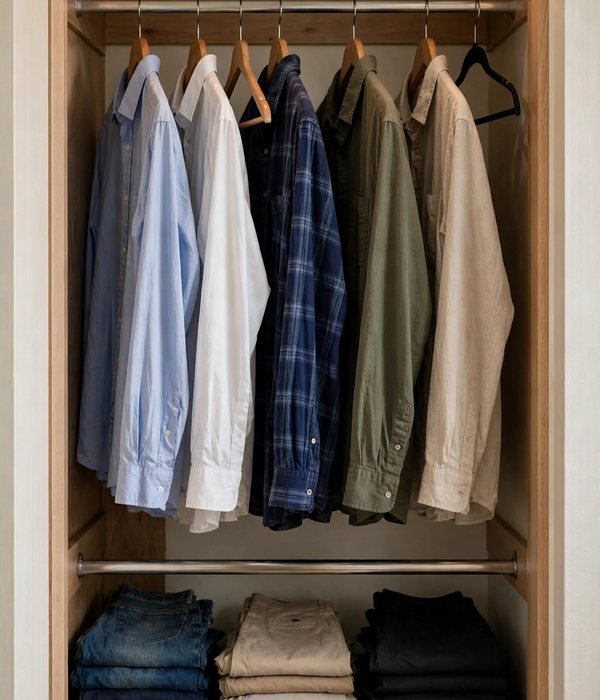
A second rod 40 inches below the existing one doubles capacity in any 80-inch-tall closet: shirts up top, pants below. The average reach-in closet holds 25 to 30 garments on one rod; double-hang takes it to 50 to 60.
It works because shirts and folded pants only need about 40 inches of hang length, the rest of a full-height closet is empty air.
Mini-steps:
- You need 80 inches from the existing rod to the floor for two 40-inch zones.
- Reserve double-hang for short items only; leave 20 to 24 inches single-height for dresses and coats.
- Hang the lower rod 40 inches from the floor so pants clear it.
- For full loads, screw-mount into studs or solid blocking, tension rods slip over time under 30+ pounds.
10. Slim Velvet Hangers: 50 Percent More Rod Space
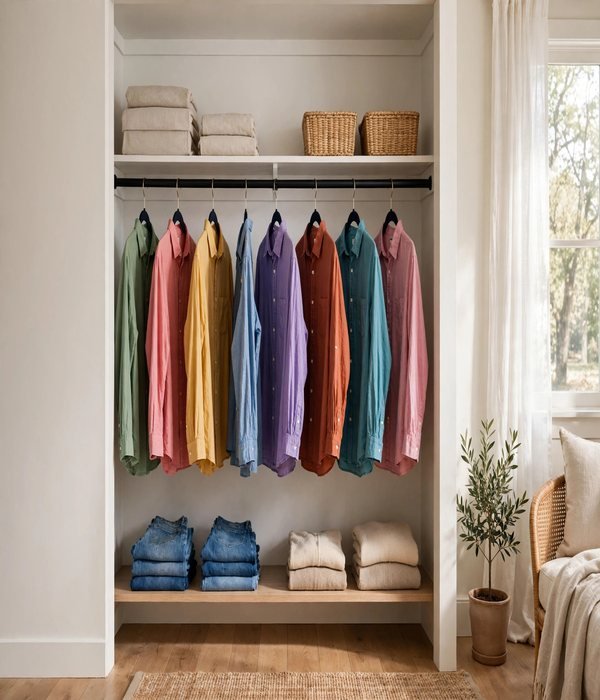
Standard plastic hangers are nearly an inch thick; slim velvet hangers are 0.2 inches. Swap 30 bulky hangers for slim ones and you reclaim about 24 inches of rod, nearly two feet of hanging space from a $15 box. The velvet coating grips fabric so clothes stop sliding off, quietly ending the chair pile.
Keep 5 to 10 sturdy wooden hangers for heavy winter coats, which bend slim hangers over time.
Mini-steps:
- Count your hanging garments first, buy the 50-pack, not the 20-pack, so you convert the whole closet at once.
- Wipe new velvet hangers with a damp cloth to remove loose fibers that shed on dark clothes.
- Re-home the freed 2 feet of rod: a hanging shelf unit or the vacuum-bagged off-season bin goes there.
11. Cascading Hanger Connectors: 5 Shirts in 6 Inches of Rod
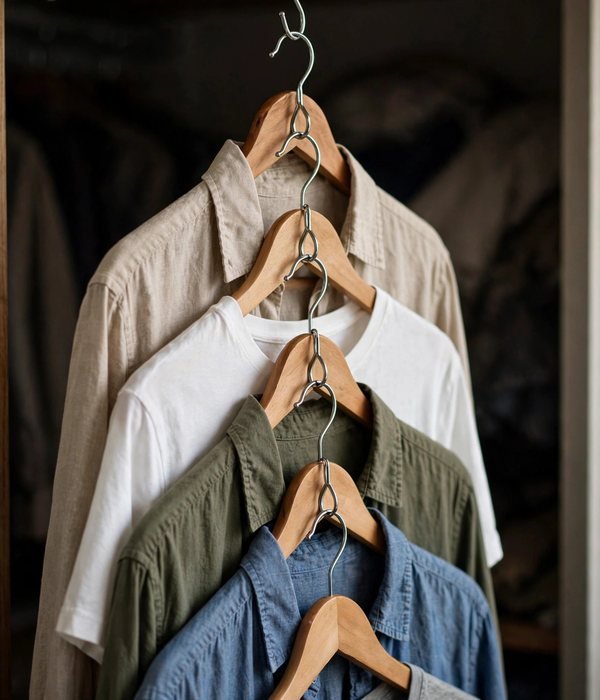
Cascading hanger connectors (or simple S-hooks) link hangers vertically so five shirts occupy 6 inches of horizontal rod instead of 30, double-hanging made modular. Cascade the work-uniform or out-of-season section, leave the daily section normal. A $10 set of 20 connectors reorganizes a whole closet. Reserve it for knits and casual wear, since cascaded clothes wrinkle more than single-hung.
Mini-steps:
- Group each chain by category, all work shirts, all blouses, so you grab the right chain, not a mystery stack.
- Hang the heaviest item at the bottom of each chain; gravity keeps the chain straight.
- Limit chains to 4 or 5 hangers, longer chains swing, tangle, and stress the top hook.
- Use a sturdy hanger at the bottom of each chain; it carries the full chain’s weight.
12. Shelf Dividers: Stand-Up Sweater Shelves
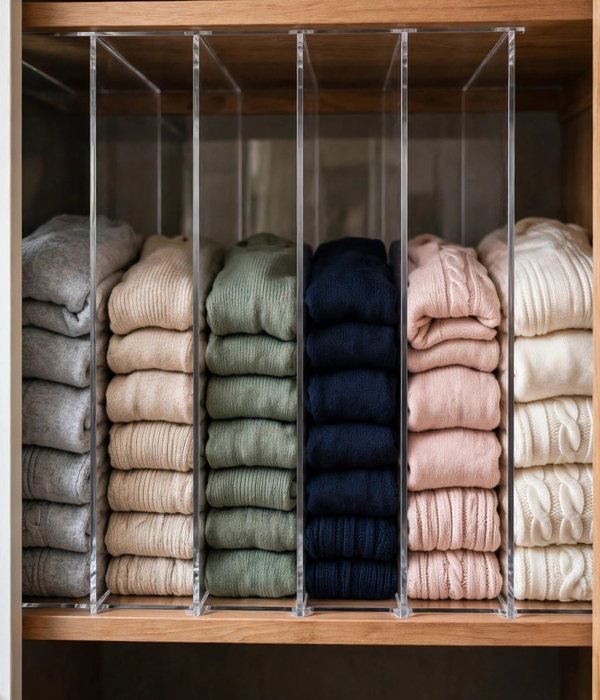
Closet shelves turn folded sweaters into leaning towers because nothing holds the stacks upright. Shelf dividers, acrylic or wood panels clamping onto 3/4-inch to 1-inch shelves, split one long shelf into 4 to 6 vertical compartments so each stack stands on its own. A 6-pack costs under $15.
Folded piles fail sideways, not vertically: give each stack a wall and it stops avalanching. Fold everything to the compartment width, uniform folds are what make it look tidy.
Mini-steps:
- Measure your shelf thickness before buying, dividers clamp 3/4-inch to 1-inch shelves.
- Space dividers 10 to 12 inches apart for sweaters, 8 inches for jeans and tees.
- Fold everything to the same width as the compartment, uniform folds are what make it look tidy.
13. Hanging Shelf Units: 6 Shelves From One Rod
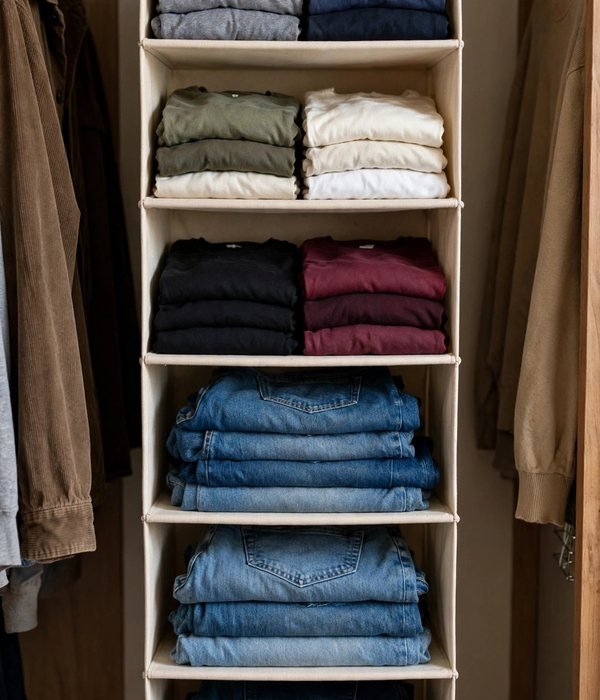
A canvas hanging shelf unit (roughly 12 by 12 by 47 inches, 6 shelves) converts 12 inches of closet rod into folded-clothes storage, no assembly, no tools, hangs in seconds. Folded items need shallow, separated shelves: each shelf holds one category, visible at a glance. Under $20, and it moves with you, the renter’s dresser.
Mini-steps:
- Hang it on the rod section you freed with slim hangers or cascading connectors.
- Assign one shelf per category and label the shelf edge with painter’s tape (point 7).
- Heaviest items on the bottom shelves, a loaded unit can reach 15 to 20 pounds.
- In a shared closet, one unit per person ends the “whose shelf is this” problem permanently.
- In a reach-in closet, hang the unit at one end so hanging clothes keep the other.
14. Over-Door Shoe Organizer: 24 Pairs on a Door
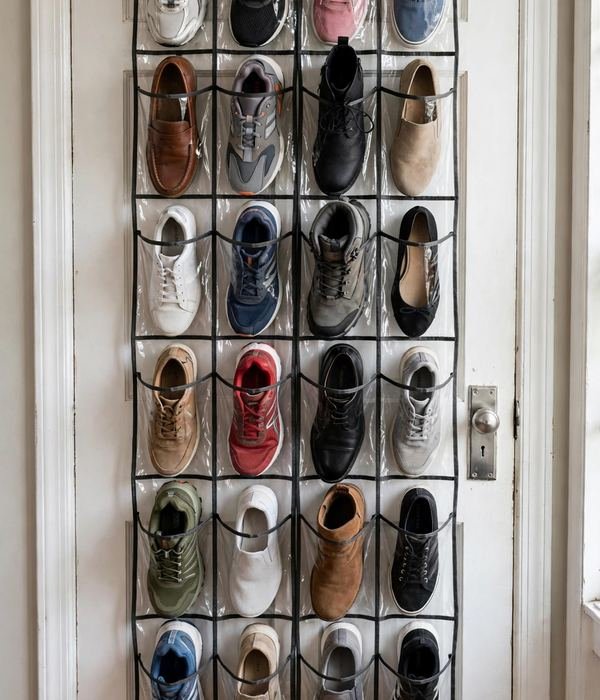
A 24-pocket over-door shoe organizer converts the dead slab of a closet or bedroom door into visible shoe storage, every pair in a clear pocket, no digging through a floor pile. Pockets sized for shoes use door space at nearly 100 percent efficiency, and the clear vinyl ends the “I forgot I owned those” problem.
Most hold 24 pairs and cost under $15, and pockets also swallow scarves, belts, and cleaning cloths.
Mini-steps:
- Hang it on a door that fully opens, loaded pockets need 5 to 7 inches of clearance behind the door.
- Daily pairs go in the middle pockets, occasion shoes up top.
- Keep one pocket per person labeled in a shared entryway or closet.
- Wipe the pockets seasonally, dust settles in them faster than you’d expect.
15. Under-Shelf Hooks: Bags and Belts Under the Shelf
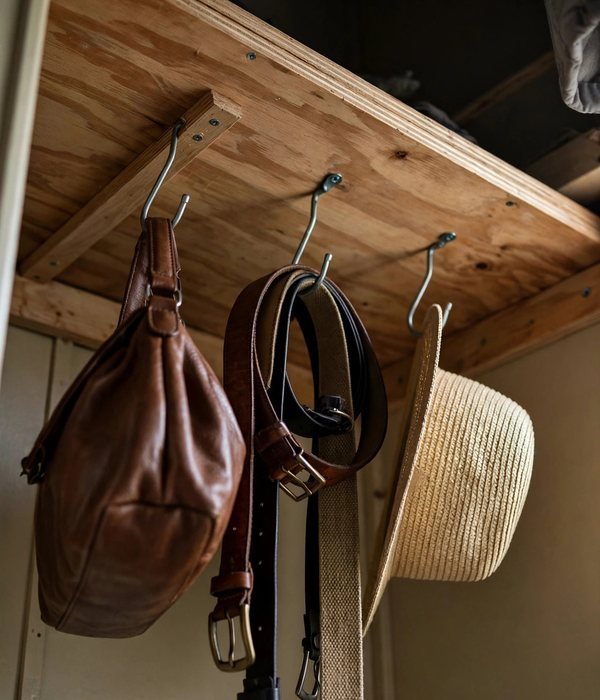
Screw-on or twist-in under-shelf hooks turn the wasted air beneath every closet shelf into hanging storage for handbags, belts, ties, and hats. A 3-pack holds 5 to 10 pounds total and costs under $10. Accessories are light and oddly shaped, they don’t stack, but they hang beautifully in space that was holding nothing.
Twist-in needs no tools; screw-on holds heavier bags.
Mini-steps:
- Measure the clearance under the shelf, you need the item’s height plus 2 inches to lift it on and off.
- Twist-in hooks for belts, ties, and light scarves; screw-on hooks for handbags.
- Space hooks 4 to 5 inches apart so bags don’t crowd each other.
- Reserve this for accessories you grab weekly, rarely-worn pieces go in bins, not prime hook real estate.
16. Off-Season Vacuum Bags: 80 Percent of the Bulk, Gone
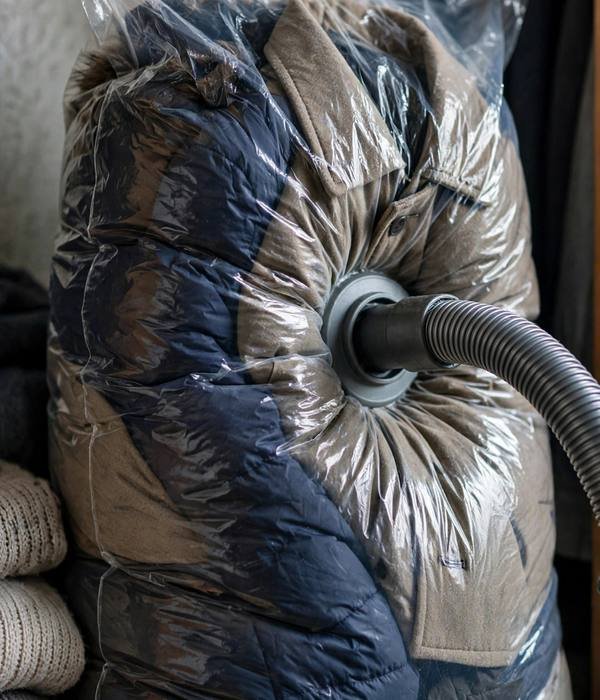
Vacuum storage bags compress bulky off-season clothes, winter coats, sweaters, spare bedding, down to 20 to 30 percent of their original volume. Four to six winter coats fit in one jumbo bag, and the flattened result slides onto a closet shelf instead of filling a bin.
Multi-packs cost a few dollars per bag; soft goods are mostly trapped air, and removing it turns a coat into a sweater.
Mini-steps:
- Wash everything before sealing, sealed-in odors become permanent.
- Roll the bag before sealing to push out excess air, then vacuum slowly through the valve.
- Double-seal the zip, one missed inch and the bag re-inflates within a week.
- Never compress natural down or feather items for longer than 6 months, they lose loft permanently.
17. The Donate Box: One-In-One-Out Rule
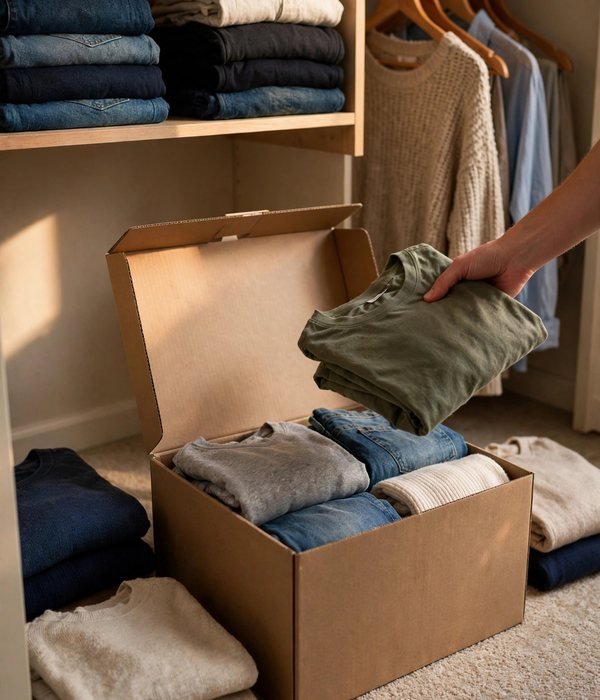
Every closet needs an outflow valve, or organizing becomes rearranging. The donate box, a lidded bin kept permanently in the closet, holds anything that no longer fits or earns its space, and goes to the donation center when full. Pair it with one-in-one-out: every new item in means one old item out.
Outflow has to match inflow, or the closet fills no matter how well it’s organized. how to declutter clothes room by room
Mini-steps:
- Place a lidded bin on the closet floor or top shelf, visible, always open for deposits.
- When you try something on and it doesn’t work, it goes straight in the box, no “maybe” pile.
- A full box leaves the house within a week, otherwise it’s just organized clutter.
Bedroom and Bathroom
The smallest rooms with the most stuff per square foot. These work the vertical surfaces and gaps around fixtures, the only space these rooms have to give.
18. Under-Bed Wheeled Bins: 60 Liters Each, Zero Floor Space
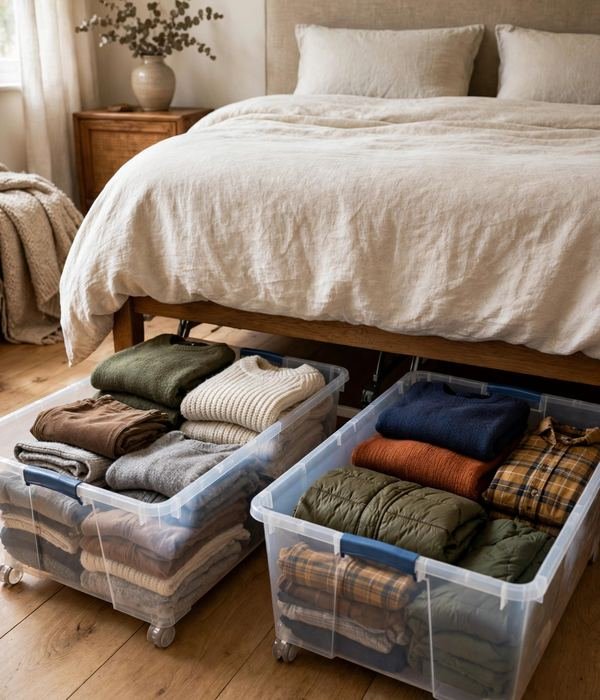
A queen bed hides a 60-by-80-inch footprint with 6 to 8 inches of clearance, room for four 60-liter rolling bins, about 240 liters (8.5 cubic feet) of off-season clothes, shoes, and linens on zero new floor space. Get wheeled bins: without wheels you won’t pull a loaded bin out twice.
Look for 6 to 6.7 inches tall with wheels on the short end so they roll toward you. The bed’s footprint is already paid for, the storage underneath is free.
Tips for best results: measure your clearance first, platform beds often sit under 6 inches and need soft-fabric bags instead. Assign one bin per category (winter coats, shoes, linens, keepsakes) and label the short end facing out.
Watch out: center-support legs on many platform frames block bins from sliding straight through, measure around them.
19. Over-Toilet Etagere: The 30-Inch Zone
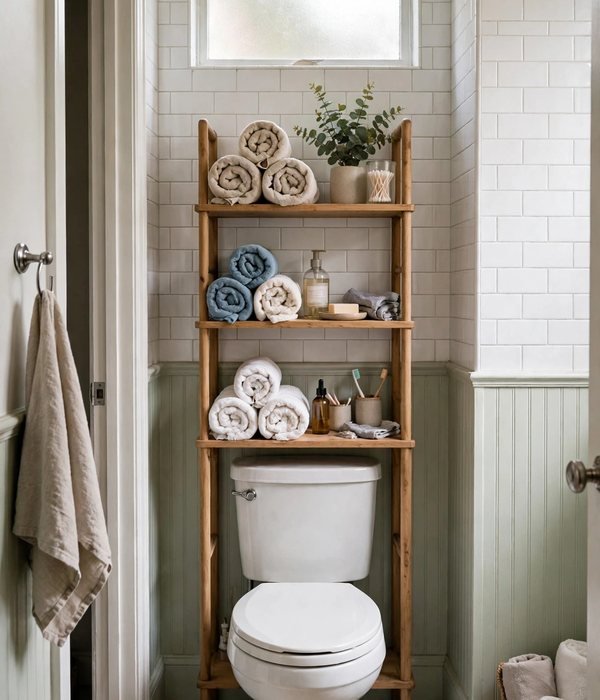
The wall above the toilet, roughly 30 to 34 inches of vertical zone starting at the tank top, is the bathroom’s biggest unused surface. A freestanding over-toilet etagere (legs straddle the tank, no wall mounting) adds 2 to 3 shelves for towels, toilet paper, and toiletries on zero new floor space.
Standard units are 25 to 30 inches wide and fit tanks up to 28 inches tall, no holes, fully renter-safe.
Tips for best results: measure tank height AND the flush-handle side, legs must clear the handle’s swing. Choose adjustable shelf heights; fixed shelves waste the tall zone. Bamboo or powder-coated steel resists humidity; raw wood doesn’t.
Watch out: in a household with small kids, anchor the top with one adhesive strip for tip protection. Keep medications and electronics elsewhere, this zone steams with every shower.
20. Adhesive Bathroom Shelves: 10 Pounds, No Holes
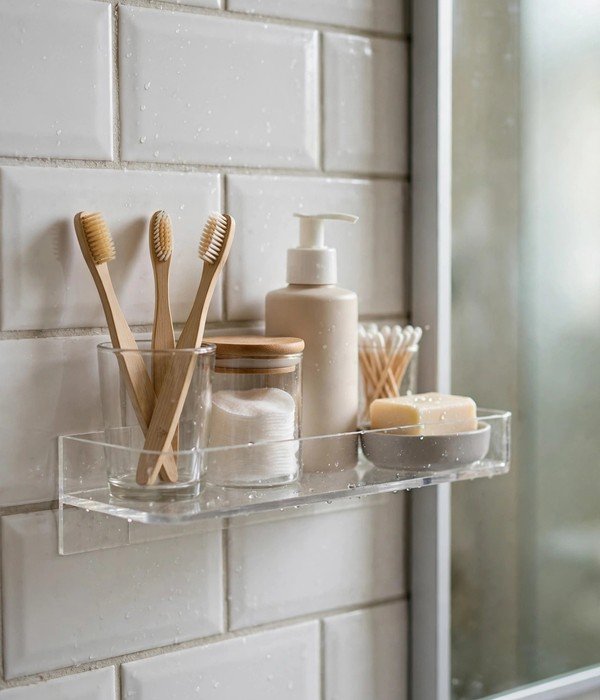
Heavy-duty adhesive shelves (rated 10 to 15 pounds) give renters real bathroom wall storage: a 12-inch shelf beside the mirror holds the daily lineup; two stacked in the shower corner hold every bottle. The track-and-shelf style wins, the track stays on the wall while the shelf slides off for cleaning.
Smooth tile and glass give adhesive its best grip, and bathrooms are nothing but that.
Tips for best results: mount on smooth tile or glass only, grout lines and textured tile defeat the adhesive. Clean with rubbing alcohol, press 30 seconds, cure a full 24 hours before loading (shower steam demands the full cure).
Watch out: ratings assume perfect conditions, load to 70 percent in a steamy bathroom. Remove by the pull-tab method, never pry, or you’ll take tile glaze with it.
21. Shower Tension Caddy: A Corner Pole of Storage
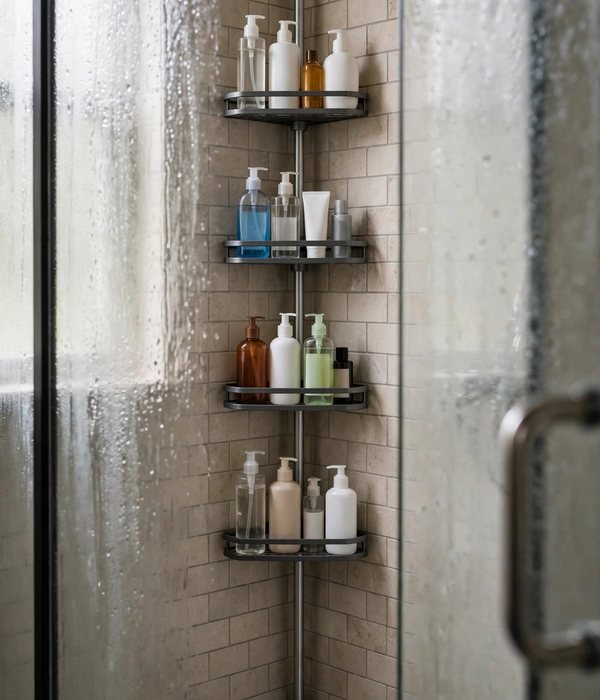
A floor-to-ceiling tension rod in the shower corner holds 3 to 4 caddy shelves for every bottle in the household, no drilling into tile, fully renter-safe. Standard rods adjust 60 to 108 inches, and each shelf holds 5 to 10 pounds. Shower corners are vertical dead space, and one pole replaces the rusting wire caddy on the showerhead.
Tips for best results: measure floor to ceiling at the exact corner, tile corners are rarely square. Extend the rod 2 to 3 inches beyond the measurement, then twist-lock. Load the heaviest bottles on the bottom shelf, a low center of gravity keeps the pole stable.
Watch out: textured or sloped shower ceilings defeat the tension grip, test by hanging your full weight on it gently before loading.
22. Nightstand With a Drawer: The 18-Inch Command Center
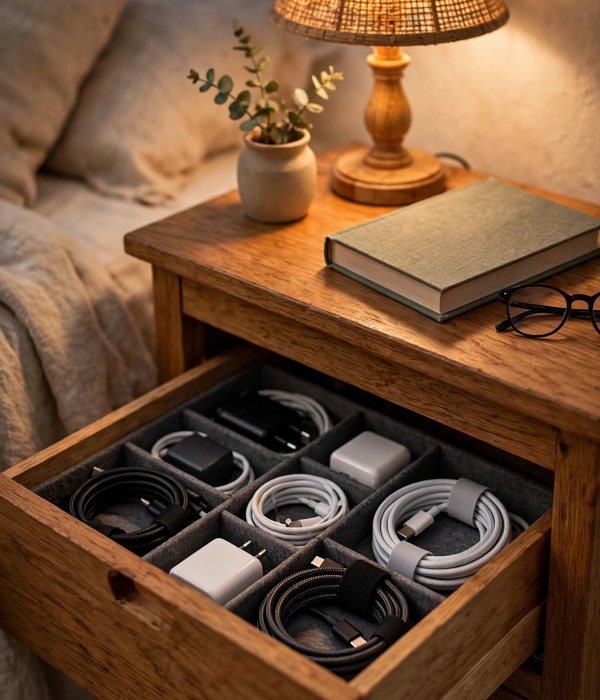
A nightstand with one drawer plus an open shelf (the standard 18-by-18-inch footprint) ends the bedroom-surface sprawl: the drawer swallows chargers, meds, and reading glasses; the shelf holds the book and water; the top stays clear for the lamp. Nightstand clutter is really “homeless small items”, give them a drawer and the surface stays clean. Under $40.
Tips for best results: the drawer needs a divider or small tray inside, one open drawer becomes a mini junk drawer within a month. Keep the top to lamp plus one item; the nightstand is not a second dresser.
Watch out: measure your mattress height against the nightstand, the top should sit within 2 inches of the mattress for middle-of-the-night reach. Too tall or too short and you’ll knock things over in the dark.
23. Linen Closet Zone Labels: Sheets by Size, Towels by Set
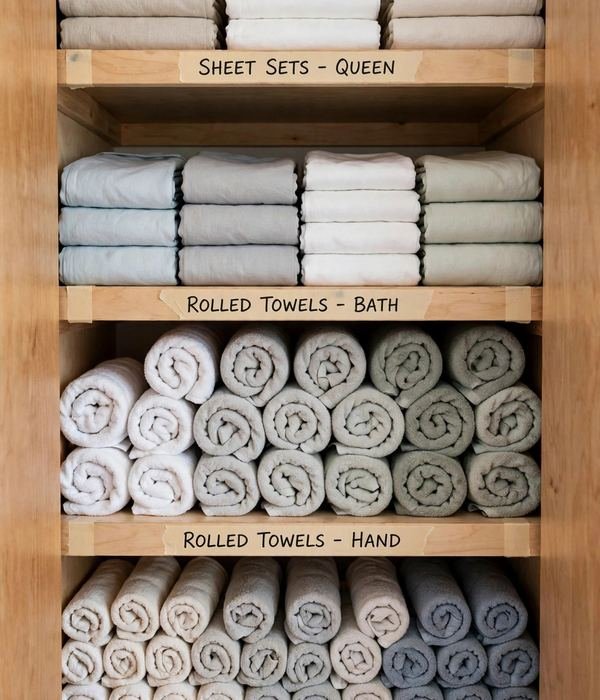
Linen closets fail because every folded stack looks identical and nobody remembers which set fits which bed. Zone labels, painter’s tape on the shelf edge, one zone per category, fix it: queen sets together, twin sets together, bath towels as complete sets.
The failure was never folding technique, it was retrieval: labels turn “dig through six stacks” into “grab the labeled zone.”
Tips for best results: store each sheet set inside one of its own pillowcases, the set stays together and the pillowcase is the label. Roll towels instead of folding, you see every towel and the stack stays put.
Watch out: don’t overstuff zones, a shelf packed edge to edge means pulling one set topples three. Leave 2 inches of breathing room per zone or the labels won’t save you.
24. Medicine Cabinet Risers: Two Decks Behind the Mirror

Medicine cabinets are 4 to 5 inches deep, and short bottles waste the air above them, a stepped riser (2 to 3 tiers) creates a second visible deck inside the same shelf. Daily vitamins sit on the steps; tall bottles stand behind.
Visibility is the whole game here: if you can’t see it, you buy a duplicate or miss the dose. A $10 acrylic riser doubles the usable shelf.
Tips for best results: daily items on the front step at eye level, occasional items behind. Wipe monthly, bathroom humidity films everything. Heaviest bottles stay on the cabinet shelf itself, not the riser.
Watch out: check expiration dates when you install the riser, the “I can finally see everything” moment is the perfect time to toss the expired.
25. Hamper With 2–3 Sorters: Sort at the Toss
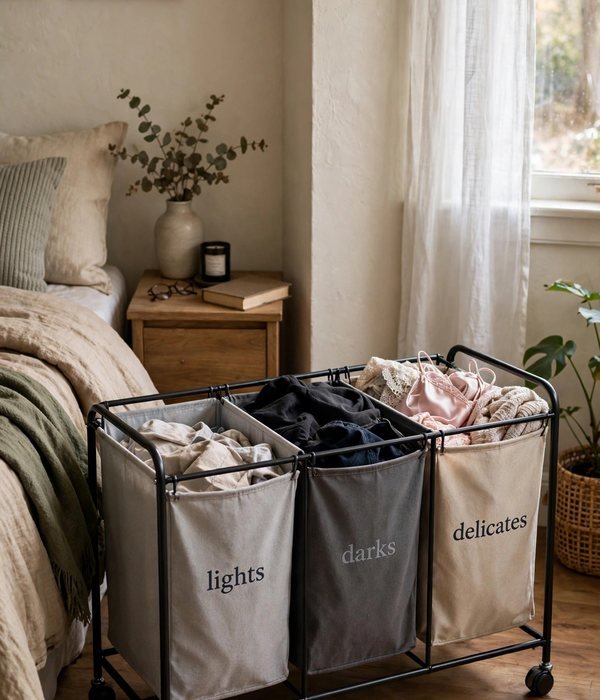
Laundry sorting fails because it happens at the machine, when motivation is lowest. A divided hamper, 2 to 3 compartments (lights, darks, delicates) in one rolling frame, moves the sort to the toss: clothes go in pre-sorted, and laundry day becomes grab-a-bag instead of sort-a-mountain.
Standard 3-bag sorters hold about 1.5 loads total, piggybacking sorting onto a habit you already have.
Tips for best results: label each bag, unlabeled compartments merge into one mixed hamper within a week. The rolling frame matters: if you can’t wheel it to the machine, it won’t get used.
Watch out: this does NOT work if your household won’t learn the compartments, in that case, one hamper per person beats one divided hamper. And delicates bags still go inside the delicates compartment; the sorter doesn’t replace mesh bags.
Living Room and Entryway
The rooms guests see, where clutter has nowhere to hide. These nine ideas give the daily drop zone a system: everything gets a home within 30 seconds of the door.
26. Entryway Hook Rail With Shelf: The 30-Second Drop Zone
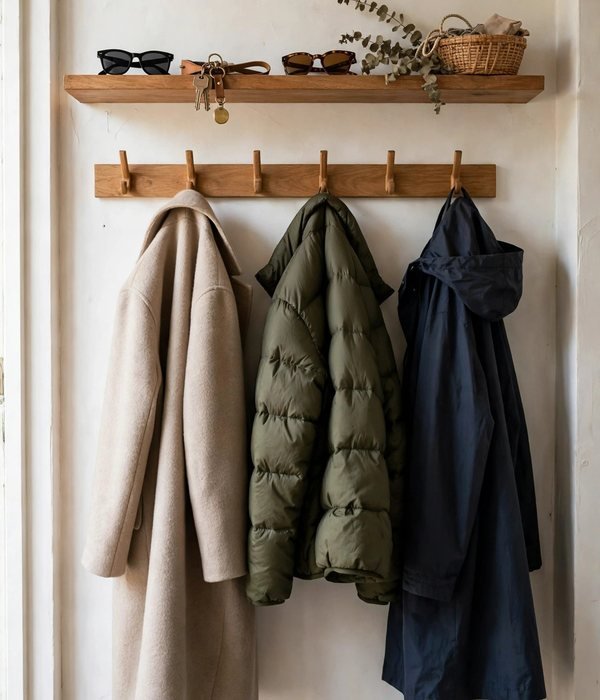
Coats, bags, and keys pile up because the entryway has no landing spot. A hook rail with shelf (24 to 36 inches, 4 to 6 hooks at 5 to 10 pounds each) gives every arrival a home within 30 seconds of the door: coat on a hook, bag on the next, keys and sunglasses above.
Entryway clutter is a decision problem, the rail makes the decision automatic. Screw into a stud for winter-coat loads; freestanding hall trees are the renter alternative. 15 renter-friendly storage ideas
What you can do with it:
- 4-hook rail: one household’s daily coats and the dog leash
- 6-hook rail plus shelf: coats below, keys, mail, and sunglasses above
- Above a storage bench (point 38 style): the complete entryway station, sit, stash, hang, go
27. Shoe Tray at the Door: Contain the Dirt Line
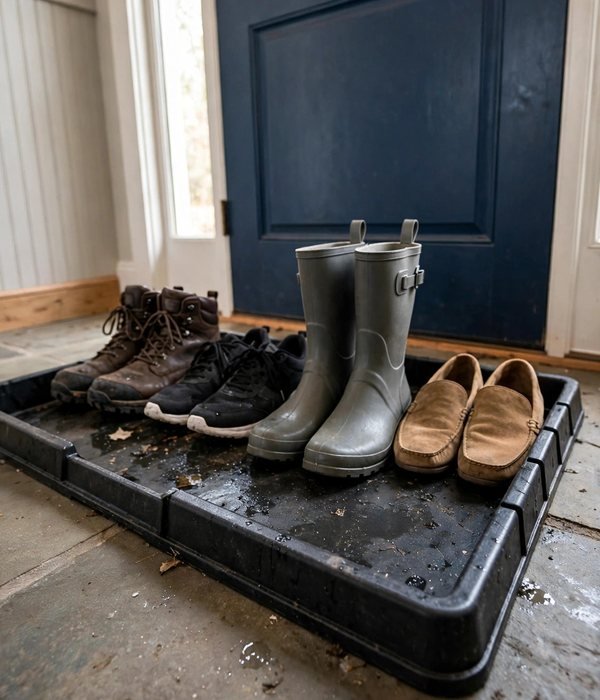
Shoes migrate across the entryway because there’s no defined boundary. A boot tray, roughly 30 by 15 inches with a 1-inch lip, draws the line: shoes live on the tray, the floor stays clean. Raised edges contain water, mud, and winter salt; the tray wipes clean in seconds.
“Shoes on the tray” is easier to enforce than “shoes neatly by the door.” Under $25, and it saves the floor finish.
What you can do with it:
- Winter entryway: wet boots contained on the tray instead of puddling on hardwood
- Apartment door: 4 to 6 pairs corralled in 3 square feet
- Garage door entry: muddy shoes never make it past the tray
- Kids’ shoes: one tray per kid ends the morning shoe hunt
- Mudroom bench: one tray per family member keeps pairs separated
28. Lidded Basket System: Closed Storage That Looks Like Decor
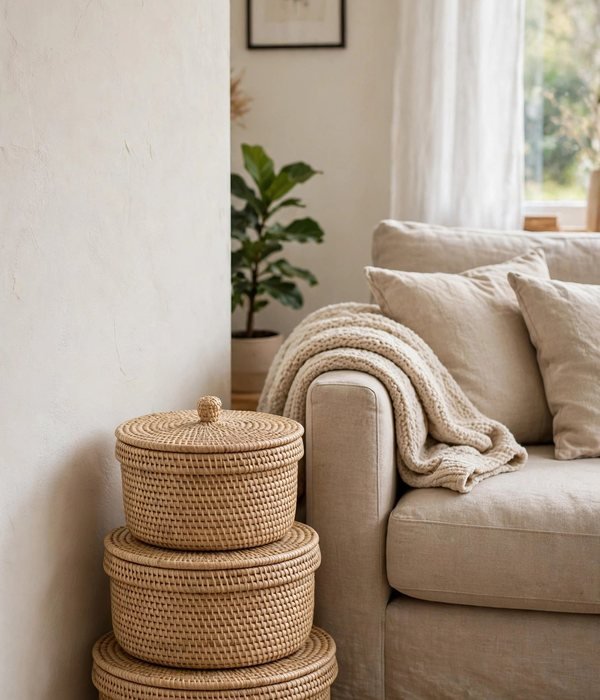
Open living-room storage looks tidy for exactly one day. Lidded baskets (16-to-24-quart, matching set) hide remote chargers, toy overflow, and the throw-blanket pile behind woven texture that reads as decor. Living-room clutter is visual noise, not volume, close the lid and the noise disappears.
Matching lids and sizes matter: five identical baskets read as intentional; five random bins read as storage unit.
What you can do with it:
- One basket per category: remotes and chargers, kids’ toys, pet supplies, throws
- Under the console table: two baskets fill the dead space with hidden storage
- Beside the sofa: the “evening basket” for the current book, glasses, and knitting
- Entryway overflow: the hats, gloves, and scarves that defeat the hook rail in winter
- TV console: remotes, chargers, and controllers disappear behind the weave
29. Ottoman With Storage: Seat, Footrest, and 3 Cubic Feet
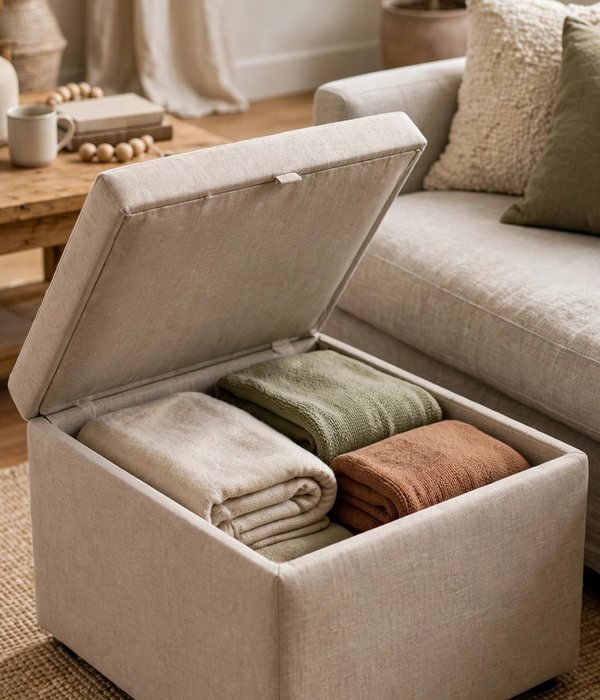
A storage ottoman is a footrest, extra seat, and 2 to 4 cubic feet of hidden storage in one 15-by-30-inch footprint, the highest storage-to-footprint ratio of any furniture piece in this guide.
The average interior (roughly 13 by 28 by 12 inches) swallows 12 to 15 folded throws, the board-game collection, or the entire gift-wrap station: three jobs in space one piece of furniture already occupies.
What you can do with it:
- Living room: throws, remotes, chargers, the coffee-table clutter zone, hidden
- Bedroom foot: off-season clothes or the spare bedding set
- Entryway: shoes, gloves, and the dog leash behind a flip top
- Kids’ room: the toy eruption, contained in one lidded box
- Guest room: spare linens and the welcome basket with toiletries
- Home office: printer paper, notebooks, and backup drives live inside
30. Behind-Sofa Console: 6 Inches Deep, One Room Tidier

The 6-to-8-inch gap behind a sofa, the strip that collects lost remotes and dust, fits a narrow console table that turns dead space into the living room’s command center: lamps, books, chargers, and a basket or two underneath.
Standard consoles run 6 to 8 inches deep and 48 to 60 inches long, reclaiming unreachable space without moving the sofa an inch.
What you can do with it:
- Lamp and book zone: reading light without a side table eating floor space
- Charging station: a power strip behind the console hides the cable nest
- Two lidded baskets underneath: the toy and throw overflow, invisible from the front
- Entry-adjacent sofa: the console becomes the key and mail drop
- Hallway sofa: the family’s shared chargers and the flashlight live here
31. Cord Management Box: Tame the Cable Nest
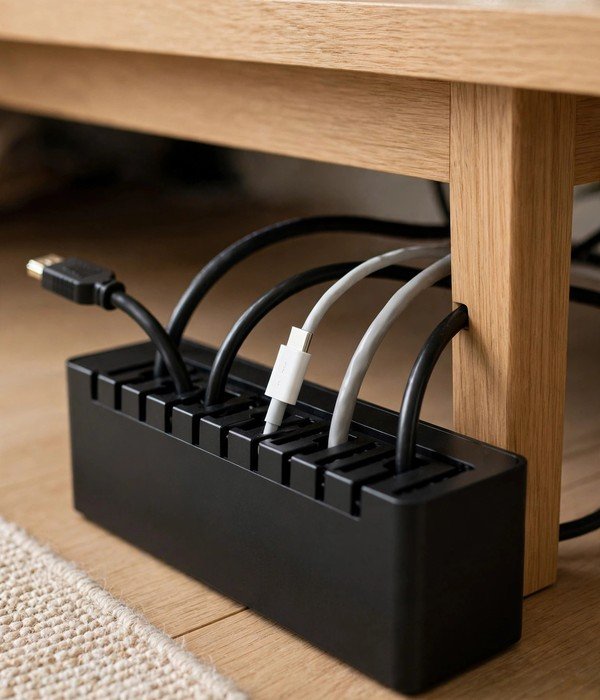
The tangle of chargers behind the TV stand isn’t just ugly, it’s a dust trap and a tripping hazard. A cord management box (12 to 16 inches long with cord slots) hides the power strip and coiled excess inside one ventilated box; cables enter and exit through slots.
Cable chaos is really “visible excess length”, contain the strip, coil the slack, and six cables read as one tidy line. Under $20, ventilated so heat dissipates.
What you can do with it:
- Behind the TV: the console, streaming box, and soundbar cables disappear
- Home office desk: the monitor, laptop, and lamp cords in one box
- Nightstand: the phone, watch, and earbud chargers without the spaghetti
- Entryway charging spot: one box keeps the family’s cables off the console
32. Remote and Control Caddy: One Home for Every Remote

The average living room has 4 to 6 remotes and controllers, and they migrate to couch cushions because none has a home. A divided caddy, 5 to 6 slots in a 10-inch footprint, sits on the coffee table or console and ends the hunt permanently.
The problem was never forgetfulness, it was homelessness: give every remote a slot and putting it back takes one second. Weighted or armrest-hanging styles stay put; spinning suits big collections.
What you can do with it:
- Coffee table: TV, streaming, soundbar, and fan remotes in four slots
- Gaming setup: controllers stand upright instead of sliding off the couch
- Bedroom: the remotes plus reading glasses and lip balm in one caddy
- Guest room: one caddy with the TV remote and the Wi-Fi password card
33. Blanket Ladder: Throws on Display, Floor Stays Clear

Throw blankets multiply until they’re draped over every chair. A leaning blanket ladder (5 to 6 feet tall, rungs 12 to 16 inches apart) holds 4 to 6 throws vertically against 2 square feet of wall, displayed, reachable, and off the furniture.
Throws are used daily and need open, grab-and-go storage, not a lidded bin you’d never open for a 10-minute blanket. Lean it at roughly 75 degrees with rubber feet so it can’t slide.
What you can do with it:
- Living room corner: the 5 throws the family actually uses, on display
- Bedroom: the extra blankets for cold sleepers, reachable without opening a closet
- Bathroom-adjacent wall: rolled bath towels on the rungs read as spa styling
- Kids’ room: their blankets and dress-up capes, hung at kid height on the lower rungs
34. Donation Drop Bin by the Door: Outflow Beats Organizing
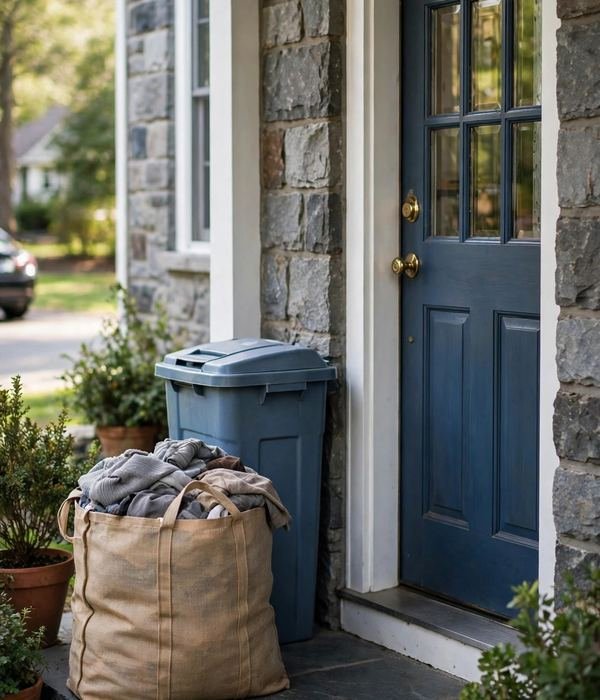
The donate box (point 17) only works if the full box leaves the house. A donation drop bin by the front door, a lidded basket in the entryway, is the staging area: full boxes land here and ride along on the next errand run.
It shortens the distance between “decided to donate” and “out of the house” to one car trip. Without it, full donate boxes sit in closets for months, quietly becoming clutter again.
What you can do with it:
- Entryway corner: the holding zone between closet cleanout and car trunk
- One bag per errand: grab the bin on the way to the grocery store with a drop-off nearby
- Kids’ outgrown clothes: their own small bin teaches the outflow habit early
- Seasonal rejects: off-season items that didn’t earn their space go straight here
Home Office and Paper
Paper is the only clutter that multiplies on its own. These eight ideas give every sheet a two-door system, in or out, plus the cable order a desk needs.
35. Vertical File Sorter: Paper Files Standing Up
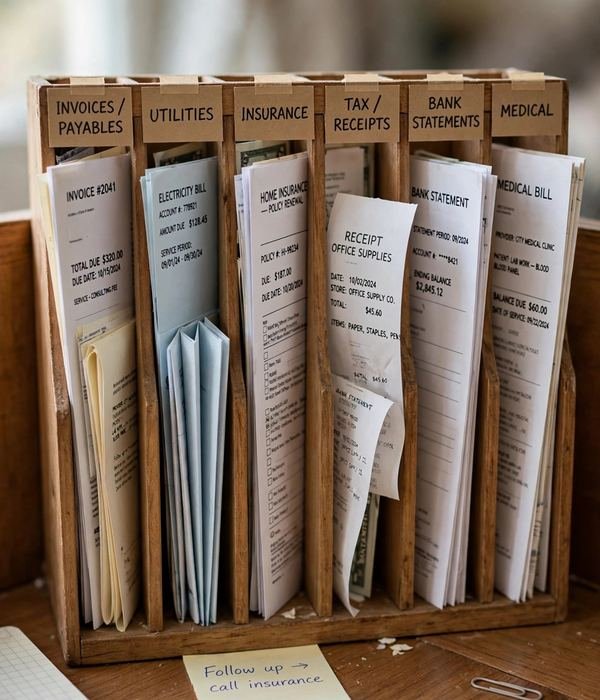
Papers stacked flat become archaeological layers, the bottom sheet is from 2023. A vertical desktop file sorter (5 to 8 slots, letter-size) stands active papers upright, bills, forms, school papers, receipts, so every category is visible and grabbable. Vertical beats horizontal for active documents: you see all eight categories at once.
Under $20, and it fits a 10-inch desk corner.
Mini-steps:
- Label every slot before adding a single paper, unlabeled slots become a second pile.
- Limit it to active papers only: anything older than 90 days gets filed or shredded, not sorted.
- Bills slot faces front, the “pay me” papers stay in your sightline.
- Empty the “to file” slot weekly into the real filing spot, or the sorter becomes the pile with dividers.
36. Cable Clips Plus Under-Desk Tray: The Cord Duo
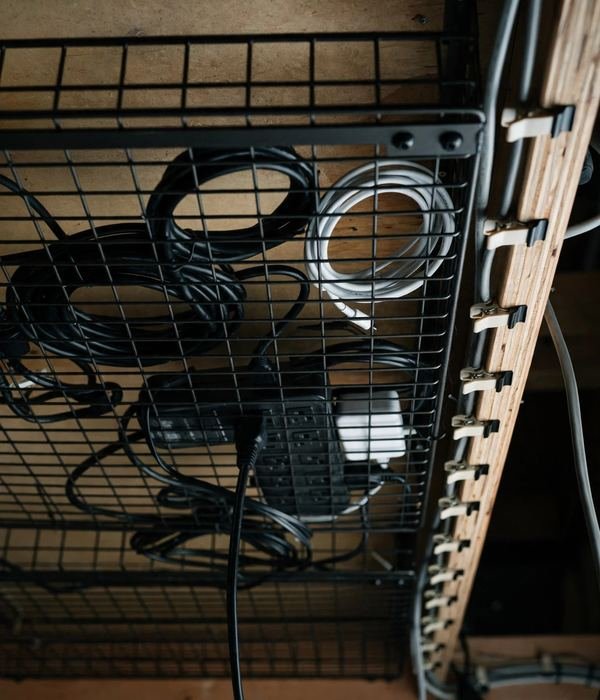
Desk cables defeat single solutions, clips alone leave slack dangling, trays alone leave cables unrouted.
The duo works: adhesive cable clips (10 for under $10) route each cable along the desk edge, and an under-desk mesh tray (15 to 20 inches wide) holds the power strip and coiled excess underneath, attacking both routing and excess length, so the floor stays clear for feet and the trash can.
Mini-steps:
- Unplug everything and lay the cables out, you can’t organize what you can’t see.
- Mount the tray under the desk’s back edge with the included screws or heavy-duty adhesive.
- Coil excess length with reusable ties, then drop the power strip and coils in the tray.
- Clip each remaining cable along the desk edge to its device, one clip per cable, no sharing.
37. Inbox and Outbox Tray Pair: Paper’s Two-Door System
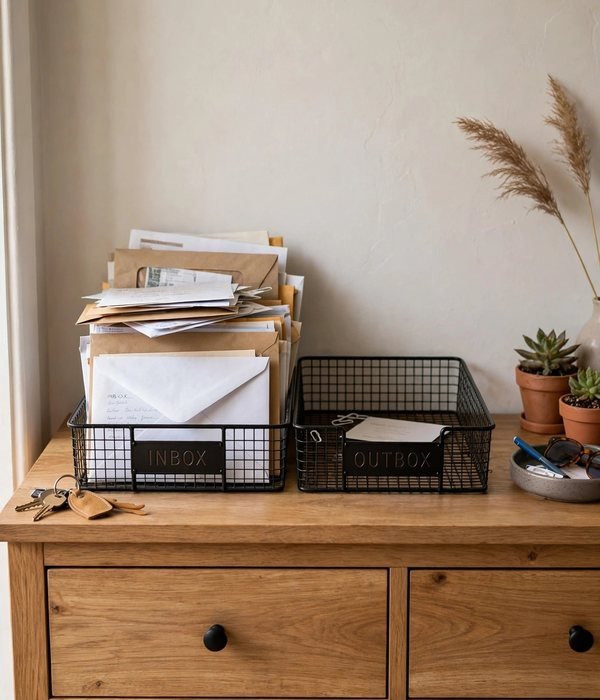
Paper enters a home with no exit plan, so it lands on the nearest flat surface. An inbox/outbox tray pair, two stacking letter-size trays, inbox on top, gives every sheet a two-door system: unprocessed paper goes in the top, finished paper (to file, to mail, to shred) goes in the bottom.
Two defined spots replace infinite surfaces; “deal with the inbox” becomes a 10-minute task. Under $15 for the pair.
Mini-steps:
- Put the pair where paper enters, the entryway console or the desk corner by the door.
- Everything unprocessed goes in the inbox, no exceptions, no “I’ll just set this here.”
- Process the inbox every few days: file, act, or shred, never re-stack.
- The outbox empties weekly: filed papers to their home, shred pile to the shredder.
38. Desk Drawer Organizer: Every Drawer a Grid
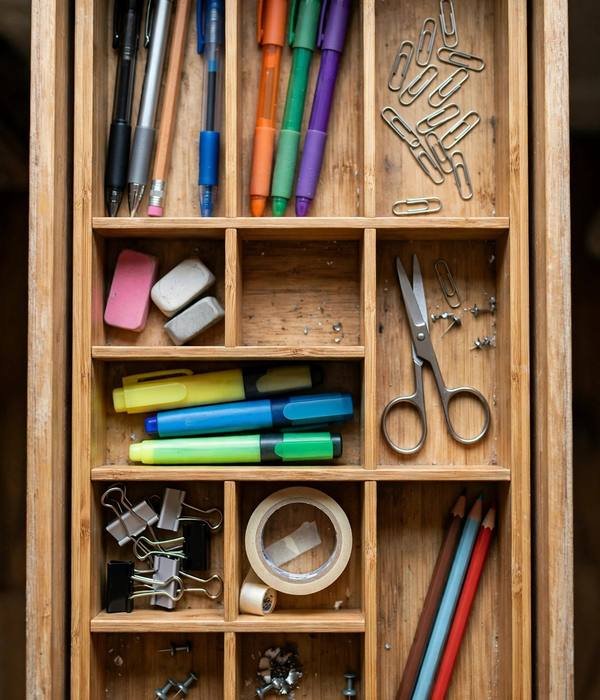
Desk drawers become junk drawers because one open cavity can’t sort small items. Bamboo or mesh organizer inserts, sized to the drawer (measure first; standard desk drawers run 12 to 20 inches wide), divide it into 6 to 10 compartments, and pens, stamps, batteries, and sticky notes each get a cell.
Small items need small boundaries: without compartments, everything migrates into one mixed layer within weeks. A $12 insert set outlasts every “I’ll keep it tidy this time” promise.
Mini-steps:
- Measure the drawer’s interior, length, width, and depth, before buying anything.
- Empty the drawer completely and toss the dead pens and dried-out markers first.
- Place the insert, then assign one compartment per category, no shared cells.
- One “misc” compartment maximum; two misc compartments means the system has already failed.
39. Charging Station: One Dock for Every Device

Phones, watches, earbuds, and tablets charge in four different rooms because no single spot was ever designated. A multi-device charging station (5 to 6 ports, 40 to 60 watts total) consolidates every device onto one dock, one outlet, one location, no cable hunt.
Charging is a location habit: once every device lives on the dock, “where’s my charger” stops being a daily question. Place it where devices naturally get set down.
Mini-steps:
- Count your household’s daily-charge devices, buy ports for that number plus one spare.
- Choose 40 watts minimum for a family dock.
- Label each cable with painter’s tape (point 7), identical white cables are the enemy.
- Set the rule: devices sleep on the dock, not on the couch, the habit is the product.
40. Wall-Mounted File Pockets: Vertical Paper on the Wall
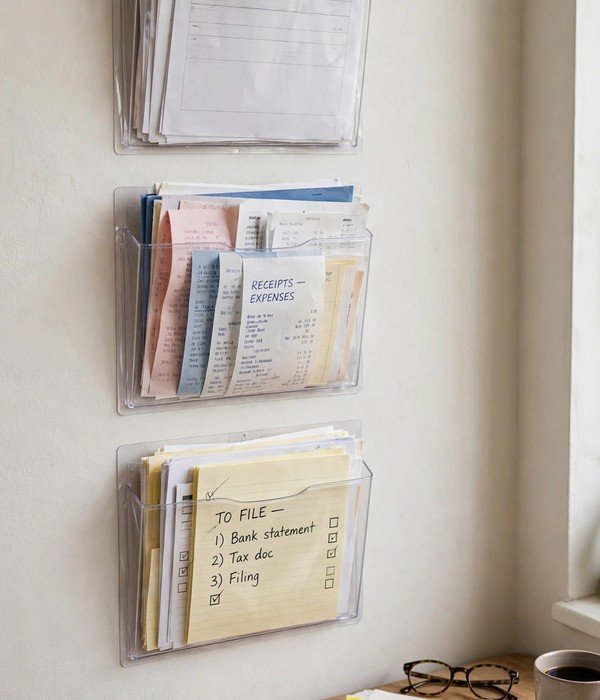
When desk space is zero, the wall takes over. Wall-mounted file pockets (3 to 5 letter-size pockets) hold active papers vertically on 2 square feet of wall, the household command center beside the desk or inside a cabinet door. Same vertical-visibility logic as the desktop sorter, but zero desk space, which in a small apartment is the whole game.
Adhesive-mounted versions are renter-safe; screw-mounted hold heavier loads.
Mini-steps:
- Mount at eye level where paper gets handled, beside the desk or on the hallway wall.
- One pocket per category: bills, school, medical, receipts, “waiting on someone.”
- The “waiting on” pocket gets reviewed weekly, it’s where rebates and returns go to be forgotten.
- Anything older than 90 days leaves the pockets for the archive box or the shredder.
41. Label Maker: The $25 Habit That Sticks
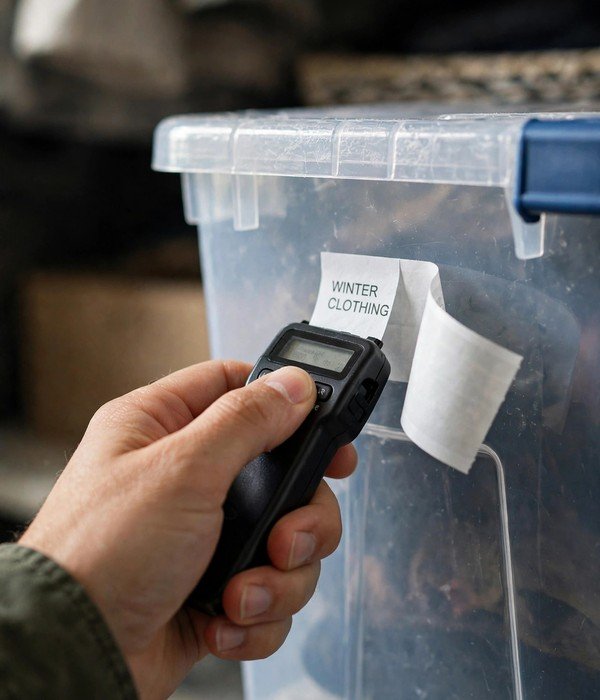
Handwritten labels fade, smudge, and look temporary, so nobody trusts them and the system erodes. A basic label maker (about $25) prints crisp, waterproof labels in seconds, and labeled bins get used correctly by everyone in the household. Legibility is authority: a printed label reads as a rule, a scribbled one reads as a suggestion.
One tape cartridge labels roughly 100 bins.
Mini-steps:
- Label the bins and zones from this guide’s other points, the maker pays for itself on day one.
- Use 1/2-inch tape for bins and shelves; 3/4-inch for anything read from more than 6 feet.
- Label cables and chargers too, the label maker ends the “whose charger” war.
- Keep it where the organizing happens, not in a drawer, friction kills the labeling habit.
42. The 5-Minute End-of-Day Reset Routine

Every system in this guide degrades without maintenance, the reset is the maintenance. Five minutes at day’s end: remotes to the caddy, coats hung, inbox cleared, trash tossed, shoes on the tray. Clutter compounds daily but clears in minutes, a 5-minute reset prevents the 2-hour weekend excavation.
Pair it with an existing habit (after dinner, before the show) so it runs on autopilot. Skipped days compound, but one reset always brings the system back, no guilt required.
Mini-steps:
- Set a phone timer for 5 minutes, the ticking timer makes it a game, not a chore.
- Work room by room, not item by item: living room surfaces, entryway, kitchen counter, desk.
- Involve the household: 5 minutes times 3 people is a 15-minute whole-house reset.
Garage, Laundry and Seasonal
The heavy-duty zone: tools, bulk storage, and the seasonal rotation that keeps holiday decor from eating the house year-round.
43. Wall Pegboard for Tools: Every Tool Visible
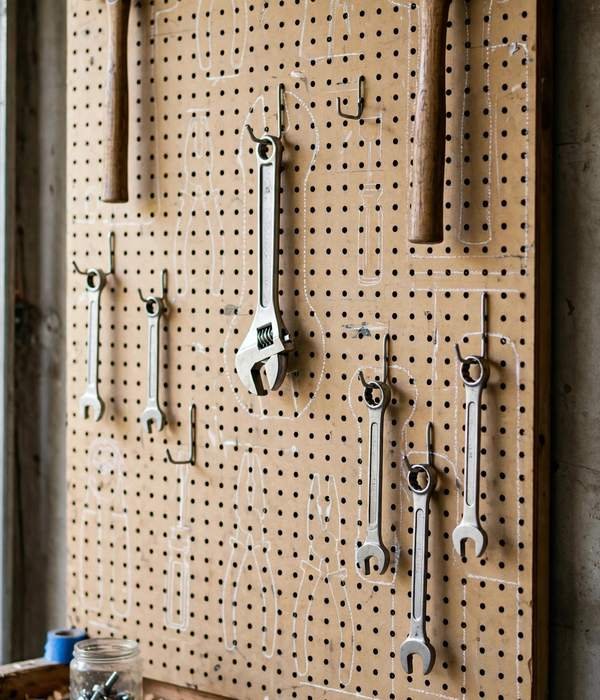
Tools in a pile get used once and lost twice. A pegboard panel (the standard 16-by-32-inch size, plus a bag of hooks) turns a garage or closet wall into a fully reconfigurable tool board, every hammer, wrench, and drill visible at eye level.
A framed panel screwed into two studs holds 20 to 30 pounds, and hooks cost pennies each. Visible tools get returned to their outlines; invisible tools get re-bought.
Tips for best results: paint the panel to match the wall and it reads as intentional, not workshop. Use thick hardboard, not thin craft-store stock, for real weight. Leave the bottom hooks for the tools you grab daily.
Mount with a 3/4-inch spacer behind so hooks engage the holes fully, and trace each tool’s outline so a missing tool is obvious at a glance.
44. Overhead Ceiling Rack: 4 by 8 Feet of Seasonal Storage
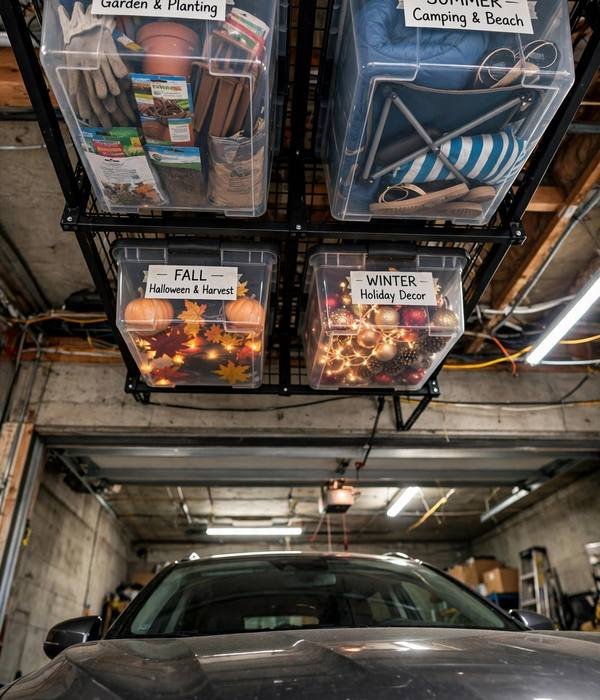
Garage floor space is for cars and projects; the ceiling is for storage. An overhead ceiling rack (the standard 4-by-8-foot platform) holds 250 to 600 pounds of seasonal bins, luggage, and holiday decor, roughly 100 cubic feet on zero floor space. Garages waste their entire upper volume, and seasonal items need “accessible twice a year” storage, not daily reach.
Tips for best results: mount into ceiling joists with the included lag bolts, never drywall anchors for a loaded rack. Keep the total under the rack’s rating with a 20 percent safety margin, and distribute weight evenly. Label every bin on the bottom face so contents are readable from the ladder.
Photograph the loaded rack once, the photo is your inventory when you’re standing in the store wondering what’s up there.
45. Clear Labeled Bins by Zone: Garage Aisles That Make Sense
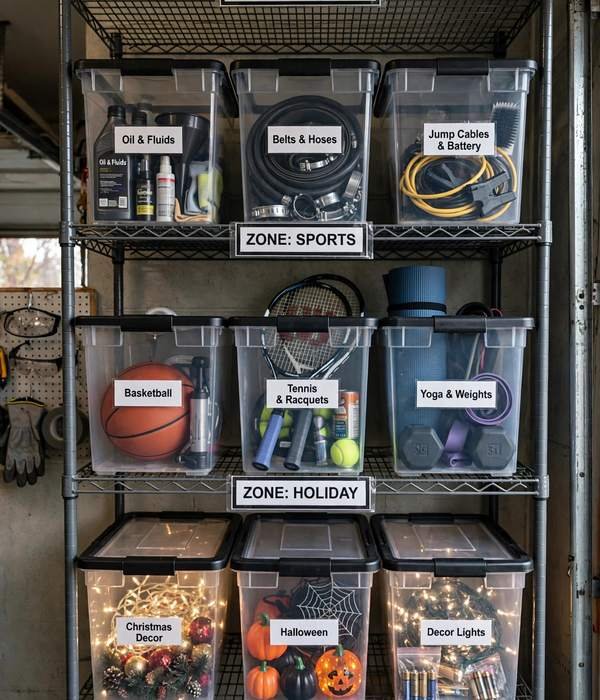
Garage bins fail when they’re sorted by “when I bought the stuff” instead of by zone. Clear 27-to-60-quart bins, grouped by zone, automotive, tools, sports, holiday, household overflow, turn the garage into aisles that make sense. Clear beats opaque here: you identify contents without opening, which matters on a high shelf.
The garage is a warehouse, and warehouses run on zones and visibility, not memory.
Tips for best results: one zone per shelving bay, with the zone name on painter’s tape at eye level. Heaviest bins on the bottom shelves, 60-quart bins of tools approach 50 pounds. Stack matching bins two high per shelf, mixed brands waste the vertical inches between them.
Keep a 36-inch aisle clear; a garage you can’t walk through is a storage unit you pay a mortgage on.
46. Fold-Down Drying Rack: 20 Feet of Drying in 2 Inches of Wall
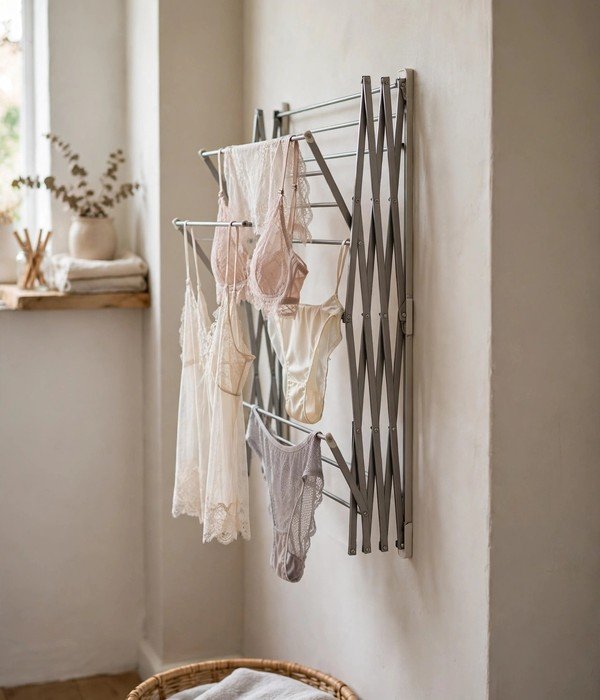
Air-dry clothes need 20 to 30 linear feet of rack, but a floor-standing rack eats a room permanently. A wall-mounted accordion drying rack gives you that full drying length when open and folds flat to 2 inches deep when closed. Drying is intermittent: the rack should exist only during the 4 hours it’s needed.
Mount it where laundry actually happens, the laundry closet, the bathroom, or inside a bedroom closet door. In rentals, the over-door version hangs on any standard door, no screws needed.
Tips for best results: mount at a height where the lowest bar clears the floor by 12 inches, clothes hang below the bars. Choose a model rated for at least 20 pounds; wet jeans are shockingly heavy. In rentals, use the over-door version instead of the screw-mounted one.
47. Rolling Laundry Sorter: 3 Bags, Zero Floor Commitment
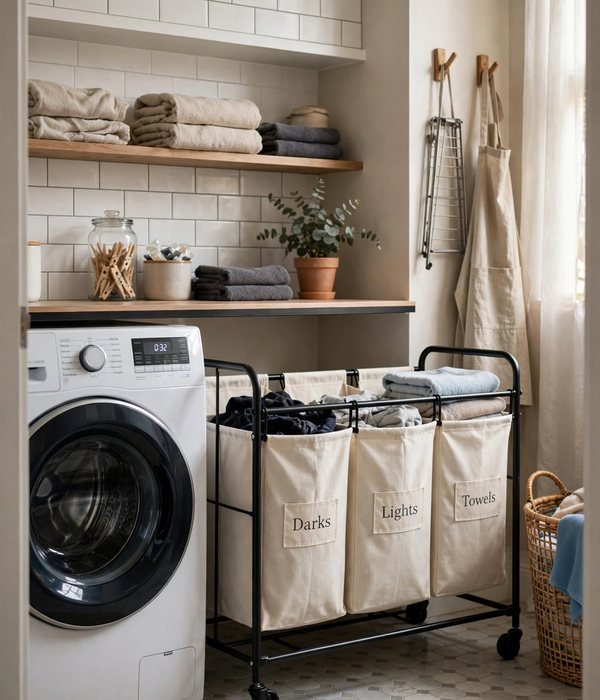
A 3-bag rolling laundry sorter is the divided hamper (point 25) grown up for the laundry room: three compartments on a wheeled frame that rolls to the machine, holds about 1.5 loads, and tucks into a 24-inch gap. It merges sorting and transport, sort at the toss, wheel the full bag to the washer.
The rolling frame is the whole point; a stationary sorter is just three hampers touching.
Tips for best results: label each bag (lights, darks, delicates), unlabeled compartments merge within a week in a shared household. Lock the wheels during loading so the frame doesn’t walk. Keep a small trash bin clipped to the frame for lint, tags, and pocket treasures.
Clip a mesh delicates bag to the frame too, so small items never ride loose in the machine.
48. Seasonal Bin Rotation: Holiday Boxes Labeled by Month
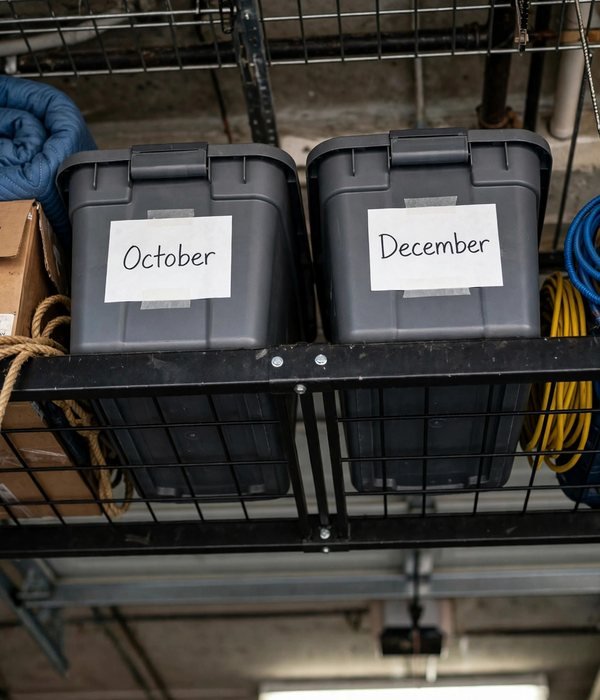
Holiday decor owns the garage year-round because it has no rotation system. Seasonal bin rotation fixes it: one labeled bin per holiday or season, stored on the overhead rack or high shelves, and only the current season’s bin ever comes down. Label each bin by month, “October” beats “Halloween” when you’re scanning shelves.
Five bins of permanent clutter become 1 bin of current decor.
Tips for best results: photograph each bin’s contents and tape the photo to the lid, next year’s decorating starts without opening five bins. Donate the decorations you skipped two years running; the rotation only works if the bins earn their space.
Keep the current season’s bin at reachable height and the rest overhead, rotation only works if the seasonal swap takes five minutes.
49. Bike Wall Hooks: Bikes Off the Floor
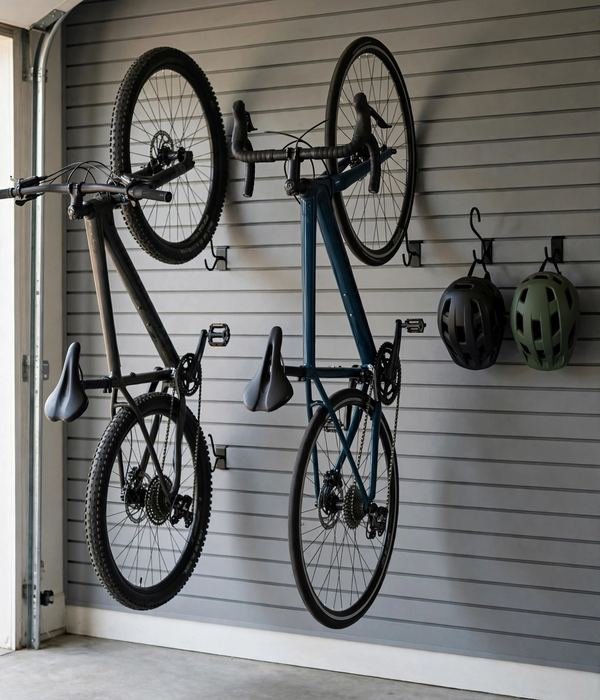
A bike on the garage floor eats 6 square feet and falls over onto the car. Wall-mounted bike hooks (rated 50 pounds per bike, a standard adult bike weighs 25 to 35 pounds) hang bikes vertically or horizontally on the wall, reclaiming the full footprint.
Bikes are light for their size and garage wall space is free: one hook per bike, screwed into a stud. Vertical-hang fits narrow walls; horizontal arms suit wide ones.
Tips for best results: screw into studs, 35 pounds of bike on drywall anchors is a wall repair waiting to happen. Hang the daily rider lowest and easiest to grab; the rarely-ridden goes highest. Rubber-coated hooks protect rims; bare metal scratches them.
Space hooks 48 inches apart so handlebars don’t tangle, and hang helmets on a second hook beside each bike.
50. Small-Parts Jar Wall: Screws and Nails in Sight
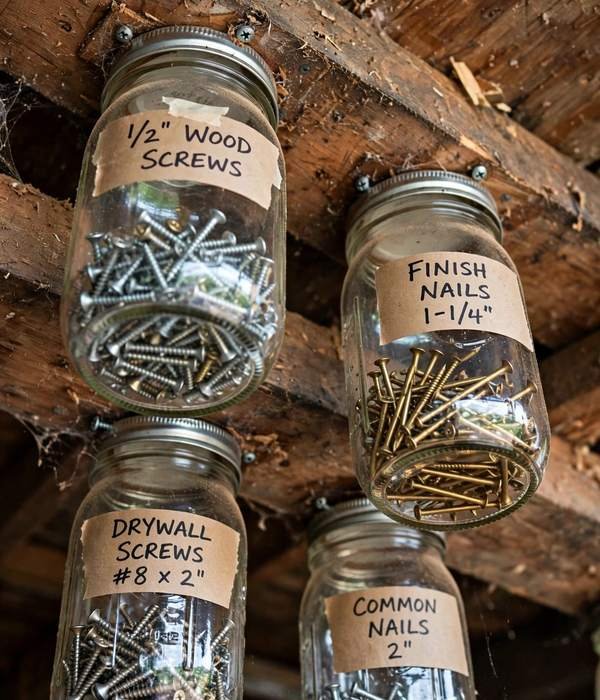
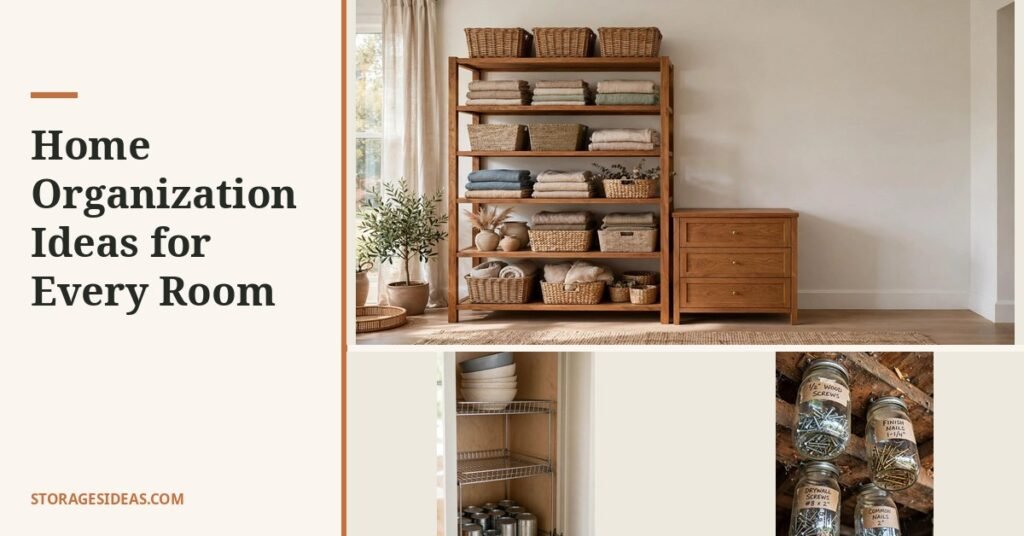
Small hardware, screws, nails, wall anchors, picture-hanging kits, vanishes into junk drawers because it has no visible home. A jar wall (mason or repurposed food jars screwed by their lids under a shelf, so each jar unscrews downward) keeps every fastener visible, sorted, and one twist away.
Small parts need transparent, single-category containers at eye level: you see the screw size without opening anything. A dozen jars under one 24-inch shelf organizes an entire collection.
Tips for best results: label each lid with the contents and size, “2-inch wood screws” beats “screws.” Sort by project type, not just fastener type: one jar of “picture hanging kit” (hooks, anchors, wire) beats three jars of components. Keep the jars you reach for most at the front of the shelf.
Conclusion
Fifty ideas, one system: declutter first, then contain, label, and maintain. If you do nothing else: the slim velvet-hanger swap (two feet of closet rod for $15), under-bed wheeled bins (8.5 cubic feet on space you’re already paying for), and the donate box with one-in-one-out (the idea that makes all the others permanent).
🏆 Start here: the donate box. It’s free, and it’s the one idea that makes every other idea stick, organizing only works on what’s left after the outflow. Put the bin in the closet tonight. 17 small apartment storage tricks
- 25 decluttering tips for beginners
- the room-by-room declutter checklist
- the 30-day declutter challenge
- how to declutter clothes without regret
- 20 dollar tree organization ideas
- 30 organization hacks for small homes
- how to declutter your kitchen in a weekend
- organizing tips for ADHD brains
Frequently Asked Questions (FAQ)
What’s the most important rule behind these home organization ideas?
Declutter before you contain, always. Containers divide space; they don’t create it, so a labeled bin of clutter is still clutter. Pull everything out of a zone, keep only what earns its space, then measure the cleared area and buy containers that fit it.
Every idea here assumes step one is done.
How do I start organizing when the whole house feels overwhelming?
Start with one zone, not one room, a single drawer, one shelf, the entryway. Finish it completely: declutter, contain, label. A finished drawer proves the system works and builds momentum; a half-done room proves nothing.
The 5-minute end-of-day reset then keeps finished zones finished while you work through the rest.
What’s the best first purchase for someone on a tight budget?
Painter’s tape and a marker, about $4. Labels are the cheapest organizing tool and make every other solution work better: labeled zones get maintained, unlabeled bins become mystery boxes. After that, a $15 box of slim velvet hangers reclaims two feet of closet rod, the highest space-per-dollar move here.
How do I keep my organized spaces from sliding back into clutter?
Two habits: one-in-one-out (every new item in means one old item out) and the 5-minute end-of-day reset. Systems don’t fail from one bad day, they fail from thirty un-reset days compounding. The reset takes five minutes with a timer; involve the household and a whole house resets in fifteen minutes.
Which of these ideas are safe for renters?
Most of them. The renter-safe core: over-door organizers, tension rods and caddies, adhesive hooks and shelves (2–16 pounds with proper curing), clip-on under-shelf baskets, rolling carts, under-bed bins, freestanding etageres and hall trees, and all the bins and labels. Where a point needs screws, the renter alternative is named in the text.
How do I organize if I share my home with people who won’t maintain it?
Lower the system’s skill requirement. Labeled bins beat open shelves, anyone can toss a thing into a labeled bin. One bin per person beats shared compartments.
Put the donate box where everyone sees it. Accept the 80/20: if the common zones stay clear and bedrooms are personal chaos, the system is working.
What’s the biggest mistake people make with storage containers?
Buying them before decluttering and measuring. The wrong-size bin wastes its gap, and a bin bought for clutter just stores clutter more expensively. Measure the cleared space first, buy containers that fit the space and the category, and label on day one.
Clear bins for high shelves and garages; matching baskets where they’ll be seen.
How often should I declutter to keep the system working?
Seasonally, four times a year, tied to the seasonal bin rotation. Each pass takes an hour: walk each zone with the donate box, pull what no longer earns its space, and check labels still match contents. Quarterly passes beat one annual purge, clutter enters one bag at a time.