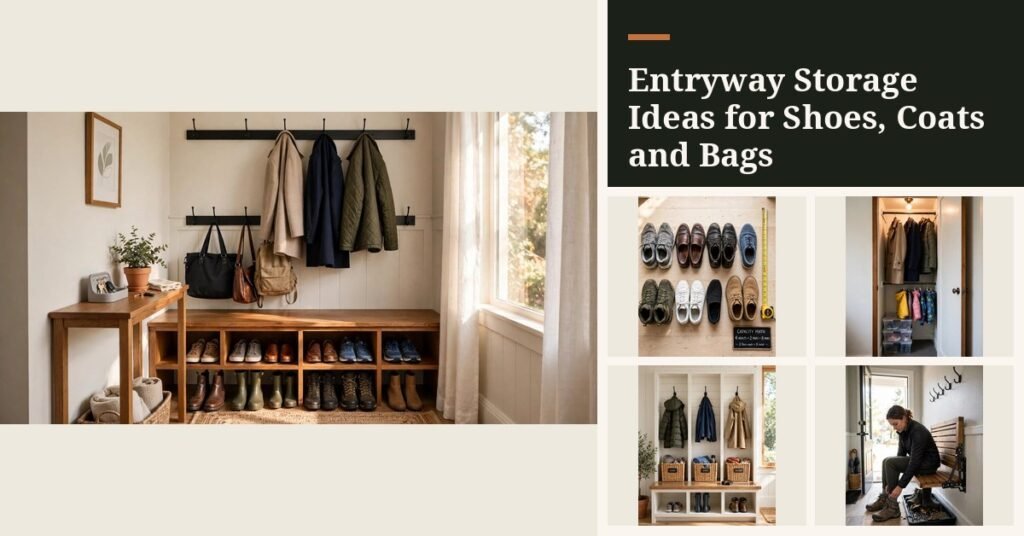
Your entryway is a 30-second zone. Shoes off, coat hung, keys down, bag parked, door closed, and if any one of those five moves doesn’t have a dedicated landing spot, it ends up on the floor, the stairs, or the nearest chair. That’s why most entryways fail: they were decorated, not engineered. The entryway storage ideas in this guide are built around that 30-second rule.
A console table with a pretty bowl is lovely, but it doesn’t solve the 14 shoes, 6 coats, and 3 backpacks a family of four drops at the door every evening.
This guide treats your entryway like the high-traffic transit hub it is.
The 25 ideas below are organized into five groups, shoes, coats, the small stuff, furniture, and the weird layouts nobody talks about, and every one is built around the 30-second rule: you should be able to arrive, unload, and be inside in half a minute without thinking.
You’ll find the shoes-per-person math that keeps floors clear, hook heights that actually fit your household, bench specs for tiny footprints, and renter-safe options throughout. Start with whichever group hurts most at your house. The full system works best as a set, but even two or three fixes transform the daily bottleneck.
Why the 30-Second Rule Beats Pretty Decor
A living room can be a little aspirational, you have time to enjoy it. An entryway gives you no such grace.
The average person crosses it in under ten seconds coming in and about twenty going out, and in that window your storage has to catch everything: footwear, outerwear, bags, keys, mail, the umbrella you grab last, the sunglasses you forget first.
If a storage piece needs a door opened, a lid lifted, or a second hand, it fails the speed test and the floor becomes the default.
The mechanism is simple. Every item needs a one-motion home: hook it, drop it, slide it, done. That’s why open hooks beat closed closets at the entryway, why a boot tray under the shoes beats a shoe cabinet with a door for daily pairs, and why a key rail at hand height beats the junk drawer every time.
The one-motion rule also explains the two-pair math: with two pairs per person out at the entryway (today’s pair + tomorrow’s or the season’s pair), you get enough rotation to let wet shoes dry without a pileup, and the numbers stay small enough to stay open and visible.
Measure first, buy second. Your door’s swing arc, usually 30 to 36 inches, is non-negotiable floor space. The wall run you actually have, minus baseboard and trim, is your true working width.
Sketch those two numbers on paper before you buy anything, and you’ll avoid the classic mistake: a 36-inch bench in a 40-inch alcove that traps the door. The ideas below all give the real dimensions, so shop with a tape measure, not a guess.
Shoe Storage
Five open, one-motion shoe systems that keep daily footwear off the floor without slowing the 30-second unload.
1. The 2-Pairs-Per-Person Rule: Your Capacity Starting Point
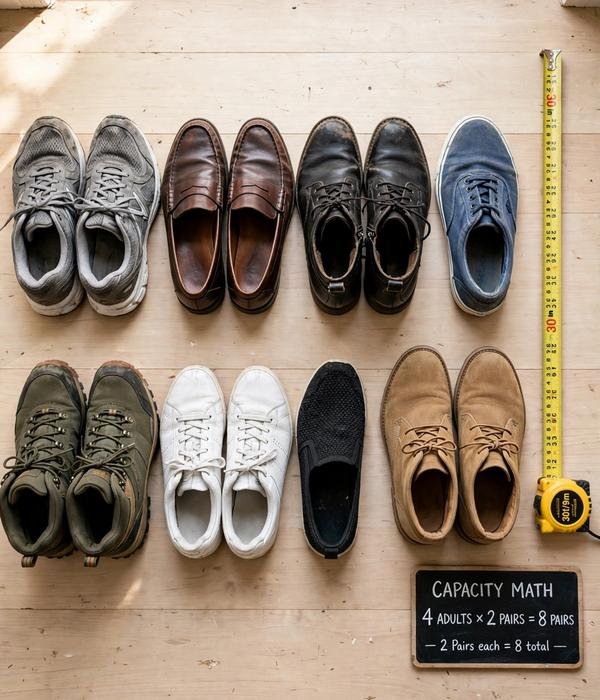
Before buying a single rack, do the math: allow two pairs of shoes per person at the entryway, the pair worn today and the backup pair (tomorrow’s shoes, seasonal boots, or the dry pair rotating out of a wet day). A family of four needs room for 8 pairs at the door, no more.
Everything beyond two pairs per person lives in bedrooms or a closet, not the entryway. This cap is the whole system: it keeps shoe storage small enough to stay open and fast, and it forces the seasonal purge that prevents the dreaded 20-shoe pile. Count your household’s real number now, because every rack width below is sized from this number.
- Count heads in the household and multiply by two, that’s your entryway shoe capacity.
- Add two spare slots for guests (one pair each for the two most common visitors).
- Walk the house and relocate every extra pair to its owner’s bedroom or the hall closet.
- Measure the widest remaining pile, that’s the rack width you actually need, usually 24 to 36 inches.
- Set a house rule: when a new pair arrives at the door, an old one moves upstairs. Enforce it monthly.
2. Stackable Two-Tier Shoe Rack: 8 Pairs in 30 Inches
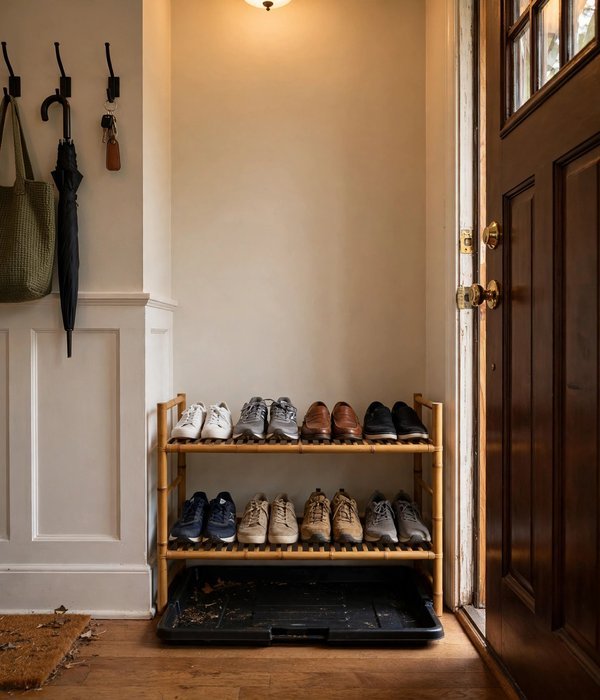
The workhorse of entryway shoe storage: a simple two-tier open rack, typically 24 to 36 inches wide, 10 to 12 inches deep, and 16 to 20 inches tall, holding 6 to 9 pairs depending on shoe size.
Open sides and no doors mean shoes go in with one slide and come out just as fast, no bending, no lids, no second motion. Choose a rack with 6 to 7 inches of clearance on the bottom tier so ankle boots fit without tipping, and look for a model whose tiers slope slightly forward so shoes stay put.
Bamboo and metal frames run $25 to $60 and wipe clean; they also ventilate, which matters when damp shoes land there daily.
- Size it from your count: 24 to 36 inches wide covers 6 to 9 pairs for most households.
- Check 6 to 7 inches of clearance on the bottom tier so ankle boots fit without tipping.
- Slide the bottom tier over a boot tray in wet months for a drip-catching combo.
- Label tiers by person with small adhesive tags if kids keep “forgetting” whose row is whose.
- Stack a second identical unit in winter when boots double the volume, modular beats one big rack.
3. Tilted Slim Shoe Cabinet: Hidden Storage, Zero Depth Drama
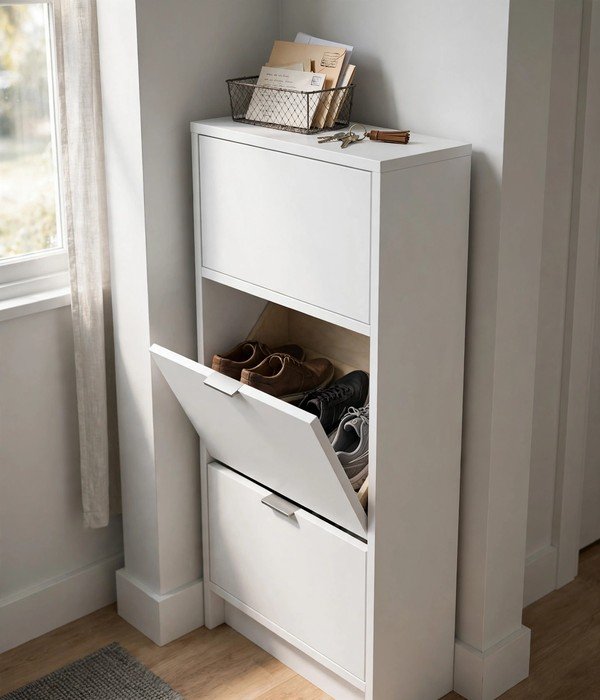
If open racks read as clutter to you, a tilted slim shoe cabinet is the closed alternative that still respects the 30-second rule. These cabinets are only 10 to 12 inches deep, half the depth of a bookcase, and the compartments tilt out, so each row opens with a fingertip pull and closes with a nudge.
A three-row unit (about 32 inches wide, 40 inches tall) holds 12 to 18 pairs of flat shoes; boots need a two-row unit or a taller compartment, so measure your tallest pair first. Ventilation slots matter: without airflow, a closed cabinet becomes a shoe-sweat locker. Price bands run $60 to $150 for sturdy MDF with metal hardware.
- Measure your tallest everyday pair and add 2 inches, that’s your minimum compartment height.
- Anchor the cabinet to the wall; tall, shallow cabinets tip when a row is pulled open.
- Keep the top surface clear as a key-and-mail landing pad, 30 to 36 inches high.
- Leave the bottom row for wet shoes only in rainy months, with a tray inside the compartment.
- Wipe the interior monthly, closed cabinets hide the dirt that open racks make obvious.
4. Boot Tray Station: Wet-Weather’s First Line of Defense
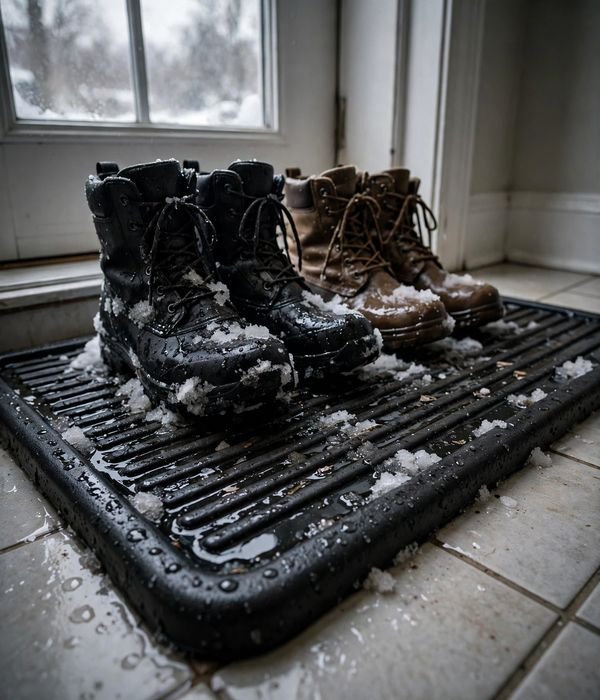
A boot tray is the cheapest entryway upgrade with the biggest daily payoff: a shallow lipped tray, typically 30 by 15 inches for two pairs, or 36 by 18 inches for a family row, that catches the water, mud, and salt your shoes drag in.
Buy one with a 1- to 2-inch raised edge so meltwater stays inside, and a ridged surface so shoes sit above the puddle and dry instead of stewing. Place it exactly where wet shoes land (usually just inside the door, at the swing arc’s far edge), not tucked where nobody will bother.
Trays run $10 to $30; rubber and heavy polypropylene survive winters, and they’re renter-safe since they need zero installation.
- Buy one with a 1- to 2-inch raised edge and a ridged surface so shoes sit above the puddle and dry.
- Size it by household: 15 inches of width per two pairs is comfortable, 30 by 15 inches for two pairs, 36 by 18 for a family row.
- Place it exactly where wet shoes land, inside the swing arc’s far edge, not tucked where nobody bothers.
- Choose dark colors or patterns; white trays show every salt stain by February.
- Shake it out weekly and hose it monthly, a tray full of grit stops working.
5. Per-Person Shoe Cubbies: The End of the Communal Pile
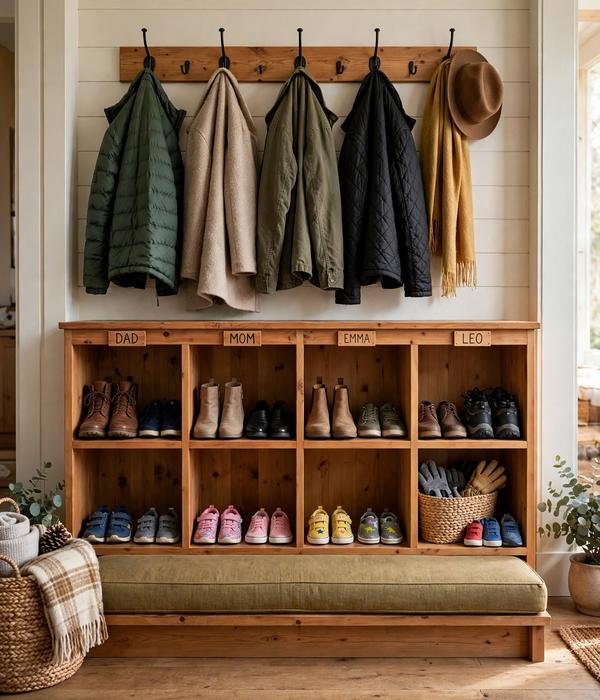
When shoes are communal, they’re nobody’s responsibility, that’s the psychology behind the pile. Per-person cubbies fix it: a small open cubby unit with one compartment per household member, each 12 to 15 inches wide, holding two pairs.
A four-person unit runs 48 to 60 inches wide if placed side by side, but stackable two-person modules (24 to 30 inches wide, 24 inches tall) fit narrow walls and hallways. Kids’ cubbies sit at the bottom so little arms reach them; adults take the top. The one-motion rule holds because there’s no door, just slide and go.
- Give each person one 12- to 15-inch-wide cubby for their two daily pairs, stackable two-person modules fit narrow walls.
- Put kids’ cubbies at the bottom so little arms reach them; adults take the top.
- Label cubbies by person or use different-color baskets to end ownership disputes.
- Use the unit’s top as each person’s bag-and-key landing zone.
- Slide a washable mat underneath, cubbies contain shoes but not the dirt.
Coats & Outerwear
Hooks, rails, and closet tricks that swallow the whole family’s outerwear in one motion, no wrestling with hangers.
6. Double-Row Wall Hook Rail: Twice the Coats, Same Wall
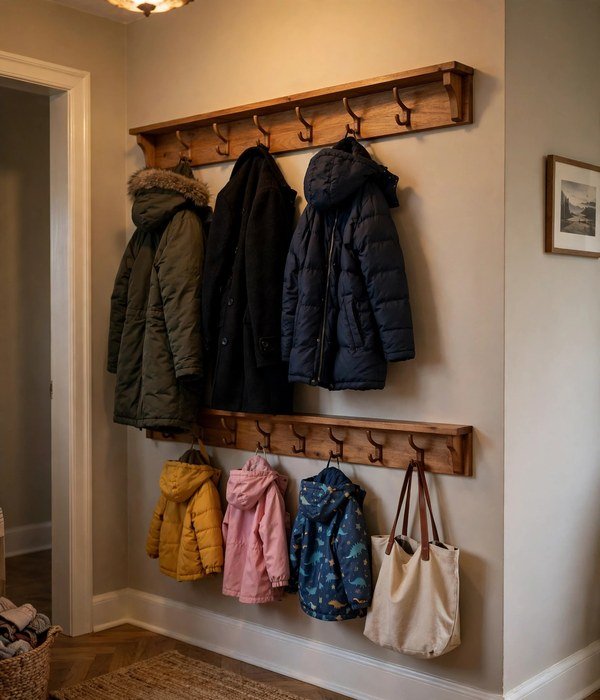
A single row of hooks fills up fast, but a double-row rail, one row at adult height (66 inches from the floor), a second row 12 to 18 inches below it, doubles capacity on the same wall length without doubling the footprint.
Adults use the upper row for coats and the lower row for bags, scarves, or kids’ jackets; households with children flip it and put the kids’ row at 40 inches. Mount the rail into studs or use toggle bolts rated for 50-plus pounds per rail, because four wet winter coats plus a backpack easily top 30 pounds.
A 36-inch rail with 6 to 8 hooks runs $20 to $50.
What you can do with it:
- Find the studs first, a hook rail full of coats pulls hard on drywall anchors alone.
- Space hooks 8 to 10 inches apart so bulky coats don’t overlap and jam.
- Run the top row at 66 inches for adults and a lower row at 40 inches for kids in a family entryway.
- Keep the bottom 24 inches of wall clear below the lower row so long coats don’t drag on the floor.
- Cap the rail at one coat plus one bag per person, overflow goes to the coat closet, not a second rail.
7. Wooden Peg Rail: The Flexible, Forgiving Classic
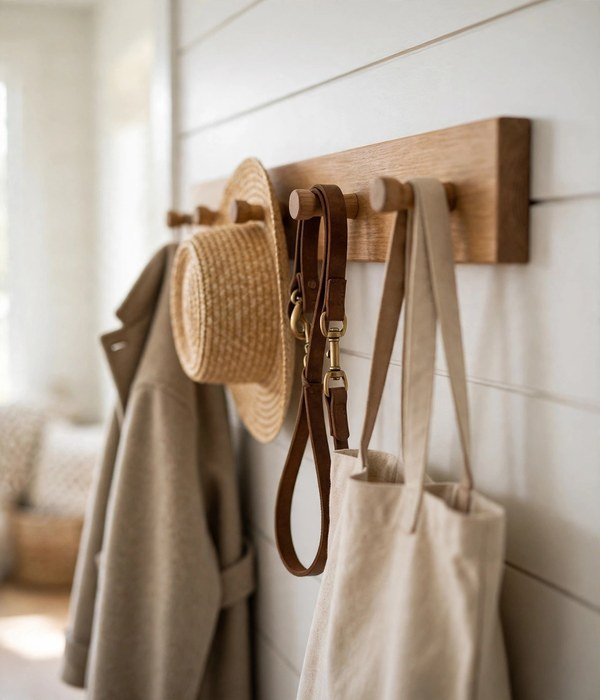
The Shaker peg rail, a simple wood strip with round pegs, is the most forgiving coat storage ever made: no hardware to fumble, nothing to break, and pegs at 6- to 8-inch intervals accept coats, hats, dog leashes, and tote bags with the same one-motion hang.
Pegs angle slightly upward so items stay put, and the whole rail is 3 to 4 inches deep, so it works on walls where a closet door or the swing arc eats into the space. A 36-inch rail with 6 pegs costs $15 to $40 unfinished; stain or paint it to match the trim.
Renters: mount it with two heavy-duty picture-hanging strips only if the load stays light (hats and scarves, not winter coats), otherwise use proper anchors and patch at move-out.
What you can do with it:
- Run a peg rail the full length of a hallway wall to turn dead space into coat storage.
- Dedicate the end pegs to the daily grab bag: leash, keys, reusable shopping bags.
- Hang a small basket from one peg for sunglasses, gloves, and the mail you keep forgetting.
- Pair it with the boot tray below for a complete no-furniture entryway kit.
- In a kid-height rail at 40 inches, little ones can hang their own coats, independence unlocked.
8. Rolling Garment Rack: A Closet Where There Isn’t One
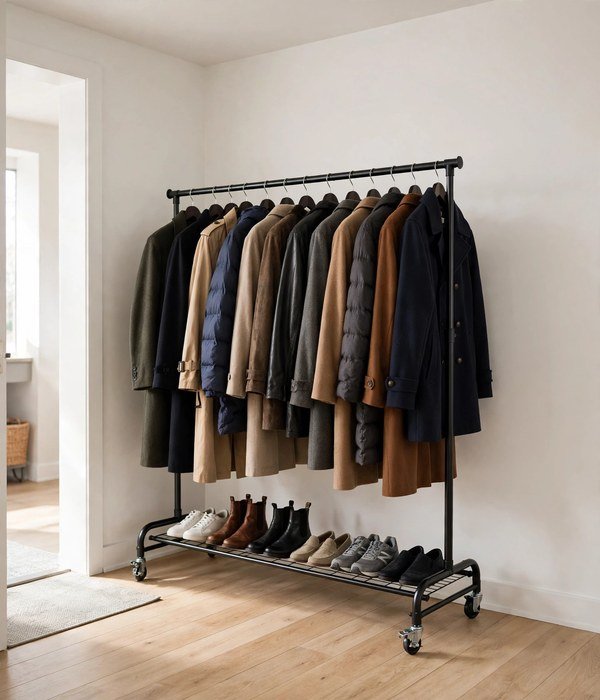
No coat closet? A rolling garment rack is a real closet on wheels: a single-rail steel rack, 36 to 48 inches wide and 60 to 65 inches tall, holds 10 to 15 coats on hangers and rolls wherever the wall space is.
Choose one with a lower shelf or shoe rack built in and locking casters, unlocked casters drift across hard floors every time the door slams. Weight rating matters: look for 100-plus pounds capacity so winter coats don’t bow the rail. Prices run $30 to $70.
The one-motion rule suffers slightly (hangers vs. hooks), so reserve the rack for the second tier of coats, guests’ jackets, seasonal overflow, and keep daily coats on hooks.
Where it works best:
- In an entryway with a blank wall but no closet: the rack becomes the closet.
- In a studio or open-plan home where the “entryway” is just a corner by the door.
- For guest overflow during holidays, roll it out for the party, roll it away after.
- Paired with a shoe rack underneath for a full self-contained drop zone.
- Avoid placing it in the door’s swing arc; 36 inches of clearance in front is the minimum.
9. Coat Closet Double-Hang: Twice the Rods, Same Closet
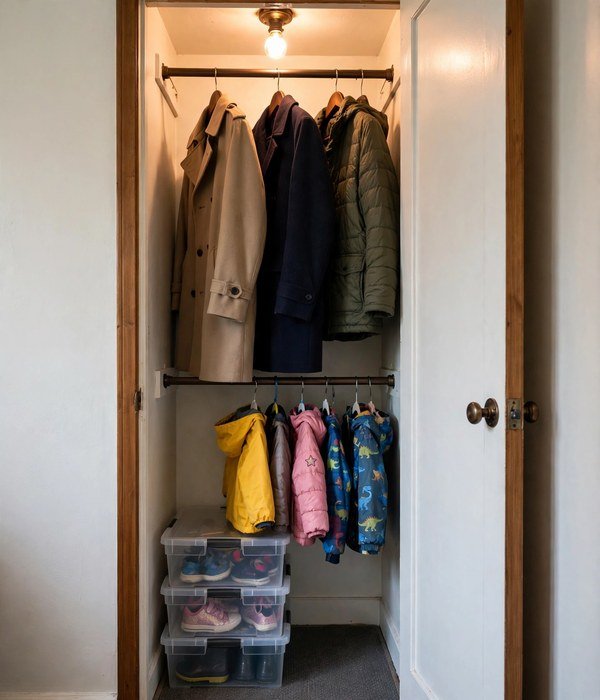
If you have a coat closet, you’re probably using half of it. A double-hang conversion, adding a second rod 40 inches below the top rod, doubles hanging capacity in the same footprint. The top rod at 66 inches holds adult coats; the lower rod at 40 inches takes kids’ jackets, short coats, and bags on hooks.
Add a tension rod ($8 to $15, no tools, renter-safe) instead of drilling, and slide a narrow shoe organizer or stackable bins on the closet floor for the footwear overflow.
While you’re in there: move off-season coats to a bedroom closet and keep the entryway closet to current-season only, the two-pair shoe rule has a coat equivalent, and it’s one coat per person per season at the door.
What you can do with it:
- Check the closet’s interior height first, you need at least 80 inches for a comfortable double-hang.
- Set a tension rod at 40 inches for the lower row (renter-safe), or screw in brackets for a permanent fix.
- Hang daily coats on the top rod and kids’ jackets, short coats, and bags below.
- Slide a 24-inch-wide stackable shoe unit or two bins onto the floor beneath the lower rod.
- Purge seasonally: off-season coats move to bedrooms so the entryway closet stays current-season only.
10. Over-Door Hook Rack: Storage on the Back of the Door
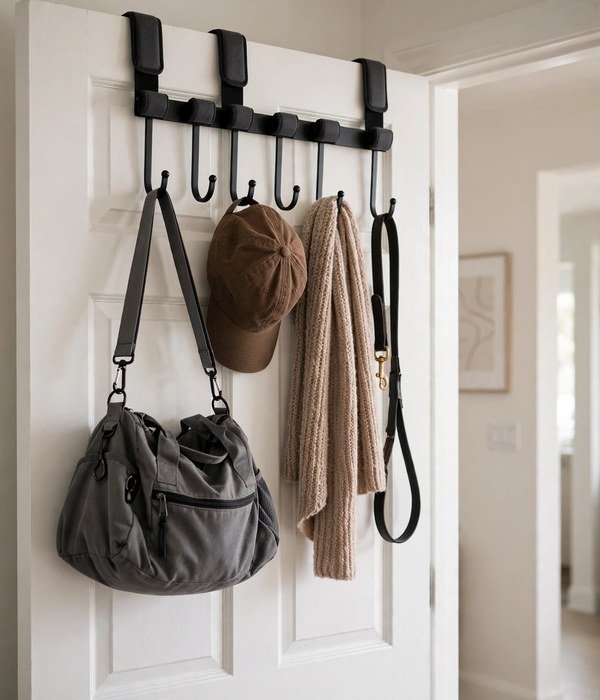
The back of the entryway closet door, or the front door itself, is free real estate: an over-door hook rack with 5 to 8 hooks turns it into instant coat, bag, and hat storage.
Buy one with flat, padded brackets that fit standard 1⅜- to 1¾-inch interior doors without scratching; check your door’s thickness first, because a rack made for a 1⅜-inch door wobbles on a 1¾-inch one. Capacity runs 5 hooks for light items (hats, scarves, leashes) to 8 heavy-duty hooks for coats, don’t mix them, or the light items get buried.
Prices run $15 to $35, installation is zero tools, and it’s fully renter-safe.
What you can do with it:
- Hang tomorrow’s outfit or the gym bag the night before for a grab-and-go morning.
- Use it for guest coats during gatherings, instant extra capacity, zero footprint.
- Keep the dog leash and poop-bag holder on the bottom hook for the last-second grab.
- In small apartments, this can be the entire coat system: no wall holes, no furniture.
- Check that the door still closes fully, thick brackets can stop a door from latching.
Bags, Keys & Small Things
The daily-carry layer: keys, wallets, mail, sunglasses, and bags get their own one-motion homes so they stop vanishing.
11. Key Hook Board with Mail Slot: The Launch Pad
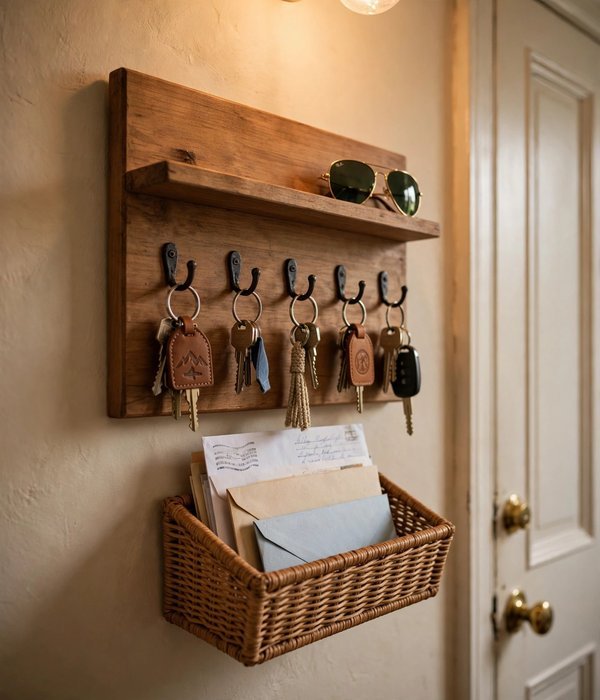
Lost keys are an entryway storage failure, not a memory failure. A key hook board, 12 to 18 inches wide with 4 to 6 hooks, mounted at 55 to 60 inches (reachable, visible), gives every set of keys a one-motion home.
The upgrade that makes it a system: a small mail slot or tray mounted directly below or beside it, so keys, wallet, and today’s mail land in the same 2-square-foot zone every evening. Mount it on the wall right beside the door you actually use, not the decorative one.
Boards run $15 to $40; choose one with a tiny shelf on top for sunglasses and the lip balm that lives in no known location.
Tips for best results:
- Mount it within one step of the door you actually use, distance kills the habit.
- Assign one hook per person plus one spare for guests and the spare set.
- Put the mail tray directly under the keys so the two arrivals merge into one motion.
- Keep a small bowl on the shelf for the wallet, transit card, and earbuds.
Watch out: empty the mail tray weekly into the real filing spot, a launch pad is not a filing cabinet, and a full tray trains everyone to ignore it.
12. Wall-Mounted Bag Hooks and Shelf: Bags Off the Floor
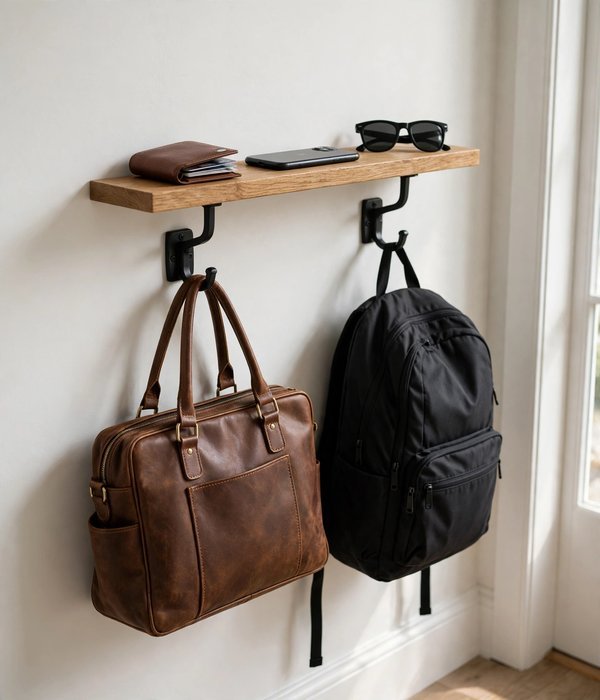
Bags are the entryway’s silent clutter, too big for a hook board, too in-the-way for the floor. The fix is a dedicated bag zone: two to three heavy-duty hooks (rated 25 pounds each for loaded work bags and backpacks) mounted at 48 to 60 inches, with a narrow shelf above at 66 inches for the wallet-phone-sunglasses trio.
The shelf keeps small items visible so they don’t get buried inside the bag, and the hooks keep bag bottoms off dirty floors. A hook-and-shelf combo unit 24 inches wide runs $25 to $55; or mount separate pieces to fit an odd wall. Keep it to one bag per person, the second bag lives in the bedroom.
Tips for best results:
- Hang the daily work bag or backpack at shoulder height for a true grab-and-go.
- Use the shelf above for the phone, keys, and sunglasses staging area.
- Add a lower hook at 40 inches for kids’ backpacks, they can manage their own.
- Mount a small mirror beside it for the last-look check on the way out.
Watch out: cap the zone at one bag per person, the second bag lives in the bedroom, or this becomes the bag graveyard.
13. Slim Console with Drawer Organizer: The Landing Pad, Upgraded
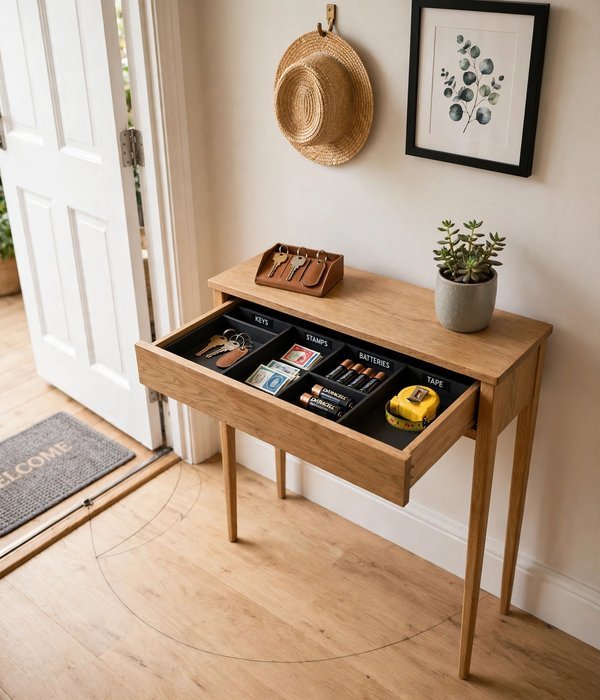
A slim console table, 10 to 14 inches deep, 30 to 48 inches wide, is the entryway’s landing pad, but the top alone just becomes a clutter magnet.
The upgrade is what happens inside: a single shallow drawer fitted with a $10 to $20 organizer tray, divided into slots for keys, spare batteries, the tape measure, stamps, and the mystery items that otherwise colonize the surface. Keep the tabletop to three zones only: a tray for keys and wallet, a small plant or photo, and nothing else.
If the console is deeper than 14 inches, it starts eating the swing arc, measure the door’s 30- to 36-inch clearance first.
Tips for best results:
- Check the door’s swing arc before buying, the console must sit fully outside the 30- to 36-inch clearance.
- Stay at 10 to 14 inches deep; deeper consoles turn into junk shelves.
- Fit the drawer with a divided organizer tray on day one, not “later.”
- Give the tabletop three zones only: keys/wallet tray, one decorative item, and empty space.
Watch out: declutter the drawer quarterly, landing pads accrete clutter by nature, and a junk drawer by the front door sets the tone for the whole house.
14. Wall Pocket Organizer for Mail, Masks, and Sunglasses
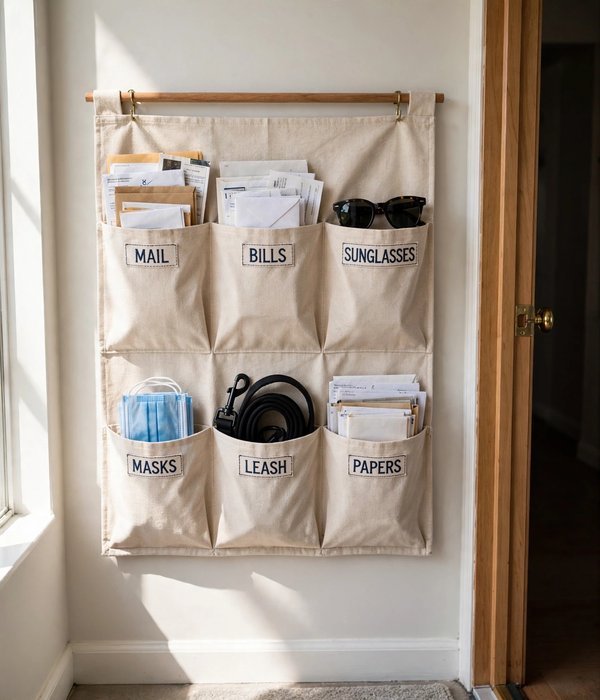
Some small things need sorting, not just a bowl. A wall-mounted pocket organizer, fabric, wood, or acrylic with 4 to 6 pockets, about 16 by 24 inches, gives mail, sunglasses, reusable masks, the dog’s spare leash, and outgoing letters each their own slot.
Hang it at 55 to 65 inches so pockets are visible and reachable; label the pockets if the household needs the nudge. Fabric organizers run $12 to $25 and hang from a single hook (renter-friendly); wood and acrylic versions need two screws but look sharper.
The rule: pockets are for in-transit items only, anything that sits for a week moves to its real home.
Tips for best results:
- Hang it at 55 to 65 inches so every pocket is visible and reachable.
- Label the pockets if the household needs the nudge, “bills,” “action,” “outgoing.”
- Give sunglasses and reading glasses their own pocket so they stop living on random surfaces.
- Keep an “outgoing” pocket for letters, library books, and returns by the door.
Watch out: pockets are for in-transit items only, anything that sits for a week moves to its real home, or the organizer becomes wallpaper.
15. Entryway Charging Drawer: Phones Land Here, Not Everywhere
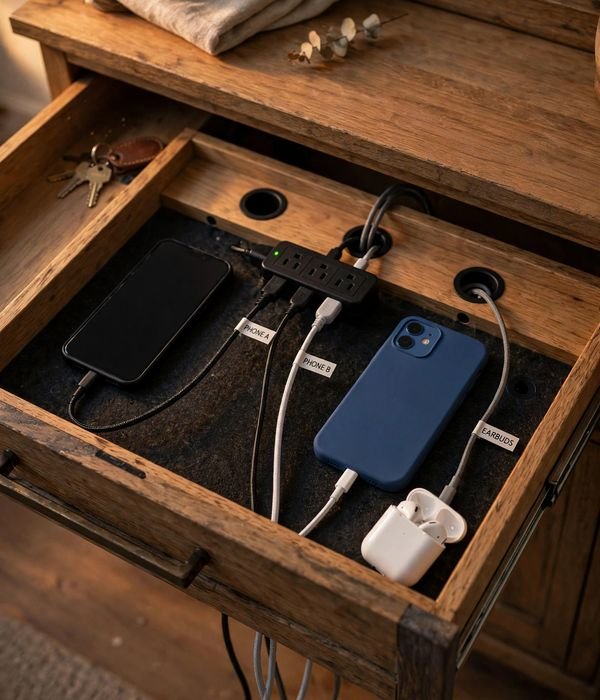
The modern entryway has a new clutter category: charging cables snaking across the console. A charging drawer, a slim console drawer fitted with a power strip and cable pass-throughs, or a dedicated charging station box ($25 to $50) on the console top, gives every household phone and earbud case one home at the door.
Phones charge overnight at the entryway instead of migrating to bedrooms, and leave with you in the morning in one motion. Use a surge-protected strip, keep the drawer ventilated, and add short 1-foot cables so there’s no spaghetti. Renter-safe if you use a station box instead of drilling the drawer.
Tips for best results:
- Make it the rule: every device docks at the door every night, no more nightly phone hunt.
- Keep one labeled short cable per person so nobody unplugs anyone else’s phone.
- Add a small tray on top for the watch and earbuds that don’t fit the drawer.
- Use a surge-protected strip and keep the drawer ventilated.
Watch out: if the drawer gets warm, switch to an open station box, heat plus batteries is a combination you don’t negotiate with.
Benches & Furniture
Seating plus storage in one footprint: the furniture pieces that let you sit to put shoes on while swallowing gear below.
16. Lift-Top Storage Bench: Sit, Lift, Stow
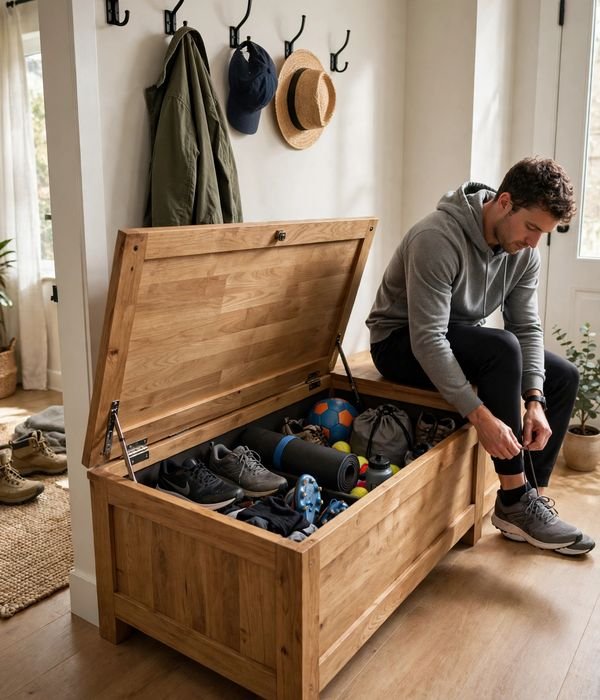
The lift-top storage bench is the entryway’s best two-for-one: a bench seat at the standard 17- to 19-inch sitting height, with the entire interior, typically 36 to 48 inches wide, 14 to 18 inches deep, 14 inches tall inside, available for shoes, bags, sports gear, and the seasonal overflow.
The hinged top lifts with one hand, so stowing is nearly one-motion, and the seat means nobody sits on the floor to tie shoes. Look for a bench with a soft-close hinge (no slammed fingers, no noise) and ventilation gaps if shoes live inside.
Prices run $80 to $200 for solid wood or sturdy MDF; weight capacity should be 250-plus pounds for two adults sitting.
- Measure your wall run and subtract the door’s swing arc, the bench must clear both.
- Choose seat height 17 to 19 inches; lower benches strain knees, higher ones look odd.
- Check the hinge: soft-close and a stay-open feature are worth paying for.
- Line the interior with a washable mat if shoes go inside, interiors get grimy fast.
- Keep daily shoes on an open rack and use the bench interior for overflow and gear, not the daily rotation.
17. Cubby Bench: A Locker Room at Your Door
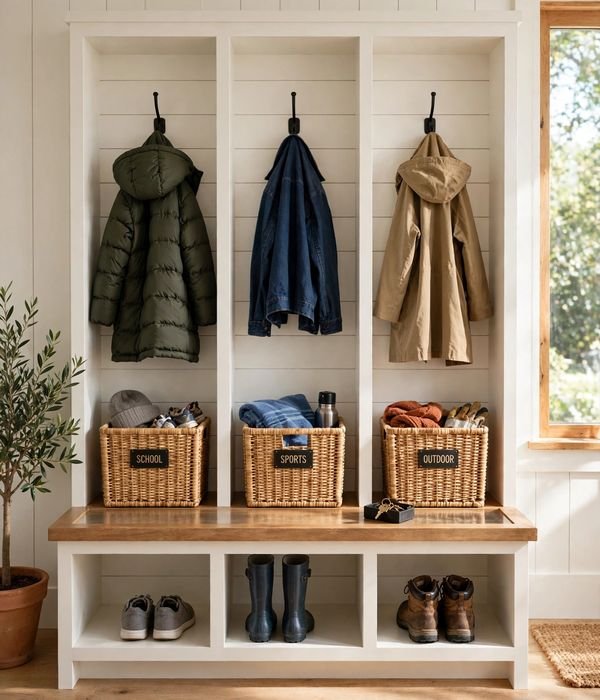
A cubby bench takes the per-person system and builds it into furniture: an open bench (seat height 17 to 19 inches) with 2 to 4 cubbies below, each 12 to 15 inches wide, one column per household member.
Each person gets a seat-height perch plus their own cubby for shoes and their own hooks above, and suddenly the entryway runs like a tiny locker room. A 48-inch three-cubby bench fits most walls; add a second unit or stack for larger families. Prices run $100 to $250.
The open cubbies keep the one-motion rule intact, no doors, while the bench top doubles as the bag-and-key landing zone.
- Assign one cubby column per person: hooks above, cubby below, tray on the seat top.
- Slide labeled fabric bins into cubbies for gloves, hats, and the stuff that looks messy loose.
- Keep the bench top two-thirds clear, it’s a landing zone, not a shelf.
- Put kids’ columns at the end nearest the door so their chaos gets contained first.
- Anchor tall units to the wall; a bench kids climb on must never tip.
18. Narrow Hall Console with Baskets: Storage in 12 Inches
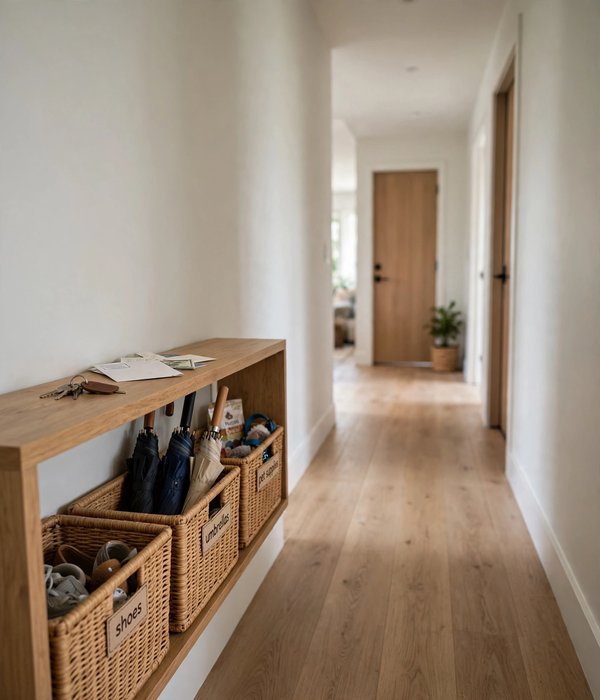
When the entryway is a hallway, not a room, a narrow hall console, 10 to 12 inches deep, 36 to 60 inches long, with two or three slide-in baskets underneath turns a pass-through into storage.
The baskets (about 12 by 12 by 10 inches each) hold shoes, umbrellas, pet supplies, or the reusable-bag collection; the console top stays a clean landing pad for keys and mail.
Keep the total depth under 12 inches if the hallway is 36 inches wide, building code wants 36 inches of clear passage, and a 14-inch console in a 36-inch hall leaves an awkward 22-inch squeeze. Console plus baskets runs $70 to $160.
- Measure hallway width first, you need 36 inches of clear walkway after the console.
- Choose 10 to 12 inches deep, never more, in a true hallway entryway.
- Size baskets to the console’s openings before buying, “standard” varies by brand.
- Label baskets by category (shoes, umbrellas, pet, bags) so the system survives guests.
- Keep the console top minimal: tray, one decorative item, done.
19. Tall Shallow Entryway Cabinet: A Closet in 14 Inches
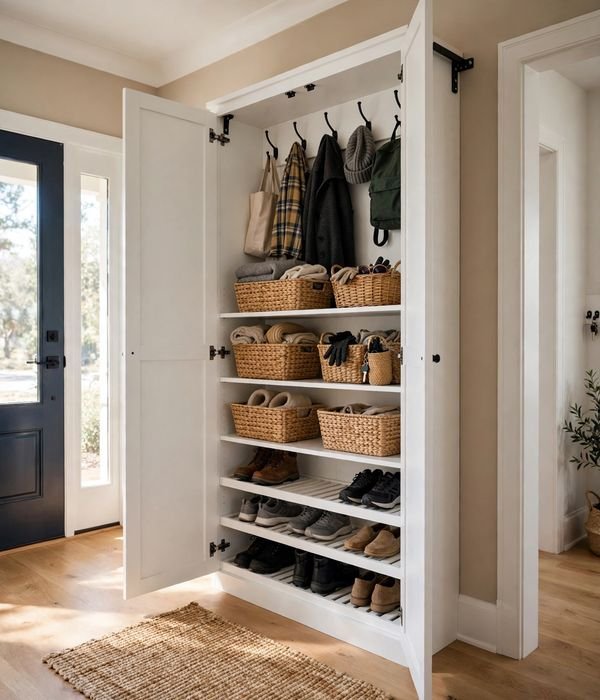
For maximum hidden storage in minimum depth, a tall shallow cabinet, 12 to 14 inches deep, 24 to 36 inches wide, 60 to 72 inches tall, works like a coat closet that needs no closet.
Inside: hooks or a short rod up top for coats, adjustable shelves in the middle for bags and baskets, and shoe shelves or a boot tray at the bottom. Because it’s shallow, everything stays visible and reachable, no lost items in the dark back.
Anchor it to the wall (tall and shallow tips easily), and keep the doors’ swing in mind: in a tight entryway, sliding or bifold-style doors beat swing doors. Prices run $120 to $300.
- Measure your blank wall: 24 to 36 inches wide and 60 to 72 inches tall is the sweet spot.
- Set it up zoned: coats on hooks or a short rod up top, bags and baskets in the middle, shoes below.
- Use adjustable shelves to fit tall boots on one side and folded items on the other.
- Mount hooks inside the doors for scarves, leashes, and the small stuff.
- Anchor it to the wall, tall and shallow tips easily, and mind the doors’ swing in tight spaces.
20. Coat Tree with Seat: Vertical Storage for Tight Corners
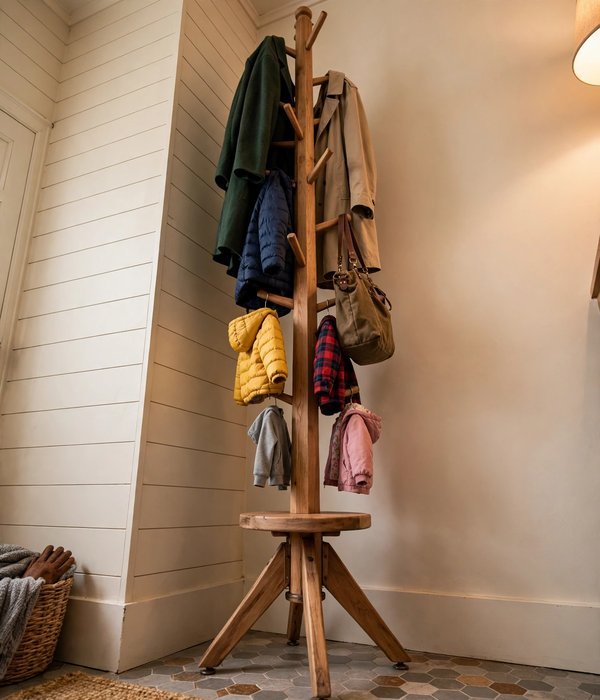
A coat tree with a built-in seat solves the corner problem: it stands on about 20 square inches of floor (24-inch-diameter footprint), rises 70-plus inches with 8 to 12 staggered hooks, and includes a small seat for shoe-tying.
It’s the highest hook density per square foot of anything in this guide, ideal for corners, beside-door dead space, and apartments where wall mounting is restricted. Choose one with a weighted or wide tripod base rated for 30-plus pounds of coats; top-heavy trees with narrow bases tip. Prices run $40 to $90.
The seat is small, so this suits one person tying shoes at a time, pair it with a wall bench if the household is large.
- Pick a corner or the dead space beside the door with a 24-inch footprint to spare.
- Choose a weighted or wide tripod base rated for 30-plus pounds of coats, narrow bases tip.
- Assign hooks by height: adults high, kids low, bags in the middle.
- Keep the base clear of the door’s swing arc.
- Limit it to one coat per hook, overloaded trees lean, then fall.
Small & Awkward Entryways
No foyer? Door opens into the living room? These five ideas make storage work when the architecture doesn’t cooperate.
21. Map the Swing Arc First: The 30-Inch Rule
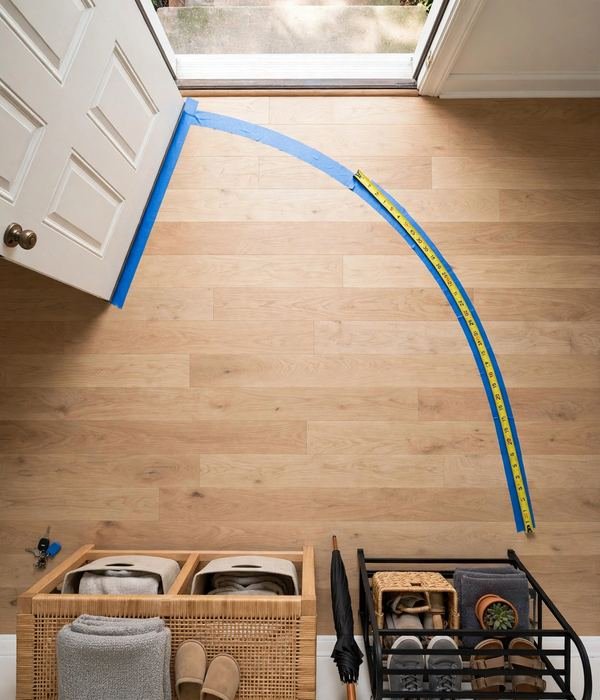
Every awkward entryway fix starts with the same measurement: your door’s swing arc, the quarter-circle the door sweeps as it opens, typically 30 to 36 inches from the hinge. Nothing with a footprint goes inside that arc, ever.
Open the door fully, mark the arc’s edge on the floor with painter’s tape, and design your storage in the remaining space: usually a strip along one wall, a corner, or the wall opposite the hinges.
This one tape line prevents the two classic mistakes, the bench the door bangs into and the shoe rack that traps you behind the door. It takes five minutes, costs nothing, and every idea below assumes you’ve done it.
What you can do with it:
- Open the door fully and mark the swing arc’s edge with painter’s tape.
- Measure the wall runs outside the arc, that’s your true storage real estate.
- Note the hinge side: storage fits best on the wall opposite the hinges.
- Check the arc at the closet door too, if you have an entryway closet.
- Leave the tape down for a week while you test furniture placement before buying.
22. The Wall-Only Entryway: Zero Floor Footprint
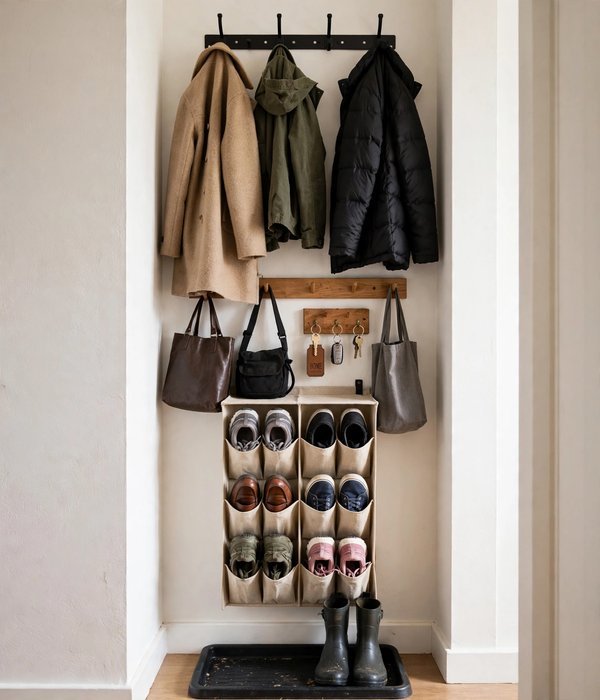
When floor space is zero, a door that opens straight into the living room, a 24-inch-wide strip of wall, go fully vertical: a hook rail at 66 inches for coats, a second row or peg rail at 40 inches for bags and kids’ items, a key board at 58 inches, and a wall-mounted shoe rack or hanging shoe organizer that holds footwear off the floor entirely.
Nothing touches the ground except a single 30-by-15-inch boot tray. Total floor footprint: under 3 square feet. Every piece mounts with screws or heavy-duty adhesive strips (renter-safe for light loads), and the whole system costs $40 to $100.
The one-motion rule survives because everything is a hook, a pocket, or a drop, no doors, no lids.
What you can do with it:
- Build the full system on one 36-inch wall section beside the door.
- Use a hanging shoe organizer (the fabric kind) on the wall for 6 to 8 pairs, off the floor.
- Add a fold-down wall shelf as a part-time landing pad, up when needed, flat when not.
- Keep a slim umbrella stand in the one floor spot the arc allows.
- Everything adhesive-mounted stays renter-safe; switch to screws only for heavy coat loads.
23. Mirror Plus Hooks: Storage That Doubles the Space
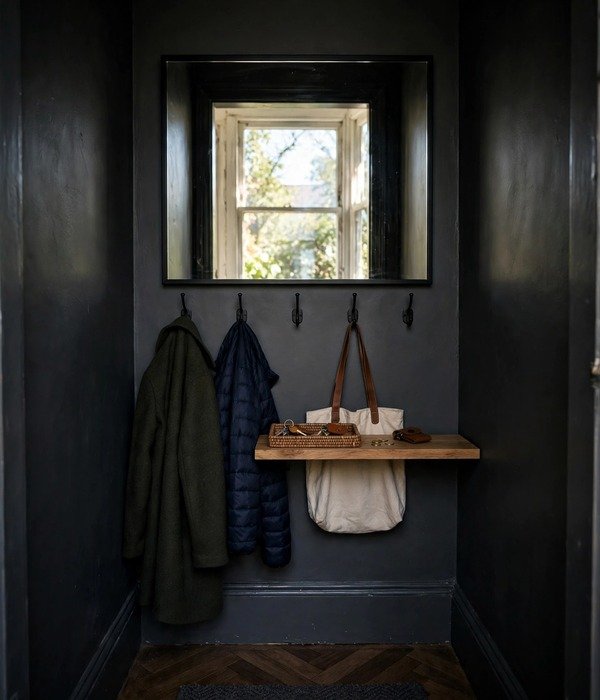
A mirror above a hook rail does double duty: it’s the last-look check on the way out, and it visually doubles a cramped entryway by reflecting light and space.
Mount a 24- by 36-inch mirror at eye level (center around 60 to 65 inches) with a row of 4 to 6 hooks directly beneath it at 48 to 55 inches, coats and bags hang below the sightline, the mirror stays clear. The combo needs about 30 inches of wall width and zero floor space.
Mirror plus hook rail runs $40 to $90; use a shatter-resistant acrylic mirror in households with kids or in rentals where a falling mirror is a liability. Hang the mirror first, then set hook height so hanging items don’t cover the glass.
What you can do with it:
- Bounce light from the nearest window or fixture to brighten a dark entryway corner.
- Keep the mirror clear of hanging items, hooks go below, not across, the glass.
- Add a narrow floating shelf under the hooks for the key tray and sunglasses.
- In a hallway entryway, a full-length mirror on the opposite wall doubles the corridor visually.
- Clean the mirror monthly, entryway mirrors collect dust and fingerprints fast.
24. Under-Stair and Alcove Conversion: Found Storage
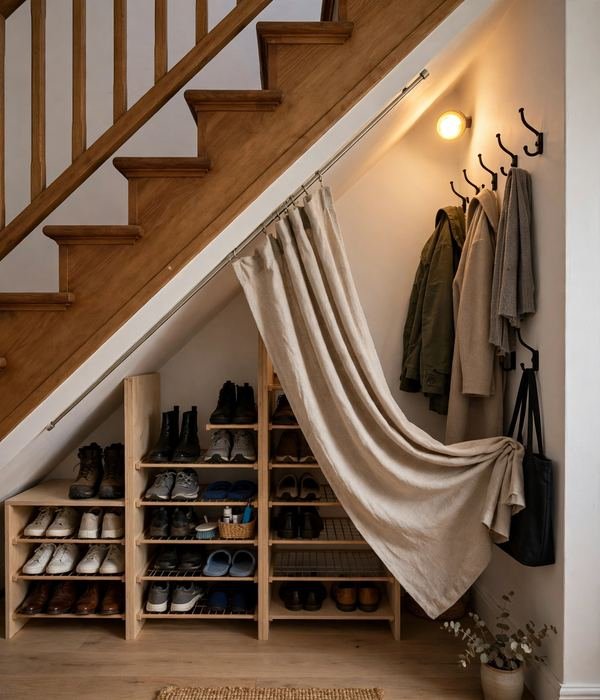
If your door opens near a staircase or a shallow alcove, you have found storage: the under-stair triangle fits a custom or modular shoe rack (low end) plus coat hooks on the tall end, and a 24-inch-deep alcove swallows a narrow bench with baskets.
Measure the triangle’s heights at 12-inch intervals from the low end, shoes need 6 to 8 inches of clearance, boots need 14 to 16, and build the rack to the slope instead of fighting it. Alcoves take a tension-rod curtain ($10 to $20) to hide the whole system when guests arrive.
This is the highest-capacity awkward-entryway fix: a standard under-stair run holds 12-plus pairs of shoes and 6 to 8 coats in space that was literally empty.
What you can do with it:
- Measure the under-stair heights every 12 inches from the low end to map the slope.
- Put shoe storage in the low zone (6- to 8-inch clearance) and hooks in the tall zone.
- Use modular stackable units so the layout follows the staircase angle.
- Add a motion-sensor puck light ($8 to $15), under-stair zones are dark by nature.
- Hide it all with a tension-rod curtain for instant tidiness when guests come.
25. Folding Wall Bench: A Seat That Disappears
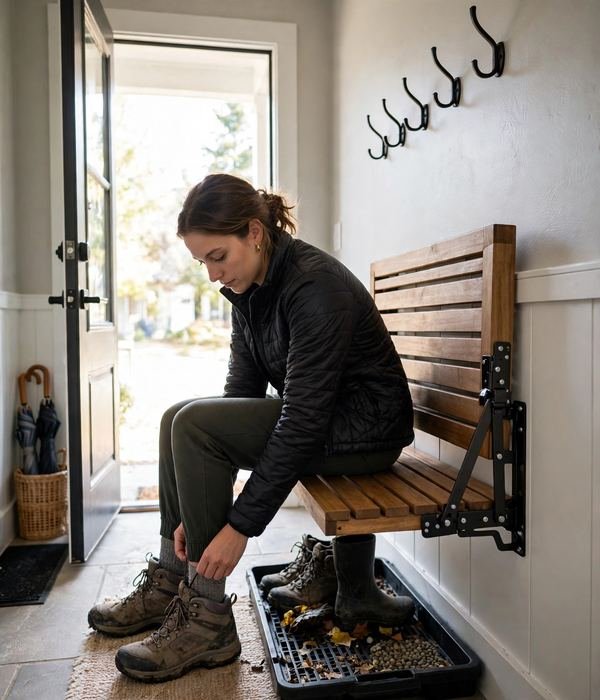
The final awkward-entryway trick: a folding wall-mounted bench that seats you for shoe-tying, then folds flat against the wall when the 30-second rush is over. Mounted at 17 to 19 inches high with brackets rated for 250-plus pounds, it projects 12 to 14 inches when down and just 3 to 4 inches when folded.
Pair it with the wall-only hook system above and a boot tray below, and you have a complete entryway, seat, coats, shoes, keys, in a wall strip 36 inches wide with essentially zero permanent floor footprint.
Folding benches run $60 to $150; installation needs studs or serious toggle bolts, so this one is for homeowners or long-term renters comfortable patching two holes later.
What you can do with it:
- Fold it up after the morning rush to reclaim the full walkway.
- Mount it on the wall opposite the door hinges, outside the swing arc.
- Pair with hooks above and a tray below for the complete zero-footprint kit.
- Choose a model with a locking mechanism, a bench that folds mid-sit is a bad day.
- If wall mounting is off-limits, a folding step stool stored in a 12-inch gap works as the renter version.
Conclusion
Twenty-five ideas is a lot, but the entryway only needs you to act on the 30-second rule: every daily item gets a one-motion home, and nothing with a footprint sits inside the door’s swing arc. If your floor is currently a shoe graveyard, start with the capacity math and a rack that fits it.
If coats are the crisis, the double-row hook rail solves it this weekend. Measure the arc, mount at the right heights, and cap every zone at its number, two pairs of shoes, one coat, one bag per person.
Best first fix: the double-row wall hook rail (point 6) with a boot tray beneath it.
For under $60 and one afternoon with a drill, you get the highest-capacity, fastest system in this guide: coats and bags on hooks at the right heights, wet shoes caught below, zero floor furniture, and a setup that works in a hallway, a corner, or a full mudroom.
Everything else in this guide is an upgrade, this is the foundation.
If you build only one thing this month, build the drop zone first and let the pretty console come later. A beautiful entryway that can’t catch your Tuesday-night arrival in 30 seconds is just a hallway with aspirations.
Frequently Asked Questions (FAQ)
How many pairs of shoes should I keep at the entryway?
Two pairs per person: today’s pair and a backup or tomorrow’s pair. If you have more than that at the door, the extras belong in bedrooms or a hall closet. This cap keeps shoe storage small enough to stay open and fast, and it forces the seasonal rotation that prevents pileups.
Add two guest slots for common visitors.
What height should entryway hooks be?
Mount the adult row at 66 inches from the floor and a kids’ row at 40 inches. If you run a double-row rail, keep 12 to 18 inches between rows so coats don’t overlap.
The key board sits a little lower at 55 to 60 inches so keys stay visible and reachable, and bag hooks work well at 48 to 60 inches depending on bag length.
How do I organize an entryway with no closet?
Go wall-only: a double-row hook rail for coats and bags, a wall-mounted or hanging shoe organizer to keep footwear off the floor, a key board with a mail slot, and a single boot tray as your only floor piece.
A rolling garment rack or tall shallow cabinet can stand in for the closet if you have a blank wall, and an over-door rack adds capacity with zero installation.
What’s the best entryway storage for renters?
Anything that doesn’t need wall anchors: over-door hook racks, tension rods inside closets, freestanding shoe racks and boot trays, rolling garment racks, coat trees, and fabric pocket organizers on adhesive hooks.
If you do drill, keep it to two or three small holes for a hook rail, they’re easy to patch with spackle at move-out, and the daily payoff is worth it.
How wide should an entryway bench be?
Match it to your wall run minus the door’s swing arc: 36 to 48 inches suits most entryways, with 17- to 19-inch seat height and 14 to 18 inches of depth. In a hallway, stay under 12 inches deep and keep 36 inches of clear walkway.
Always measure the swing arc first, a bench the door hits is worse than no bench at all.
How do I keep my entryway from getting cluttered again?
Cap every zone at its number, two pairs of shoes, one coat, one bag per person, and enforce the one-in-one-out rule when something new arrives. Do a 5-minute reset each evening (shoes on the rack, coats on hooks, mail sorted) and a 15-minute purge monthly.
Clutter returns when caps slip, so the caps are the system, not the furniture.
Should entryway storage be open or closed?
For daily items, open wins: hooks, open racks, and trays respect the 30-second rule because everything is one motion. Use closed storage, cabinets, lift-top benches, lidded baskets, for overflow, seasonal items, and the gear you grab weekly rather than daily.
If a closed piece slows you down, move its contents to an open spot and demote it to backup duty.
- ideas, 15 small entryway ideas that make a tiny entrance work
- storage, 12 narrow hallway storage ideas that don’t block the way
- ideas, 14 entryway shoe storage ideas for small spaces
- ideas, 20 mudroom ideas for every home, even without a mudroom
- ideas, 10 entryway bench ideas with storage
- organization, 11 coat closet organization ideas for the front entryway
- decor, 10 Christmas entryway decor ideas for small spaces
- ideas, 11 easy corner mudroom ideas that maximize space