You know the avalanche. You open the front door and six pairs of shoes tumble across the threshold, one boot hiding under the coat rack and a sneaker halfway into the kitchen. Small entryways lose to shoes faster than to anything else, and a bigger closet down the hall will not fix it.
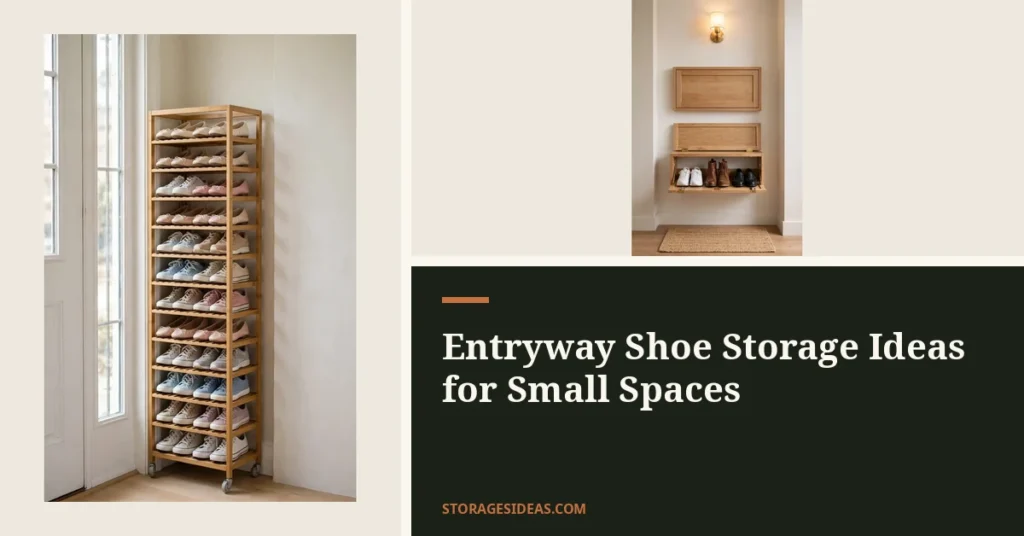
These 14 entryway shoe storage ideas fix the pile right where it starts: at the door. They are grouped by placement, so you can shop your actual space: by the door, up the wall, beside the closet, or under a bench.
Every pick names its pair capacity, the inches it needs, and its price band, so you measure once and buy once.
By the door (points 1 to 4)
Why Entryway Shoe Storage Ideas Matter in Tiny Hallways
Shoes multiply at the door because the doorway is where decisions happen. You walk in, kick them off, and deal with them later, and later never comes. In a small entryway there is nowhere for the overflow to hide, so a family’s daily pairs become a 16-shoe drift across the only path in and out.
The fix is placement, not volume. Door-side storage wins because it sits inside the two steps where shoes come off. A bench or rack five feet away might as well be in another room, because nobody carries shoes to it.
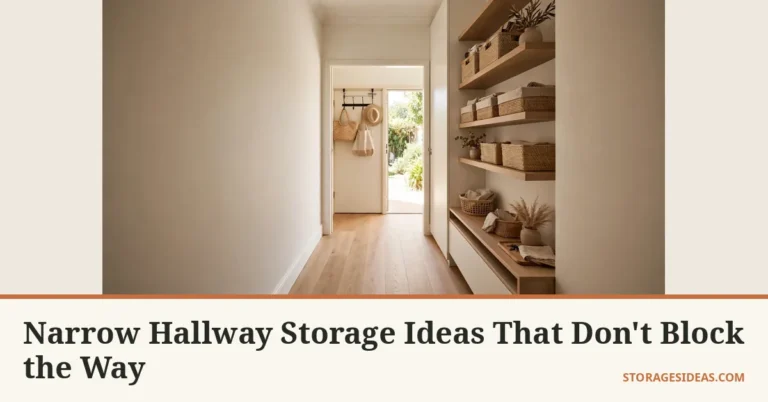
If the whole doorway zone needs a rethink beyond shoes, our small entryway ideas cover coats, keys, and mail in the same footprint.
Measure the walkway before you shop. You want at least 30 inches of clear path past anything you add, and 36 is better when two people cross at once. Note the door swing too, since a cabinet that blocks the door from opening fully will get abandoned within a week.
1. Slim Rolling Shoe Cart: Slides Into a 7-Inch Gap
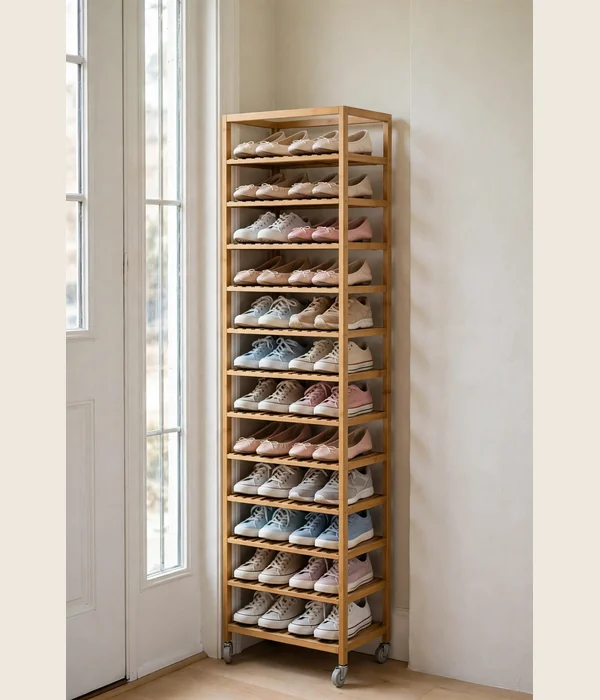
The strip between your door frame and the nearest wall is usually 7 to 10 inches of dead air. A slim rolling tower claims it. Ten shallow tiers hold up to 12 pairs of adult shoes, the whole tower rolls out when you mop, and the casters lock so it stays put when the door slams.
Because the tiers face sideways, every pair is visible at a glance, which kills the kick-them-off-and-forget habit fast. Stack shoes heel-to-toe and most tiers take two pairs. It is fully renter-safe since nothing mounts to the wall.
Set it up in four moves:
- Measure the gap at the floor, mid-door, and trim. Buy a cart at least one inch narrower than the smallest reading.
- Space tiers 5 to 6 inches apart for flats, and 7 to 8 inches on the bottom two tiers for boots.
- Load heavier shoes on the bottom two tiers so the tower cannot tip when a kid yanks a sneaker free.
- Lock the casters, then leave the top tier half empty for the pair you grab every day.
Plastic tier towers run under $30, while bamboo or steel ones land between $35 and $55. If your gap is under 6 inches, skip the cart and use the wall rail in point 6 instead.
2. Over-the-Door Pocket Organizer: 12 Pairs Behind the Door
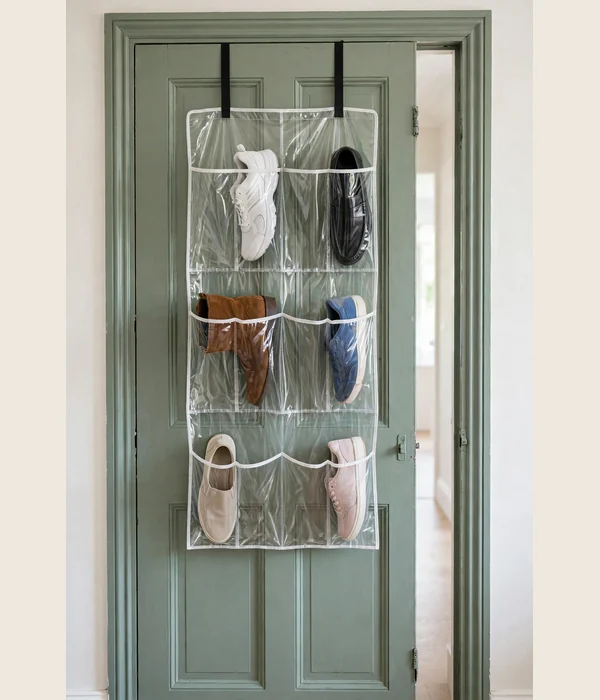
The back of your entry door is about 18 square feet of storage you never touch. A pocket organizer hangs there on padded hooks and turns it into 24 pockets, which holds 12 pairs with one shoe per pocket. It keeps the floor completely clear, which matters most in a narrow hall.
The mechanism is pure visibility. When every shoe has a labeled pocket, the nightly reset takes two minutes, and guests can find a spot without asking. Choose clear vinyl pockets so you can see contents, or canvas pockets if you want it to look tidier from the hall.
Where it works best:
- Apartments and rentals where screwing into walls is not allowed, since the whole thing hangs off the door.
- Narrow halls under 36 inches wide, because it adds zero inches to the walkway.
- Kids’ shoes, sandals, and flats, which are light enough that the organizer never sags.
- Doors with at least 3/8 inch of clearance at the top, so the hooks close without rubbing the frame.
Watch the weight: 12 pairs of adult sneakers can pull a cheap organizer crooked, so look for reinforced stitching and metal grommets. Price band is $15 to $28, and felt pads on the hooks stop door rattles in the $20 and up range.
3. Tilt-Out Shoe Cabinet: 18 Pairs in 9 Inches of Depth
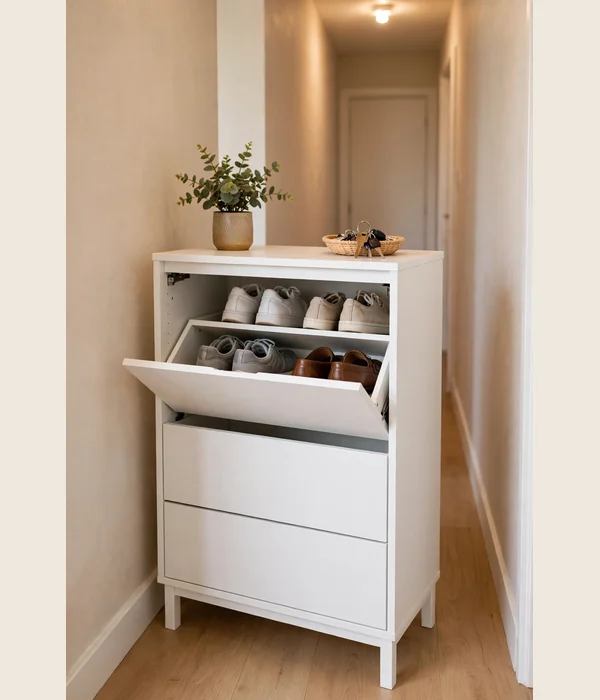
A tilt-out cabinet looks like a slim console table, but each of its three or four compartments drops forward to reveal two rows of shoes. A 45-inch tall cabinet holds 18 to 24 pairs in a footprint only 8 to 10 inches deep, which is why it suits halls where a floor rack would block traffic.
The tilt mechanism does the real work. Shoes rest at a slight angle on interior shelves, so compartments close flush and dust stays out. Because the cabinet reads as furniture, it works in entries that open straight into the living room, where an open rack would look like a closet exploded.
Get the fit right with four steps:
- Measure your hall width and subtract 36 inches for the walkway. The remainder is your maximum cabinet depth.
- Choose a three-compartment model for halls under 40 inches wide, or four compartments when you have 45 inches or more.
- Anchor it to the wall with the included anti-tip strap, since a full top compartment makes it front-heavy when open.
- Reserve the top compartment for daily pairs, and push seasonal boots to the bottom where the tilt angle is gentlest.
Expect $70 to $120 for solid wood or MDF models, and $40 to $65 for particleboard. If your hall is tighter than 36 inches, our narrow hallway storage ideas round up slimmer picks that still clear the path.
4. Shoe Tray Landing Zone: Stops the Spread at the Threshold
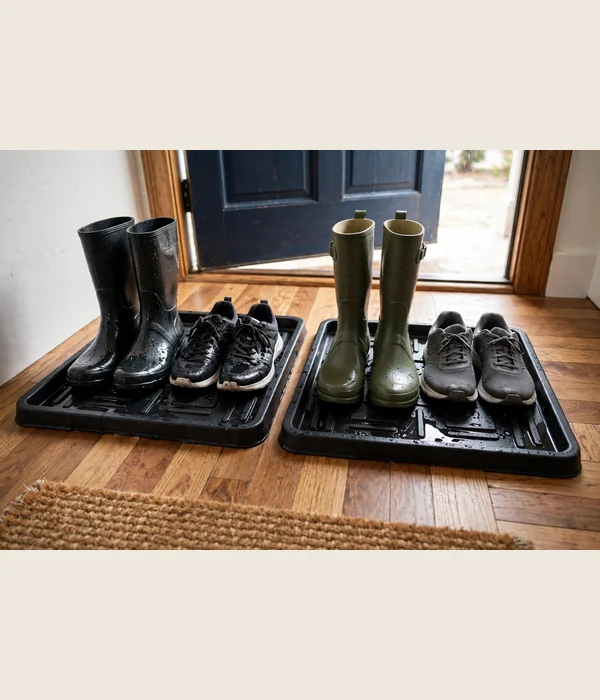
A boot tray is a shallow pan with a 1.5-inch lip, and it works by giving shoes a border they cannot cross. A 30 by 15 inch tray holds 3 to 4 pairs, and two trays cover a couple’s daily rotation.
Wet boots drain into the tray instead of the floor, which saves hardwood in rainy months.
The rule that makes it work is one tray per person, parked exactly where shoes come off. When the tray is the obvious landing spot, shoes stop drifting. Add a second smaller tray for guests so visitors are not hunting for a corner.
Where it works best:
- Entryways with zero storage furniture, since a tray needs no assembly and no wall.
- Wet and snowy climates, where the lip contains slush that would otherwise eat your flooring.
- Renters, because it is 100 percent damage-free and moves with you.
- Under a bench or beside a door mat, where it catches drips from the shoes stored above.
Rubber trays run $15 to $25 and wipe clean, while metal or rattan-look trays land between $28 and $45. Size up to 36 inches if anyone wears size 12 or larger, since big boots overhang a standard tray.
Up the wall (points 5 to 8)
5. Floating Shoe Shelves: One Pair Per Foot of Wall
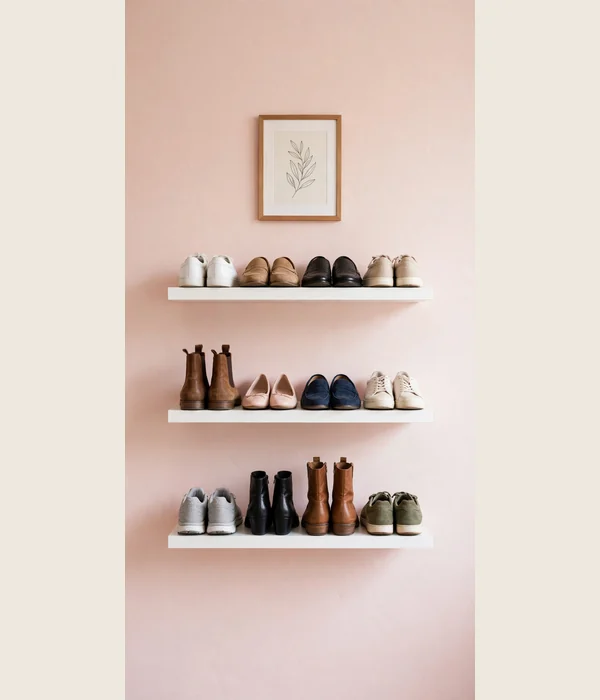
Blank wall above the baseboard is wasted vertical space, and floating shelves turn it into shoe parking. A 24-inch shelf holds 3 to 4 pairs, a 36-inch shelf holds 5 to 6, and two shelves stacked cover a couple’s rotation. Shelves project 8 to 10 inches, so they fit halls where a floor rack would eat the walkway.
Shoes sit stable on shelves because each pair gets its own slot. Space the shelves 6 to 8 inches apart vertically for flats and sneakers, and 10 to 12 inches on the bottom shelf for ankle boots. That spacing is the whole trick: too tight and shoes jam, too loose and you waste a shelf.
Mount them in five steps:
- Find studs with a stud finder and mark them, since a loaded shelf can weigh 15 to 20 pounds.
- Hold the first shelf 4 inches above the baseboard so mopping underneath stays easy.
- Level and anchor with screws rated for at least 25 pounds per shelf, not the plastic anchors in the box.
- Stack the next shelves using a cardboard spacer cut to your chosen gap, so every row matches.
- Load toe-first with heels out, which keeps pairs from sliding when the door slams.
Pairs of 24-inch shelves run $20 to $35. Renters, skip this one unless your landlord allows anchors, and use the over-door organizer in point 2 instead.
6. Slanted Wall-Mounted Shoe Rails: Shoes as a Wall Display
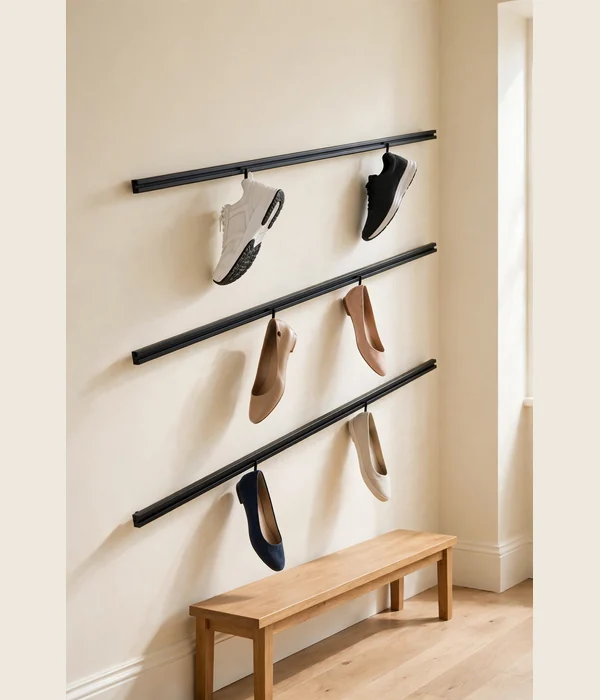
Slanted rails are metal bars mounted at about a 45-degree angle, and shoes hang on them by their heels. Each rail projects 5 to 6 inches from the wall while holding 3 to 4 pairs, so three rails give you 9 to 12 pairs. It is the slimmest real shoe storage you can buy.
The angle is the mechanism. Gravity pulls each shoe against the rail, so pairs stay put without straps or lips, and air circulates around them, which keeps odors down in a closed hallway. From across the room it reads as a display, not a storage unit, which suits entries that double as living space.
Where it works best:
- Hallways 30 to 36 inches wide, where every inch of depth is negotiated.
- Sneaker and flat collections, since heels longer than 2 inches slide off the rail.
- Modern and minimal entries, where the rails look intentional rather than improvised.
- Above a radiator cover or low bench, turning dead wall into a second shoe tier.
Sets of three rails run $30 to $50, and stainless or matte black finishes sit at the top of that band. Screws are required, so this one is not renter-friendly. If your wall is plaster and lathe, anchor into studs or use toggle bolts.
7. Wall-Mounted Flip-Down Shoe Rack: Folds Flat When Empty
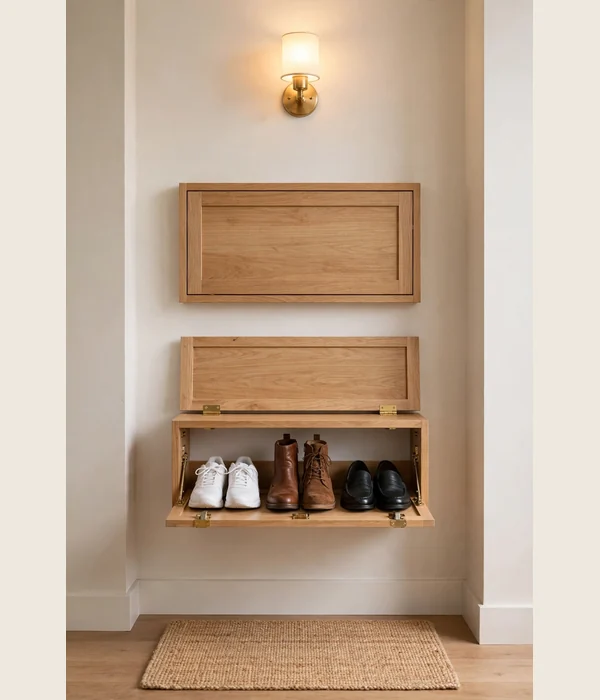
A flip-down rack mounts to the wall like a murphy bed for shoes. Open, its two or three hinged shelves hold 6 to 10 pairs. Closed, the whole thing folds flat to about 3 inches deep.
Nothing else on this list disappears like that. It earns its keep in entries that need the capacity only when guests come over.
The hinge design carries the load. Each shelf locks at 90 degrees with a metal stay, and the stays are rated for 10 to 15 pounds per shelf, so adult shoes are fine but a row of heavy work boots is not. Mount it at knee height so shoes slide on without bending.
Install it in five steps:
- Choose a wall section at least 24 inches wide with no light switches or thermostats in the swing zone.
- Mark studs and pre-drill, because the hinge torque pulls hard when shelves are loaded.
- Mount the back plate level at 18 to 20 inches off the floor for the bottom shelf.
- Test each shelf’s lock with a pair of your heaviest shoes before you load the rest.
- Fold it flat once a week and wipe the shelves, since dust settles on horizontal surfaces fast.
Two-shelf models run $35 to $60, three-shelf versions $55 to $85. This needs screws and solid studs, so renters should pass. It shines in entries that host guests rarely but need the capacity when they do.
8. Pegboard Shoe Wall: Renter-Safe With the Right Hooks
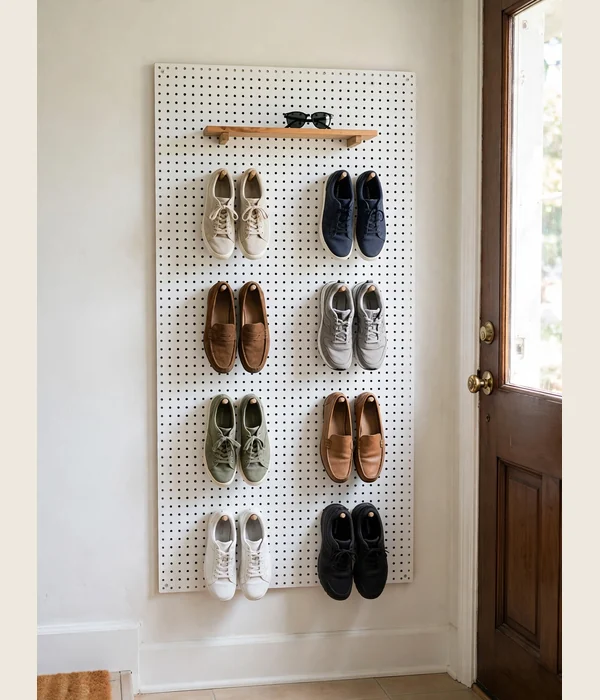
A pegboard panel turns a blank entry wall into adjustable shoe storage. Hang the board, add short dowel pegs or wire hooks, and each pair rests on two pegs under the arch. A 24 by 36 inch board holds 8 to 12 pairs depending on shoe size, and you can rearrange pegs in seconds when the seasons change.
The peg system is the whole advantage. Unlike fixed shelves, you move the layout around boots in winter and sandals in summer without tools. Paint the board to match your wall and it reads as decor, which matters when the entry opens straight into the living room.
Where it works best:
- Renters, when the board hangs on two heavy-duty adhesive strips or a French cleat that leaves only tiny holes.
- Kids’ entry zones, since pegs can sit low enough for a four-year-old to hang their own shoes.
- Awkward wall slices beside the door, where a 12-inch wide board still holds 4 to 6 pairs.
- Craft-friendly homes, because painting and pegging the board is a genuine weekend project.
Boards run $18 to $30, with peg and hook sets adding $10 to $15. Keep each peg pair 4 to 5 inches apart so shoes do not crowd. If your landlord forbids even small holes, lean a framed pegboard against the wall like art instead.
Beside the closet (points 9 to 11)
9. Stackable Shoe Boxes by the Closet Door: See-Through and Dust-Free
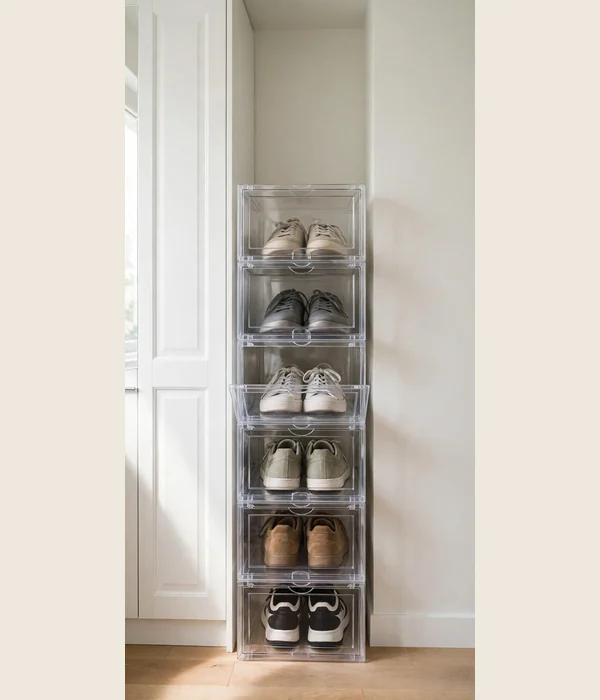
Drop-front shoe boxes stack into a tower beside your closet, and each box holds one pair up to size 13. A stack of 6 boxes stands 44 inches tall and 13 inches wide, which fits between a closet door and the wall. The drop front opens without unstacking, so the bottom pair is as reachable as the top.
The clear plastic is the mechanism. You see every pair without opening anything, so the tower gets used instead of becoming a shoe coffin. Ventilation slots on the back keep leather from going musty, which matters in a closed entry closet corner.
Build the tower in four steps:
- Measure the closet-side gap and buy boxes no wider than it, since overhang snags the door swing.
- Stack no more than 5 boxes high for stability, or 6 if the tower sits in a corner with two walls.
- Put daily pairs in the middle two boxes, where hands reach without stooping or stretching.
- Label the front of each box with a paint pen if the shoes inside are seasonal, so winter boots surface fast.
Six-packs run $25 to $40, and sturdier hard-plastic versions land between $40 and $60. Fully renter-safe, fully moveable. If your closet has floor space to spare, the carousel in point 11 holds more per square foot.
10. Under-Stair Pull-Out Shoe Drawer: Dead Space Under the Steps
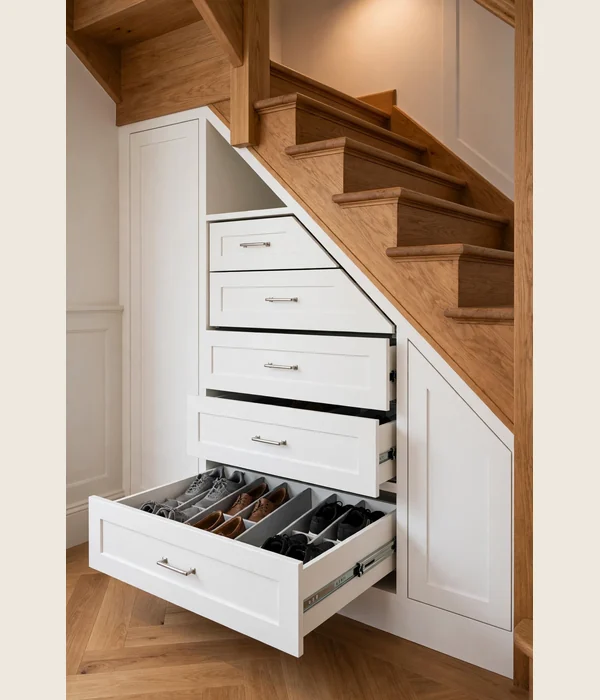
The triangle under your entry stairs is usually sealed off and forgotten, but a pull-out drawer unit turns it into 12 to 20 pairs of shoe storage. Shallow drawers 30 to 36 inches wide roll out on full-extension slides, and angled inserts keep each pair visible. The stairs were already there, so the footprint costs zero floor space.
The slides are the mechanism. Full-extension ball-bearing slides bring the back of the drawer all the way out, so no pair hides in the dark. Drawer boxes 6 to 8 inches tall fit most shoes, and one deeper 10-inch drawer at the bottom swallows boots.
Where it works best:
- Homes with an entry staircase, which is the only real requirement.
- Households of three or more, since the capacity finally matches a family’s daily rotation.
- Dust-sensitive entries, because closed drawers keep shoes cleaner than any open rack.
- Resale-minded owners, since built-in stair storage reads as an upgrade.
Custom units run $150 to $300 per drawer bank, while ready-made rolling under-stair carts land between $80 and $140. This is a homeowner project, not a renter one, since it needs the stair cavity. Measure the cavity depth before ordering, because stairs vary wildly.
11. Rotating Shoe Carousel: A Lazy Susan for Shoes
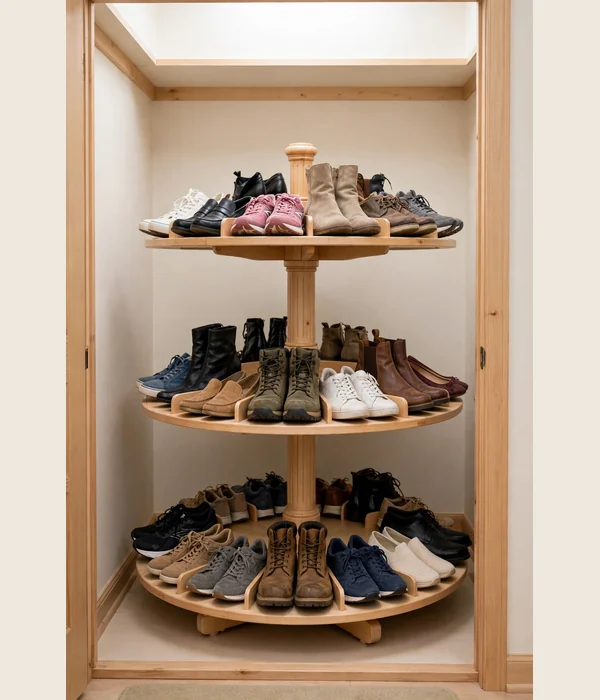
A three-tier rotating carousel puts 18 to 24 pairs on a 24-inch diameter footprint inside a small entry closet. Spin the top and every pair comes to you, which ends the archaeological dig through a dark closet floor. It needs a closet at least 26 inches deep and 26 inches wide to spin freely.
Rotation is the mechanism. A center pole on a ball-bearing base turns with a fingertip push, so the pair you want is never more than half a turn away. Tier spacing adjusts in 2-inch increments, which fits everything from flats to mid-calf boots if you plan the gaps.
Set it up in four steps:
- Empty the closet and measure depth and width, then buy a carousel at least 2 inches smaller in both.
- Assemble the pole first and check that it spins level before adding tiers.
- Set tier gaps at 6 inches for flats, 8 for sneakers, and 12 on one tier for boots.
- Load the heaviest shoes on the bottom tier so the spin stays smooth and wobble-free.
Carousels run $45 to $80, with solid wood models reaching $100. Fully renter-safe since it stands free inside the closet. If your entry has no closet at all, the bench options in points 12 to 14 do the same job in the open.
Under a bench (points 12 to 14)
12. Bench With Open Shoe Cubbies: Sit, Stash, Go
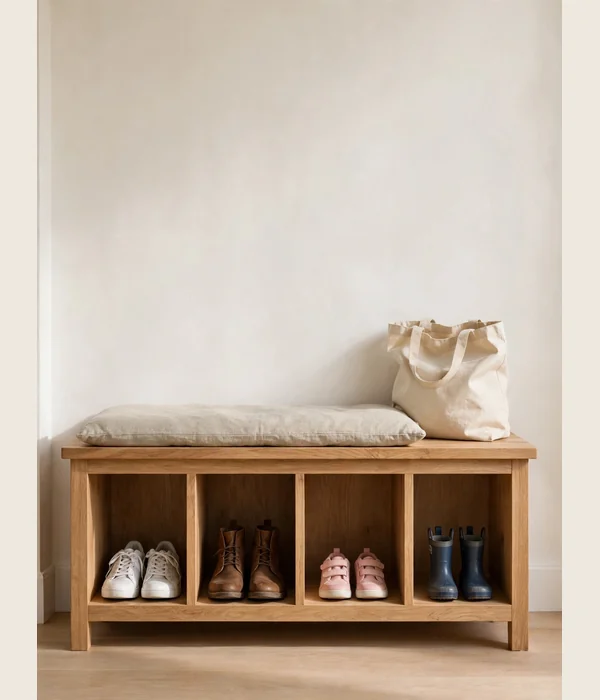
A bench with open cubbies underneath solves two entry problems at once: somewhere to sit while you tie shoes, and somewhere for those shoes to live. A 36-inch bench holds 4 to 6 pairs in its cubbies, and a 48-inch bench holds 6 to 8.
The 16 to 18 inch seat height works for most adults, and bench depth runs 14 to 17 inches, which keeps it hallway-friendly.
The open cubby is the mechanism. No doors means shoes go in with one motion, which is exactly the effort level a rushed morning allows. Airflow through the open fronts keeps odors from building, a real advantage over closed cabinets in a small entry.
Where it works best:
- Family entries, where kids can sit and stash without a single instruction.
- Hallways 36 inches and wider, since a 15-inch bench still leaves a comfortable path.
- Boot-heavy households, because open cubbies accept tall shafts that tilt-out cabinets reject.
- Entryways that need a landing spot for bags, since the bench top doubles as a drop zone.
Wooden cubby benches run $60 to $120, with solid hardwood models reaching $150. Renters can use one freely since it stands alone. Keep one cubby empty for guests, or the whole system breaks the first time visitors arrive.
13. Storage Bench With Flip-Top and Shoe Shelf: Hidden Bulk, Open Daily Pairs
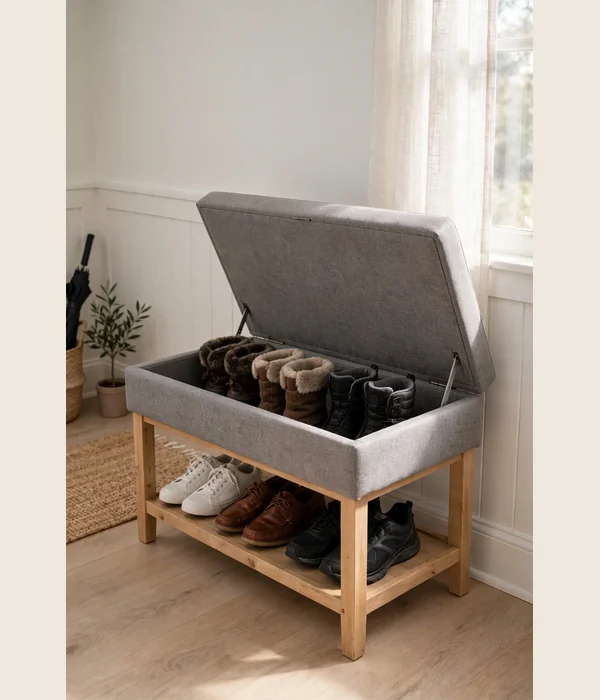
A flip-top bench hides a deep storage well under the seat while an open shelf below holds daily shoes. The well swallows 6 to 10 pairs of off-season shoes, and the open shelf keeps 3 to 4 daily pairs grab-ready.
Standard sizes run 32 to 40 inches wide and 15 to 18 inches deep, with the seat at 17 to 19 inches high.
The split design is the mechanism. Daily pairs live in the open where the two-second rule applies, and everything else goes in the well, out of sight and dust-free. The flip top opens with a piano hinge, so one hand lifts it while the other drops shoes in.
Choose and place it in four steps:
- Measure your walkway and subtract 36 inches for clear passage. The remainder caps your bench depth.
- Pick a 32-inch bench for solo or couple use, or 40 inches when three or more people share the door.
- Line the well with a washable liner, since off-season shoes bring in last year’s dirt.
- Put the bench where the door swing misses it by at least 2 inches, or the lid will fight the door.
Flip-top benches run $80 to $140, with upholstered tops at the high end. Free-standing and renter-safe. If you want the cleanest look of the three bench options, the pull-out drawers in point 14 hide everything.
14. Bench With Pull-Out Shoe Drawers: No Bending, No Dust
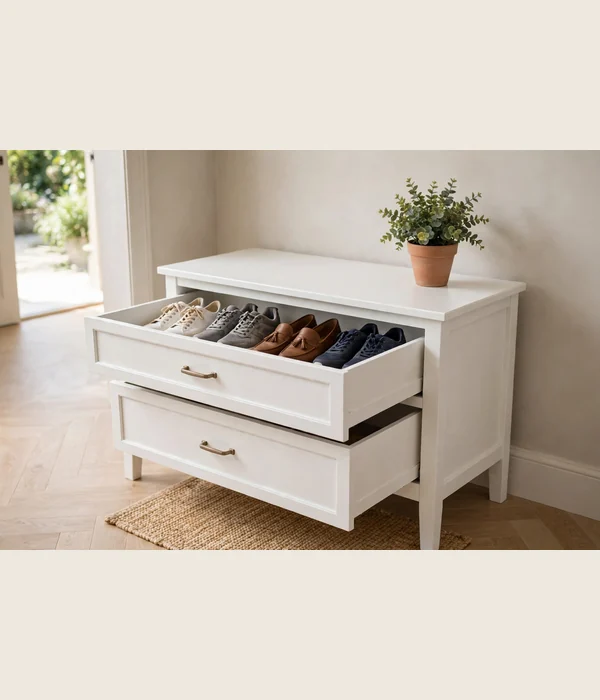
Pull-out drawers under a bench give you closed storage with open-rack convenience. Each drawer glides toward you on slides, holds 3 to 4 pairs, and a two-drawer bench stores 8 to 12 pairs total. Typical benches run 36 to 48 inches wide with drawers 5 to 7 inches tall, sized for everything short of knee-high boots.
The drawer is the mechanism. You see every pair at once when it opens, so nothing gets lost at the back, and closing it hides the clutter completely. That matters in entries that open straight into the living room, where shoe chaos is always on display.
Where it works best:
- Design-conscious entries, since closed drawers read as furniture, not storage.
- Dusty homes near busy roads, where closed storage keeps shoes visibly cleaner.
- Pet households, because drawers shut out the dog that loves to chew laces.
- Small entries that double as mudrooms, where the bench top holds baskets above the drawers.
Drawer benches run $90 to $160, with soft-close slides at the top of the band. Free-standing and renter-safe. Leave the top drawer for daily pairs and push seasonal shoes to the bottom, or the system slowly inverts itself.
Conclusion
The shoe pile loses when storage sits inside the two steps where shoes come off. Pick the idea that matches your constraint: no wall damage, a hallway under 36 inches, or an entry with no closet at all. Any one of these 14 ends the avalanche, because each one was built for the door, not the bedroom.
Best first buy: the tilt-out cabinet in point 3. It holds 18 to 24 pairs in 9 inches of depth, hides the mess behind furniture fronts, and suits nearly every small entryway. If your hall is too tight for it, the slim rolling cart in point 1 does the same job for under $55.
For the full room plan beyond shoes, our entryway storage ideas cover coats, keys, and mail in the same small footprint. Measure your gap, buy once, and enjoy a doorway you can actually walk through.
Frequently Asked Questions (FAQ)
What are the best entryway shoe storage ideas for renters?
If you cannot drill, stick with the over-door organizer, the slim rolling cart, stackable shoe boxes, and any free-standing bench. These need zero wall damage and move with you. If your landlord allows small nail holes, a pegboard on a French cleat opens up wall storage with almost no repair needed at move-out.
How many pairs should a small entryway actually hold?
Plan for two daily pairs per person plus two guest pairs, so a couple needs about six slots. If your family of four stores more than ten pairs by the door, the overflow belongs in a bedroom closet, not a bigger entry rack. The entry is a transit zone, and capping it keeps the reset fast.
What size bench fits a 36-inch hallway?
If your hallway is exactly 36 inches, a bench deeper than 15 inches leaves too little walking room, so look for slim 12 to 14 inch models. If you have 40 inches or more, a standard 15 to 17 inch bench works with a comfortable path. Always measure the door swing, since a bench that blocks the door gets abandoned.
Will an over-the-door organizer damage my door?
If your door has at least 3/8 inch of clearance above it, padded hooks close without rubbing the frame or the paint. If the fit is tight, choose slim metal hooks rather than chunky plastic ones, and add felt pads where they touch. Heavy loads can strain hinges over time, so keep it to 12 pairs or fewer.
How do I stop shoe smell in a tiny entryway?
If the entry has no window, favor open storage like cubbies or slanted rails so air circulates around the shoes. If you prefer closed cabinets, add cedar blocks or activated charcoal sachets inside each compartment and wipe trays weekly. Rotating pairs so no shoe is worn two days running cuts odor more than any spray.
Should I pick a tilt-out cabinet or an open bench?
If your entry opens into the living room and you want the shoes invisible, the tilt-out cabinet wins on looks and dust control. If kids or rushed mornings rule your house, the open bench wins because shoes land in it with one motion. If hallway width is under 36 inches, the cabinet’s slim 9-inch depth beats most benches.
What is the minimum walkway clearance past shoe storage?
If the hall is a main path used by two people, keep 36 inches clear, which matches standard building guidance. If it is a single-person pinch point, 30 inches still feels workable for daily use. Measure at the narrowest spot, including baseboards and door trim, and subtract your storage depth before you buy.