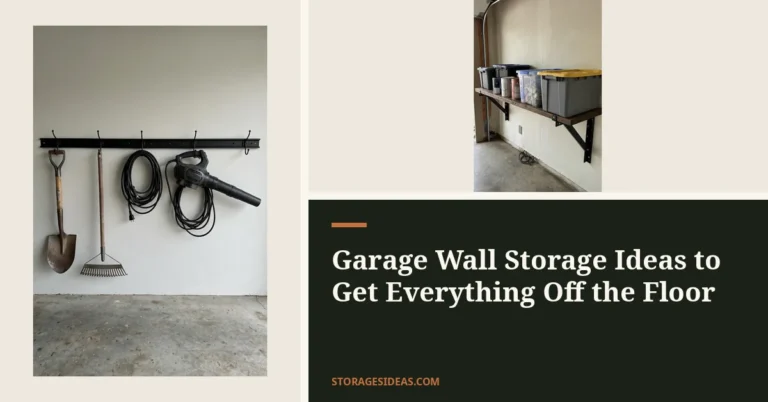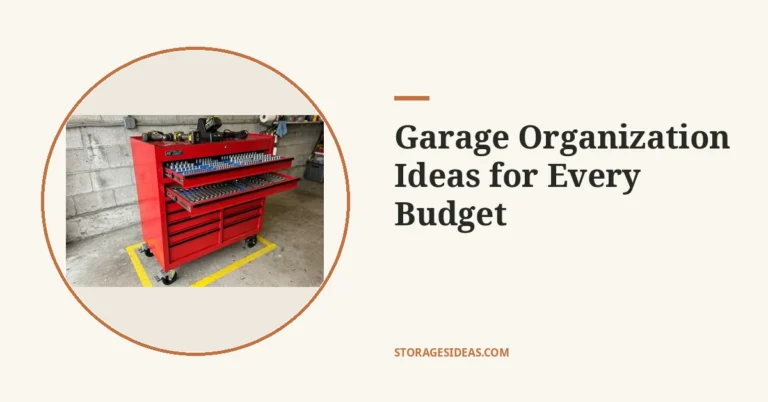
I bought my second screwdriver before I ever found the first one. It was somewhere in my garage — in a drawer, under a pile on the bench, or behind the paint cans — and I was tired of digging for it, so I bought another. That was the day I stopped blaming the garage and started fixing how I could see my tools. These garage tool storage ideas are the system that came out of that mess: every tool with a marked, reachable home, so I can see what I own, grab it in seconds, and put it back where it belongs.
Tools you can see are tools you actually use. A tool buried in a drawer or a pile on the bench might as well not exist, and a tool left on the floor is a trip hazard and a quick way to ruin a cutting edge. The ten ideas below work because they put the tool where your eyes and your hands already go: on the wall at eye level, overhead and out of the way, or in a labeled drawer you can open without thinking.
If your whole garage needs a reset first, start with our garage organization ideas guide, then come back here for the tools. I did the walls first, and one finished wall made the next one easy to start.
Key takeaways
- Put tools where your eyes and hands already go: on the wall at eye level, overhead and out of the way, or in a labeled drawer.
- A pegboard with drawn outlines shows you at a glance when a tool is missing — an empty outline is the reminder.
- French cleats hold heavy tools better than pegboard, because the angled strips spread the load and grip tighter as the weight grows.
- Small parts only stay organized if every drawer is labeled — an unlabeled drawer turns into a junk drawer within a month.
- Lock the rolling cabinet, switch the charging station off, and do the lock-up check every time you leave.
In this guide, I’ll cover
- Pegboard Wall with Outlined Tool Shapes
- French Cleat Wall
- Magnetic Tool Bar
- Overhead Ceiling Rack for Long Tools
- Rolling Tool Cabinet with Locking Casters
- Slatwall Panels with Hooks and Bins
- PVC Pipe Holders for Long-Handled Tools
- Labeled Small-Parts Drawer System
- Fold-Down Workbench That Clears the Floor
- Battery Charging Station with Power Strip
Wall-Mounted Garage Tool Storage Ideas
I started with the walls, because in my garage they were the only empty surface left — everything else was on the floor or the bench. These three ideas are the ones that changed how fast I can find a tool: one tells me where each tool lives, one moves without new holes, and one holds the tools I reach for most.
1. Pegboard Wall with Outlined Tool Shapes: See Every Tool at a Glance
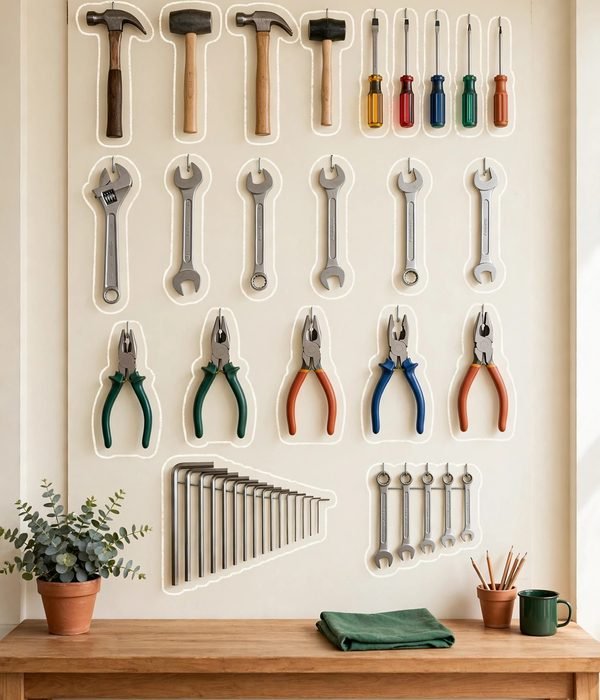
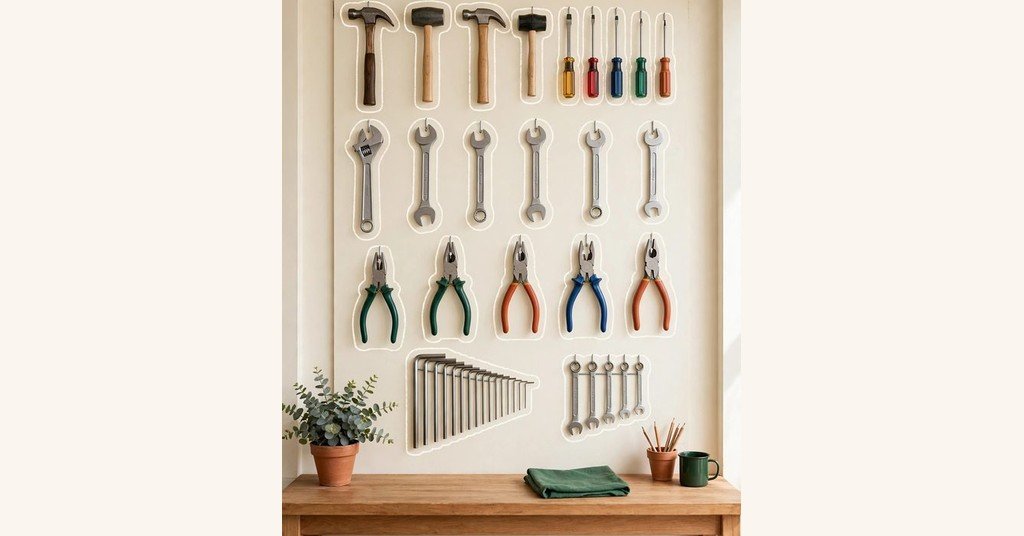
A pegboard wall is the simplest of these garage tool storage ideas because it turns the wall into a map. You hang each tool on a hook, then draw its outline on the board, so every tool has a marked home and a missing tool shows up as an empty outline. That one detail is the whole mechanism: you stop hunting, and you stop buying duplicates of tools you already own. A standard 4×8 ft pegboard sheet covers a full wall section above a bench, which is enough room for the hand tools most people reach for every week.
Start by mounting the board on spacers so the hooks have room behind it, and screw it into the wall studs, not just the drywall. Hang your most-used tools first, at eye level and within arm’s reach. Then trace around each tool with a marker or paint pen, and hang it back on its hook. Put heavy tools low and sharp tools with their edges facing the wall.
Best for: anyone whose tools live in a pile or a junk drawer right now. Skip if: your garage wall is bare concrete or brick with no way to mount a board, or you have very few hand tools and a small bar would do the job instead.
2. French Cleat Wall: Garage Tool Storage Ideas That Move Without New Holes
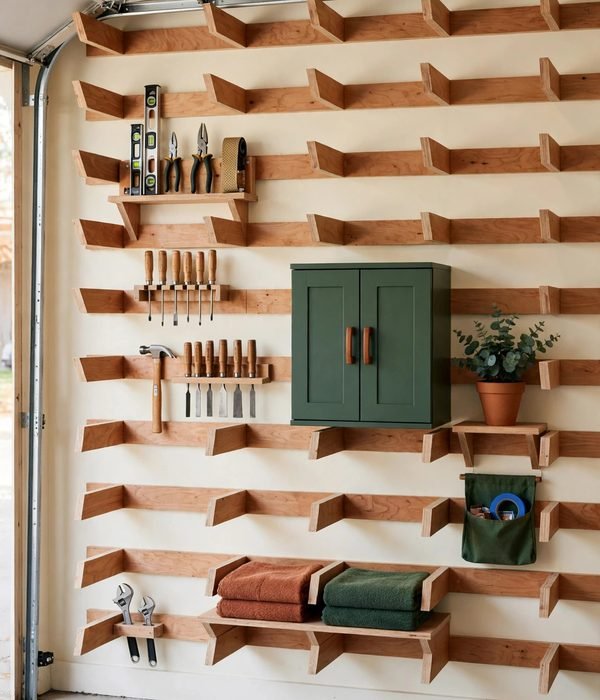
A French cleat wall works because of a simple angled joint. Strips of 3/4-in plywood are cut at 45 degrees, one strip is screwed to the wall, and the matching strip on a shelf or holder slides down onto it and locks under its own weight. The angle means the heavier the holder, the tighter it grips, and the load spreads along the whole strip instead of hanging from a single hook. The real payoff is that you can lift a holder off and move it somewhere else without drilling new holes.
Cut your strips from 3/4-in plywood, screw the wall strip into the studs with the angled edge facing up and out, and build holders — shelves, tool racks, small cabinets — with the mating strip on the back. Hang the heavy holders low, keep the layout loose for the first week, then move anything you reach for awkwardly until the arrangement feels natural. I moved my most-used shelf twice in the first week before it landed where my hand expects it.
Best for: garages that change as your projects change, and anyone who likes building their own storage. Skip if: you want a finished system with no cutting or measuring, or your wall cannot take screws into studs.
3. Magnetic Tool Bar: Your Most-Used Tools in One Row
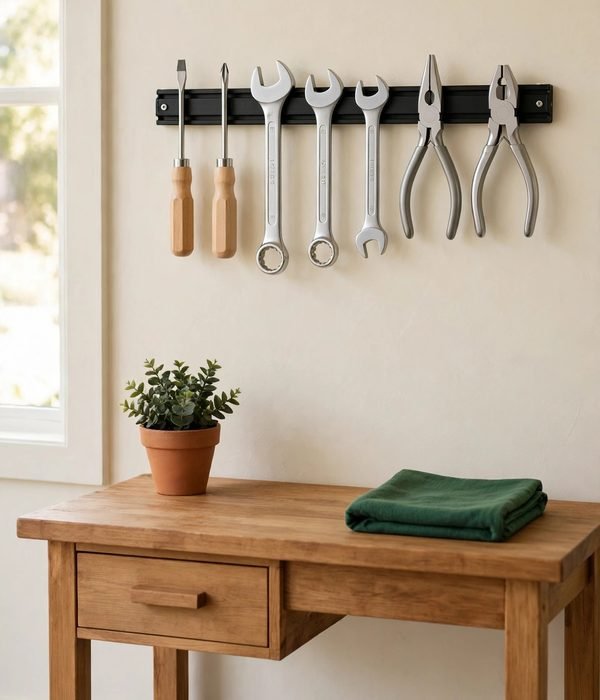
A magnetic tool bar works because it holds steel tools with no hooks, no clips, and no hunting. An 18–24 in magnetic bar, mounted at eye level above your bench, keeps screwdrivers, wrenches, and pliers in a single visible row. You can see the size you need, pull it off with one hand, and slap it back when you are done. The mechanism is just the magnet, which is why it only works for tools with enough steel in them — and why it works so well for exactly those tools.
Mount the bar into a stud so it cannot peel off the wall under load, then press each tool onto it and give it a tug to check the hold. I line the tools up in the order I use them, most-used sizes in the middle — it is the bar I reach for first. Keep the bar clear of sawdust and metal filings, and wipe it down when the grip starts to feel weak.
Best for: small garages and anyone who reaches for the same few hand tools every day. Skip if: most of your tools have plastic or wooden handles with very little steel, or your heaviest tools are too heavy for a magnet to hold safely.
Ceiling and Floor
I used to trip over the ladder every time I walked to the car, so these two came next. Getting the biggest, most awkward things up high or onto wheels gave me my floor back — and the tools I use least often are still easy to reach when I need them.
4. Overhead Ceiling Rack for Long Tools: Ladders and Lumber Up High
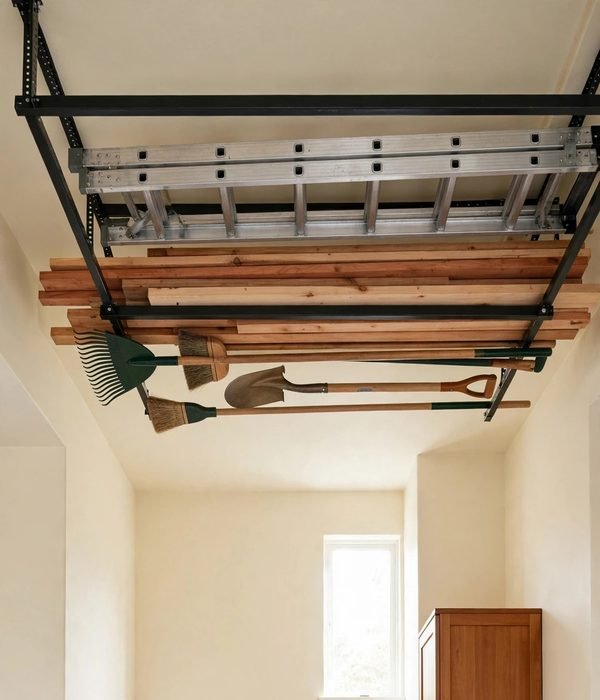
An overhead ceiling rack works because it uses space you were not using at all. Ladders, lumber, and long-handled tools go up into a rack mounted to the ceiling joists, above head height, and the floor underneath stays clear for parking and walking. The joists carry the weight, so the rack can hold long, awkward items that would never fit on a wall, and you can see everything from the floor because nothing is stacked on top of anything else.
Lag the rack into the ceiling joists, never just the drywall, and leave enough clearance above your head and above the car. Load the longest, least-used items first, and keep the rack over the parking area or a walkway you do not stand under for long. When you winterize the garage, this is the natural home for the long-handled summer tools you will not touch again until spring.
Best for: garages with a ceiling high enough to walk under a loaded rack, and anyone storing ladders or lumber. Skip if: your ceiling is low, you need these tools every day, or you cannot reach the rack safely with a step stool.
5. Rolling Tool Cabinet with Locking Casters: A Workshop That Moves to You
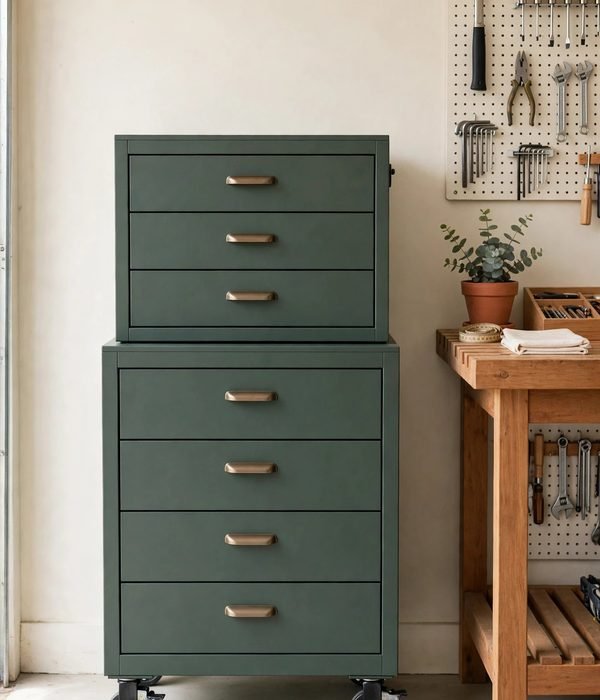
A rolling tool cabinet works because it brings the tools to the work instead of making you walk back to the wall. A chest and rolling cabinet hold your tools grouped by job, and the locking casters let you wheel the whole set over to the car or the bench, lock the wheels, and work without the cabinet drifting. Locking the casters is the part that makes it safe: a cabinet that rolls while you pull a heavy drawer open can tip, so the lock comes first, every time.
Sort your tools by the job you use them for, label each drawer, and put the heaviest tools in the bottom drawers so the cabinet stays stable. Roll it to where you are working, press the caster locks down, and only then open the drawers. Pair it with the layout ideas in our home garage storage ideas guide so the cabinet has a parking spot when the work is done.
Best for: anyone who works on cars or projects in different corners of the garage. Skip if: your garage floor is uneven or crowded, or you have so little floor space that a cabinet would block the door.
Small Parts and Power
These last five are the finishing details I kept putting off — and they are the ones I notice every single time I work now. Two holders for small and long tools, a labeled drawer system that ends the hunt for one screw, a bench that folds away when the work is done, and a charging station that keeps batteries safe and visible.
6. Slatwall Panels with Hooks and Bins: Garage Tool Storage Ideas You Can Rearrange in Seconds
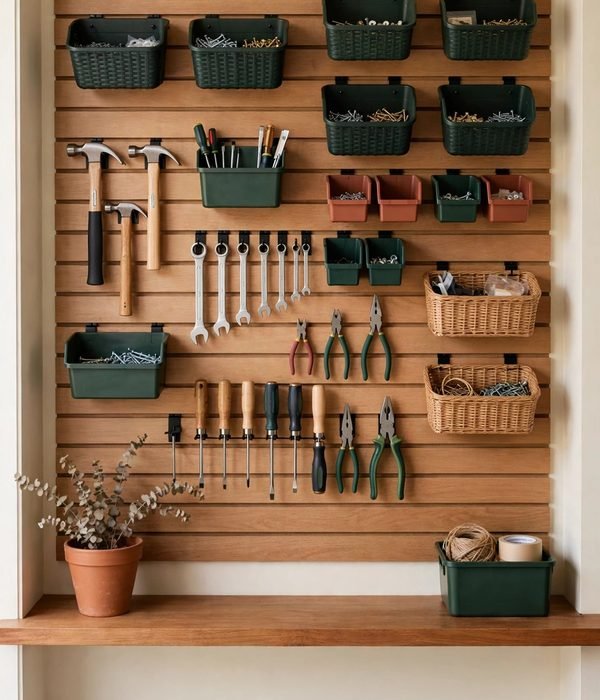
Slatwall is one of the most flexible garage tool storage ideas because its horizontal slots accept hooks, baskets, and small bins that you can lift out and move in seconds, with no screws and no new holes. That makes it the right choice when your collection keeps changing: a hook that held a hammer last month can hold a basket of sandpaper this month. The panel spreads the load across the wall, so a row of bins full of hardware stays put as long as the panel itself is screwed into the studs.
Mount the panels into the studs, then add hooks for hand tools, baskets for gloves and rags, and small bins for hardware. Keep heavy items low and light items at eye level, and leave one empty slot or two so you have room to grow. If a hook starts to sag, move the weight down a row instead of adding more hooks to the same slot. I keep mine by the bench, and the bins are the part I rearrange most.
Best for: garages where the tool collection changes often, and anyone who likes rearranging. Skip if: your wall space is already taken by a pegboard or cleat wall, or you prefer one fixed layout you never move.
7. PVC Pipe Holders for Long-Handled Tools: Handles Up, Heads Down
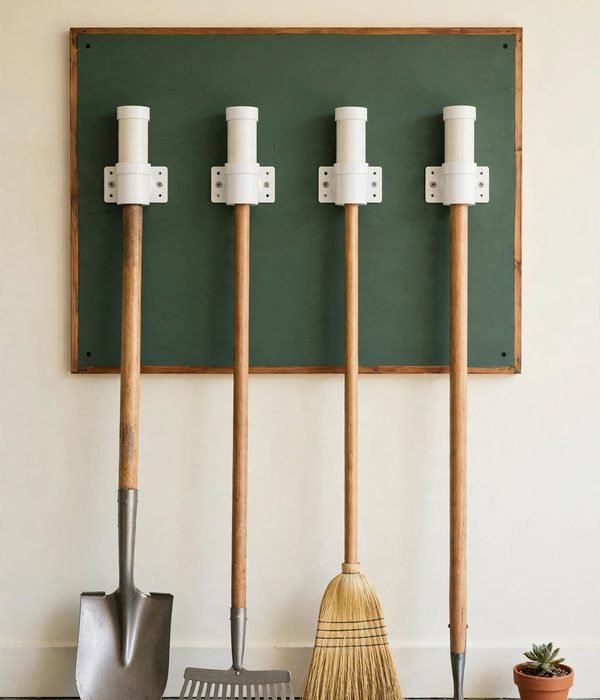
PVC pipe holders work because gravity does the holding for you. Short sections of PVC pipe are screwed to a wall board, and the handle of a shovel, rake, or broom drops into a section while the head hangs down below it. The tools stand upright in a row instead of leaning in a corner and sliding into a pile, and you can pull one out without knocking the rest over, because each handle has its own tube.
Cut the pipe into short sections, screw them in a row onto a board mounted to the wall, and drop each handle in so the head clears the floor. Measure your thickest handle first and size the pipe to it, and leave a little space between sections so wide heads do not jam against each other.
Best for: anyone with a growing collection of shovels, rakes, and brooms. Skip if: your tools have very thick handles that will not fit standard pipe, or you only own one or two long-handled tools and a single hook would do.
8. Labeled Small-Parts Drawer System: One Screw, No Hunting
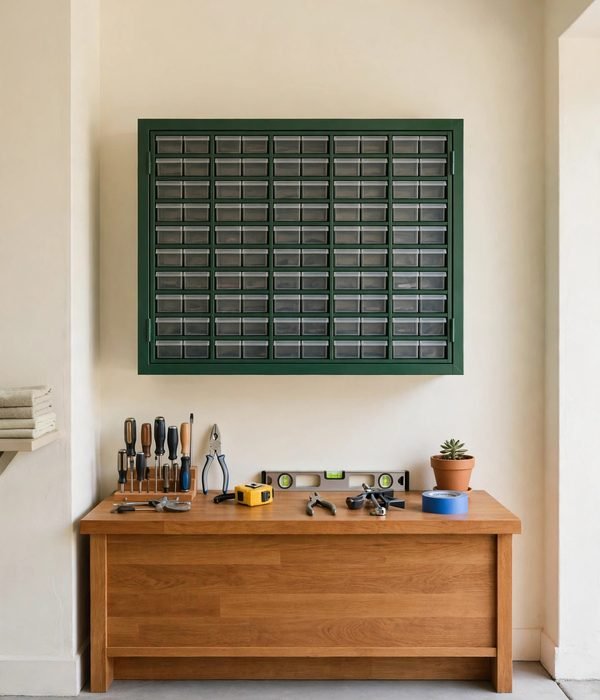
A labeled small-parts drawer system works because the label does the remembering for you. Screws, nails, anchors, and drill bits each get their own small drawer, labeled by type and size, so you open exactly one drawer and find exactly what you need. Without labels, small drawers become junk drawers within a month, because a screw that looks right is never quite right, and one wrong size mixed into a drawer ruins the whole drawer.
Sort your hardware by type first, then by size, and label both the drawer front and the contents inside. Keep drill bits next to the drill, and keep the fasteners you use most at the top. When a drawer runs low, write the size on your shopping list before you forget which one it was.
Best for: anyone who does regular DIY and keeps spare hardware. Skip if: you buy hardware for each project and rarely keep spares, or you only own a handful of fasteners that fit in one small box.
9. Fold-Down Workbench That Clears the Floor: A Bench When You Need It
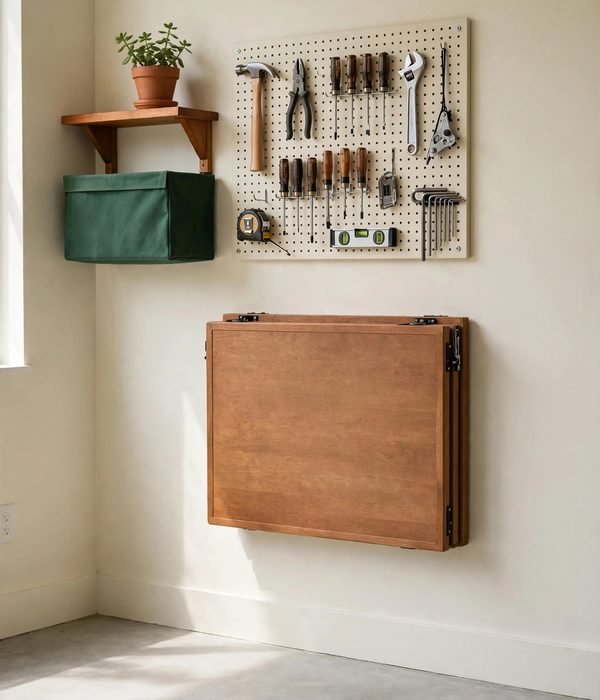
A fold-down workbench works because it gives you a work surface only when you need one. The bench is mounted to the wall on hinges, folds down onto a leg or bracket when you work, and folds flat against the wall when you are done, so the floor underneath is clear for parking. The wall brackets carry the load while it is down, which is why it must be screwed into the studs — a bench held by drywall alone will pull out the first time you lean on it.
Mount the bench to the studs at a comfortable working height, add the folding leg or bracket, and test it with your body weight before you put tools on it. I keep only what I am using on the bench, and I fold it up at the end of every session — that one habit is what keeps the parking space clear. Store the tools you use at the bench on the wall right above it, so setup takes a minute.
Best for: small garages where a permanent bench would eat the parking space. Skip if: you need a heavy permanent bench for daily work, or your wall cannot take the load of a loaded bench.
10. Battery Charging Station with Power Strip: Batteries Off the Bench
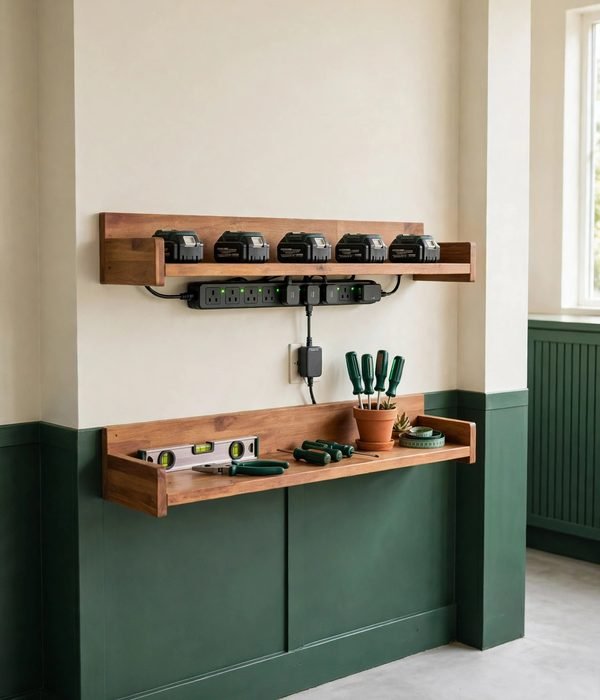
A battery charging station works because it gives every battery one safe, visible home. A shelf with a power strip holds your tool batteries off the bench and away from dust, sawdust, and spills, and because they all charge in the same place, you can see at a glance which ones are full and which ones need a charge. Keeping batteries together also keeps them away from heat and clutter, which is the part that matters for safety as much as for tidiness.
Mount a shelf at eye level, plug in a power strip with a switch you can reach, and label a slot for each battery so a half-charged battery never gets mistaken for a full one. Charge batteries only when you are around to check on them, and never charge a battery that is cracked, swollen, or damaged — set it aside and replace it instead. I check the row every time I walk past — it is the fastest way I know to spot a battery that still needs a charge.
Best for: anyone with two or more cordless tools. Skip if: you own only corded tools, or you have one battery that lives on its charger already and a whole station would be overkill.
Frequently Asked Questions (FAQ)
How do I start organizing garage tools if everything is in piles?
Start with one wall, not the whole garage. Clear the bench, hang a pegboard or a magnetic bar, and put the ten tools you use most on it. These garage tool storage ideas work best when you start small and finish one area, because a finished wall shows you the system works and makes the next wall easier to start.
Pegboard or French cleats — which is better for heavy tools?
French cleats hold heavy tools better, because the angled plywood strips spread the load along the wall and lock tighter as the weight grows. Pegboard is better for lots of light hand tools you want to see at a glance. If you have both, use cleats for the heavy holders and pegboard for the hand tools.
How high should I hang tools in a garage?
Hang the tools you use every day at eye level, between about shoulder height and just above your head, so you can grab them without a step stool. Put heavy tools lower, where you can lift them safely, and put tools you use once a season higher up or in the overhead rack.
How do I keep garage tools safe from kids and theft?
Keep sharp and heavy tools high or behind a lock, lock the rolling cabinet when you are done, and do a quick lock-up check every time you leave: cabinet locked, charging station switched off, and nothing valuable left in plain sight by the door. A locked cabinet and a tidy bench are the two simplest safety steps in any garage.
Lock Up, Check Once, and You Are Done
I started with the wall in front of my bench — just the pegboard, just my ten most-used tools — and that one finished wall changed how the whole garage felt to work in. A tidy garage is not a garage with more storage; it is a garage where every tool has a home and you can see at a glance when something is missing. I would do the wall first again, every time, and let each finished section earn the next one.
Your start-here step is the one I took: pick the pegboard wall or the magnetic bar, hang your ten most-used tools today, and do the lock-up and safety check tonight — cabinet locked, batteries on the station and switched off, and the floor clear enough to walk through without stepping over anything. If you can do that check in thirty seconds, the system is working.
Save this for your next garage tidy-up — and share it with a friend whose tools are still in a pile on the floor.