Grab your tape measure before you read further. Most small entries run about 3 feet wide, and that number decides everything. A piece of furniture only 12 inches deep still eats a third of your walkway, so depth is the measurement that matters most.
Here is the rule I use on every small entryway project: keep 36 inches of clear passage and never buy a piece deeper than 10 to 12 inches. Everything in this list of 15 small entryway ideas respects those two numbers, with exact dimensions, price bands, and renter-safe flags on each pick.
You will get door-side storage, wall-mounted pieces that touch zero floor, corner solutions, and dead-space ideas for under the stairs. Grouped by zone so you can work your way in from the front door.
Why Small Entryway Ideas Start With a Tape Measure, Not a Mood Board
Most tiny entries fail for one mechanical reason: the furniture is deeper than the walkway allows. A 16-inch-deep console in a 36-inch hallway leaves 20 inches to walk through, which is narrower than a standard door. Shoulder width alone tells you that feels wrong.
The fix is vertical volume. Walls in an entryway offer 6 feet of unused height above your head, and the door itself is a blank storage surface nobody counts. Slim tilt-out cabinets, hook rails, and over-the-door racks all trade floor space for wall space, which is why they show up so often in small entryway ideas for apartments.
Depth rules of thumb: 10 inches max for anything against the wall in a 3-foot entry, 12 inches only if your passage reaches 40, and hooks at 60 inches for adults or 36 to 42 for kids. Before you buy, measure three numbers: passage width, door thickness, and stud spacing (usually 16 inches on center). Those beat any shopping list.
If you are planning the whole room and want the big picture, the entryway storage ideas pillar covers coats, shoes, and drop zones in one place.
1. The Slim Tilt-Out Shoe Cabinet: 18 Pairs in 8 Inches of Depth
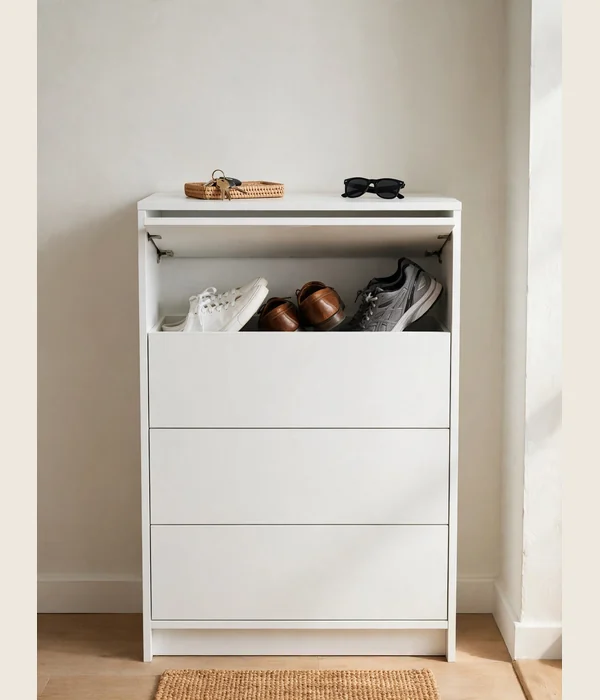
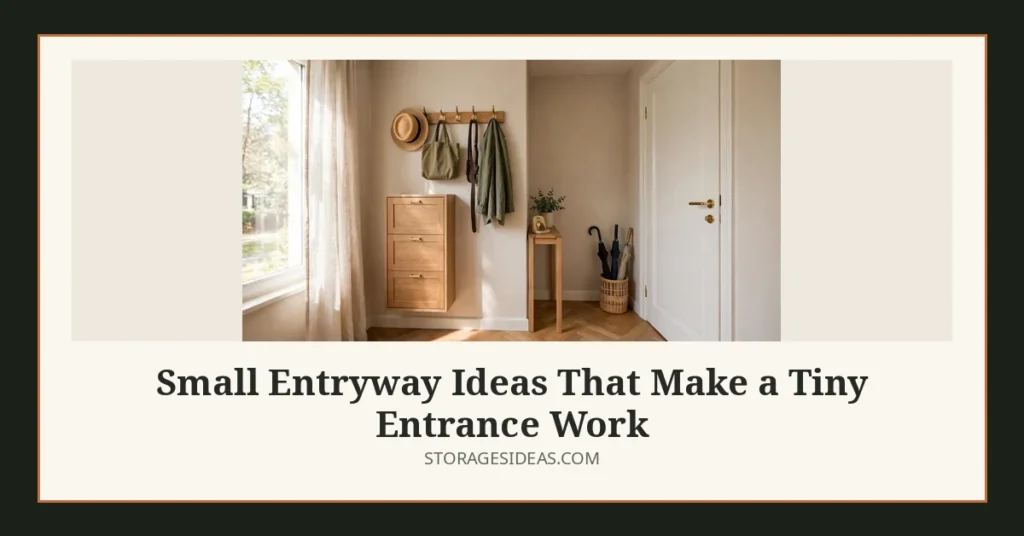
A tilt-out shoe cabinet is the highest-capacity piece for a 3-foot entry: about 42 inches wide, 8 deep, and 40 tall, with four tilt-out compartments that store shoes at an angle, so the doors need zero swing clearance. Each compartment holds 4 to 6 pairs, landing a unit at 8 to 18 pairs in 2.3 square feet of floor.
This beats an open shoe rack twice over. The tilt mechanism hides dusty soles, which matters in the first room guests see. And the flat top at 40 inches becomes your drop zone, so one piece does the job of a shoe rack and a console table.
What you can do with it:
- Sort by person: one compartment per family member, so nobody’s sneakers migrate into your work shoes.
- Store ankle boots by removing one divider: the interior height per compartment is about 12 inches, which clears most 4 to 6-inch boots.
- Mount it to the wall with the included anti-tip hardware: a cabinet full of shoes is top-heavy, and this is non-negotiable on rental floors too.
- Use the top as a mail tray zone with a single shallow basket, so paper clutter lands here instead of the kitchen counter.
Price bands run about $150 to $180 for solid pine versions. Skip the particleboard ones under $80: the tilt hinges are the moving part and cheap ones sag within a year.
2. A Wall-Mounted Hook Rail Beside the Door: Coats Off the Floor, Zero Footprint
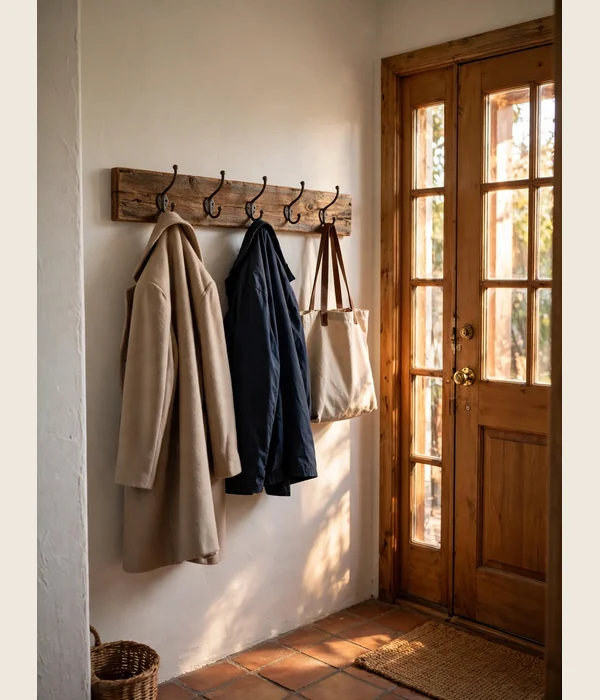
A hook rail gives you coat storage without touching the floor, the whole trick in a tiny entrance. A 24 to 36-inch rail holds 4 to 6 coats, and mounted at 60 inches high, the 12-inch swing of a hanging coat is the only space it claims. Compare that to a standing rack’s 21-inch base and the math is obvious.
- Measure 60 inches up from the floor and mark it: that is adult coat height. Drop to 36 to 42 inches if kids will use it daily.
- Find the studs with a $10 stud finder: they run 16 inches on center in most apartments, and screwing into a stud gives you 20 to 40 pounds of holding power per hook set.
- Hold a level on the rail and mark all holes before drilling: a rail that tilts even half an inch is visible forever in a small room.
- Drive 2.5-inch wood screws through the rail into the studs. Test with your heaviest winter coat before you trust it: a loaded rail pulling out of drywall is the classic entryway disaster.
Renters get a damage-free option: heavy-duty adhesive hooks hold up to 7.5 pounds each, enough for a jacket or tote, and they pull off clean with the tab. They will not hold a winter parka, so for heavy coats use removable over-the-door hooks instead.
3. An Over-the-Door Coat Rack: Storage on the Back of Your Door
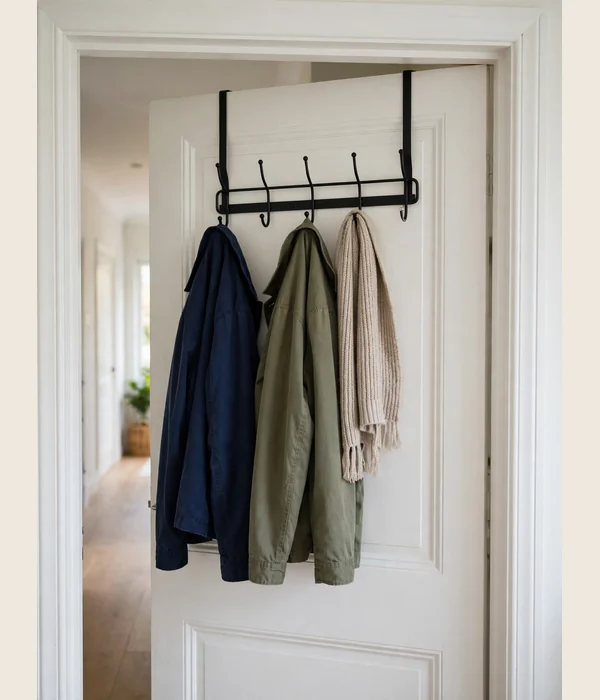
The back of your entry door is the most ignored square footage in a small entrance. A metal over-the-door rack hangs on two brackets over the top of the door, needs no tools, and holds 20 to 30 pounds of coats, bags, and dog leashes. Installation takes ten seconds, which makes it the renter’s best friend.
Fit is the one thing to check before buying. Standard interior doors run 1.25 to 2.25 inches thick, and most racks fit with foam-lined brackets. The bracket adds about an eighth of an inch above the door, so measure the gap between the door top and the frame: tighter than a quarter inch and the door will scrape.
Tips for best results: Hang the rack on the door side facing into the apartment, not the hallway, so coats stay private. Put a small felt pad where each bracket touches the frame to stop paint wear. Keep the load under the stated rating: five coats at 4 pounds each is 20 pounds, right at the limit of most racks.
Watch out: Heavy loads make the door harder to close and can strain the hinges. If your entry door is a fire-rated steel door, brackets will not grip, so use adhesive hooks or a wall rail instead. Leave at least 5 inches between the loaded door and the nearest wall so coats do not pinch in the swing.
4. A Slim Drop-Zone Console: Keys, Mail, and a Landing Strip in 10 Inches
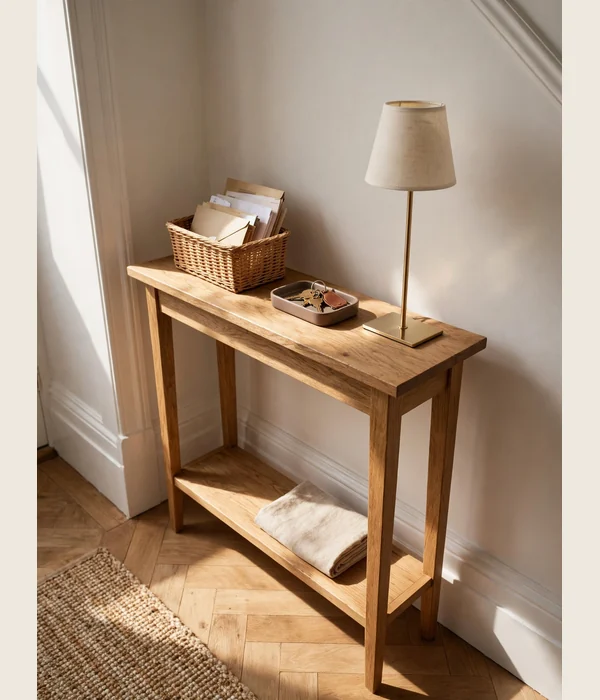
A console table in a tiny entry is a landing strip, not display furniture. Look for 10 to 12 inches deep, 30 to 34 inches high, and 30 to 48 inches long. At 10 inches deep you can park a key tray, a mail basket, and a lamp, while the walkway keeps its 36 inches of clear passage.
The height matters more than people think. Thirty inches is the low end where you drop keys naturally as you walk in. Anything above 34 inches starts to feel like a wall and blocks the sight line into the room, which makes a small entry feel smaller.
Where it works best:
- Entries under 40 inches wide: a 10-inch-deep table leaves 30 inches of walkway, which is tight but workable for a single person.
- Entries 42 to 48 inches wide: a 12-inch-deep console with a bottom shelf for baskets, leaving a comfortable 30-plus inches clear.
- Right-hand side of the door if you are right-handed: your keys land there without thought on the way in.
If your passage is a hallway rather than a square entry, same rules live in narrow hallway storage ideas. Under $100 buys laminate and metal legs, fine for keys and mail; spend $150 to $250 for solid wood if it holds a lamp. Anchor it to the wall: narrow tables tip forward when a bag catches edge.
5. A Drip-Tray Umbrella Stand: Wet Weather Without the Puddle
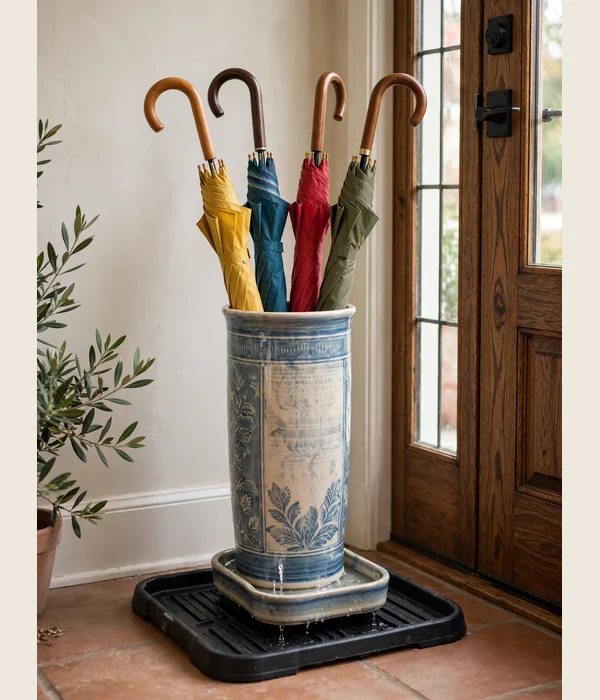
One umbrella dripping on the floor turns a tiny entry into a hazard zone. A stand 7 to 9 inches across and 18 to 24 inches tall parks 4 to 6 umbrellas upright in under half a square foot. The drip tray is the trick: catches the melt so floors stay dry and the stand never rusts inside.
Placement counts. Put the stand on a boot tray rather than straight on hardwood: a 30 by 15-inch tray under the stand and your boots creates one waterproof zone that you can lift and shake out. The tray is a $10 to $15 add that saves your floors.
Tips for best results: Choose a weighted base or a tall narrow stand with a wide foot: top-heavy stands tip when you drop in a long golf umbrella. For apartments, a 24-inch stand tucked beside the door works; houses with porches can use a shorter 18-inch stand outside.
Watch out: Empty the drip tray weekly in rainy season: standing water breeds mildew and mosquitoes in five days. Never store a wet umbrella folded tight for days; open it halfway against the wall so it dries. Skip woven or rattan stands for daily wet use: they soak through and smell, while powder-coated steel or ceramic wipes clean in seconds.
6. Floating Shelves Above Head Height: Dead Air Becomes Storage
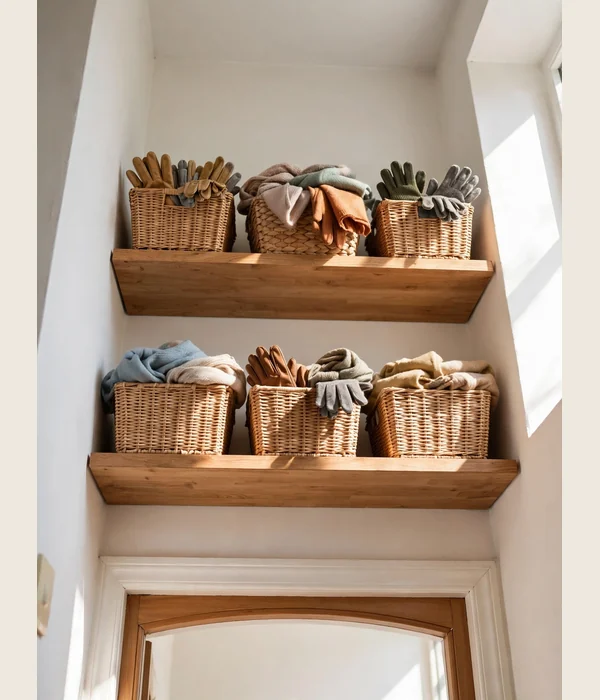
The air above 66 inches is dead space: too high to bump, too high to block sight lines. Two floating shelves, each 8 to 10 inches deep and 24 to 36 inches long, turn that band into storage for seasonal overflow. Gloves, scarves, sunscreen, and guest slippers all live here in labeled bins, out of the daily lane.
Mounting is the whole job, and it is simple if you respect the studs.
- Find the studs at 16 inches on center with a stud finder and mark both edges of each stud.
- Hold the shelf bracket at 66 to 72 inches, which clears the door frame line and keeps items out of your sight line when standing.
- Drive 2.5-inch screws into at least two studs per shelf: floating shelves on drywall anchors alone sag under bin weight within months.
- Slide the shelf onto the bracket and check with a level before loading.
- Load heavy bins toward the stud side and light stuff at ends: a 10-inch shelf holds 20 to 30 pounds per bracket when stud-mounted.
Choose bins with lids, not open baskets: dust settles fast at ceiling-adjacent heights and open bins up there get grimy. Clear bins beat opaque ones because you will not climb up to check what is inside. For renters, adhesive-mounted picture ledges hold up to 5 pounds per strip, enough for two or three small decor items but not storage bins.
7. A Pegboard Panel: Repositionable Hooks for Changing Seasons
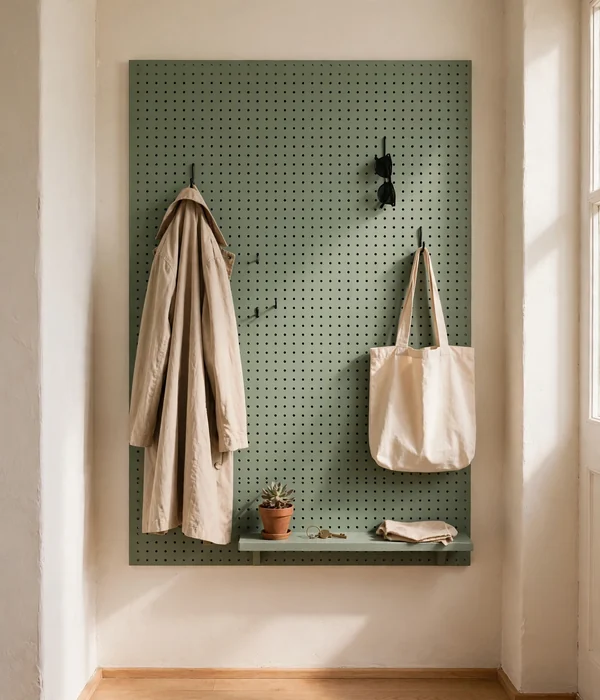
A pegboard is the entryway piece that adapts when your life does. A 24 by 36-inch panel on standoff mounts sits half an inch off the wall, and hooks you can move in seconds fit the 1-inch grid. Winter coat, summer tote, holiday wreath: the same panel serves all three with no new holes.
Weight limits are straightforward: each metal pegboard hook holds 5 to 10 pounds on a properly anchored panel, and the panel itself carries 15 to 25 pounds total on drywall anchors. That is a coat, a tote, keys, and sunglasses, the full daily kit. Heavy winter coats go on the double-arm hooks, light stuff on the singles.
What you can do with it:
- Hang the season’s coat and bag at arm’s height near the door, and move them down or up when the season changes.
- Add a small shelf ledge across the bottom row of holes for a wallet tray and spare keys.
- Clip mesh pouches to the hooks for dog leashes, sunscreen, and the spare house key you always forget.
- Paint it before hanging: one quart of paint covers a 24 by 36 panel, and a painted panel looks like furniture, not a workshop.
Renters can use a floor-leaning pegboard on a weighted base, which needs zero holes but does claim about 10 inches of floor depth. Framed pegboard panels also hide their edges and read more finished in a small room.
8. A Wall-Mounted Mail and Key Sorter: Paper Clutter Meets Its End
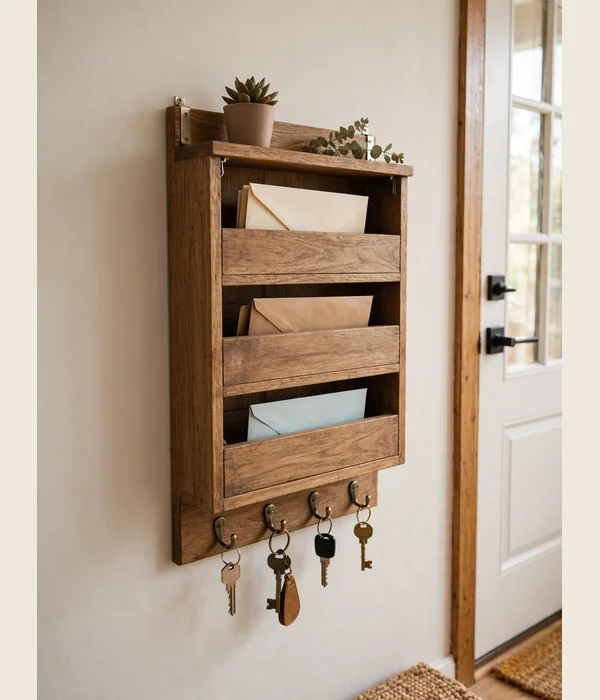
Paper is the silent entry killer. A wall-mounted sorter about 8 to 10 inches deep, with 2 to 3 mail slots, 6 to 8 key hooks, and a top shelf, gives every paper a landing decision. Mount it at 52 to 56 inches: visible when you walk in, out of small hands’ reach, high enough to clear a console table.
The real trick is the habit the sorter forces. Slot one is “action this week” for bills and forms, slot two is “file” for drawer-bound papers, and everything else goes straight to recycling the day it arrives. A sorter without the habit is just a prettier pile, so pair it with a small recycling bin right under it.
Tips for best results: Label the slots with a label maker or washi tape: unlabeled slots drift back into one big pile within a month. Add a magnetic strip along the bottom for spare keys and the garage remote. Choose a sorter with a tray on top so your sunglasses and wallet have a home too.
Watch out: Do not buy one narrower than 12 inches wide: three real slots need room or envelopes jam. Ventilated metal or wood beats fabric pockets, which stretch and sag under a week’s mail. For renters, a magnetic board on the fridge plus one adhesive key hook does 80 percent of the same job with zero holes.
9. A Storage Mirror: Bounce Light and Hide the Small Stuff
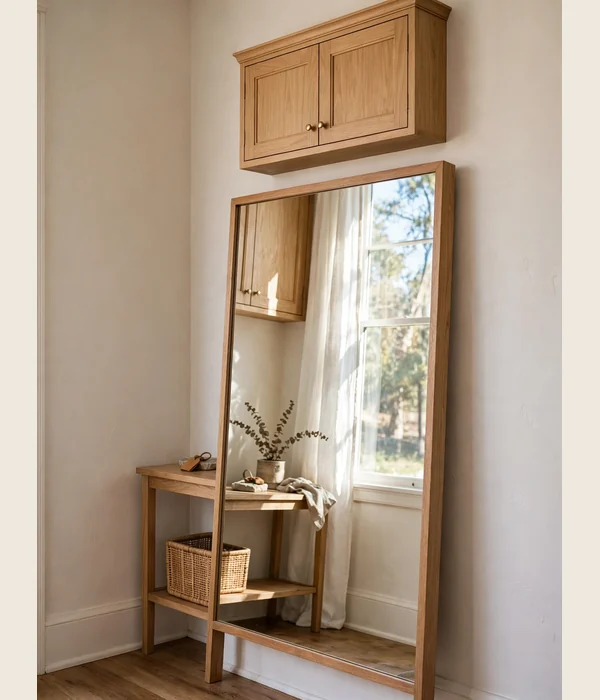
A mirror is the one entryway piece that makes the room bigger while storing things. The mechanism is simple sight lines: a 16 by 48-inch mirror reflects the opposite wall, doubling the perceived depth of a 3-foot entry. Mounted on or above a slim cabinet, it keeps the room feeling open instead of walled in by storage.
The storage version is a mirror cabinet 4 to 5 inches deep, which holds sunglasses, spare keys, lip balm, and the hand sanitizer without showing any of it. That is the difference between a mirror that only flatters and one that works.
Where it works best:
- Opposite a window or glass door: the mirror bounces daylight into the darkest corner of the entry.
- Above a 10-inch console or tilt-out shoe cabinet: the mirror at eye level makes the slim furniture feel intentional.
- At the end of a narrow entry corridor: it visually extends the space instead of dead-ending it.
- As a leaning full-length mirror beside the door: gives the last look before you leave, no mounting holes needed.
Anchor anything heavier than 10 pounds into a stud: a leaning mirror over 40 inches tall needs the top strap or anti-tip hardware too, especially with kids or pets. Price bands run $40 to $80 for plain full-length leaning mirrors and $80 to $150 for storage cabinets. Keep the glass away from direct door swing paths.
10. A Fold-Down Wall Bench: A Seat That Disappears After
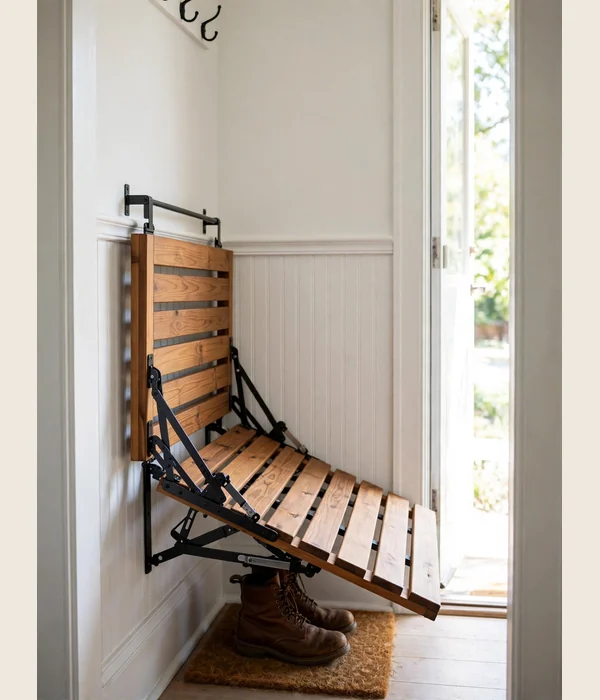
Lacing boots while standing is the indignity of an entry. A fold-down wall bench fixes it with no bench in the way: folded, it sits 2 to 3 inches off the wall; opened, it gives a 12 to 14-inch-deep seat, 30 to 40 inches wide, at 17 to 19 inches high. You sit, you lace up, you fold it away.
This one needs real screws, so here is the safe install.
- Lay out your studs at 16 inches on center: you need at least three brackets, each into a stud, to hit the 200 to 250-pound load rating these benches carry.
- Mount the main rail at 17 inches from the floor: that sets your seat height once the panel folds down onto the brackets.
- Drive 3-inch lag screws into each stud through the rail: this is the load path, so skip the drywall anchors entirely.
- Attach the folding panel and its support legs or arms, then test with your full weight plus a bag before trusting it daily.
- Add a small cushion with ties if the bare panel is hard: 2 inches of foam makes a daily seat livable.
This is not a renter piece: adhesive cannot hold a seated human. Owners get $80 to $150 of hardware that beats a 15-inch-deep bench claiming floor space all day. Keep the floor under it clear so it folds down flat.
11. A Corner Shoe Carousel: Spin to Your Shoes
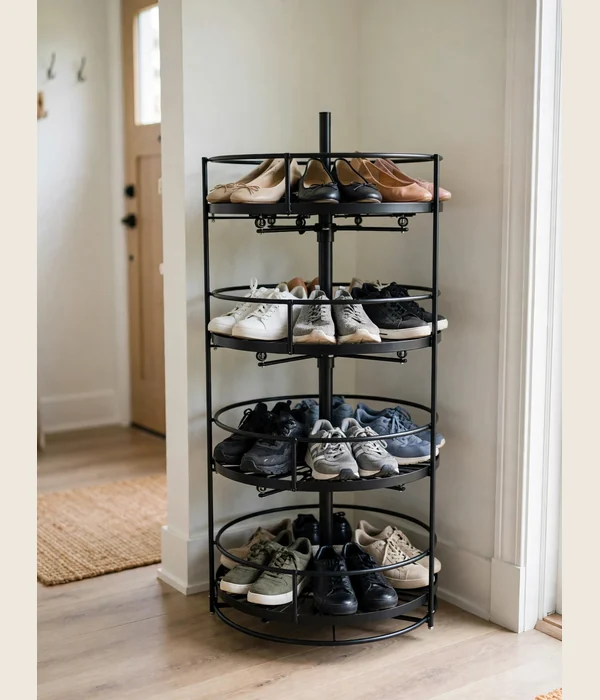
Corners in tiny entries are dead zones: nothing rectangular fits. A spinning shoe carousel turns an 18 to 20-inch corner footprint into 12 to 16 pairs on 3 to 4 rotating tiers. The rotation is the mechanism: you spin the tower instead of digging, so the back pairs are as reachable as the front.
Sizing is forgiving. The tower footprint is smaller than a dining chair, and the height runs 32 to 48 inches depending on tier count. Set it in the corner nearest the door so shoes travel the shortest path from foot to storage.
What you can do with it:
- Assign one tier per person in a 2 to 3-person household: kids get the bottom tier, which sits at a reachable 12 to 18 inches.
- Stack flats and sandals two per slot: the slots are sized for single shoes, but small flats nest easily.
- Use the top tier for off-season shoes you still want accessible, since the spin makes “top shelf” as easy as eye level.
- Wipe the tiers monthly: rubber soles shed, and a carousel collects dust in its center column.
For the deep dive on every shoe format, entryway shoe storage ideas compares cabinets, racks, and carousels side by side. Carousels run $40 to $90 in metal and plastic. They need no holes, so renters are fine, but keep the tower clear of door swings or the spin becomes a battering ram.
12. A Freestanding Corner Coat Tree: Fifteen Hooks in a 2-Foot Circle
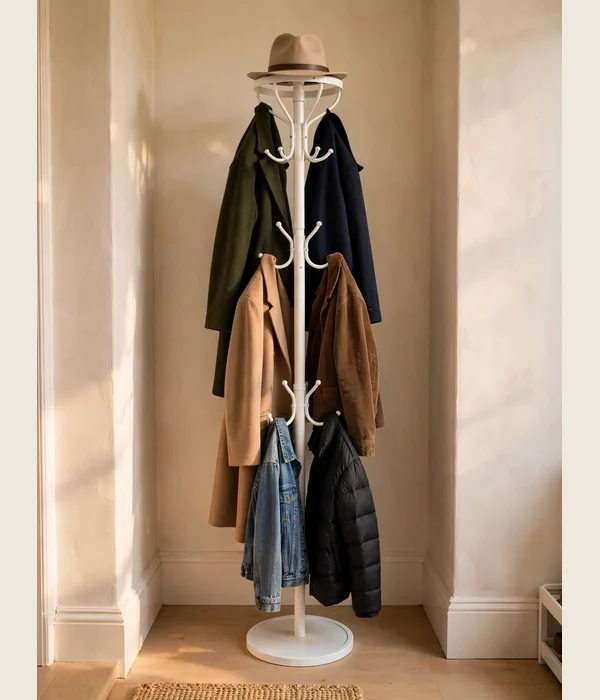
With no free stud and no free door back, a corner coat tree answers. The metal version runs 65 to 70 inches tall on a 21-inch base, carries up to 88 pounds, and spreads 10 to 15 hooks across three heights. Kids take the low hooks at 30 to 36 inches; adults take the top at 60 plus.
Stability is the spec to read before buying. A 21-inch four-point base is the minimum for a loaded tree, and even then load bottom-up: heavy coats on the low hooks, light scarves up top. On carpet, slide a 24-inch square of plywood under the base: legs sink into thick carpet and the tree leans.
Tips for best results: Place the tree in the corner the door does not swing into: a loaded tree behind a swinging door is a coat trap. Hang each person’s gear on their own level so nobody’s scarf buries someone else’s keys. Tighten the center pole monthly: loaded trees loosen at the joints and start to wobble.
Watch out: Eighty-eight pounds is the whole-tree limit, not per hook: five coats at 6 pounds each plus bags gets you there fast. Skip single-pole wooden trees under $15: the hooks screw in with threads that shear off under coats. Metal trees in $25 to $40 band hold up for years; $15 to $25 ones suit one person’s light use.
13. A Corner Basket Tower: Bins That Swallow the Daily Dump
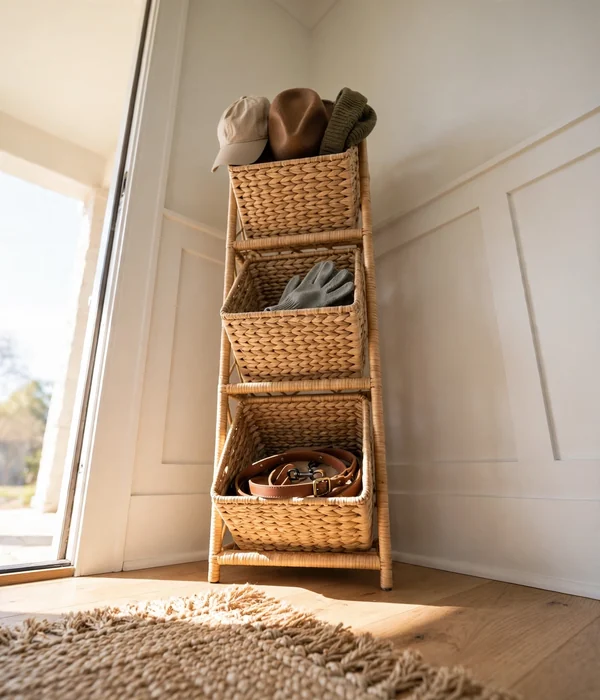
Every entry has a dump: hats, gloves, the dog’s leash, reusable bags. A corner basket tower, a frame 10 to 14 inches per side with 3 stacked bins, swallows it all with no door to open. Each bin at 9 by 12 by 12 inches holds a winter kit per person: hat, gloves, scarf, and the sunglasses you never remember.
Open bins are the point here. In a cabinet you hide things; in a corner tower you grab them. That makes this the piece for the gear you touch twice a day, not the seasonal overflow that belongs on high shelves.
Where it works best:
- Beside the door in the 10-inch strip between the frame and the nearest wall: the tower’s corner shape slides into space a square piece cannot use.
- In entries shared by kids: bottom bin at floor level is reachable from age three, and each kid gets their own bin.
- As a bag station: one bin per person for the tote or backpack that otherwise lands on the floor.
- Next to the shoe storage: one bin for shoe care (spray, cloth, spare laces) so everything for the door lives at the door.
Woven seagrass bins look best at $40 to $70 for the set; fabric bins are $20 to $35 but show wear faster. Keep one bin empty on purpose: it is the landing zone for mail and keys when your hands are full.
14. A Slim Rolling Cart for the Gap: The 7-Inch Slot Between Furniture
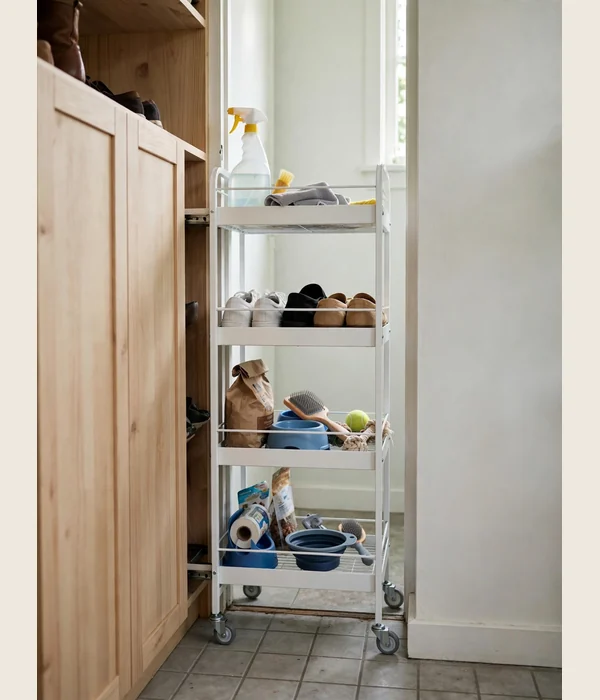
Every small entry has a gap: the 7-inch slot beside the shoe cabinet nobody planned. A rolling cart 6 to 8 inches wide with 3 to 4 tiers turns it into storage for shoes, pet supplies, or cleaning gear. The wheels are the mechanism: the cart hides in the gap and rolls out when you need it.
Measure the gap before you shop, and measure twice.
- Slide a tape measure into the gap at floor, middle, and top: baseboards and trim can narrow the bottom by an inch.
- Subtract half an inch from the smallest number: the cart needs clearance to roll without scraping paint.
- Count your tiers by item height: shoes need 6 to 8-inch tiers, spray bottles need 10 inches.
- Assemble with the casters on and lock two of them: an unlocked cart rolls out every time the door slams.
- Load the bottom tier heaviest: carts are top-heavy by design and a loaded top tier tips on carpet.
These run $20 to $40 in metal and plastic, which makes them the cheapest real storage on this list. They are fully renter-safe: no holes, no adhesive, nothing to uninstall. Do not overload past the 20 to 30-pound tier ratings: a cart full of books will bow the middle shelf and jam the wheels.
15. Under-Stair Pullouts: Turn the Triangle Under the Stairs Into Drawers
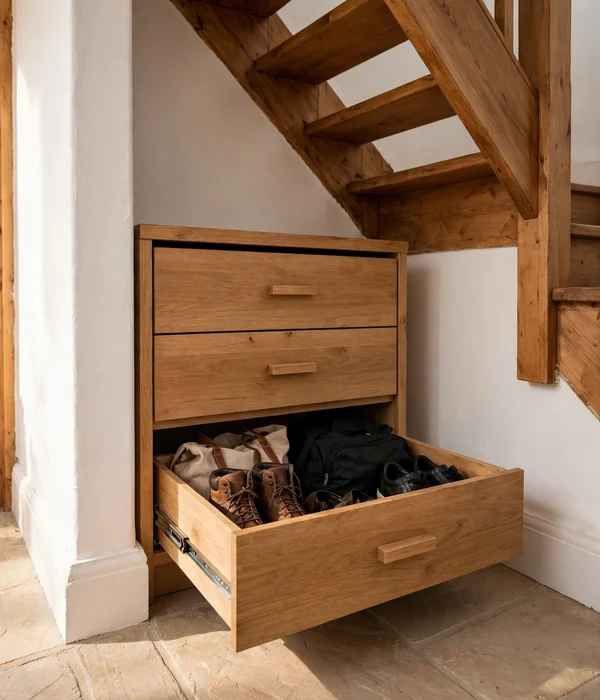
If your entry sits under a staircase, the triangle is the unused volume in the room. A riser is 7 inches tall and the tread 11 deep, so each step cavity fits a pullout 22 to 30 inches deep and 12 to 18 inches wide. Three or four pullouts swallow the shoes, bags, and cleaning gear living in your walkway.
Ready-made under-stair pullout kits exist in the $80 to $150 band per unit, sized for standard framing. They mount on full-extension drawer slides rated for 75 to 100 pounds, which matters because shoe-filled pullouts are heavier than they look.
Tips for best results: Measure the lowest clear height under the stairs before ordering: the short end often clears only 12 to 18 inches, which is shoe-height, not coat-height. Ventilate the cavity: drill two 2-inch holes or leave the back open so shoes do not trap moisture. Label each pullout so the family does not turn them into junk drawers.
Watch out: Do not cut into load-bearing stair stringers or fire-blocking to fit a pullout: that is structural, not storage. Renters should skip the built-ins and use rolling crates on furniture sliders: three 12-inch cubes roll into the triangle by hand, zero screws. Keep the pullout fronts flush with the wall so they do not snag the passage.
Conclusion
Fifteen ideas is a lot, so here is how I would spend the money. Measure first, then buy in this order: the landing zone (console or sorter), the coat solution (hook rail or over-door rack), then the shoe storage. Coats and shoes are the two things that turn a 3-foot entry into an obstacle course, and everything else is optimization.
Best first buy: the wall-mounted hook rail. It costs $15 to $40, installs in twenty minutes, touches zero floor, and fixes the biggest entryway problem: coats on chairs, coats on the floor, coats everywhere. A 36-inch rail with 5 hooks at 60 inches holds the household’s daily outerwear, and renters can swap to adhesive hooks with no holes at all.
Frequently Asked Questions (FAQ)
What is the minimum width an entryway needs to fit any furniture?
Keep 36 inches of clear passage as your hard minimum, and size furniture from what is left. In a 36-inch entry that means nothing deeper than 10 inches; in a 42 to 48-inch entry you can go to 12. Under 36 inches, skip floor furniture entirely and use wall hooks, over-the-door racks, and floating shelves, which claim zero walkway.
How do I store shoes in a tiny entryway with no closet?
If one or two people live there, an over-the-door organizer with 20 to 30 pockets handles the daily rotation for under $15. For three or more, a tilt-out cabinet 42 inches wide and 8 deep holds 8 to 18 pairs and doubles as your drop zone. A corner fits a spinning carousel: 12 to 16 pairs in an 18-inch footprint.
Can renters hang coat hooks without losing the deposit?
Yes, if you pick the right mount. Heavy-duty adhesive hooks hold 7.5 pounds each and remove clean with the pull tab, covering jackets and totes; for winter coats use an over-the-door rack, which needs no holes. If your lease allows small screws, use them: holes fill with spackle in minutes and most landlords accept them, but check first.
What are the best small entryway ideas for a narrow hallway under 40 inches wide?
Go vertical and shallow. A 10-inch-deep console leaves 30 inches of walkway, a wall hook rail at 60 inches holds coats with zero floor footprint, and floating shelves above 66 inches store seasonal bins. Avoid anything freestanding deeper than 10 inches: it cuts your passage under 30 inches and you will feel it every time you carry groceries in.
How do I organize a small entryway on a $50 budget?
Spend it in three pieces: a $12 over-the-door hook rack for coats, a $15 key tray and wall mail sorter for the drop zone, and a $20 rolling cart or boot tray for shoes. That covers coats, keys, mail, and shoes for under $50 with zero tools beyond a screwdriver. Add the floating shelves later when the budget allows.
There is no free wall space at all. Where does the stuff go?
Use the surfaces you forget: the back of the door takes an over-the-door rack, the gap takes a 7-inch rolling cart, and under the stairs takes crates on sliders. A corner coat tree needs no wall and claims only a 21-inch circle. If the ceiling is high, one floating shelf above the door frame holds a bin nobody sees.