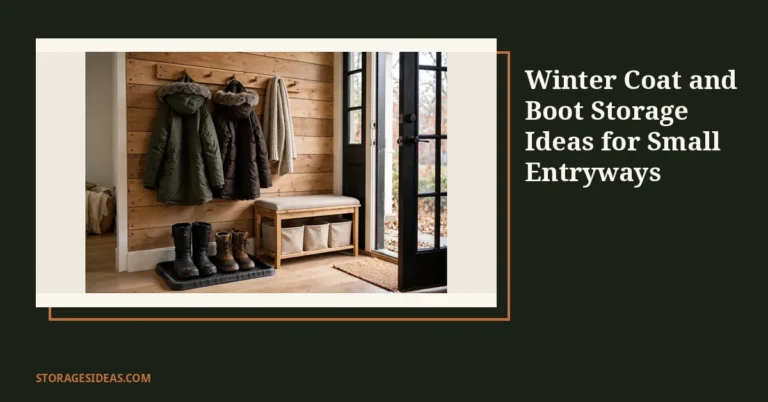

One glove on the stairs, a hat squashed behind the couch, a damp scarf draped over the newel post because nowhere else would take it. Winter accessories are small, so they end up everywhere, and by mid-January the entryway looks like a yard sale.
The fix is not a bigger closet. It is giving every hat, glove and scarf one small, obvious home within two steps of the door. These 10 ideas for winter accessories storage do exactly that, sized for real entryways and priced like real budgets.
Why Winter Accessories Need Their Own Storage Plan
Winter accessories storage is its own discipline because hats, gloves and scarves behave nothing like coats and boots. They are small, they are wet half the time, and there are multiples of everything in a family home. Four people means four hats, four pairs of gloves and a pile of scarves that can swallow a whole hallway in one afternoon.
That is why the entryway, not the closet, is the right address. Accessories get used twice a day, so storing them anywhere past the front door guarantees the pile comes back. Plan on three zones: a hook or rail for hats, a draining spot for wet gloves, and a drape-or-roll system for scarves.
Most of these ideas fit a rental, need no special carpentry, and cost less than a tank of gas. For the bigger winter picture, pair them with your coat setup (winter coat storage for a small entryway) so coats and accessories share one coherent drop zone instead of competing for the same hooks.
1. Wall-Mounted Hat Hook Rail: Hats Keep Their Shape and Stay Visible
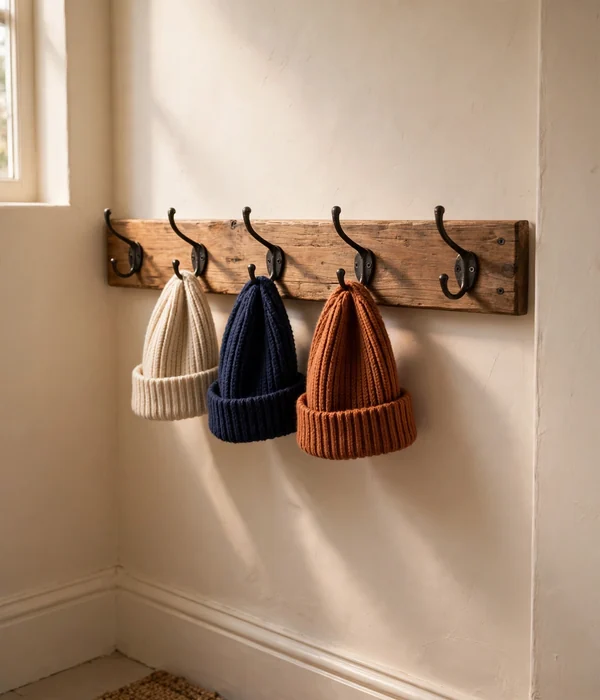
A hook rail gives every hat its own resting spot, and that changes everything. Hats hang instead of stacking, so knit crowns do not flatten and brims do not crease under the weight of three other hats. Because it mounts on the wall, it reclaims zero floor space, which is the whole game in a narrow entryway.
Look for a rail 20 to 24 inches wide with 5 or 6 hooks, rated around 40 lb total. That rating leaves comfortable margin for a wool coat plus three hats on the same rail.
Mount it at 60 to 66 inches so adults can grab and go, and space the hooks 8 to 10 inches apart so beanies do not swallow each other.
What you can do with it:
- Hang one hat per hook, brim facing out, so nothing stacks and creases.
- Reserve the end hook for the guest hat or the scarf nobody claims.
- Mount a second rail lower for kids if the household runs short.
- Keep two inches of clear wall behind each hook so knit crowns rest uncrushed.
- Choose a solid wood or metal rail with hidden screws, typically $15 to $25.
2. Shelf with a Front Lip: The Hat Catch-All That Cannot Slide Off
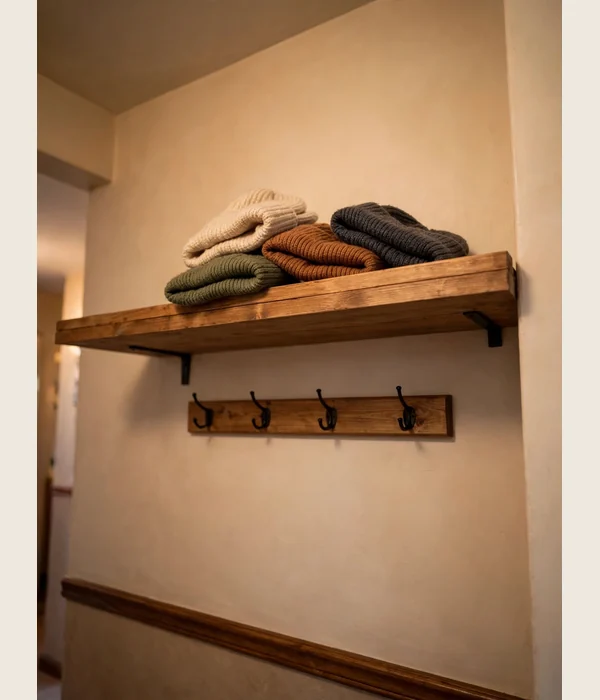
An open shelf fails for hats for one simple reason: round, squashy things roll off when the door slams. A front lip of 1.5 to 2 inches solves it completely, so hats can stack two or three high while the lip holds them as you grab the one you want.
Size the shelf 12 to 16 inches deep so beanies and caps sit securely without teetering, and 24 to 36 inches long for a family of four. A pine board with a lip rail costs under $20 at a home center, while ready-made hat shelves with the lip built in run $25 to $40.
Before you buy, measure the wall and check what is behind it. A stud finder beats a surprise: drywall anchors hold a hat shelf fine, but if the shelf sits above a doorway, confirm the clearance so tall visitors do not knock hats onto their heads.
Where it works best:
- Directly above the coat rail, inside arm’s reach of the front door.
- In closets, for off-season hats stacked above eye level.
- In mudrooms and garages, where capacity matters more than looks.
- In small apartments, where two statement hats on the shelf double as decor.
3. Over-the-Door Pocket Organizer: One Pocket Per Person, Per Item
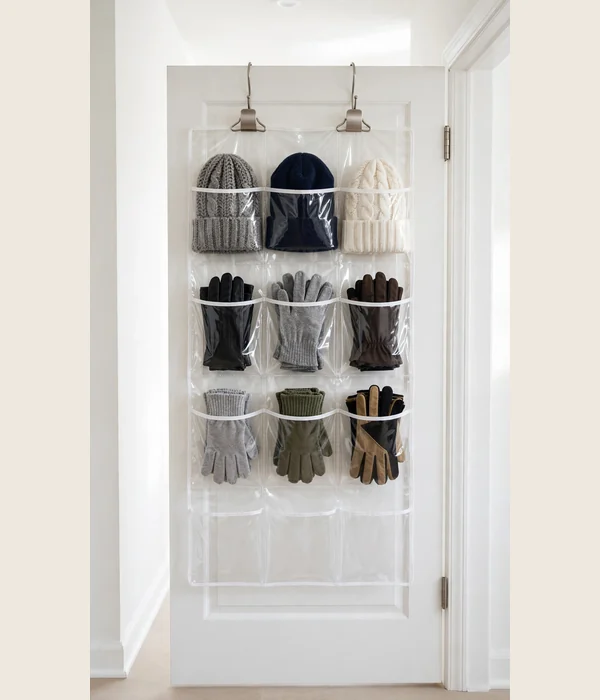
Twenty or so clear pockets turn the back of a door into a labeled grid, and the grid ends the daily dig. Hats go in the top pockets where the depth is greatest, gloves in the middle rows, and lip balm and sunscreen in the slim side mesh.
You see the blue gloves through the vinyl instead of dumping a bin to find them.
Standard organizers run about 57 inches tall by 20 inches wide and fit doors 1.4 to 1.7 inches thick. Canvas and clear-vinyl versions cost $12 to $20, and most hold 5 to 10 lb across all the pockets without sagging or pulling the door.
This is the most renter-friendly option on the list. No tools, no holes, and it lifts straight off the door when you move. Just confirm your door is a standard 1.4 to 1.7 inches thick so the hooks sit flat.
What you can do with it:
- Assign each family member a row so nobody asks who took their gloves.
- Put kids’ rows at their eye level and adult rows higher up.
- Slide damp gloves into mesh pockets so they air out instead of mildewing in a bin.
- Pick a slim organizer so the door still closes fully and latches.
4. Wet-Gear Drying Station: A Tray Plus Airflow, Nothing Fancy
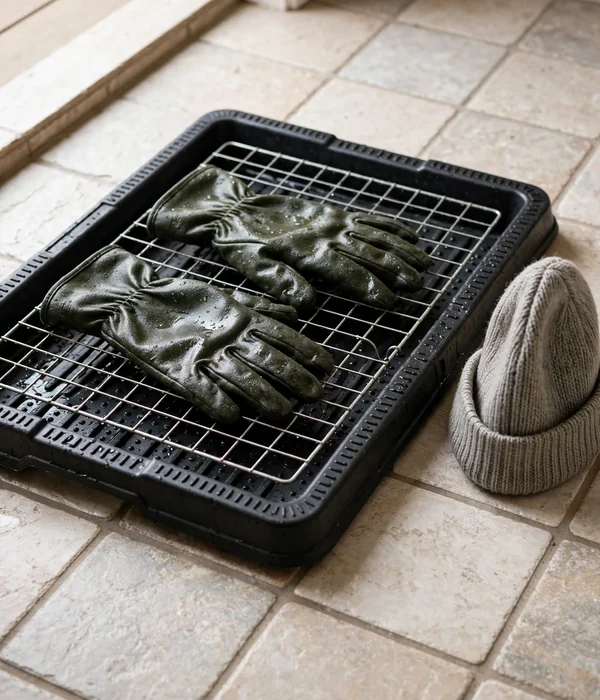
Gloves arrive wet and stay wet in a closed bin, which is how they earn that sour smell by February. A boot tray with a raised grid lifts gloves and hats above standing meltwater while room air circulates underneath them.
Elevating wet knit even one inch above the melt cuts drying time roughly in half, because the water can leave instead of wicking back in.
A 27.5 by 16 inch rubber tray fits three pairs of boots with gloves around the edges, and the 34 by 14 inch version with a 1.2 inch raised rim handles a whole family’s daily gear. Expect $17 to $31 depending on size, and add a wire grid or rely on the tray’s own molded ridges.
Set it up in order:
- Park the tray within two steps of the door, on tile or a washable mat.
- Shake the snow off gloves outside, then lay them palms-down on the grid.
- Stand hats brim-up so meltwater drains away from the crown.
- Leave one to two inches of space between items so air reaches every surface.
- Empty the tray weekly, because standing meltwater is what breeds the smell.
5. Hanging Glove Clips: Cuff-Down Drying That Actually Works
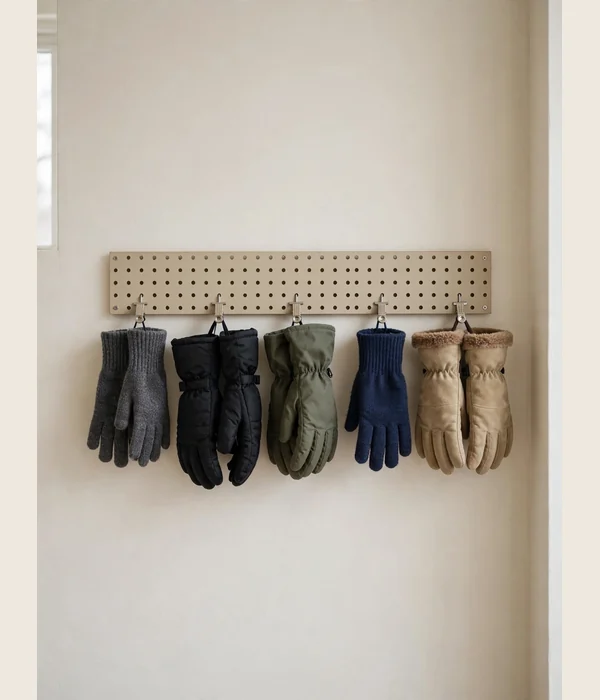
Gloves dry fastest cuff-down, because water drains out instead of pooling at the fingertips. A row of clips on a pegboard strip or tension rod holds every pair exactly that way, and you can grab the right pair without unstacking anything. It also keeps the soggiest gear off the floor entirely, which matters in a tight entryway.
A pack of 20 stainless glove clips costs $8 to $12, and a 24 inch pegboard strip with clips runs under $20. If your household soaks through pairs daily, a small forced-air glove dryer uses mild heat around 105°F and dries a pair in one to two hours, typically $30 to $60.
Set it up in order:
- Mount the clip strip inside the coat closet or on the mudroom wall at chest height.
- Clip each glove by the cuff, fingers pointing down, with a finger-width gap between pairs.
- Clip mittens by the loop or wrist strap so the lining faces outward.
- For soaked gloves, give them 30 minutes on the tray first, then move them to the clips.
- Replace worn clips each season, because a clip that slips drops a wet glove on the floor.
6. One Bin Per Person: The Cube System That Ends the Sorting
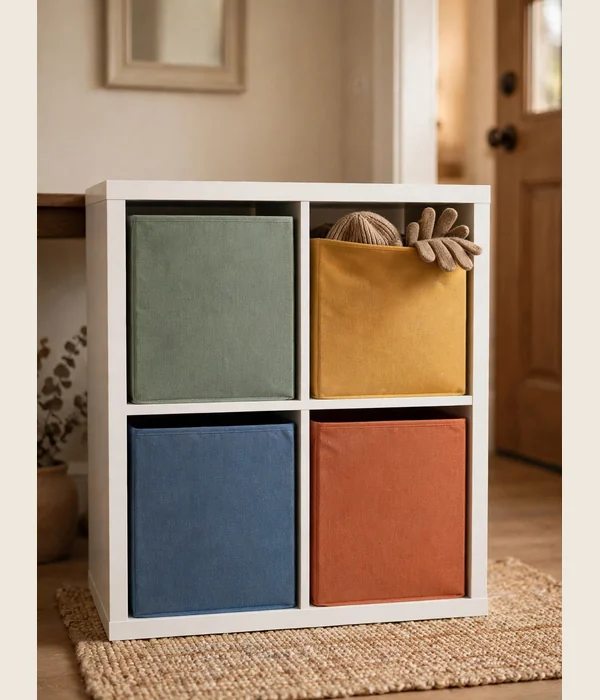
The sorting is the job nobody wants, so remove it entirely. One 13 inch cube per person means every hat and glove lands in exactly one place, and putting things away takes four seconds. No sorting, no matching, no communal bin to dig through on a cold morning.
The 13 by 13 by 13 inch fabric cubes run about $10 each, or $25 to $30 for a 6-pack. A 2 by 2 cube shelf, roughly 31 inches square, holds four cubes and costs $40 to $70. Label each cube with a tag or a color so the system survives when you are not there to enforce it.
What you can do with it:
- Give each household member their own cube, including a spare for guests.
- Keep the current week’s gear in the cube and the seasonal overflow in a closet.
- Wipe cubes down when salt stains appear, or toss fabric ones in the wash.
- Slide the shelf under the coat rail so the whole system fits a three-foot wall.
- Cap each person’s active gear at what fits their cube, and the pile cannot grow.
7. Leaning Scarf Ladder: Drape, Do Not Fold, Your Knits
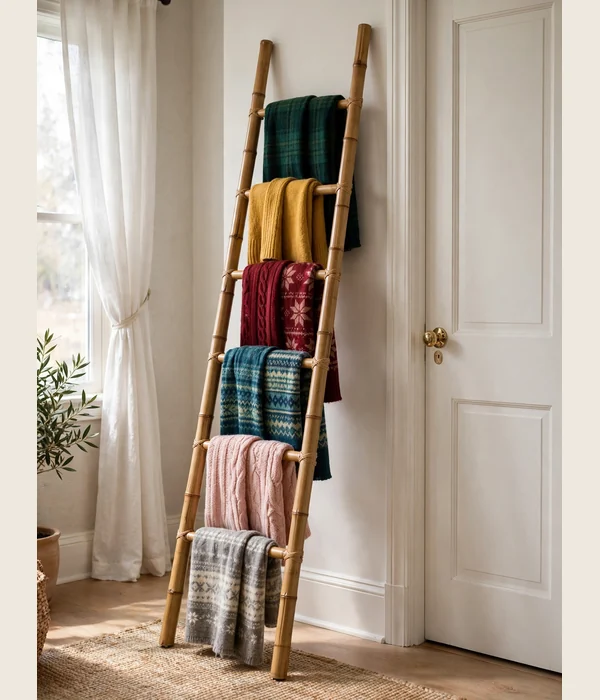
Wool and chunky knits stretch when folded over a thin rod and crease when crammed in a drawer. Draping them over wide ladder rungs spreads the weight evenly, keeps every scarf visible, and adds a little texture to a blank wall. Because you can see the whole collection, you actually wear what you own.
A 5 to 6 foot leaning ladder with rungs 12 to 14 inches apart holds 8 to 12 scarves draped double. Bamboo and pine versions run $25 to $45. It needs no screws and no studs, and it moves rooms in ten seconds when the seasons change.
This method suits wool best, since wool hates being compressed. For silk or thin scarves, the rolled box in point 8 packs more per inch. Either way, keep scarves visible in winter, because you will wear what you can see.
Where it works best:
- Beside the front door, in a two-foot gap that fits nothing else.
- In bedrooms, for the scarves you reach for most often.
- In small apartments, where it doubles as a throw blanket display.
- In entryways where a ladder reads as decor rather than as storage.
8. Rolled Scarf Organizer Box: Drawer-Like Order Without a Drawer
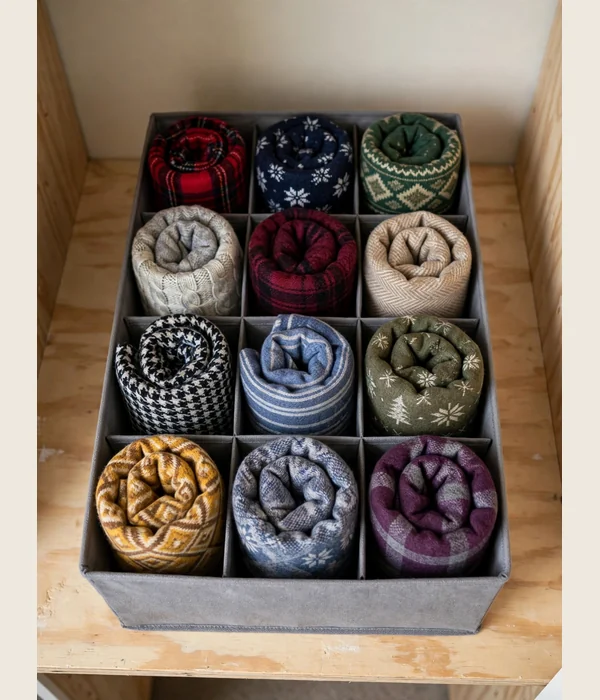
Rolling a scarf into a 4 to 5 inch roll does two jobs at once. It shows every pattern at a glance, and it avoids the hard fold lines that stacking causes in knit and wool. A compartmented box keeps the rolls standing upright like files, so nothing slides to the back and disappears until spring.
A 16 by 12 inch fabric organizer with 12 to 20 compartments holds a full family’s scarves and costs $12 to $18. Rolls should sit snug, not squeezed; if a roll fights back going in, that compartment is too small for a chunky knit.
Sort the compartments by how often you wear each scarf, not by color. The daily knits go up front at grab height and the occasion scarves in back. When a scarf sits untouched for a month, it has earned a move to the closet.
What you can do with it:
- Roll each scarf and file it upright, pattern-side out for easy picking.
- Keep thin silk scarves in the front compartments and chunky knits in the back.
- Slide the box onto a closet shelf or under the entryway bench.
- Move the box to the coat closet in winter and to bedroom storage in spring.
9. Rotating Scarf Ring Hanger: Twenty Scarves in One Hanger of Space
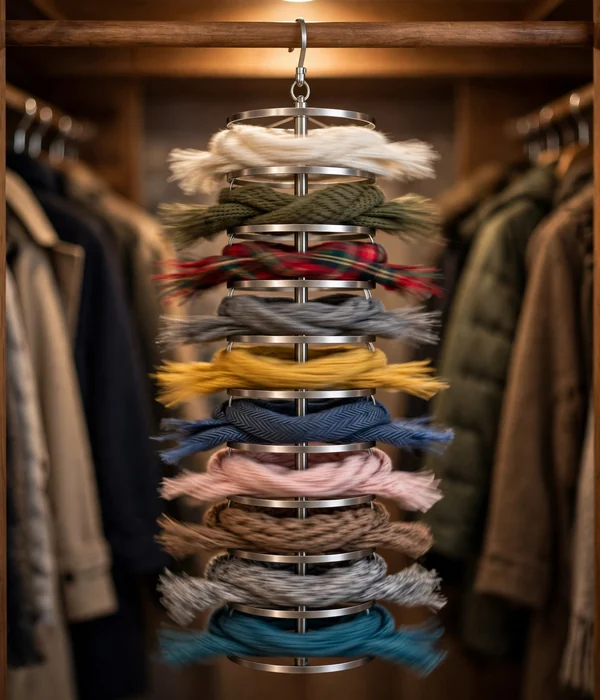
A multi-ring hanger hangs from the closet rod and spins, so twenty scarves live in the footprint of a single hanger. The 360-degree swivel turns the collection into a carousel you browse instead of a tangle you pull apart. For renters and anyone whose entryway has no spare wall, it is the highest-capacity option per inch of space.
Ten-tier ring hangers hold about 20 scarves, support up to 20 lb, and cost $10 to $16. Hang it on the closet rod beside the coats at eye level so it stays part of the daily routine instead of hiding behind the parkas.
Spread the weight evenly around the rings rather than loading one side. An unbalanced hanger tilts on the rod and slides toward the coats. Two lighter hangers beat one overloaded one if the collection keeps growing.
Where it works best:
- In coat closets, where scarves otherwise tangle with coat sleeves.
- In shared closets, with one hanger per person to keep collections separate.
- In small entryways, when the coat closet is the only storage you have.
- In rental homes, since it hangs on the existing rod with zero installation.
10. Family Drop Zone Cubbies: Every Kid Gets a Locker
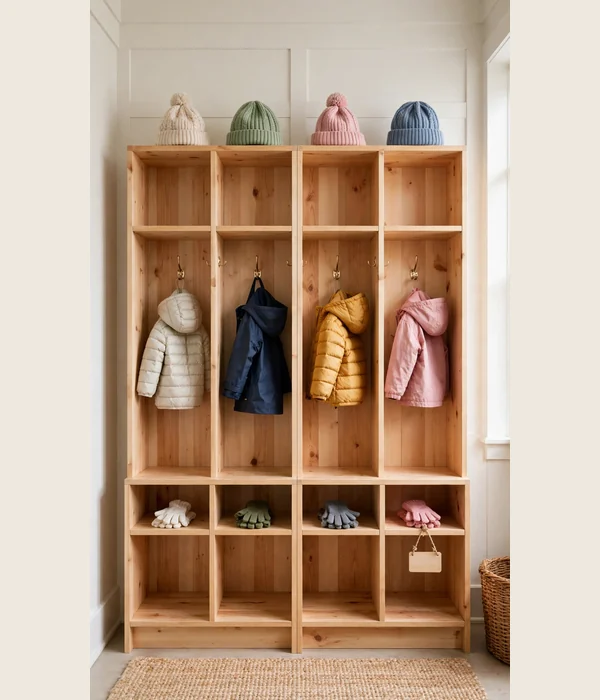
Kids do not put things away; they drop them. Cubbies turn the drop into the system: one section per kid, with a hook for the coat, a shelf for the hat and a cubby for gloves and boots. The mess gets boundaries, which is the most a parent can reasonably ask in February.
Place the unit as close to the door as the layout allows. Every extra step between the door and the cubby is a step where a wet glove hits the floor instead. A washable rug under the unit catches the drips that miss the tray.
A 4-section kids’ locker, about 36 by 12.5 by 35.6 inches, gives each child two hooks, a top shelf and storage cubbies, typically $90 to $160. Anchor it to the wall with the included anti-tip hardware.
A loaded locker will tip forward when a kid yanks a backpack off a hook, so that anchor is not optional.
What you can do with it:
- Label each section with a name tag or photo so toddlers find theirs.
- Keep the hat on the top shelf and gloves in the cubby, same spots daily.
- Drop a small basket in each section for the inevitable single glove.
- Fold the unit into the broader layout in entryway storage ideas so the whole entry works as one zone.
Conclusion
Winter gear chaos almost always traces back to placement. Every hat, glove and scarf needs one obvious home, and most entryways already have the space for it. Start with three moves: hats up on a rail or shelf, gloves draining somewhere with air, and scarves draped or rolled where you can see them.
Best for families: the one-cube-per-person system from point 6 plus the over-the-door organizer from point 3. Together they cost under $50 and need zero tools.
They give every person in the house exactly one place to look. In a family of four, that is the difference between a two-minute exit and a ten-minute glove hunt. For the full entryway picture, build these zones into the layout in these small entryway ideas.
Frequently Asked Questions (FAQ)
How do I keep gloves from smelling by mid-winter?
If your gloves smell, they are staying damp too long. Move them out of the bin and onto a draining setup like the tray in point 4 or the clips in point 5, cuff-down with air space around each pair.
Once gloves dry fully between wears, the smell usually fades within a week. For pairs that are already sour, a hand wash with mild soap plus a full 24-hour dry resets them.
My entryway has no free wall. Where do hats go?
If wall space is gone, use the door. An over-the-door pocket organizer from point 3 or a slim behind-door hook rail holds four to six hats without a single screw.
If even the door is taken, the top of a narrow shoe cabinet works as a hat shelf. Hats need their own visible spot, and a shared pile is what crushes them.
How many bins or cubes does a family need for winter gear?
One cube per person is the honest minimum for winter accessories storage, plus one spare for guests or the single-glove collection. A family of four fits comfortably in a 2-by-2 cube unit. If your kids each own more than two hat-and-glove sets, give the daily gear the cubes and move the extras to a closet shelf.
What is the best way to store wool scarves so they do not stretch?
Drape them over a wide rung or roll them loosely, since both methods avoid the stress points that cause stretching. Never hang a heavy wool scarf folded over a thin wire hanger; that is exactly what stretches the middle. If a scarf has already stretched, a gentle hand wash and flat-dry on a towel usually pulls it back to shape.
How do I stop the entryway pile from coming back in January?
The pile returns when the system needs sorting, because nobody sorts. Keep the one-bin-per-person rule and do a five-minute reset each Sunday, capping each person’s active gear at what fits their cube. If something does not fit the cube, it lives in the closet, not on the floor, and that cap is the whole secret.