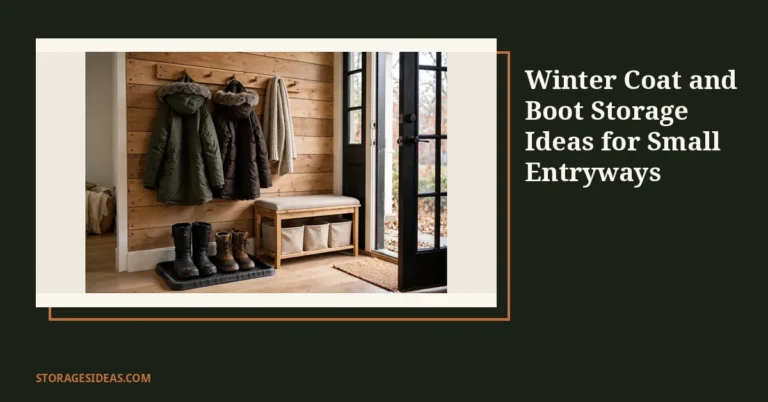

Picture this: the first real snow arrives, and your doorway turns into a soggy mountain range before breakfast. Mittens drip onto the welcome mat, boots leak across the floor, and you are hunting for the second glove with the carpool honking outside. A snow gear mudroom ends that chaos.
Build it before the first storm, not after. The nine ideas below follow your family’s real rhythm: walk in, shed the wet stuff, dry it, and grab it again in the morning. Most take one afternoon and cost under $50.
If your doorway is tiny, pair these with small entryway storage ideas for the full entry plan.
Why Your Entryway Needs a Snow Gear Mudroom Before December
Winter gear multiplies fast in a family. Two kids and two adults means roughly eight boots, eight mittens, four hats, and four coats arriving wet at the door every day from December through February. Without a system, that pile stays damp, smells by Thursday, and eats your weekday mornings.
A snow gear mudroom works because it separates the three jobs of every winter entryway: catching meltwater, drying what is wet, and staging what leaves tomorrow. One zone per job keeps damp gear from touching dry gear, and that is the real reason everything dries faster and smells better.
You do not need a dedicated room. A six-foot stretch of wall by the garage door or back door handles a family of four, as long as each zone owns its inches.
For wider layouts, browse these mudroom ideas before you plan your build. Start with the zones, not the furniture: measure the wall, mark the drip line, then buy.
1. Boot Tray Drip Station: Catches Every Drop of Meltwater
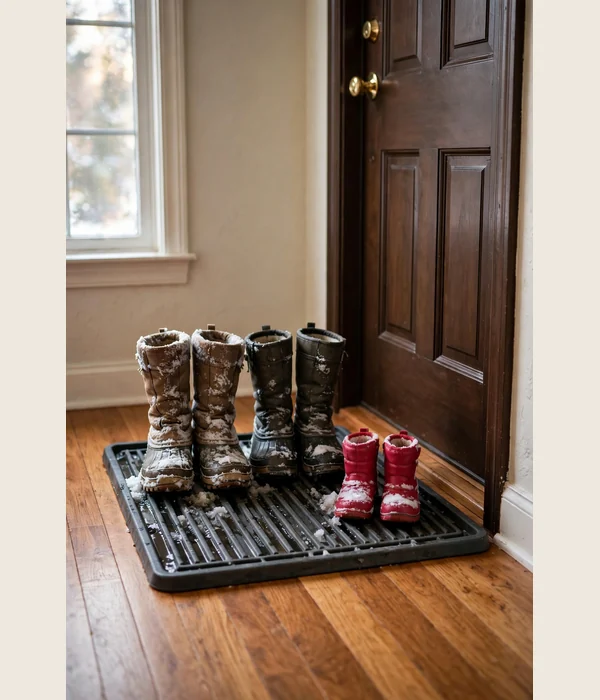
Meltwater is the real enemy. One pair of snow boots can carry several ounces of slush inside, and on a warm floor that spreads into a three-foot puddle. A boot tray with a real lip turns it into one contained pool you can dump in a single motion.
Size matters more than material here. Standard trays run 30 by 15 inches and hold two to three adult pairs. For a family of four, set two 34-by-16-inch trays side by side, or one extra-large 48-inch tray for the whole household’s boots.
Look for a lip at least 1.5 to 2 inches tall and raised ribs or a grid pattern on the tray floor. The ribs lift soles above the standing melt so boots dry from the bottom up instead of sitting in a cold bath. That one detail protects your floor finish and cuts drying time.
Set up your drip station in 4 steps:
- Measure your boot line first: a 48-inch tray holds about seven pairs, and two 30-inch trays hold five to six.
- Place the trays directly inside the door. Boots should land in the tray on step one, not after a wet walk across the room.
- Tuck a washable absorbent mat at the tray’s front edge to catch drips from boots still in transit.
- Empty the tray on heavy-snow evenings. Standing melt can refreeze overnight and glue boots to the tray.
Basic trays run under $20; a heavy 48-inch rubber tray with deep ribs lands in the $25 to $40 band.
2. Double-Row Hook Wall: Coats and Backpacks Stop Landing on the Floor
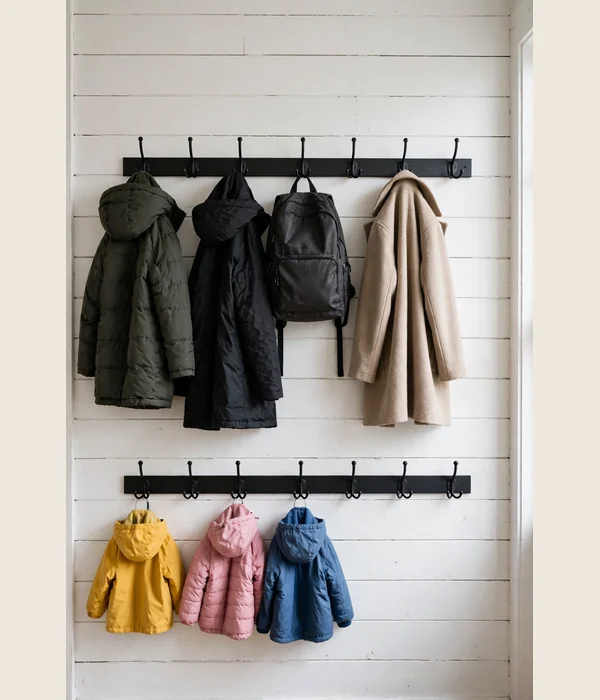
Hooks fail when they are hung for adults only. Kids will not hang anything on a hook they cannot reach, so every jacket ends up on the floor by Wednesday. Two rows at two heights fix the actual problem: the adult row holds coats, the lower row gives kids a reach they can use without a chair.
Mount the adult row at 60 to 66 inches off the floor and the kid row at 42 to 48 inches. Space hooks 8 to 10 inches apart center to center so bulky winter coats do not crush each other. Choose double hooks, because each one takes a coat plus a backpack or scarf in the same footprint.
Anchor every hook into a stud with 2-inch screws, or use toggle bolts in drywall. A wet wool coat pulls harder than you think, and one ripped-out hook teaches the whole family that hooks are optional. A painted 1-by-6 board makes a clean hook rail; expect $30 to $80 in materials for a DIY version.
Tips for best results: Label one hook per person with a small tag or color dot. It ends the “my coat is buried under yours” fights fast. Keep the rows 12 inches apart vertically so adult coats do not drape over the kid row.
Watch out: Skip adhesive hooks for winter gear. They fail at the worst moment under a wet coat’s weight, so renters should use a single screw-anchored rail board that leaves just a few small holes to patch later. For more coat ideas, see winter coat storage for a small entryway.
3. Sit-Down Bench with Open Cubbies: Gear Lands in Bins, Not Piles
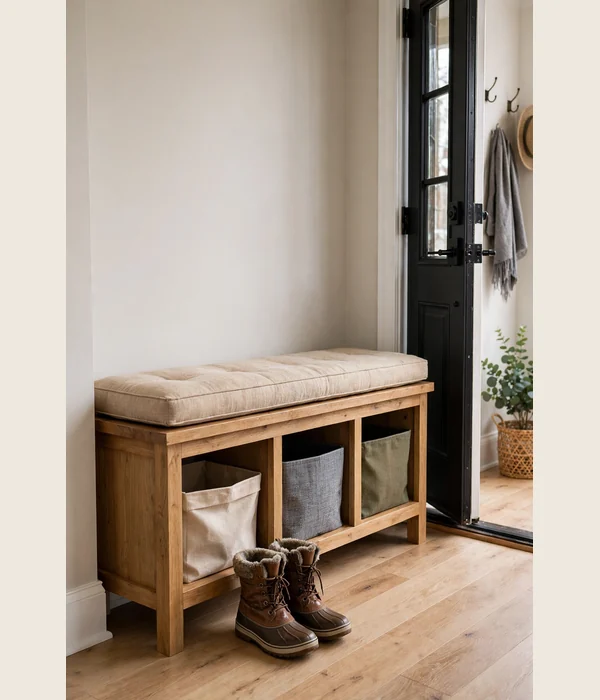
A bench does two jobs at once. It gives everyone a place to sit while wrestling off boots, and the space beneath it becomes the landing zone for everything that used to pile up. Kids hop on, kick off their boots, and their gear is already where it belongs.
Build or buy a bench 36 to 48 inches wide with the seat 17 to 19 inches above the floor. That height works for a five-year-old and a grown adult. Keep the cubbies open, because a bin you can see is a bin kids will actually use.
Set one fabric bin or basket per family member inside the cubbies and label each bin with a name. Snow pants, spare socks, and goggles live in the bins; boots go on the tray; coats go on the hooks. The whole system reads in seconds, which is exactly what a rushed morning needs.
Tips for best results: Choose bins with a front window or mesh panel so you can see what is inside without pulling them out. A washable cushion on the bench top makes it the seat everyone fights for, which keeps the system in use.
Watch out: Avoid closed cabinets for daily winter gear, since doors add one step kids skip and a sealed cabinet traps the damp coming off wet snow pants. Save closed storage for off-season gear. A DIY bench-and-cubby build typically runs $200 to $400.
4. Forced-Air Boot Dryer: Dry Boots by Morning, Every Morning
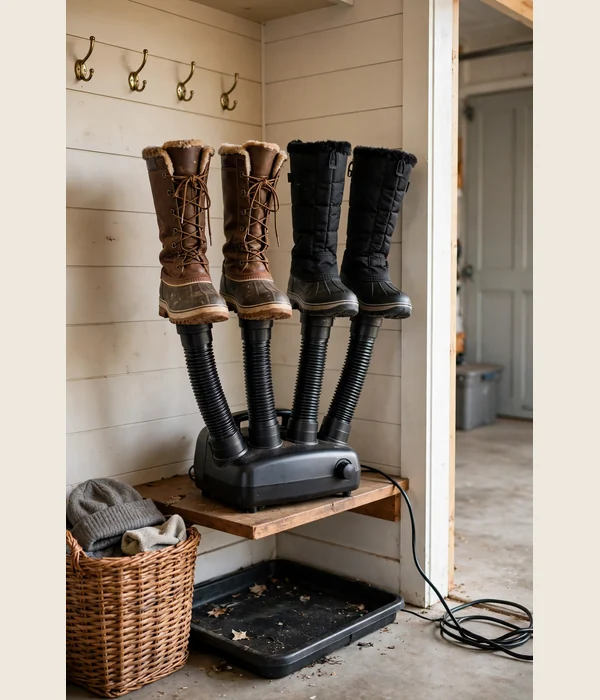
Wet boots left by the door are still wet the next morning. Newspaper stuffing helps, but it needs changing and nobody does it twice. A forced-air boot dryer fixes the physics instead: it pushes gently warmed air up through the boot so moisture leaves from the inside out, exactly where socks absorb it.
Most family-size dryers handle two pairs at once and dry them in 1 to 5 hours depending on how soaked they are. Look for heat-or-no-heat settings with a max around 105 degrees Fahrenheit. A typical unit is about 12 by 7.5 by 15 inches and runs near silent on a timer.
The payoff is a habit your family keeps: boots on the dryer become as automatic as plugging in a phone. Morning arguments about damp boots simply stop happening.
Run it right in 4 steps:
- Knock loose snow off the boots outside before they come in. Less snow means less work for the dryer.
- Slide boots onto the drying tubes toe-down so air reaches the toe box, where moisture hides.
- Choose the no-heat setting for leather boots and gentle heat for everything else.
- Set the timer for 2 to 3 hours and park the unit on a shelf or in a corner so it is not underfoot.
Expect $30 to $100 depending on capacity and timer features; the two-pair models are the sweet spot for families.
5. Wall-Mounted Glove Drying Rack: Mittens Stop Vanishing
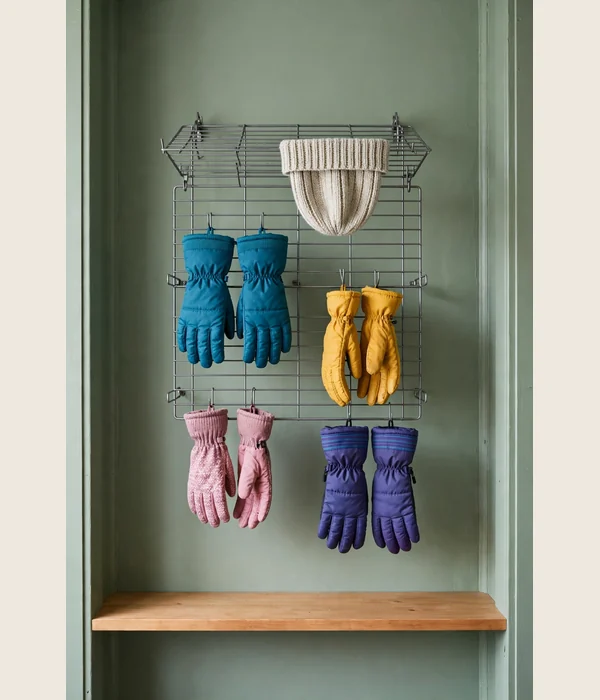
Gloves are the number-one lost item in every winter family. The real reason is that wet gloves get laid anywhere flat to dry, then migrate. A wall-mounted drying rack gives every pair a permanent home where air reaches them, so they dry open and stay visible.
These racks are simple steel frames, typically about 22 inches wide by 14 inches tall, holding four pairs of gloves, mittens, or hats. They mount to any flat wall with included hardware in about ten minutes. The open wire design means air circulates around the fabric instead of trapping moisture the way a balled-up mitten does.
The family math works fast: one four-pair rack handles one kid’s gloves, hat, and socks plus a parent’s pair. Add a second rack as the kids grow. Most run in the $15 to $30 band and carry long warranties.
Mount it right in 3 steps:
- Hang the rack at kid height, around 40 to 48 inches, next to the hooks. Gloves dry where they are stored.
- Mount over or near a boot tray so drips land in the tray, not on the floor.
- Open each glove fully before hanging it. A mitten flattened open dries overnight; a bunched one stays damp.
If your gloves never fully dry between school and sledding, pair the rack with the boot dryer from idea 4 for a combined drying corner.
6. Mesh Pocket Organizer: Damp Small Gear Airs Out on the Door
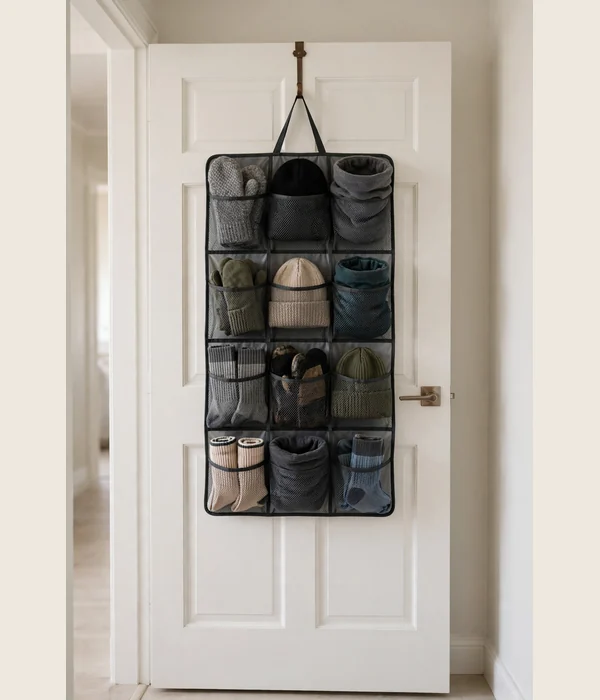
Small gear is what defeats the cubbies. Scarves, neck warmers, spare socks, and ski passes are too small for a hook and too wet for a closed bin. A mesh pocket organizer on the back of the mudroom door solves it by giving every small item its own aired slot.
Choose an over-the-door organizer with 12 roomy mesh pockets, sold as a 2-pack for roughly $12 to $20. Mesh matters because you can see what is in each pocket and damp gloves air out instead of fermenting. Assign each family member a row of pockets and label the rows.
It hangs over any standard door in a minute with no tools, which makes it the best rental-friendly idea in this list. When winter ends, roll it up and store it flat with the rest of the seasonal gear.
Tips for best results: Reserve the bottom rows for kids so they can reach their own mittens. Keep one pocket per person as the “morning pocket” holding the day’s ski pass, bus card, or lip balm.
Watch out: Do not overload pockets with soaked items; mesh air-dries damp gear, it does not rescue dripping-wet gloves. Wring out truly soaked items first, or park them on the drying rack from idea 5.
7. Labeled Per-Person Bins: Each Family Member Gets a Landing Zone
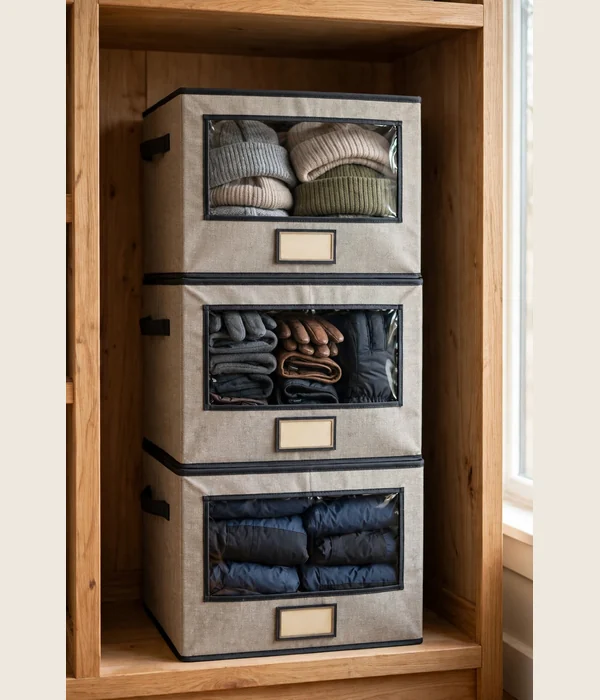
Shared baskets fail because nobody knows whose mess is whose. Per-person bins work because responsibility is visible: your bin is your bin, and a glance shows whether your gear made it home. This is the cheapest behavior fix in the whole mudroom.
Use stackable fabric bins with a metal frame, roughly 12 by 12 by 16 inches, with a front window so you can see inside without unstacking. A 2-pack typically costs $20 to $30. Label each bin with a name tag or color-coded label, and let snow pants, base layers, spare socks, and goggles live there.
Stack two bins per person in a cubby or on a shelf: the top bin holds today’s gear, the bottom bin holds the backups. When a bin gets soggy gear in it, the window lets you spot it from across the room.
Tips for best results: Do a two-minute bin check at dinner. Pull out anything damp and move it to the drying rack. Keep spare batteries, hand warmers, and an extra pair of kid socks in the bottom bin as the winter emergency kit.
Watch out: Bins are for staging, not storage of wet gear. If a bin smells musty, something wet is sitting in it too long. Ventilated fabric bins beat solid plastic totes here because damp items get some airflow.
8. Scarf and Hat Quick-Grab Station: No More Morning Hunt
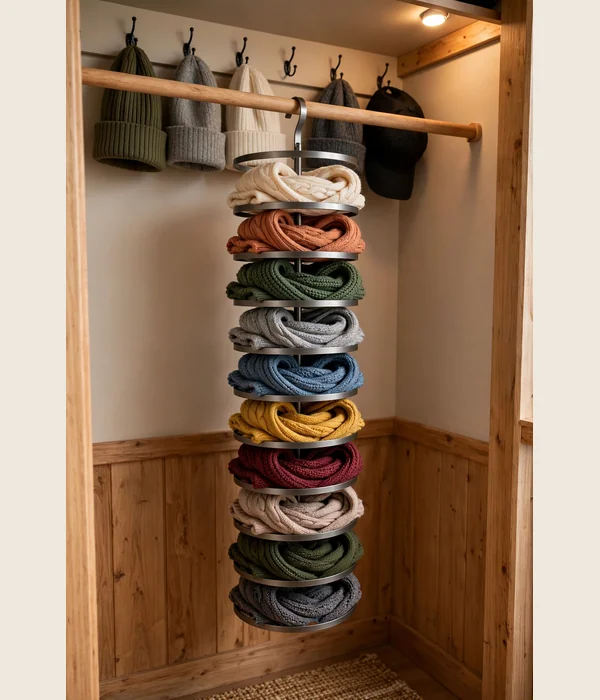
Scarves vanish into drawers and hats sink into coat sleeves. A quick-grab station keeps both visible and vertical, so the morning search drops to zero. The trick is one station at the door for daily wear, separate from the deep storage of backup gear.
Hang a 10-tier metal scarf hanger on the mudroom closet rod. It holds up to 20 scarves in one rod’s worth of space, and the smooth bars do not snag knits. Scarves you can see are scarves that get worn instead of rebought in February.
For hats, mount an over-door or wall rack with 16 hooks plus movable clips, around $15 to $25. Three tiers take beanies, caps, and anything with a loop. Hang it right beside the door your family actually leaves from.
Tips for best results: Limit the station to daily-wear items only. Off-season and backup scarves belong in a labeled bin on a high shelf. Five scarves per person at the station is plenty for most families.
Watch out: Do not hang wet snow-covered hats on the scarf tiers. Shake them off first or clip damp hats on the rack’s bottom tier over the boot tray. Knits stretched over wide hooks lose their shape, so use clips for beanies.
9. Exit-Rule Staging Shelf: Tomorrow’s Gear Leaves Tonight
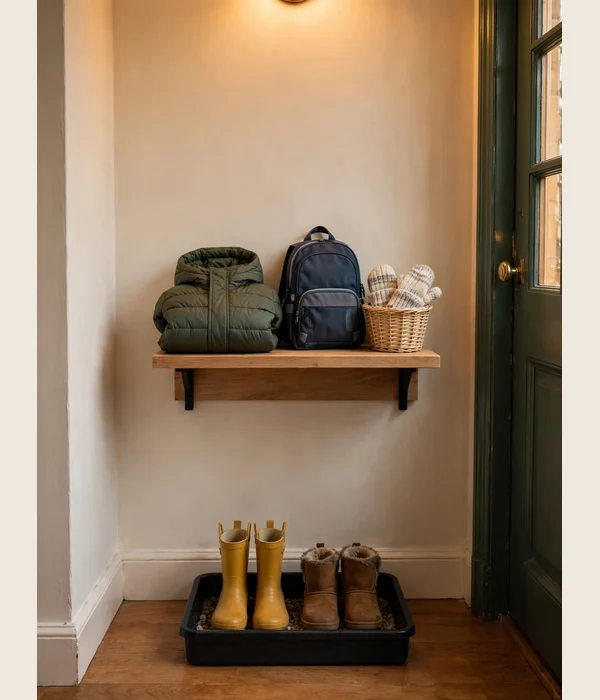
The smoothest winter mornings are decided the night before. A staging shelf is a small shelf or ledge by the door where tomorrow’s gear lands tonight: jackets folded, backpack packed, mittens paired. One rule, zero morning decisions.
Mount a 24- to 36-inch shelf at 48 to 60 inches high on the wall nearest the door your family uses. Add one small basket per kid for their next-day items and a tray for keys, wallets, and the car remote. The whole setup costs under $30 if you already own a shelf and basket.
Make the rule concrete: gear lands on the shelf before dinner. Kids stage their own bag and gloves, which builds the habit that keeps the whole mudroom working. Parents stage theirs too, or the rule dies in a week.
Tips for best results: Add a tiny whiteboard or chalk tag on the shelf for tomorrow’s extras: library books, permission slips, the snow pants for the field trip. The shelf becomes the family’s launch pad, not just a gear shelf.
Watch out: Guard the shelf from drift, because mail, sunglasses, and random kid treasures will colonize it. If it is not gear or keys, it does not live here. A five-second nightly reset keeps the system honest.
Conclusion
You do not need a renovation to survive winter with kids. A drip station that catches the melt, hooks every family member can reach, and a drying setup that actually dries covers about 80 percent of the daily mess. The rest is staging and labels, which cost almost nothing.
The mudroom fix: If you buy one thing, make it the forced-air boot dryer from idea 4. Wet boots are the domino that ruins everything else, because damp boots mean damp socks, cold feet, and a morning that starts behind. Dry boots by breakfast, and the whole system holds.
Start this weekend, before the first real snow. Pick the three ideas that match your wall, set them up in an afternoon, and let the routine build itself. By January, your doorway will be the calmest room in the house.
Frequently Asked Questions (FAQ)
What size snow gear mudroom does a family of four need?
You need less than you think. A six-foot stretch of wall handles a family of four if each zone owns its inches: about four feet for boot trays, two feet for a hook rail, and the cubbies under a 36-to-48-inch bench. If your entryway is smaller, use a wall-mounted glove rack and an over-door organizer.
Can a boot dryer sit on carpet?
It can, but put a tray or mat under it first. Dryers blow warm air, and the boots on them drip as they warm up. On hard flooring you can place it directly a few inches clear of walls for airflow, but if the only spot is carpeted, a cheap plastic tray underneath protects the carpet and catches drips.
How do I stop the mudroom from smelling like wet wool?
Smell comes from gear that never fully dries. If your rack stays musty, move damp items to the forced-air dryer so everything dries completely within hours, not days. Ventilation helps too: crack a nearby window for an hour, or run a small fan at the drying zone, and wash fabric bins and mats monthly.
What hook height works for both toddlers and adults?
Use two rows: mount the adult row at 60 to 66 inches and the kid row at 42 to 48 inches, with about 12 inches of vertical space between them. A five-year-old can reach 42 inches without a chair. Space hooks 8 to 10 inches apart so winter coats do not pile up on each other.
Are heated boot dryers safe for leather boots?
Use the no-heat setting for leather. Most forced-air dryers offer heat or no-heat, and the no-heat airflow still dries boots well overnight. Heat above roughly 105 degrees Fahrenheit can dry out and crack leather over time, so for leather snow boots, air-only drying plus the open wire rack is safest.
How do I keep kids using the system past the first week?
Make their part easy and visible: hooks at their height, a bin with their name on it, and the exit-rule staging shelf give them three small wins per day. If they skip a step, make the fix instant. The two-minute dinner bin check catches damp gear before it becomes a problem, because systems survive on routine, not on lectures.