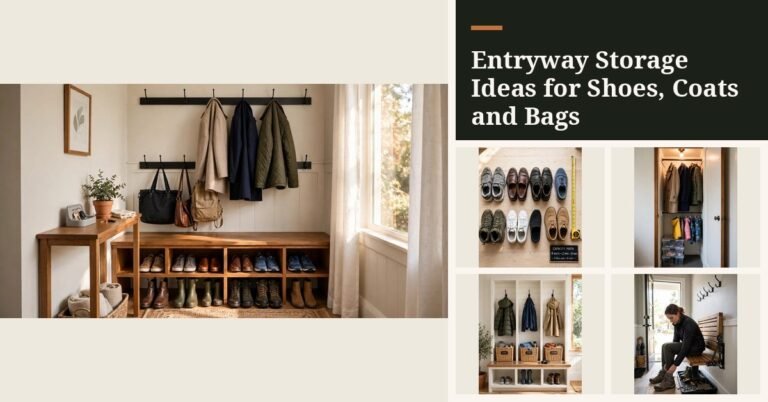
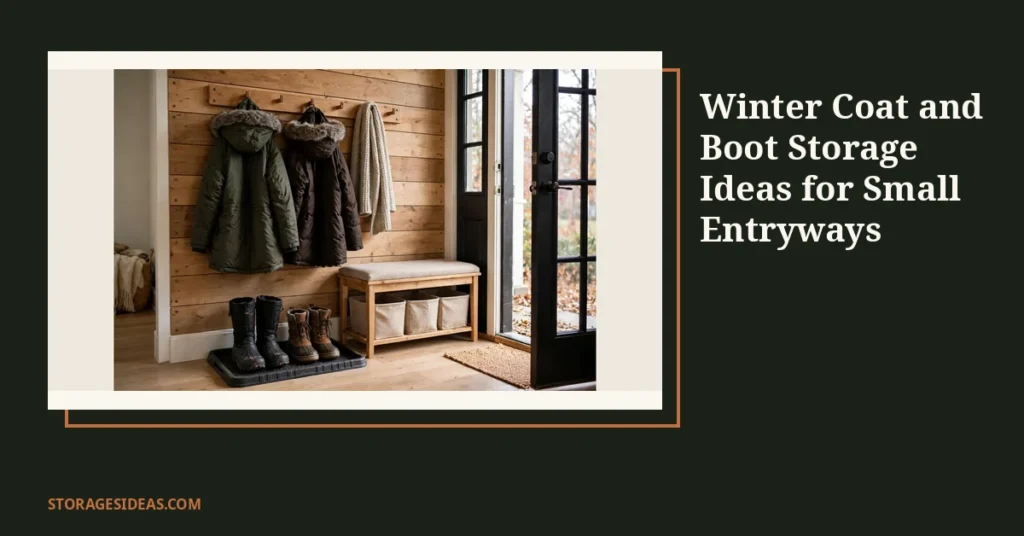
November is the month your entryway changes careers. The light fall jackets that lived on a single hook all October suddenly look wrong, and the heavy parkas, snow boots, and mitten bins move in whether you have room or not.
If you searched for winter coat storage small entryway, you already know the pain. These 12 ideas are built for tight foyers and skinny hallways, each one sized, rated, and renter-flagged so you can pick what fits your wall and your lease.
Most need under $60 and one free afternoon. A few need zero tools at all. our entryway storage hub covers year-round systems, and if your fall setup still needs a decor pass, these fall entryway storage tricks make the switch-over look intentional.
Why Winter Coat Storage Needs a Dedicated Small Entryway Plan
Winter gear breaks every rule that makes summer entryways easy. A parka weighs five times what a windbreaker does, knee-high boots will not stand up inside a shoe cabinet built for sneakers, and everything you bring home drips. A hallway that handled fall perfectly turns into a swamp by December if you do not change the system with the season.
The fix is a dedicated winter coat storage plan for your small entryway, built around three landing zones. Coats go up on wall hardware rated for real weight. Boots stay down on boot tray ideas that catch melt before it spreads.
Gloves, hats, and overflow get one shallow layer that nobody has to dig through.
Measure before you buy anything. Most tight entryways allow furniture no deeper than 10 to 12 inches before the walkway pinches below 24 inches, which is the minimum for comfortable passing. Check your door’s swing arc too: a rack that works perfectly on paper will fight the door every single morning if the arc crosses it.
Coats
1. Stud-Mounted Hook Rail: Your Heavy-Duty Backbone
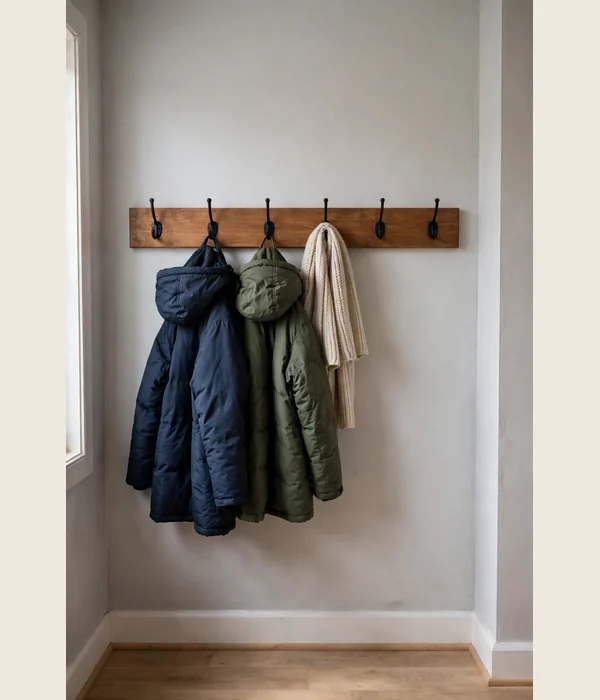
A winter parka weighs 5 to 7 pounds dry, and closer to 10 when soaked with sleet. That is why hooks fail every January: one wet coat rips a drywall anchor loose. A stud-mounted rail spreads the load across two or three studs, giving 50 to 100 pounds of total capacity.
Spacing is what separates a good rail from a useless one. Look for hooks set 6 to 8 inches apart. Closer than 5 inches and puffy sleeves overlap into a tangled knot.
A 36-inch rail with six double hooks handles a family of four’s daily rotation without a fight, and everyone stops knocking the neighbor’s coat down.
Shop for solid wood or powder-coated steel with each hook rated at least 11 pounds, and expect to pay $20 to $45. Anything under $15 usually means thin hooks and drywall-only anchors, which you should skip for winter weight. This one needs screws, so renters should keep scrolling to point 2.
- Find the studs with a stud finder and mark mounting holes at 60 to 65 inches, the standard adult reach height.
- If a bench sits below, leave 30 to 36 inches between the seat and the lowest hook so long coats never pool on it.
- Pre-drill into the studs, drive the screws flush, then hang two heavy coats as a test load overnight.
- Press both ends of the rail. Any flex means a screw missed the stud, so redo that side before real winter hits.
2. Over-the-Door Hook Rack: The Renter’s Zero-Drill Landing Pad
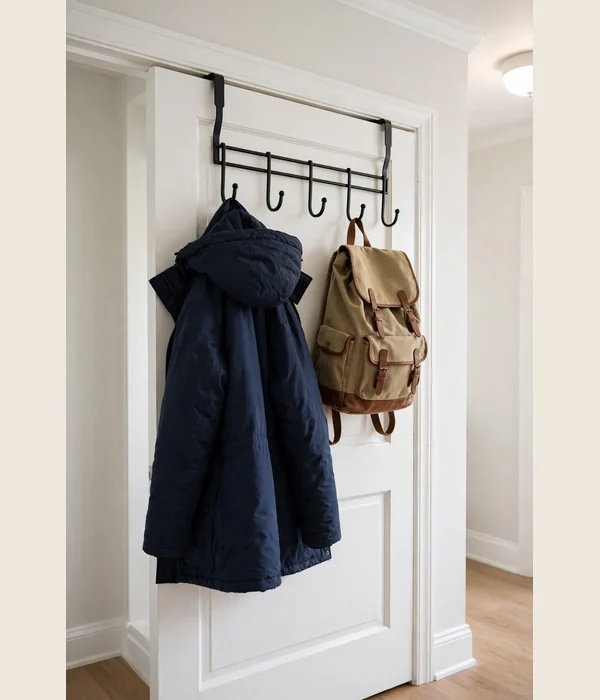
Renters get the same coat real estate with zero holes in the wall. A steel rack drapes over the top of the door on padded hooks, and quality models carry a 50-pound total rating. That is enough for two heavy parkas plus a backpack or purse, all swinging with the door instead of fighting the wall.
Measure before you order. Standard interior doors run 1 3/8 to 1 3/4 inches thick, and most racks fit doors up to 1 3/4 inches. You also need about a quarter inch of gap between the door top and the frame so the hooks seat without grinding.
What you can do with it:
- Hang two winter coats plus a school backpack on a 5-hook version without touching a wall.
- Lift the whole rack off in seconds when guests arrive and the door needs to look clean.
- Pair it with the over-the-door basket rack in point 10 for a complete no-drill entryway kit.
- Choose powder-coated steel over plastic, and skip any rack rated under 30 pounds total.
- Look for foam or felt padding on the hooks so the door finish stays mark-free.
One caution: a rack full of wet coats adds real swing weight to the door, so tighten any loose hinge screws first. And keep this one for adult gear only, since loaded hooks sit right at kid head height on most doors.
3. Slim Flip-Down Hook Row: Hooks That Vanish When Empty
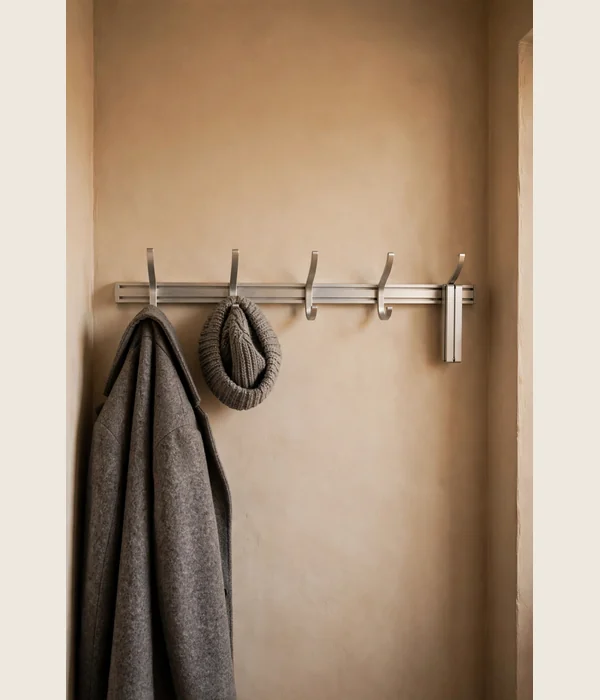
A hook row that folds flat against the wall solves the door-swing problem without giving up wall space. Open, each hook holds 11 to 13 pounds, enough for a parka or a boot bag. Folded, the whole row is under an inch thick, so the door clears it even in the narrowest hallway.
This is the hardware to pick when your only free wall is the one the door swings toward. A fixed hook sticking out 3 inches becomes a nightly collision.
A flip-down row gives you the same hanging spot when you need it and disappears when you do not, which also keeps the hallway looking calm.
Expect $25 to $40 for a five-hook aluminum or steel row. Screw-mounted versions need one stud or toggle bolts; adhesive versions exist but top out around 4 to 8 pounds per hook, which is not winter-coat territory. Mount at 60 inches and test one hook with your heaviest coat before you trust the row.
- Mark the row at 60 inches on the wall the door swings toward, then confirm the folded profile clears the door arc with a dry run.
- Anchor into at least one stud; use toggle bolts rated 50 pounds each for the remaining screws in hollow drywall.
- Flip each hook down and hang your heaviest parka for a full day before loading the rest.
- Teach the household the ritual: hooks fold flat on the way out, which keeps the walkway at full width all day.
4. Narrow Hall Tree Bench: Sit, Hang, and Stash in One Footprint
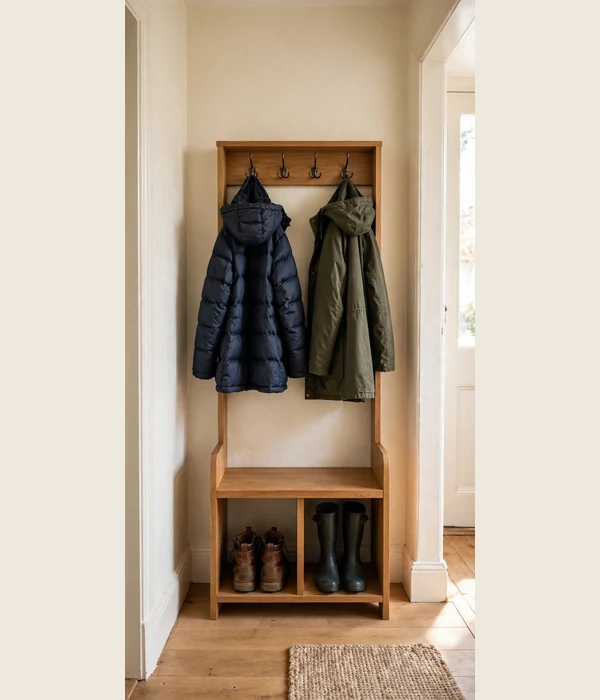
A narrow hall tree earns its floor space by doing three jobs at once. Slim models measure about 12 to 16 inches deep and 28 to 40 inches wide, so they sit against a wall in a hallway that would choke on a dresser. You get hooks above, a sitting bench in the middle, and shoe or bin storage below.
Check the ratings before you buy, because winter gear is heavier than these units are usually marketed for. Look for hooks rated 11 pounds each, a bench that supports 200 to 220 pounds, and a shelf load of 40 pounds or more. The whole unit should include an anti-tip kit, since four loaded hooks make anything top-heavy.
Where it works best:
- A 12.6-inch-deep model leaves a workable walkway in hallways as narrow as 38 inches.
- The 68 to 72-inch height uses vertical space your old coat rack never touched.
- The bench seat, usually 17 to 19 inches high, makes boot changes possible without hopping on one foot.
- Open cubbies below swallow two pairs of boots each if you leave out the dividers.
- Budget $60 to $130, and always use the anti-tip strap, especially with kids or a dog that leans.
Assembly takes about an hour and a basic screwdriver. Put the heaviest coats on the center hooks to keep the load balanced, and leave the two end hooks for lighter bags and scarves.
Boots
5. Boot Tray Zone: Catch the Slush Before It Travels
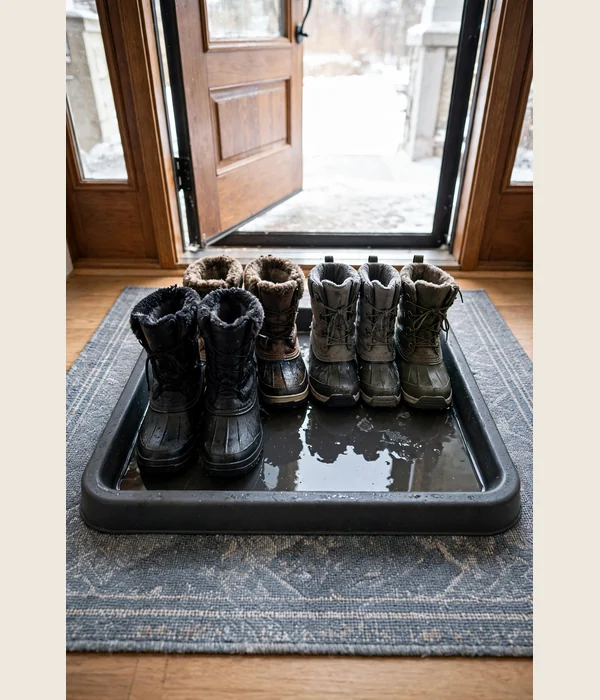
Every winter boot drags home a cup of melt, and a tray is the cheapest way to keep it off your floors. The workhorse size is 16 by 36 inches, which holds four large pairs, while a 16 by 27.5-inch tray handles three.
Look for a raised lip of at least an inch so water stays in the tray instead of sheeting across the tile.
Material matters more than looks. TPE or natural rubber trays stay flexible in cold and will not crack when stepped on, while thin plastic trays slide around and split at the corners. Expect $17 to $35 for a quality rubber tray, and confirm it lies flat, since some ship rolled.
The tray also becomes your household’s wet-boot rule: boots land here the second you walk in, every time. That one habit does more for floor protection than any mop, because melt that never leaves the tray never needs cleaning up. This is the single highest-value boot tray idea in the whole article for homes with kids.
- Measure your door swing and place the tray just inside it, where boots come off without blocking the doorway.
- Put tall boots heel-to-wall and shorter shoes in front, toe-out, so pairs nest without wasting inches.
- Slide a washable absorbent mat under the tray if your floors are hardwood, for insurance against splash-over.
- Rinse the tray in the tub once a week and wipe it dry, which stops the February funk before it starts.
6. Slim Flip-Drawer Shoe Cabinet: Boots Behind Closed Doors
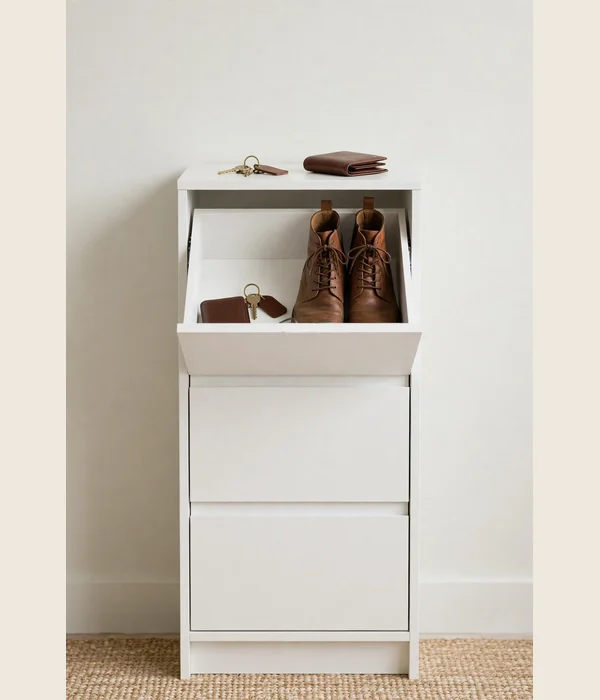
A slim shoe cabinet hides the chaos instead of managing it. The best models for winter run 6 to 9 inches deep and 30 to 32 inches wide, tall enough for two or three tilt-out drawers that swallow 12 to 15 pairs of everyday shoes. Closed, the whole thing reads as a narrow console, not a shoe pile.
Tall boots need a trick, though. Most flip drawers are built for sneakers, so fold the drawer dividers flat or leave one drawer half-open to give boots a home.
A wall-mounted steel model at 32 wide by 6 deep by 43 high keeps the floor clear for mopping. Check the interior first: men’s sizes over 12 often will not let the drawer close.
What you can do with it:
- Dedicate the top drawer to daily winter boots and the lower drawers to sneakers and overflow.
- Use the flat top as your key-and-wallet shelf, which builds the grab-and-go habit.
- Anchor it to the wall with the included anti-tip kit; a loaded 46-inch tower tips easier than you think.
- Choose steel or MDF with a sealed finish, since raw particleboard swells from boot moisture.
- Budget $45 to $90, and measure your tallest boot against the drawer depth before ordering.
This is the pick for entryways that face the living room, where a boot tray would read as clutter. Wet boots still need a tray nearby on truly slushy days, so plan the two as a team.
7. Upright Boot Stands: Dry Tall Boots Without a Closet
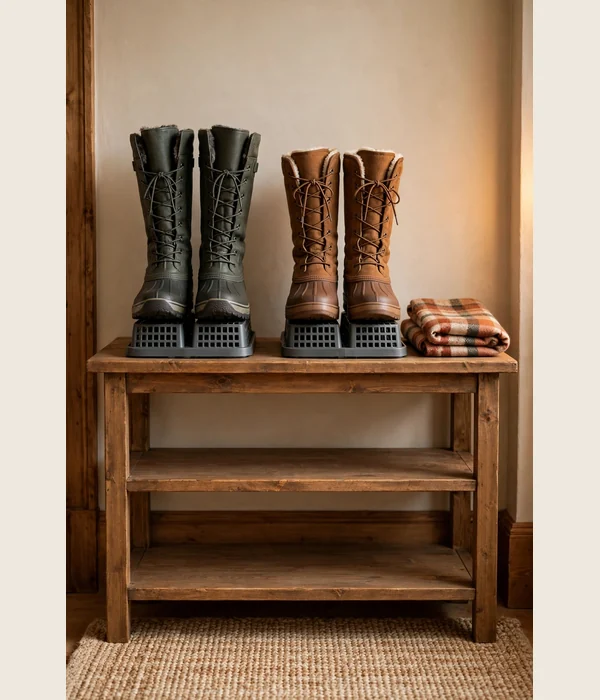
Tall boots die in two ways: folded over, which cracks the shaft, or stored damp, which breeds odor. Upright boot stands hold them vertical so air circulates through the shaft and the shape survives the season. A basic 16-inch stand costs under $15 for a set of two and fits on any shelf or under a bench.
The mechanism is pure airflow. Boots stuffed in a closet stay damp for days because moisture has nowhere to go. Stood upright with the opening clear, warm room air moves through the shaft and most boots dry overnight.
That means the same pair can go back on your feet the next morning instead of rotting in a pile.
Look for stands with a ventilated or wireframe design rather than solid tubes, since air needs to reach the inside. If you already own a hall tree or shoe shelf, a row of stands turns one 12-inch-deep shelf into drying storage for four pairs of tall boots.
- Place the stands on a shelf or tray where air moves, not inside a closed cabinet.
- Slide each boot on shaft-first and confirm the stand reaches at least halfway up the shaft.
- Keep very wet boots on the boot tray for the first hour, then move them to the stands to finish drying.
- Stuff newspaper into the toe for one night if a pair smells, then pull it out in the morning.
8. Gap-Fit Rolling Boot Cart: Steal the Dead Space Beside the Door
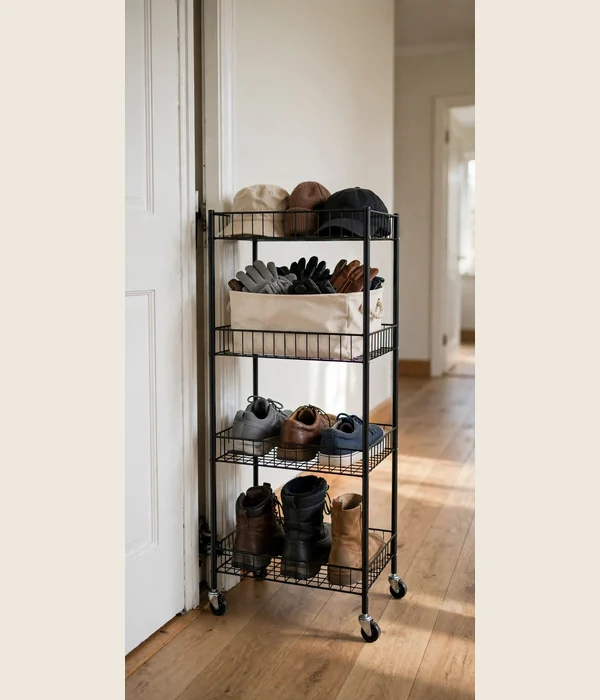
Every small entryway has a dead gap: the 6 to 8 inches between the door frame and the nearest wall, too skinny for furniture, too wide to ignore. A slim rolling cart built for that gap turns wasted inches into a boot and gear tower that pulls out with one hand.
Look for carts about 6 inches wide, 15 to 18 inches deep, and 28 to 34 inches tall, with three or four tiers. The bottom tier holds boots, the middle takes shoes and a small bin of glove pairs, and the top becomes the hat and scarf shelf.
Total price runs $25 to $45, and the wheels lock so the cart stays put when the door slams.
Where it works best:
- Gaps beside the door frame, between a radiator cover and the wall, or next to a coat closet.
- Rental homes where nothing can be screwed in and floor space is already spoken for.
- Households where each person gets one tier, which ends the daily boot hunt instantly.
- Entryways where a tray alone leaves gear sprawling; the cart gives every item a level.
- Measure the gap at the floor and at handle height, since baseboards can steal an inch.
Renter note: nothing about this cart touches the wall, so it is deposit-safe. The only rule is to keep the load low and centered, because a top-heavy cart tips when a kid yanks the bottom tier.
Accessories and Overflow
9. Pegboard or Wall Basket Row: Gloves, Hats, and Scarves at Arm’s Length
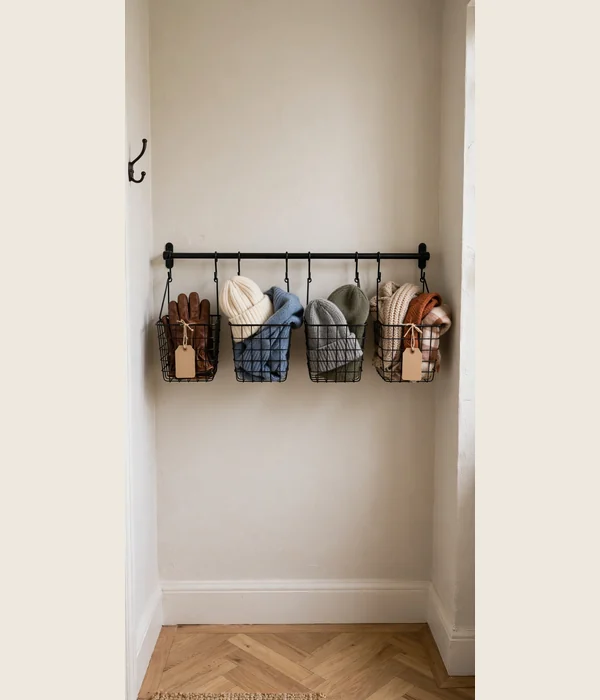
Accessories are what actually bury an entryway. Coats and boots are big but predictable; it is the eight gloves, three hats, and two scarves per person that migrate across every surface. A shallow wall basket row gives each item a home at arm’s length, right where you dress and undress.
The system is one basket per person plus one spare for guests. Wire or fabric baskets about 12 by 8 by 6 inches hold a full winter accessory set for one adult, and a 36-inch mounted rail carries four of them with room to breathe. Total cost lands around $30 to $50, and the whole thing mounts with four screws.
Label each basket with a name or a color, because unlabeled shared storage always reverts to a junk pile. This is the moment to build a true drop zone setup: one basket per person is exactly the skeleton a drop zone hangs on, and winter accessories are its busiest tenants.
- Mount the rail at 48 to 54 inches so kids can reach their own baskets.
- Slide one basket per household member onto the rail, plus one labeled GUEST.
- Put each person’s gloves, hat, and scarf in their basket the night the gear comes out of storage.
- Empty and re-sort baskets monthly; February is when single gloves start hiding in the wrong baskets.
10. Over-the-Door Basket Rack: Deep Storage That Hangs in Thin Air
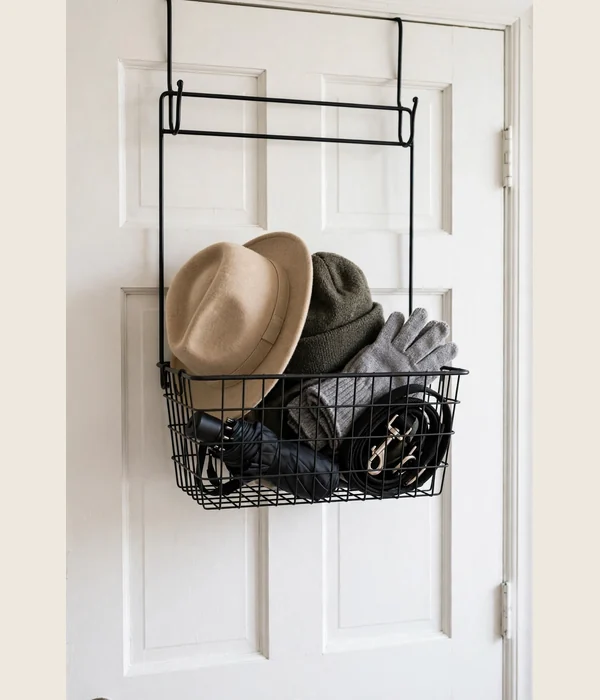
Sometimes the wall is fully spoken for and the only free surface is the back of the door. A steel over-the-door basket rack hangs on the same padded-hook principle as point 2’s rack, but swaps hooks for a deep basket that swallows gloves, hats, leashes, and the spare umbrella.
The useful size is about 17 inches wide by 11 inches deep by 4 to 5 inches tall, with a 50-pound total rating on carbon steel models. That basket holds four to six hat-and-glove sets without spilling when the door moves.
Expect $25 to $40, and confirm your door is 1 3/4 inches thick or less, which covers nearly all standard interior doors.
What you can do with it:
- Corral the family’s full glove and hat collection in one basket instead of five pockets.
- Keep the dog leash, poop bags, and a lint roller in the same grab zone by the door.
- Move it to the coat closet door in spring when winter accessories rotate out.
- Choose a model with a removable basket so you can carry the whole load to the laundry at once.
- Skip wire baskets with wide gaps if you store small kids’ mittens, which slip straight through.
Watch the door clearance the same way: the basket needs about 5 inches of wall clearance behind the door’s swing. If the door opens against a wall, the wall basket row in point 9 is the better call.
11. Entryway Storage Bench with Bins: Sit-Down Storage for the Whole Family
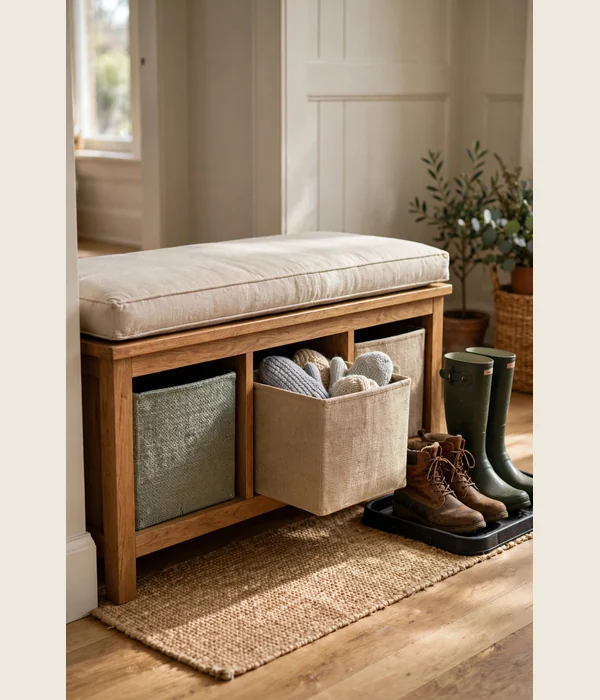
A storage bench is the family version of the hall tree, minus the hooks. The seat gives everyone a place to sit for boot changes at 17 to 19 inches high, and the cubbies below hold labeled bins of winter accessories, spare mittens, and the shoe overflow that never fits in the cabinet.
Size the bins to the cubbies, not the other way around. Most benches take 12 by 12 by 10-inch fabric bins, two per wide cubby, and the open fronts make grab-and-go actually work for kids. Look for a bench rated to at least 200 pounds of seated weight, and expect $50 to $100 for a sturdy MDF or solid-wood model.
This is where your overflow system lives. One bin per person for accessories, one bin for the household spare set (because gloves vanish in pairs), and one bin for the out-of-season overflow that rotates in spring. The bench becomes the family’s winter gear headquarters, and the floor stays clear because everything has a lidded home.
- Place the bench where boots come off, with the boot tray from point 5 alongside it.
- Load one labeled bin per person into the cubbies, plus one bin marked SPARES.
- Put the heaviest items, spare boots and the salt bag, in the bottom cubbies for stability.
- Wipe the seat weekly; it collects the same salt ring the floor gets, just higher up.
12. Seasonal Swap Cart: Rotate Fall Gear Out and Winter Gear In
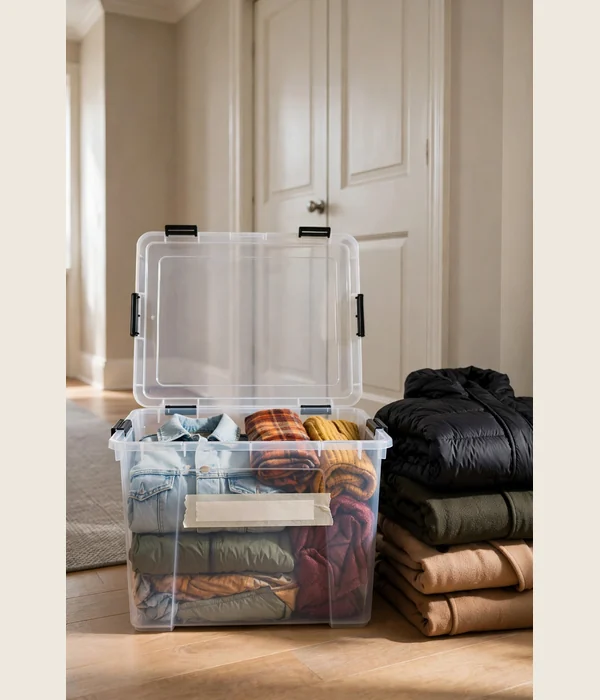
The final idea is not a product so much as a ritual, and it is the one that makes the other eleven keep working. Winter gear is bulky, and no small entryway holds two seasons at once. A labeled swap system moves the fall layer out of the way in November and brings it back in April.
You need one clear 60-quart bin per two people, which fits under most beds or on a closet shelf. When the first hard freeze hits, every light jacket, fall scarf, and sneaker that will not survive slush goes into the bin, labeled FALL with the year.
The winter gear takes its place the same afternoon, so the entryway never holds both seasons at once.
What you can do with it:
- Run the swap the weekend the forecast first shows a week below freezing, not the week after.
- Toss a dryer sheet in each bin to keep stored gear fresh through the season.
- Keep one transitional jacket out per person, because November lies about being done with fall.
- Label bins on two sides so you can read them stacked in either direction.
- Store the bins under the bed or on the highest closet shelf, the two spots nobody needs daily.
This ritual takes one hour twice a year and quietly doubles your entryway’s effective storage. Every idea above works better when it only has to hold the gear of one season.
Conclusion
If your entryway is drowning right now, start with the boot tray and the stud-mounted hook rail. That pair costs under $75 together, covers the two heaviest failure points, and takes one afternoon to install. Add the basket row next month when the accessory drift starts, which it always does by December.
Best for renters: the over-the-door hook rack and basket rack combo from points 2 and 10. Zero holes, zero tools, and a 50-pound combined rating that handles real winter coats. Pair them with the gap-fit rolling cart in point 8 for a full deposit-safe system that moves out with you in a single trip.
For homeowners with a drill and a stud finder, the narrow hall tree in point 4 is the single piece that replaces three others. And whatever you buy, run the November swap ritual from point 12, because the best storage system in the world cannot hold two seasons at once.
Frequently Asked Questions (FAQ)
How many hooks does a small entryway need for a family of four?
Plan on two hooks per person for winter, so eight for a family of four: one for the daily coat, one for a bag or tomorrow’s layer. If your wall only fits six hooks, give adults the rail and put kids’ coats on an over-the-door rack. Fewer than that, and doubling up is how the pile begins.
My tall boots never fit in a standard shoe cabinet. What works instead?
If the flip drawers will not close over your boots, stop forcing them and switch systems. Store tall boots upright on stands on a 12-inch-deep shelf, or fold one drawer’s dividers flat to make a tall slot. If you are shopping fresh, pick a cabinet with an adjustable drawer.
What is the best winter coat storage plan for a small entryway if I rent?
If you rent and cannot drill, build around the door: an over-the-door hook rack rated for 50 pounds handles the heavy coats, and a matching basket rack takes the accessories. Add a rolling cart beside the door for boots and a rubber boot tray for melt. The full kit costs roughly $75 to $110 and needs no tools.
How do I keep a boot tray from smelling by February?
If the tray smells, the problem is standing water, not the tray. Rinse it in the tub once a week, wipe it dry, and move boots to upright stands after the first hour of dripping. If the funk is already there, scrub with warm water and white vinegar, then dry it fully.
When should I swap fall gear for winter gear in the entryway?
If you swap too early, everyone digs for the fall jacket they still need; wait too long, and the entryway holds two seasons of gear. The sweet spot is the weekend the forecast first shows a full week below freezing. Move light jackets and sneakers into labeled bins that weekend, and reverse the ritual in April.