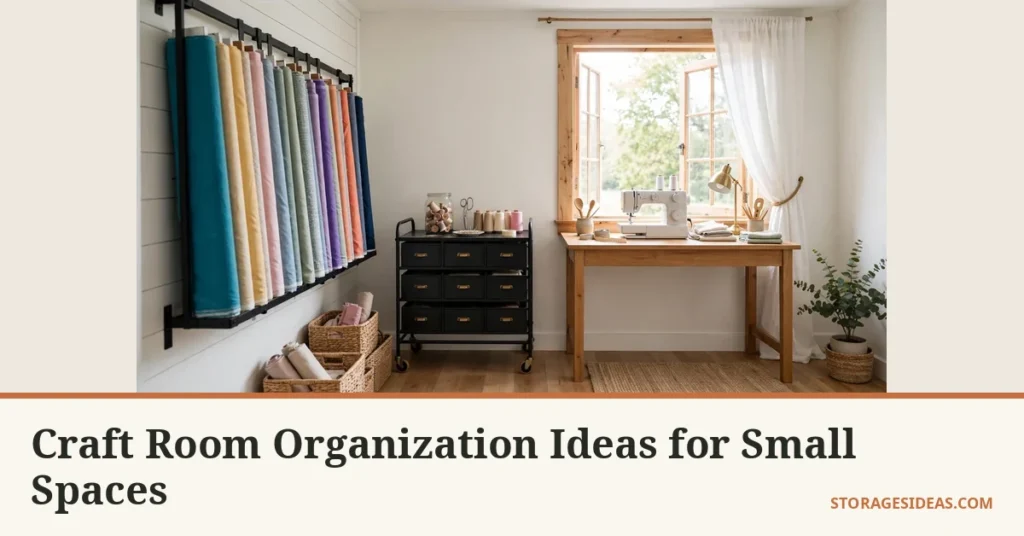
The half-finished quilt has lived on the dining table for three weeks. Nobody dares move it, nobody is finishing it, and nobody can start anything else because the good table is taken. If that scene sounds familiar, your problem is not a lack of willpower. It is a lack of landing zones.
These craft room organization ideas are built for small spaces, the kind where the “craft room” is a spare bedroom corner or half a garage. Every idea below carries real measurements, real shopping specs, and a clear yes-or-no on whether it works for renters. Nothing here needs a workshop or a second mortgage.
Why Craft Room Organization Ideas Work Best as Zones
Craft supplies multiply because every hobby arrives with its own container, and the containers never talk to each other. The fix is not more bins. It is zones: five of them, each with a job. Fabric and sewing. Paper and card. Tools and machines. Paint and finishing. Display and finish line.
The mechanism is simple. You stand or sit in one spot and everything within arm’s reach belongs to one craft phase. No more walking the quilt across the room to find the rotary cutter. The bottleneck in home studios is retrieval, not storage. A yard of fabric you can see gets used. A yard in a sealed tote becomes furniture.
Small spaces add one rule: nothing eats floor space twice. Walls hold light things like thread and ribbon. Rolling carts hold heavy things like paint and project kits. Fold-away surfaces handle the cutting table you need for twenty minutes, not twenty-four hours. A 6×8-foot corner can hold what used to sprawl across two rooms.
Fabric and Sewing Zone
1. Mini Bolt Wrap: See Every Fabric at a Glance
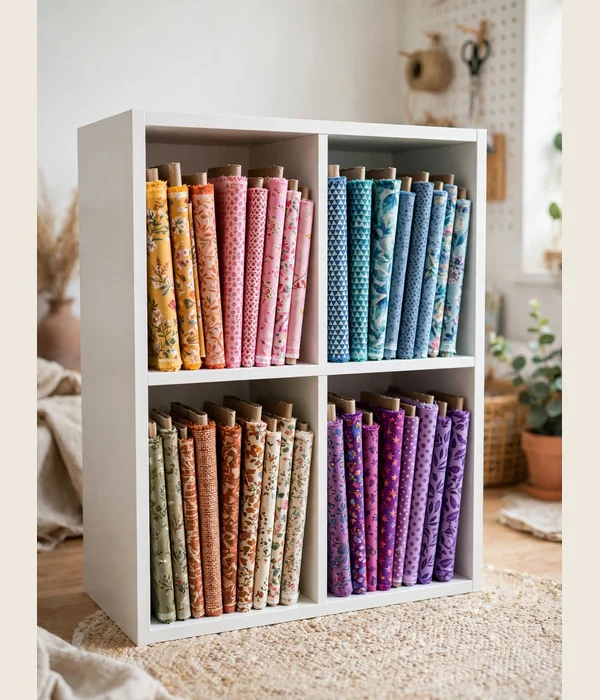
Fabric in bags goes invisible, and invisible fabric never gets used. The mini-bolt method turns every yard or two into a stiff, book-like rectangle you can stand upright on a shelf. It takes a stash from heap to shop display with zero new furniture.
The mechanism is visibility plus uniformity. When every bolt is 7 inches wide and 10 inches tall, they pack into any 13-inch cube shelf like books, and you can read the whole stash in one glance. It is renter-safe by default: no holes, no hardware, just shelves you already own.
What to buy: comic book boards (6.75 x 10.5 inches) run about $12 to $18 per 100-pack; pick acid-free for long-term cotton storage. Dollar-store foam boards cut to 12 x 10 inches work but fit fewer per shelf. Cut boards to 6 x 10 inches for pieces under one yard, and pin each roll.
- Fold fabric in half lengthwise, selvage edges together, then fold again into quarters to fit the board width.
- Roll the fabric snugly around the board like a fabric-store bolt, keeping edges even.
- Pin the loose end so the bolt cannot unroll, then stand it upright with the folded edge out.
Watch out: sunlight fades the facing edges of displayed bolts within months. If the shelf faces a window, rotate the front bolts monthly. Delicate silks belong in a closed drawer, not on display.
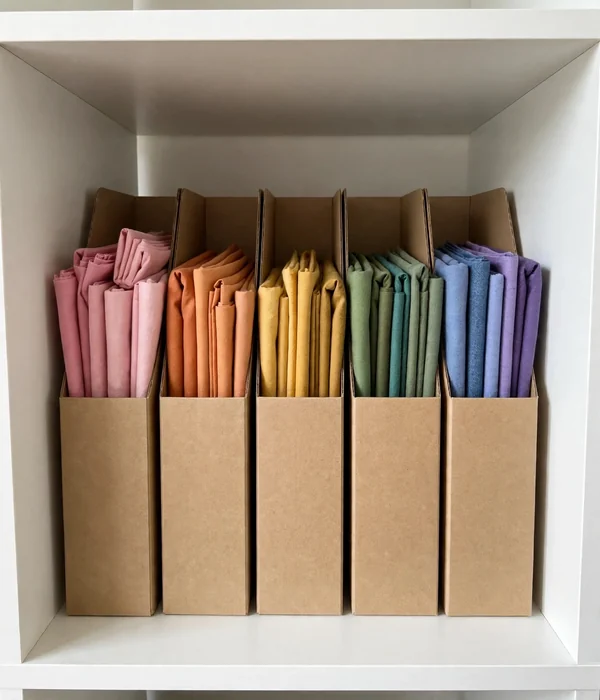
2. Magazine-File Fabric Cubbies: Cut the Chaos to Uniform Rows
A 13-inch cube shelf becomes a fabric filing system the moment you drop magazine holders into each cube. Folded fat quarters slide in upright like files, sorted by color or project. The result reads like a boutique instead of a closet.
The mechanism is constraint. A 13 x 13-inch cube opening is deep enough for a folded fat quarter stack, and the magazine file forces every bundle into the same footprint. Same footprint means nothing tips or slumps, and pulling one bundle no longer disturbs the rest.
What to buy: a 4-cube shelf unit (about 30 x 15 x 30 inches) runs $25 to $45 in particleboard, $60-plus in solid wood. Buy plastic or heavy-card magazine holders 10 to 12 inches deep; 8-inch holders let fabric flop over the front. Measure cube interiors first, since they vary by half an inch between brands.
- Sort by color family first, project bundles second; keep a dedicated “current quilt” file for active work.
- Label each file’s spine with painter’s tape so the system survives reorganizing.
- Keep the heaviest bundles in the bottom cubes; a full top cube can bow a cheap shelf.
- Leave one cube empty on purpose as the landing zone for unsorted arrivals.
Renters: this is free-standing, so no wall anchors are needed under 3 cubes high. Go taller and anchor it; a top-heavy bookcase on carpet is a tip hazard.
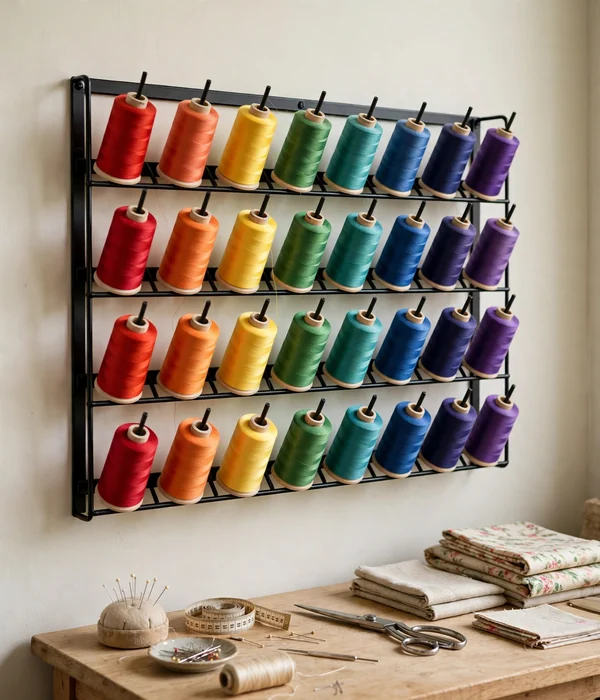
3. Wall Thread Spool Rack: Stop Losing Thread Ends
Thread spools in a drawer become a tangled archaeology dig. A wall rack gives every spool its own 2.4-inch peg, visible and grabbable. The moment you can see the color you need, you stop buying duplicate spools.
The mechanism is retrieval by sight, not memory. A standard 32-spool metal rack measures 15.6 x 12.2 inches and holds spools on 2-inch centers, fitting everything from small spools to mid-size cones. Mount it about 18 inches above the table, within arm’s reach of the machine.
What to buy: wall-mounted metal thread racks (32-spool capacity) run $18 to $28 and include screws and anchors. Prefer racks with a raised lower lip so spools cannot vibrate off mid-seam. Over 60 spools? Buy the 60-peg version (about 24 x 12 inches) instead of doubling small racks.
Tips for best results: group by color family in rainbow order so a missing shade is obvious. Slide sticky notes behind each row to log brand or weight for color-matching projects.
Watch out: this needs screws, so it is not renter-safe unless your lease allows small holes. Adhesive strips will not hold a loaded rack; 32 full spools weigh several pounds. Renters should use a tabletop thread stand (12-inch square footprint, holds 60 spools) with zero wall damage.
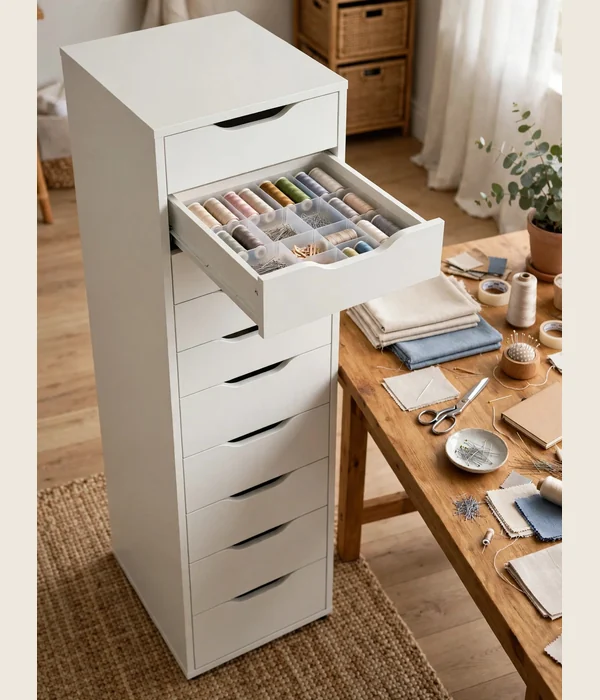
4. Alex Notion Tower: Sort Sewing Supplies by Motion
The 9-drawer Alex unit is a craft-room staple for good reason. At 14.2 inches wide, 22.9 inches deep, and 27.5 inches tall, it slides under almost any table. Five shallow drawers (about 3.5 inches tall inside) swallow notions; four deeper drawers take patterns and interfacing.
The mechanism is motion-based sorting. Shallow drawers reward light, high-touch items like pins and bobbins because you see everything at once when the drawer opens. Deep drawers hold bulkier, low-touch stuff. The 11.5-inch interior width fits standard drawer organizers, so each shallow drawer becomes a labeled grid.
What to buy: the 9-drawer unit lists around $110 to $130 and ships flat, so budget an hour for assembly. Add stackable drawer organizers (check the 11.5-inch interior width) at roughly $10 to $20 per set, plus adhesive labels.
- Top shallow drawer: needles, pins, seam rippers, marking pens. Mid-project grabs.
- Second shallow drawer: bobbins in a $8 bobbin box, plus spare presser feet.
- Third and fourth: elastic, zippers, bias tape, buttons in small tins.
- Bottom deep drawers: patterns in gallon zip bags and interfacing rolls.
- One drawer stays the “inbox” for mid-project notions; empty it monthly.
Conditionally honest: the drawers are particleboard, not plywood, so spread heavy metal tools across drawers. Re-tighten the assembly screws after two weeks, since particleboard settles.
Paper and Card Zone
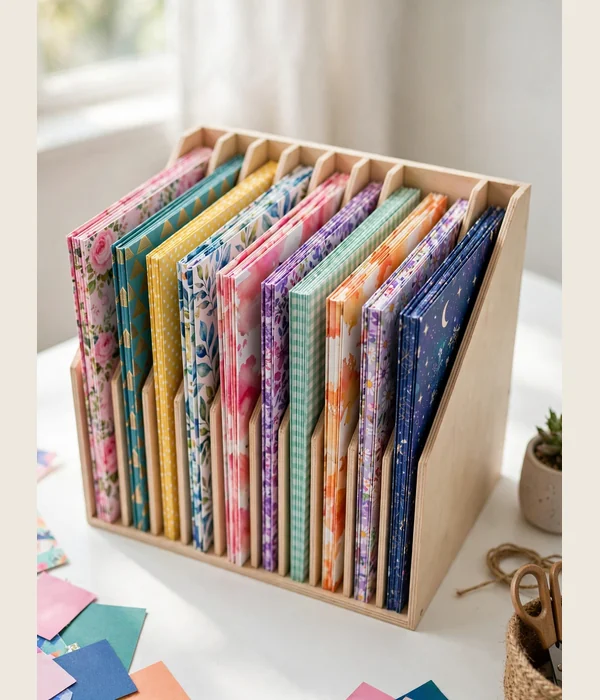
5. Vertical 12×12 Paper Slots: End the Paper Avalanche
Scrapbook paper stored flat becomes a landslide: you pull one sheet and five follow. Vertical slots, each about 12.5 inches tall and 2 to 3 inches wide, let you flip through paper like records in a crate. Every sheet stays visible.
The mechanism is gravity doing the organizing. Upright paper cannot avalanche because each sheet leans on its neighbor, and dividers spaced every 2 to 3 inches keep categories separate. A slot needs at least 12.75 inches of height to clear a 12×12 sheet when you lift it out.
What to buy: vertical paper sorters with adjustable dividers run $25 to $45 in wood or heavy acrylic. A $12 dish rack suits 8.5×11 cardstock but holds only 8 inches. For 12×12 sheets, wood slot sorters (about 13 x 13 x 13 inches) are the safe bet. Same slot logic for household paperwork: paper organization ideas.
Tips for best results: sort by color family, not brand; color is how you shop your own stash. Keep your 10 most-used sheets in the front two slots.
Watch out: paper hates humidity. Vertical slots expose every sheet edge to moist air, and cardstock curls within weeks in damp rooms. In a basement or humid climate, use sealed bins or add a dehumidifier. Keep paper out of direct sun too.
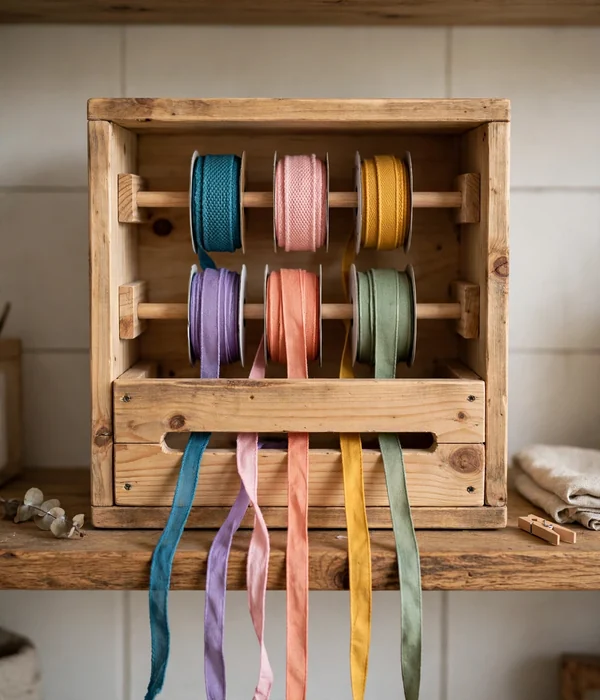
6. Dowel Ribbon Dispenser: Pull Ribbon Without Unspooling
Ribbon rolls in a bin turn into a knot that takes longer to untangle than the project took. A dowel dispenser threads each spool onto a horizontal rod so you pull ribbon one-handed, like toilet paper. No unspooling, no tangles.
The mechanism is controlled feed. The dowel carries the spool’s weight while you pull, so the roll spins instead of bouncing around a bin. A 24-inch wooden dowel (3/8 inch diameter) fits standard spools, and a shallow open-front box (about 26 x 6 x 8 inches) contains the whole thing on a shelf.
What to buy: ready-made ribbon racks with two or three dowels run $25 to $40. Or build one: a 24-inch dowel costs under $3, two 1×6 side boards a few dollars each, and a 3/8-inch drill bit makes the holes. Leave 3 inches of clearance above the top dowel so full spools lift out for refills.
- Drill 3/8-inch holes 1 inch from the top edge of each side board, centered on the depth.
- Thread spools onto the dowel, alternating colors so neighbors never match.
- Slide the dowel into the holes and pull 6 inches of each ribbon through the front.
- Cut a 1-inch notch at the front edge for one-handed tearing.
Renter note: this sits on a shelf, zero wall damage. Space wired-edge ribbon a half inch apart; it catches on neighbors when packed tight.
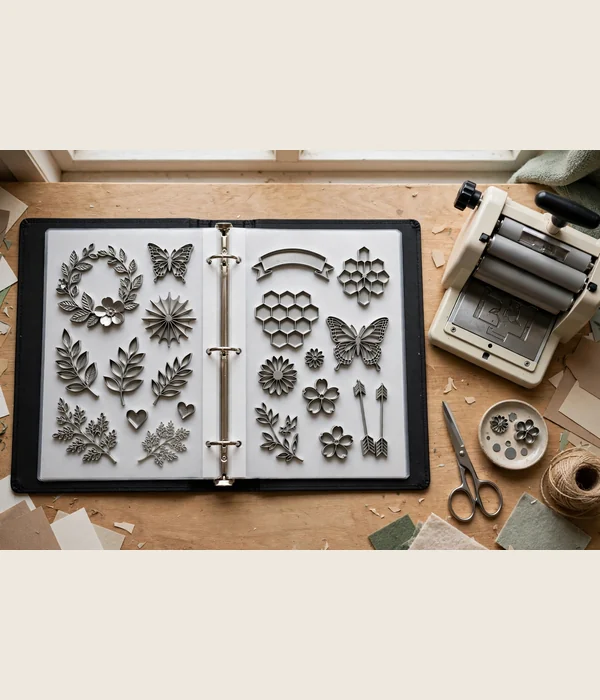
7. Magnetic Die Binders: Store Dies You Can Actually Find
Wafer-thin cutting dies disappear into drawers and never come out. The binder system fixes this with 8.5 x 11 magnetic sheets inside a standard 3-ring binder. Every die sticks to its own labeled page, and flipping pages beats digging through any drawer.
The mechanism is visibility plus zero damage. Magnets hold dies flat so they cannot bend, and a page protector over each sheet keeps them from sliding when the binder closes. One binder holds 20 to 30 pages, covering 150 to 300 dies depending on size.
What to buy: magnetic vent-cover sheets (8 x 15 inches, cut to fit) run about $1 each in 10-packs. Standard 2-inch binders are $8 to $12. Label each page by category (florals, sentiments, borders) with tab dividers.
- One binder per brand keeps sets together; one per category makes cross-brand shopping easier. Pick one.
- Slip a stamped sample into the pocket facing each page so you see the shape without squinting.
- Store binders upright, spine out, like books. Stacked flat, rings warp and dies slide.
- Photograph each finished page as a backup inventory before first use.
Conditionally honest: heavy steel-rule dies (over 1/8 inch thick) are too heavy for vent magnets and warp pages. Those belong in a lidded tin or a foam-divided drawer.
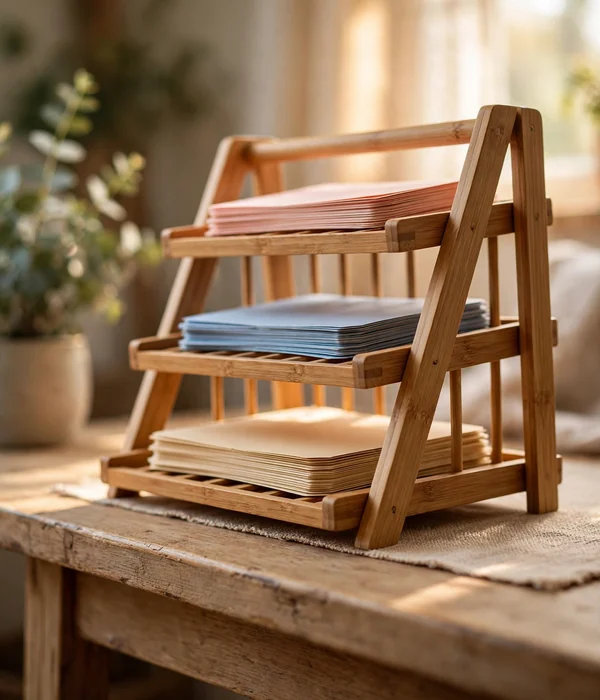
8. Tiered Desktop Sorter: Keep Today’s Paper Off the Floor
Every papercraft session produces three piles: paper you are using, paper you just cut, and paper to put away. A tiered letter tray gives each pile its own 9 x 12-inch zone, stacked vertically so it eats 12 inches of desk depth instead of 36 inches of surface.
The mechanism is forced triage at arm’s length. When the “put away” tray fills, you file it; when the “using now” tray empties, you pull the next sheets. The sorter works because the piles are visible and finite. A 3-tier sorter stands about 14 inches tall, fitting under most wall shelves.
What to buy: stackable letter trays (9 x 12 inches) run $12 to $25 for a 3-tier set in mesh metal or bamboo. Mesh sides let you see buried pieces. Get trays with an open front so 12×12 sheets slide in without lifting. Label the tiers NOW, CUT, FILE with painter’s tape.
Tips for best results: process the FILE tray at the end of every session, not every week. Five minutes of filing beats an hour of re-sorting. Keep a spare tray nested underneath for overflow days.
Watch out: this hogs desks under 24 inches deep. Measure first. On a shallow desk, wall-mounted file pockets above give the same three zones with zero footprint, and adhesive hooks keep it renter-safe.
Tools and Machines Zone
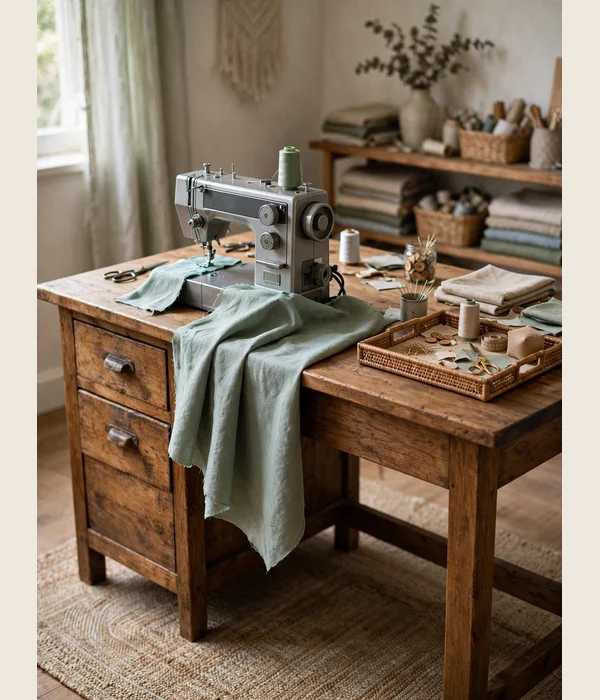
9. Dedicated Machine Triangle: Sew Without Chasing the Table
The biggest small-space sewing mistake is parking the machine on whatever table is free. Machines walk and vibrate, and a wobbly card table turns straight seams wavy. A dedicated machine spot, even a small one, changes everything.
The mechanism is vibration control plus landing zones. A machine needs a table at least 20 inches deep and 28 to 32 inches wide, with a 1-inch-thick top and a braced frame. The machine sits center-left, fabric exits left, and a 16-inch zone to the right holds the tray. A height of 28 to 30 inches suits most seated sewists.
What to buy: skip the folding card table. A secondhand solid-wood desk or drop-leaf table with a 1-inch top typically runs $40 to $80 used. Add rubber isolation pads ($8) under the machine feet and park the pedal on a non-slip mat. The same depth and stability rules in desk organization ideas apply here.
- Keep heavy storage off the machine table; extra weight changes resonance and increases buzz.
- A dense rug underneath damps noise and vibration for neighbors below.
- Clip the power cord along the rear edge so it never snags fabric.
- Leave 30 inches clear behind the chair for standing with a quilt in your lap.
Conditionally honest: if a folding card table is your only option, do not sew on it. Vibration walks the machine across the top. A $25 thrift-store wooden desk beats a $100 flimsy new table.
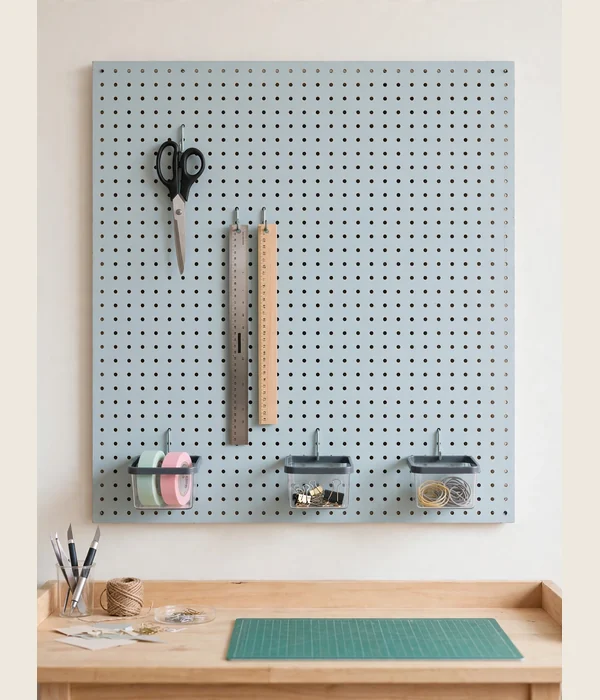
10. Pegboard Tool Wall: Hang Scissors Where Your Hand Expects Them
Scissors, seam rippers, and rulers vanish into drawers the moment you need them. A 2 x 4-foot pegboard above the desk puts every hand tool at eye level, which cuts the average “where is my seam ripper” hunt to zero.
The mechanism is habit through visibility. Standard pegboard has 1/4-inch holes on 1-inch centers, and a $15 hook assortment (J-hooks for scissors, straight pegs for rulers, small bins for pens) covers every tool shape. Mount on 1×3 furring strips for hook clearance, within a 24-inch reach arc from your seat.
What to buy: a 2 x 4-foot hardboard panel runs $12 to $20; metal runs $30 to $50. Buy the hook assortment, not single hooks, since you will rearrange twice. A 24-inch magnetic knife strip ($15 to $25) at the panel’s edge holds shears securely. The same vertical logic in small home office ideas fits tool walls.
- Mount 1×3 strips at the panel top, bottom, and middle, screwed into studs.
- Hang the pegboard on the strips with washer-head screws for hook clearance.
- Place daily tools at center; weekly tools (extra blades, awls) at the edges.
- Add one small pegboard shelf ($8) for the pin cushion and thread snips.
Renter check: this needs screws. If the lease forbids holes, a freestanding pegboard on a desk easel ($30) gives the same layout with zero wall damage, though it eats 8 inches of desk depth.
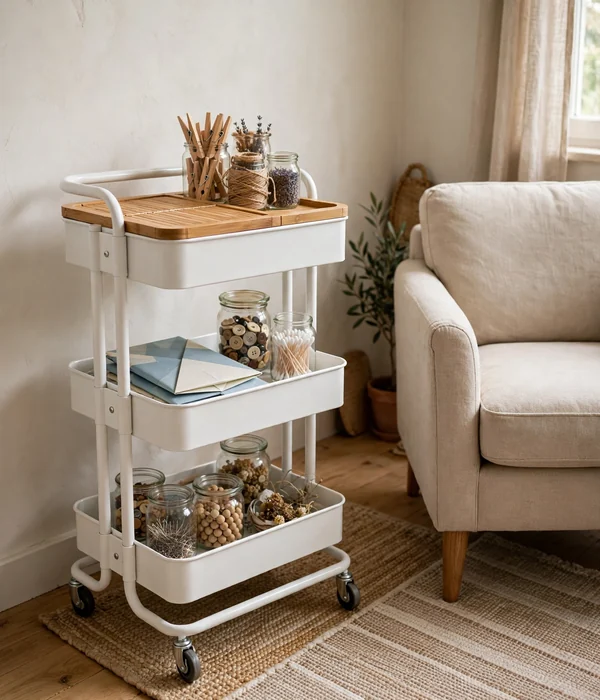
11. Rolling Supply Cart: Park Your Kit Beside Any Chair
Some sessions happen at the desk, some on the couch, some at the kitchen table. A 3-tier rolling cart carries the active kit wherever you sit, then parks in a 14-inch gap when you are done. It is the most flexible square footage in the room.
The mechanism is mobility replacing duplication. Instead of a second set of scissors and glue for the couch, the cart follows you. The classic 13.75 x 17.75 x 30.38-inch steel cart holds about 13 pounds per shelf. Three tiers sort naturally: active project on top, supplies in the middle, refills on the bottom.
What to buy: the standard 3-tier steel cart runs $30 to $40; a bamboo-lid version adds about $15 and a bonus work surface. Add small bins inside each tier so supplies do not slide while rolling. Locking casters matter on hard floors.
Tips for best results: assign each tier a permanent job (project, tools, refills) and label the handle with the current project on painter’s tape. When the project ends, empty and reload the cart.
Watch out: the 13-pound-per-shelf rating is real. A cart loaded with paint bottles bows the middle shelf within months. Keep liquids and heavy tools on the bottom tier, and never roll a full cart over thick rug; the small casters dig in and tip it.
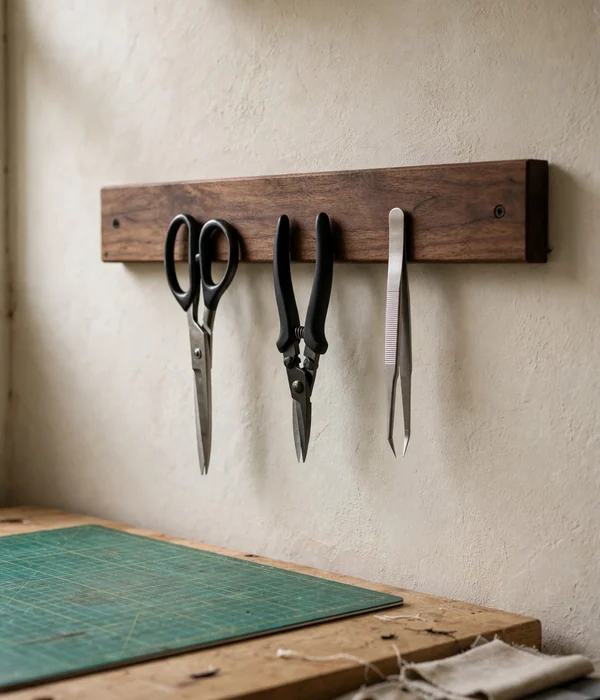
12. Magnetic Scissor Strip: Make Sharp Things Impossible to Lose
Every craft room has a drawer where sharp things hide, and a story about the rotary blade that turned up somewhere awful. A magnetic strip on the wall or desk edge gives every blade a visible, grabbable home.
The mechanism is magnetic certainty. A 12 to 18-inch magnetic knife strip ($12 to $25) holds scissors, snips, and tweezers at eye level. You see the empty spot the moment something is missing, which is the real safety feature: a missing blade is one you go find immediately.
What to buy: look for a strip rated for kitchen-knife weight (about 5 pounds of holding force); cheap $8 strips shed heavy shears. Mount at shoulder height within arm’s reach of the machine, never above a walkway. C-clamp magnetic holders ($15) attach to a desk edge with zero holes.
- Keep the strip 12 inches from computerized sewing machines; strong magnets and circuit boards mix badly.
- Wipe blades before parking them; lint reduces magnetic grip over time.
- Reserve a 6-inch “in use” section during sessions so the strip never overflows.
- Loose rotary blades do not belong here. They go in a blade bank, full stop.
Renter-safe with adhesive mounting if the load stays under the adhesive rating, but screws into a stud are the honest recommendation for anything holding shears.
Paint and Finishing Zone
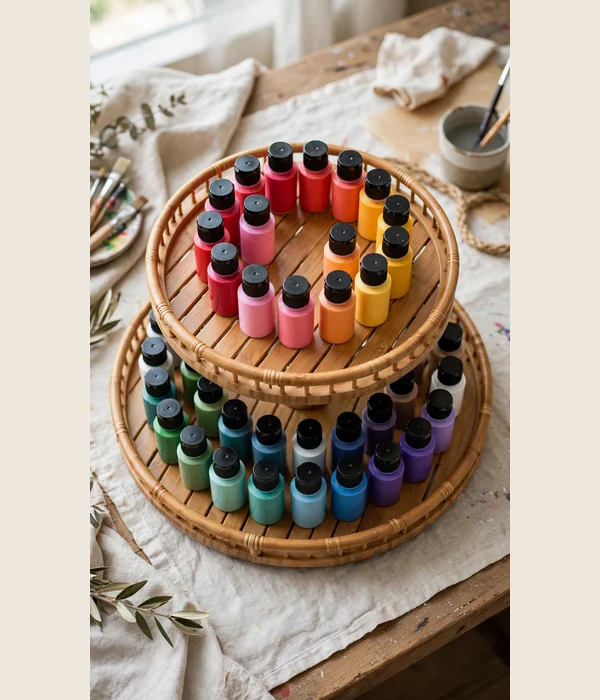
13. Lazy Susan Paint Carousel: Reach Any Bottle One-Handed
Paint bottles breed in dark cabinets. You buy a color you already own because you cannot see the ones you have. A 10 to 12-inch lazy Susan turns paint storage into a spinning display where every label faces out.
The mechanism is rotation replacing rummage. One spin shows all 20 to 30 bottles on a two-tier carousel, and the raised rim keeps bottles from walking off. Two-tier carousels (about 12 inches across, 10 inches tall) double capacity in the same footprint.
What to buy: bamboo or plastic 2-tier lazy Susans run $18 to $30. Measure cabinet depth first: a 12-inch carousel needs a 13-inch-deep shelf to spin freely. For paint tubes, a tiered spice rack ($15) with 3-inch steps works better. Add a paint-dot sticker on each cap matching the color.
- Group bottles by color family, lightest to darkest, so gradients show.
- Store metallics on the top tier; they separate and need shaking, so keep them handy.
- Keep a damp rag beside the carousel for wiping bottle threads before caps glue shut.
- Photograph the full carousel each season; the photo becomes your shopping list.
Conditionally honest: paint hates freezing and heat. In an unheated garage or sun-baked shed, bottles belong inside the house. Acrylics ruined by a freeze never recover.
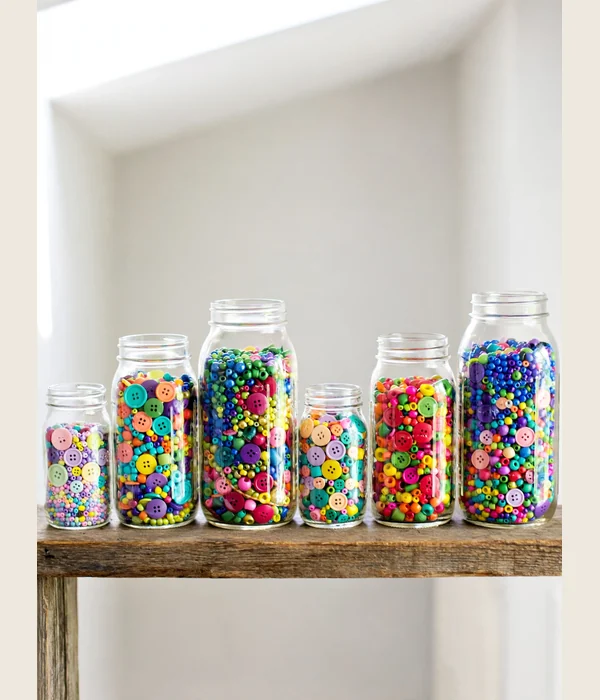
14. Mason Jar Parts Bank: Sort Buttons, Beads, and Pins by Sight
Buttons, beads, eyelets, and pins share one trait: you need to see them to use them. A bank of glass mason jars on a shelf turns small-parts storage into a color library. Reach, glance, grab. No lids to pry.
The mechanism is transparent inventory. Glass shows contents and fill level at once, and jar sizes match craft quantities: 4-ounce jars (2.5 inches wide, 2.25 inches tall) for pins, 8-ounce (about 4.3 inches tall) for buttons, 16-ounce pints (about 5.3 inches tall) for beads. One 24-inch shelf holds 8 pints in a row.
What to buy: a case of 12 wide-mouth pints runs $12 to $15; half-pints run $10 to $12 per dozen. Wide mouths matter for pinching out single beads. Add chalkboard labels so jars read “gold eyelets 5mm” instead of “shiny things.” Tape this cheat sheet inside the cabinet door:
- 4 oz (quarter pint): pins, needles, eyelets, jump rings
- 8 oz (half pint): buttons, snaps, small beads
- 16 oz (pint): bulk beads, ribbon scraps, washi rolls
- 32 oz (quart): yarn ends, fabric yo-yos, stuffing
Tips for best results: store jars no more than two deep; the back row becomes invisible clutter. Decant bulk buys immediately.
Watch out: glass and hard floors are enemies. If the shelf sits above waist height over concrete or tile, switch the top row to PET plastic jars. A dropped quart of glass beads is a two-hour cleanup.
15. Pull-Out Press Station: Iron in the Closet, Sew at the Desk
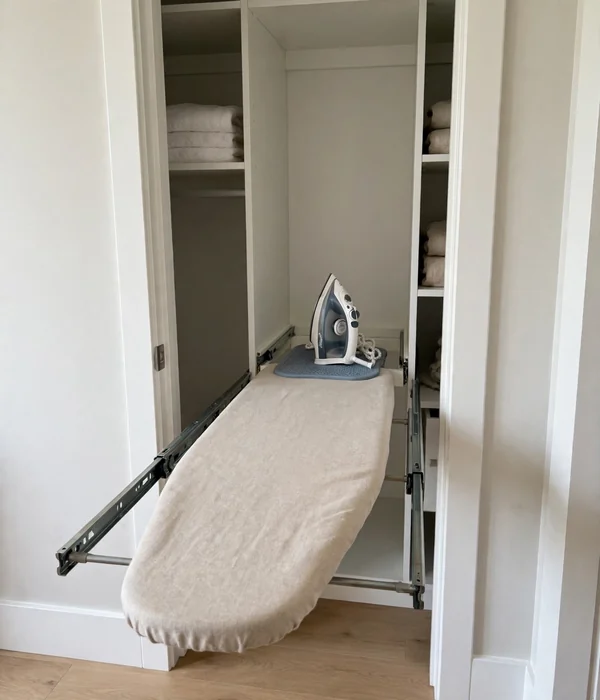
Ironing boards are space hogs that get unfolded three times, then live permanently open in the corner. A pull-out pressing station, a 14 x 36-inch board on drawer slides inside a closet, gives you a full ironing surface that vanishes when you close the door.
The mechanism is borrowed space. The board lives inside a 15-inch-deep closet, slides out on 100-pound-rated drawer slides ($20 to $30 per pair), and locks level for pressing. A silicone iron rest ($12) at the board’s end holds the hot iron, and the station needs only a nearby outlet.
What to buy: a 14 x 42-inch cotton board cover ($12); 100-pound full-extension slides ($20 to $30); a heat-resistant silicone mat (about 12 x 18 inches, $15) that doubles as a glue-gun mat. Simpler option: a tabletop pressing mat (18 x 24 inches, $25 to $40) on any sturdy table. Closet press setups are cloffice ideas thinking.
Tips for best results: keep a spray bottle and starch on the closet shelf above so pressing never needs a supply run. Press seams as you sew; a pressed seam is flatter and more accurate.
Watch out: irons and enclosed closets demand respect. Never leave the iron on inside a closed closet, and unplug it after every session. No outlet? Run a heavy-duty extension cord rated for the iron’s wattage (1200 to 1800 watts), never a lamp cord.
16. Ventilated Spray Cabinet: Keep Fumes Out of the Living Room
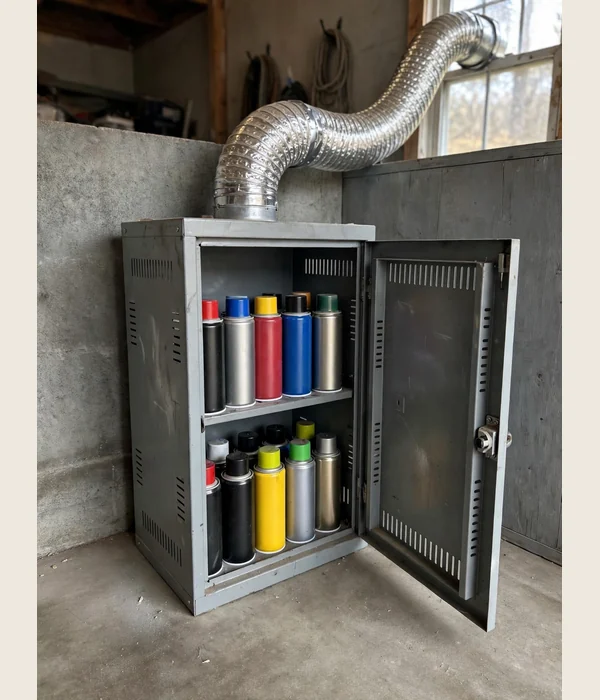
Spray paint, sealant, and adhesive sprays have no business in an open craft corner. Fumes accumulate, overspray drifts onto fabric, and cans rattle where they can puncture. A ventilated cabinet with a latching door contains all three problems.
The mechanism is containment plus airflow. A small metal cabinet (about 24 x 18 x 36 inches) holds a dozen spray cans upright, and a 4-inch dryer-vent duct ($15) from the cabinet top to a window gives fumes an exit. Store cans upright, caps on, away from the water heater or furnace.
What to buy: a locking metal storage cabinet runs $60 to $90; add a $12 battery motion light inside so you can read labels. A 4-inch inline duct fan ($25) in the vent line moves fumes on still days. Keep an ABC-rated fire extinguisher within 10 feet; this is non-negotiable.
- One cabinet, one category: sprays only. Mixing in paper or fabric defeats the containment.
- Log the purchase date on each can with a paint pen; most sprays lose pressure after 2 to 3 years.
- Shake cans monthly for 30 seconds; settled pigment causes mid-project splatter.
- Empty cans go to hazardous waste collection, never the regular trash.
Conditionally honest: if you cannot vent to a window, do not store or spray indoors. Spray in the garage or on the patio, and bring cans inside only after the 30-minute cure. No cabinet fixes a room with no exhaust.
Display and Finish Line
17. Dedicated Cutting Station: Cut Accurately on a True Flat Surface
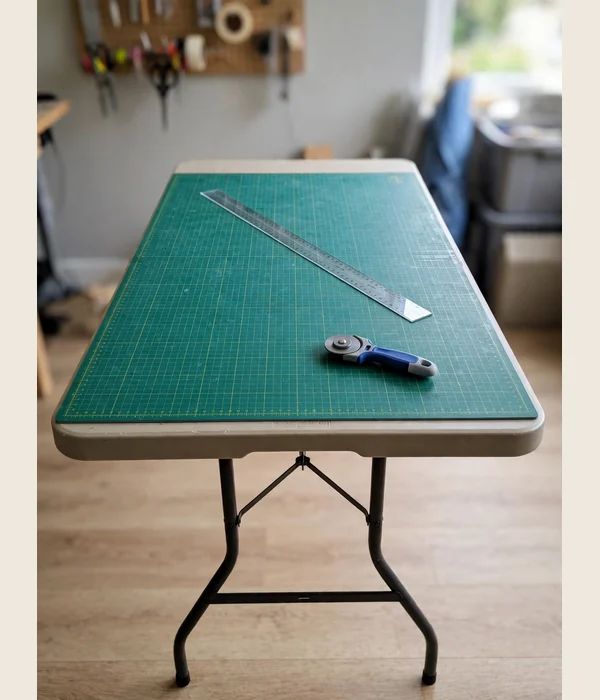
Cutting fabric on the floor or the dining table produces wavy cuts and a sore back. A dedicated cutting surface, a self-healing mat on a waist-high table, gives you true measurements and saves your knees. Accuracy starts here.
The mechanism is a flat, gridded, forgiving surface at the right height. A 24 x 36-inch self-healing mat ($35 to $55) on a 36-inch-high table lets you stand with a neutral spine and read the 1-inch grid without parallax error. The mat’s surface closes around rotary cuts, so one mat lasts 3 to 5 years.
What to buy: a 24 x 36-inch mat is the sweet spot; 18 x 24 forces you to reposition yardage. Folding banquet tables at 36-inch height run $50 to $70 new, less used. Add a 36-inch clear acrylic ruler ($20) and a 60mm rotary cutter ($25); the larger blade cuts 6 to 8 layers where a 45mm blade manages 4.
- Set the table at 36 inches high, or your wrist height standing. Measure, do not guess.
- Center the mat with 2 inches of table showing on all sides.
- Store the rotary cutter locked and retracted on the mat’s corner, every time.
- Replace the mat when cuts stop closing; a scored mat drags the blade.
Measurement cheat sheet: table 36 inches high, mat 24 x 36, ruler 36 inches, 30 inches of clearance around the table for walking yardage through.
18. WIP Project Trays: One Tray Per Project, No More Dares
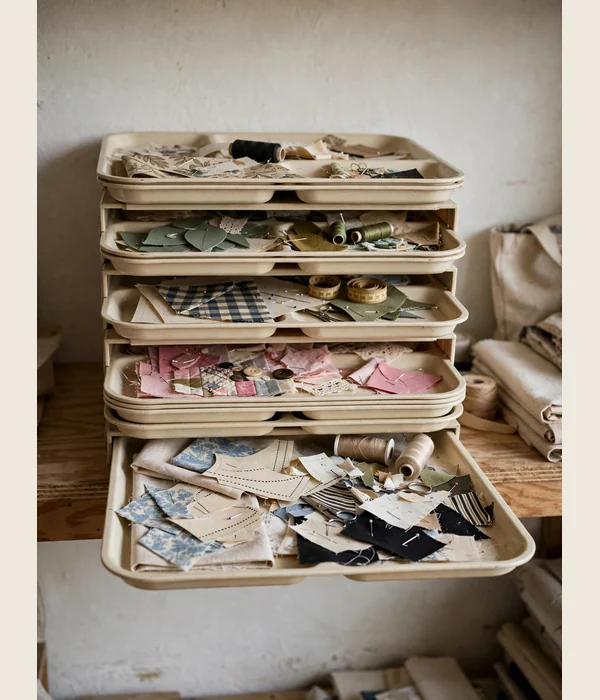
The quilt on the table exists because works in progress have nowhere to live. A WIP tray system gives every active project its own 15 x 20-inch tray, stacked on a shelf and labeled with the project name and the next step. The table stays clear because projects have an address.
The mechanism is project-level containment. Each tray holds the fabric, pattern, thread, and notions for one project, so starting a session means grabbing one tray, not reassembling the project from five locations. Cafeteria-style trays (about 15 x 20 x 2 inches, $6 to $10) stack neatly.
What to buy: buy trays in one color so the stack looks intentional. A 5-tier desktop file sorter ($25) turned on its side holds five trays vertically like a filing cabinet. Label each tray’s end with the project name and the single next step (“sew binding”); the note is what restarts a stalled project.
Tips for best results: cap active projects at five trays. The sixth waits in a “parking lot” bin until one tray empties. This limit is the system.
Watch out: trays do not file themselves. Schedule a monthly 20-minute WIP review: finish it, frog it, or file it. A tray untouched for three months is storage, not a project.
19. Scrap Triage Bins: Keep Fabric Scraps Under Control
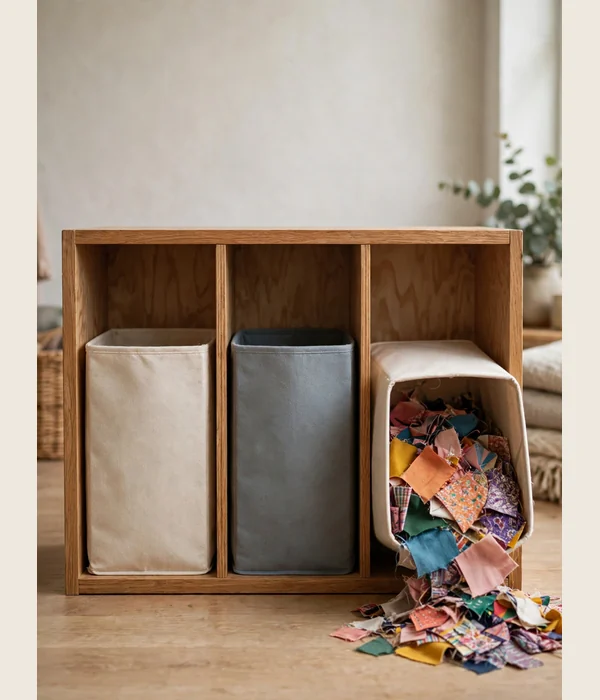
Scraps multiply faster than any other supply because every project ends with them. Without a triage rule, they fill a bag, then two bags, then a closet. Three labeled bins and a size rule keep the mountain a manageable hill.
The mechanism is a decision at the moment of creation. When you finish cutting, each scrap goes into one of three bins: KEEP (pieces 5 inches square or larger), DONATE (clean usable pieces under 5 inches), or TRASH (slivers and anything under 2 inches). The size thresholds remove judgment calls; you learn the sizes by eye and triage in seconds.
What to buy: three 10-gallon bins (about 16 x 11 x 22 inches, $8 to $12 each) or three fabric cubes in a cube shelf. Label them big and permanent. Keep a small rotary cutter and 6-inch ruler at the station so borderline pieces get trimmed to KEEP size on the spot.
- Empty the DONATE bin monthly; a full donate bin is storage with good intentions.
- Sort the KEEP bin by color twice a year, or it becomes a second stash.
- Batting scraps follow the same rule at half size: keep pieces 10 inches square or larger.
- Thread and yarn ends go straight to trash. No bin, no debate.
Conditionally honest: if you never piece scraps or donate, skip the KEEP bin. Two bins (donate, trash) beat three where one fills forever. Match the system to your habits, not your aspirations.
20. Photo Staging Corner: Photograph Finished Work the Day You Finish It
Finished projects that never get photographed might as well not exist, at least for gift records and the satisfaction of a portfolio. A permanent 3 x 3-foot photo corner means photographing a quilt takes four minutes, not forty.
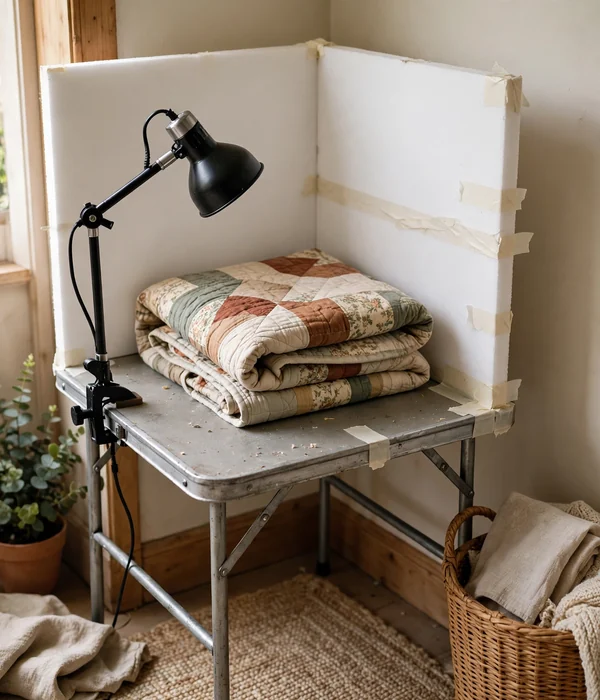
The mechanism is removing setup friction. A white foam-board backdrop (30 x 40 inches, $5) leaned against the wall, a daylight LED bulb (5000K, $10) in a clip lamp, and a small folding table create a consistent stage. Same backdrop, same light, every time.
What to buy: two 30 x 40-inch foam boards taped into an L-shape, one 5000K daylight LED bulb in a clip lamp, and a white twin sheet as backup for quilts too big for the boards. Total setup: under $30. Hang finished pieces on a $20 curtain wire beside the corner so display and camera share the light.
- Set the foam-board L on the table, lamp 45 degrees to the left, about 2 feet away.
- Lay or hang the piece, smoothing wrinkles by hand, not with the iron.
- Shoot in daylight or with the 5000K lamp only; mixed light turns whites yellow.
- Photograph the label close-up as the last shot; future you will thank present you.
Renter-safe and tiny: the whole corner folds flat into a 3-inch gap behind a door. Photograph every finish the day it is done, while the details are fresh.
Conclusion
Craft room anchor: if you buy one thing for a small craft space, make it the rolling supply cart from point 11. It costs under $40, fits a 14-inch gap, and carries the active project to any chair in the house.
When the project ends, the cart gets emptied and reloaded, which enforces the one habit that matters. Every other system here works better once the active project has wheels. Start with the cart, add the pegboard wall second, and build outward from there.
Frequently Asked Questions (FAQ)
How much space do I really need for these craft room organization ideas?
A 6 x 8-foot corner handles the full system if you go vertical: pegboard on the wall, a 14-inch-wide rolling cart, one cube shelf, and a folding cutting table. The machine needs a real table (28 inches wide minimum). If you have less than 48 square feet, start with points 9, 10, and 11.
Can I organize a craft room on a budget under $100?
Yes, if you buy the structure used and the small stuff new. A thrift-store wooden desk ($25), a 3-tier cart ($35), and dollar-store mason jars ($12) cover the machine zone, mobile zone, and small parts for under $75. Spend the rest on organizers and labels. Skip matching bins until the system works.
What is the best storage for fabric in a humid room?
Sealed beats visible in humidity. Use gasket-sealed clear bins (32-quart, about 16 x 12 x 12 inches) with silica gel packets, and keep the mini-bolt display for current-project fabrics only. If the room runs humid, a small dehumidifier matters more than any organizer. Never store fabric directly on concrete.
How do I keep a small craft room from looking cluttered?
Contain by color and close the doors. Matching bins in one color read as furniture; rainbow bins read as chaos. Keep daily tools on the pegboard and everything else behind doors or in labeled drawers. The biggest visual fix is clearing horizontal surfaces at the end of every session.
Are pegboards renter-friendly for craft rooms?
Only with permission or a workaround. Standard pegboard needs screws into studs, which most leases restrict. Alternatives include a freestanding pegboard on a desk easel, adhesive-hook rails rated for the load, or a cart with a pegboard side. Small nail holes can be filled and painted at move-out.
What should I do with craft supplies I no longer use?
Triage them like scraps: donate, sell, or trash. Quilt guilds, schools, and senior centers take fabric, yarn, and paper; one box to a guild frees a shelf in an afternoon. Sell machines and specialty tools locally rather than shipping them. Untouched for a year and not seasonal? It is clutter.
How do I organize embroidery floss in a small space?
Wind each skein onto a labeled cardboard bobbin; about 200 fit in a $10 organizer box (14 x 10 x 2 inches). File bobbins numerically in the box and keep it in a drawer away from sunlight, since floss fades fast. For active projects, a binder ring of bobbins keeps the working palette together.
Is it worth buying matching storage containers?
Only after the system works, not before. Buy cheap and mismatched while you learn what sizes you actually need, then replace with matching pieces once the layout settles, usually after two to three months. Matching containers bought on day one are almost always the wrong sizes.