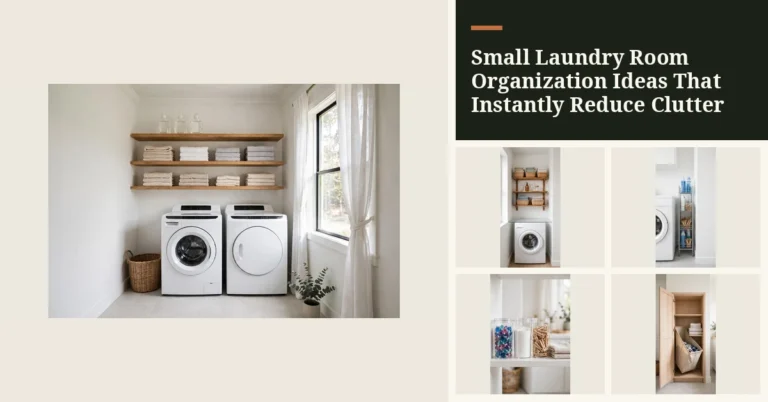

The average American laundry room is about 5 by 7 feet, 35 square feet, and a huge share of readers do laundry in something smaller: a hall closet, a basement corner, or a stacked pair squeezed into a bathroom. These laundry room organization ideas are built for all of that.
Every one of the 25 works in a 5×7 room, nearly all of them fit a closet-sized setup, and nothing here needs a renovation or a contractor.
You will find slim carts that claim the 6-inch gap between machines, over-machine shelving that clears the hoses, drop-down folding tables, hamper systems sized to your household, and a supplies system that keeps pods out of kids’ reach. Measure first, laundry rooms run on inches, and start with the single biggest bottleneck in yours.
If dirty clothes pile on the floor, start in Group 1. If detergent bottles eat your only shelf, start in Group 5.
Why Laundry Rooms Are an Inches Game
A laundry room fails for one reason: the machines eat the floor, and everything else fights for leftovers. A standard top-loader is 27 inches wide and 27 to 29 inches deep; a front-loader is 27 inches wide and 30 to 34 inches deep.
Side by side you have burned 54-plus inches of a 60-inch wall, leaving a gap that is too wide to ignore and too narrow for anything you already own.
Add the hoses and vent, 4 to 6 inches of clearance behind each machine, and the 5-foot walkway that the door swing eats, and the “organization” problem is really a fit problem.
That is why laundry room organization tips and laundry room storage all come down to the same move: stop buying generic bins and start buying to the measurement. The gaps, clearances, and heights below are the actual numbers your room is built from.
Laundry room cheat sheet (save this):
- Machine footprints: top-loaders 27×27–29 in; front-loaders 27×30–34 in; side clearance 1 in each side, 4–6 in behind.
- The side gap: usually 4–8 in, that is where a 5–6 in slim cart lives.
- Over-machine shelves: 12–16 in deep, mounted 48–52 in off the floor to clear the lid/hoses.
- Hampers: plan on ~1.5–2 loads per person per week; a standard hamper holds 2–3 loads.
- Drying racks: fold flat to 2–4 in thick; a retractable line gives ~20 ft of drying.
- Renter rule: tension rods, adhesive hooks (cure per label), and over-door racks = no holes; anything screwed into a wall needs landlord sign-off.
Sorting & Hampers
The laundry room clogs at the dirty end, not the clean end. Clothes hit the floor because there is nowhere better to put them, so these five ideas give dirty laundry a home that is sized, sorted, and out of the walkway. Once sorting happens at the hamper, wash day is loading machines, not triage.
1. Three-Bin Sort Station: Sort Once, Never Re-Sort
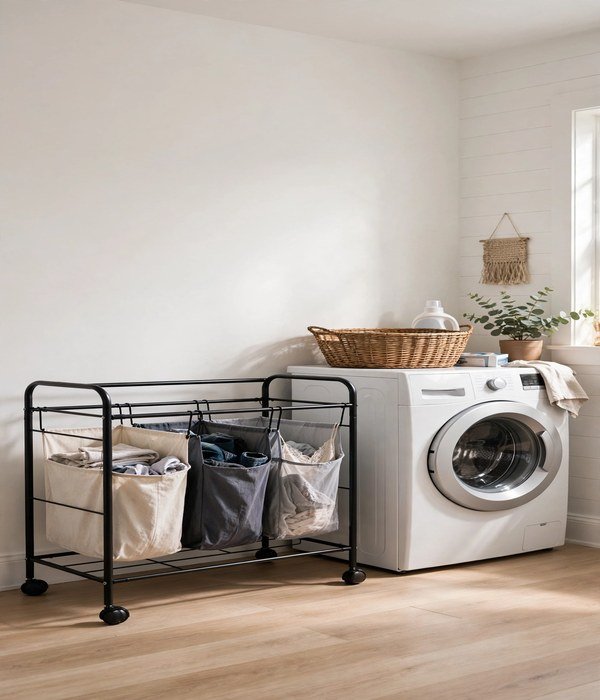
The average household generates 8 to 10 loads a week, and re-sorting every load costs you 15 to 20 minutes of wash day. A three-bag sorter, one frame, three removable bags in lights, darks, and delicates, turns that chore into a daily two-second toss.
Standard sorters are 32 to 36 inches wide and 14 to 16 inches deep, which fits against any 5-foot wall with room to walk past. Each bag holds roughly 2 to 3 loads, so a family of four empties each bag once or twice a week instead of mountain-sorting on Sunday.
- Measure your wall run, you need 36 inches of width and 16 inches of depth, plus door swing clearance if it sits behind a door.
- Choose a heavy-duty frame: 600D polyester bags beat thin canvas, and locking casters keep it from drifting.
- Label the bags, lights, darks, delicates, with clip-on tags or a label maker so guests and kids sort correctly.
- Wash the bags monthly; they get musty. Most are machine-washable, toss one bag per load.
- Renter-safe: freestanding, no mounting, under $60 typical.
2. Tilt-Out Hamper Cabinet: Dirty Laundry Disappears Behind a Drawer Front
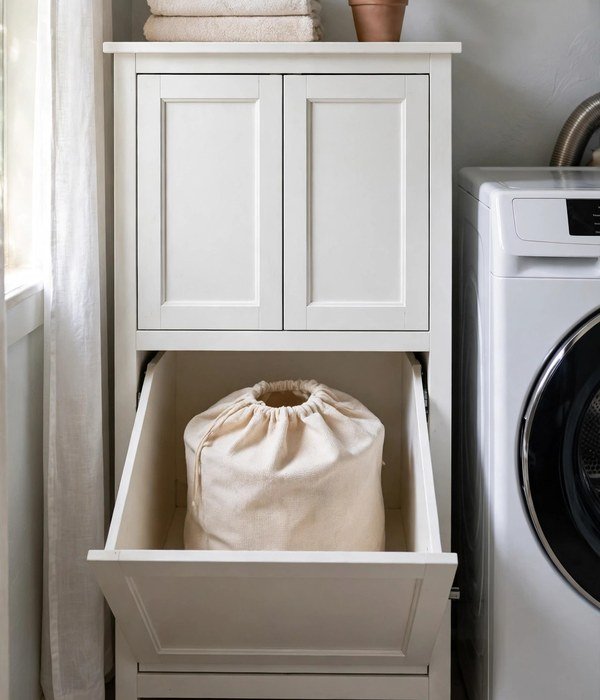
An open hamper is a smell vent and a visual mess. A tilt-out hamper cabinet hides the laundry bag behind a cabinet face that tilts open at a 30- to 45-degree angle, like a tip-out tray.
Standard units are 18 to 21 inches wide, 12 to 16 inches deep, and 30 to 36 inches tall, the footprint of one kitchen base cabinet, and the top doubles as a folding surface or a home for the detergent caddy. The bag inside hangs on a frame so you lift it straight out on wash day.
- Confirm the depth: 16 inches max in a narrow room, or the open tilt blocks the walkway.
- Look for a ventilated back panel or drilled air holes, sealed cabinets trap moisture and smell.
- Choose a washable bag with handles; mesh breathes best.
- Screw it to a stud or add a wall strap if kids will be yanking the tilt, freestanding tall units tip.
- Under $80 typical for a single-bay wood unit.
3. Over-the-Door Hamper Bag: The Closet-Laundry Lifeline
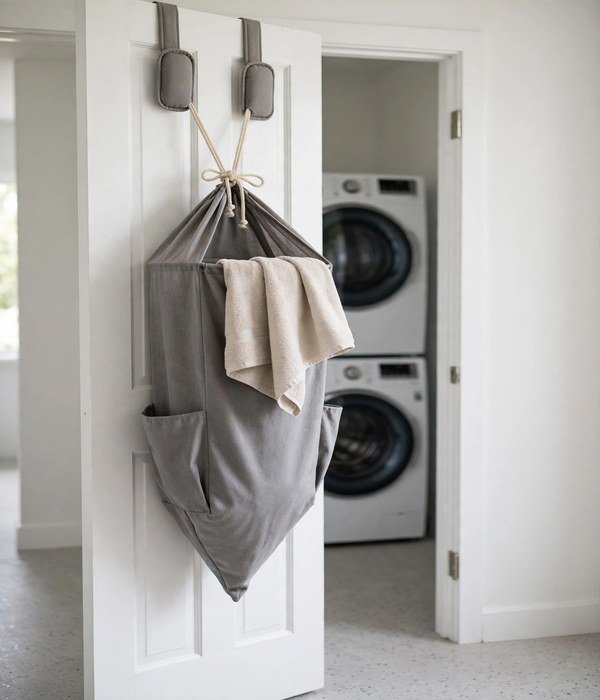
When the laundry “room” is a closet, floor space is zero, but the inside of the door is 20 inches of wasted real estate. An over-the-door hamper bag hooks over the top of any standard 1⅜-inch interior door and holds 1 to 2 loads in a bag that cinches shut.
It hangs 30 to 36 inches long, so the bottom clears the floor by a few inches even on a 6-foot-8 door. Sort happens in the bag: one bag for lights, or two bags side by side on a double hook for lights and darks.
- Check door thickness, most hooks fit 1⅜-inch doors; 1¾-inch exterior doors need a wider hook.
- Confirm the bag’s weight rating: a full bag of wet towels hits 15 to 20 pounds, so buy a reinforced hook, not a wire one.
- Use the cinch cord, an open bag on a door swings and spills.
- Renter gold: zero holes, hangs in seconds, under $20 typical.
- Not for: households over two people, the capacity caps out fast.
4. Rolling Under-Shelf Hamper: Fill the Dead Zone Below
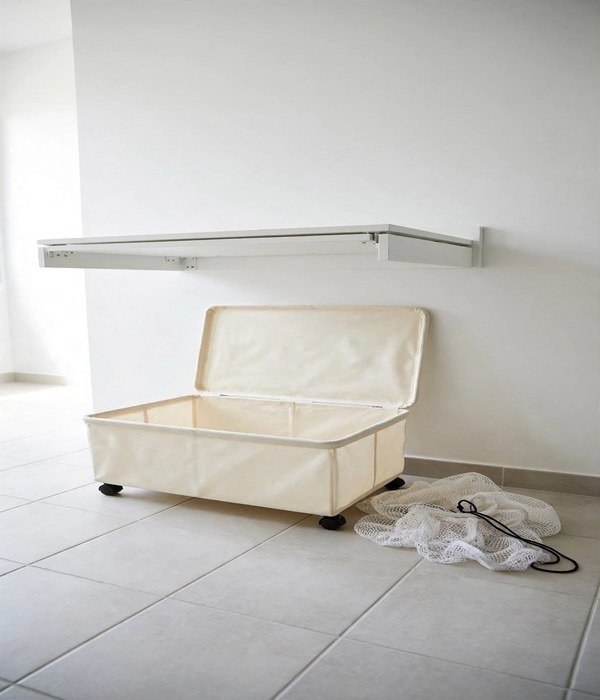
Under a wall-mounted folding table or shelf, the bottom 24 inches are dead air, and a low rolling hamper is exactly 18 to 20 inches tall. These under-shelf hampers roll on casters, hold 1.5 to 2 loads, and slide under any surface mounted at 36 inches or higher.
The rolling base matters: you wheel it to the machine instead of carrying a bag across the room, and the lid keeps damp clothes from airing onto the shelf above.
- Measure the clearance under your shelf or table, you need the hamper height plus 2 inches of finger room.
- Choose a lidded model with a ventilation strip; lidded without airflow mildews.
- Locking casters are worth the extra $10, unocked hampers drift on tile.
- Line it with a washable bag for quick unload: lift the bag, not the hamper.
- Under $40 typical; also works under a stair bulkhead or low basement ceiling.
5. Labelled Mesh Delicates Bags: Stop Losing the Small Stuff
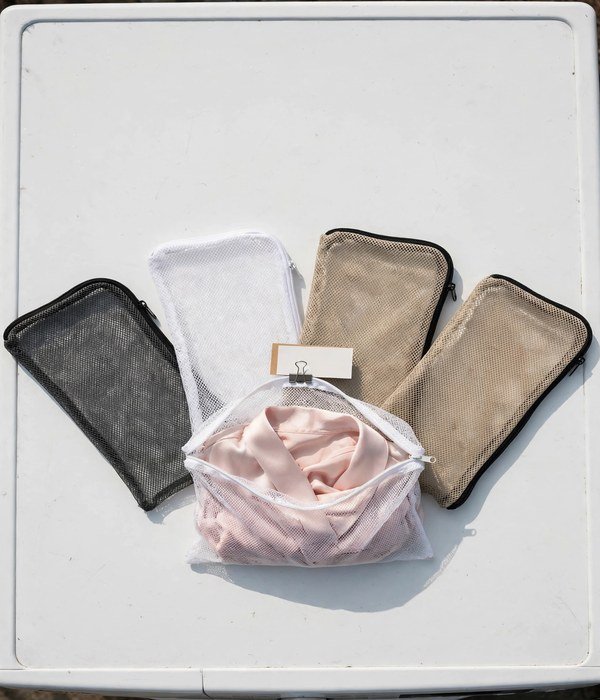
Sock orphans, stretched bra straps, a hand-wash sweater eaten by the agitator, delicates cost real money. A set of 3 to 5 zippered mesh bags (small 12×16 in, medium 16×20 in, large 20×24 in) sorts them at the hamper so they go into the machine protected. Fine mesh for lingerie and wool, coarse mesh for jeans and hoodies.
One bag per family member, labelled, ends the “whose sock is this” excavation.
- Buy fine-mesh bags for anything with straps, hooks, or wool, coarse mesh snags.
- Zip the bag closed and double-check, an open bag in the washer is worse than none.
- Wash bags monthly with the load; detergent residue builds up in the mesh.
- Keep one bag clipped to each sort-station bag so delicates get pre-sorted too.
- A 5-piece set runs under $15; they last 1 to 2 years of weekly use.
Machines & Around Them
The machines are the room’s immovable furniture, so every inch around them is premium. These five ideas harvest the side gap, the top, the sides, and the air above, the four surfaces most laundry rooms leave completely empty.
6. Slim Side-Gap Cart: Claim the 6 Inches Beside the Machines
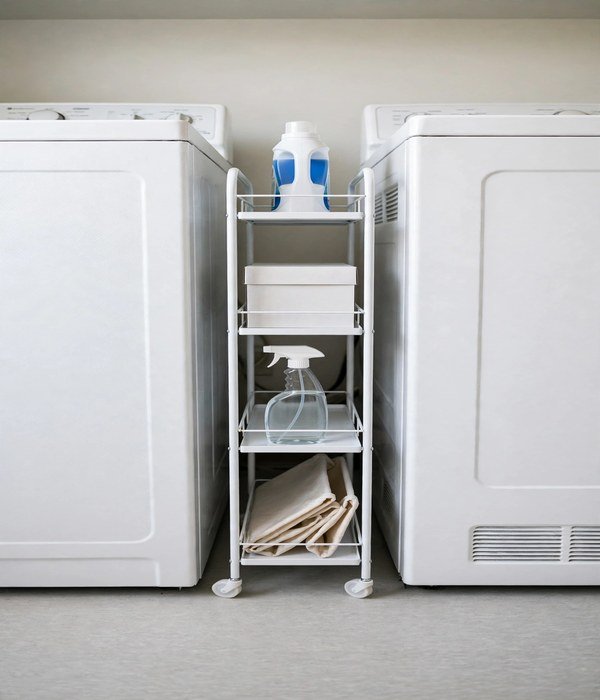
The gap between the washer and the wall, or between washer and dryer, is typically 4 to 8 inches wide and 30-plus inches deep: a perfect slot for a slim rolling cart.
Carts built for this gap are 5 to 6 inches wide, 12 to 16 inches deep, and 28 to 34 inches tall with 3 to 4 tiers. That is detergent, dryer sheets, stain spray, and a lint bin living exactly where you reach, instead of on top of the machine where vibration walks them off.
Where it works best:
- The gap between a washer and dryer, pull the cart out like a drawer on wash day
- The slot between the machine and the wall, dead space becomes a supply tower
- Top-loader rooms, keeps bottles off the machine top so the lid opens freely
- Closet laundries, one cart replaces an entire shelf
- Keep heavy jugs on the bottom tier; a top-heavy 6-inch cart tips when you pull it
Watch out: measure the gap at the narrowest point, hoses and water shutoffs bulge behind machines. Renter-safe and under $25 typical.
7. Washer-Dryer Stacking Kit: Cut the Footprint in Half
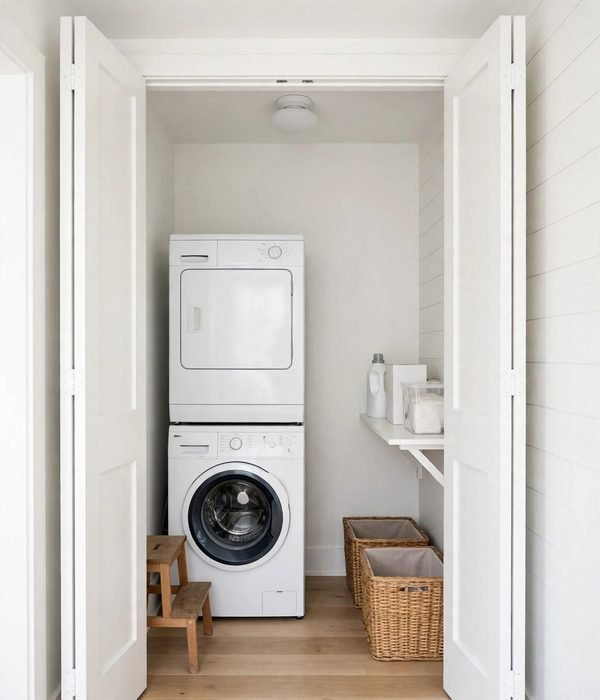
Two machines side by side eat 54-plus inches of wall. Stacking them with a manufacturer stacking kit drops that to 27 inches wide, half the wall, freed for a hamper station or a folding table. Kits are brand- and model-specific (check your model numbers before buying), bolt the dryer to the washer, and typically cost $25 to $50.
The stack is 27 inches wide, 30 to 34 inches deep, and 74 to 78 inches tall, so it needs an 80-inch ceiling clearance and a door wide enough to get the machines in.
Where it works best:
- Closet laundries, stacking is the only way a closet holds full-size machines
- Narrow rooms where the door swing hits the side-by-side pair
- When you want the freed 27 inches for a real sorting station
- Front-loaders only, top-loaders cannot stack, full stop
- Plan the controls: the dryer’s panel sits at 74-plus inches, fine for most adults, a stretch for shorter users
Watch out: never stack without the kit, a dryer on a washer held by gravity is a falling hazard. This one needs screws into the machines (not the wall), so check your lease.
8. Machine-Top Guard Shelf: A Usable Surface That Survives the Spin Cycle
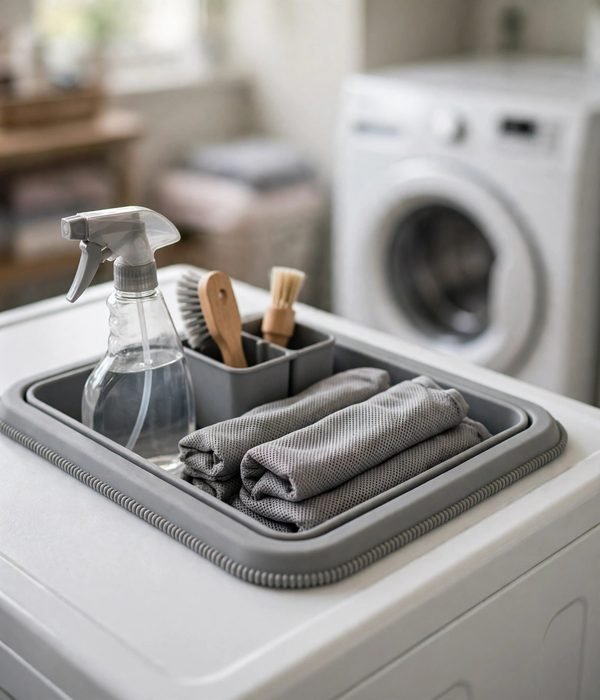
The top of the washer is the room’s most-used surface and its most chaotic: vibration walks bottles off, and the spin cycle rattles everything. A machine-top guard, a tray or shelf with a 2- to 3-inch raised lip, sized 26×24 inches to sit on one machine, contains the clutter.
The lip is the mechanism: it turns the machine top from a slide into a tray. Non-slip silicone mats underneath add grip; anti-vibration pads under the machine cut the walking at the source.
Where it works best:
- Front-loader pairs, flat tops become a detergent station and folding perch
- Holding the stain caddy, the lint bin, and the mesh bags during a wash session
- Rooms with no counter, this is your only work surface, so make it a contained one
- Renter-safe: sits on top, no mounting, moves with you
- Under $30 typical for a lipped tray; anti-vibration pads run under $15 for a set of four
Watch out: top-loaders cannot use these, the lid needs the full top. Never leave glass bottles on a machine top; the spin cycle will find the one that breaks.
9. Magnetic Side-of-Machine Organizer: Dryer Sheets Live on the Dryer
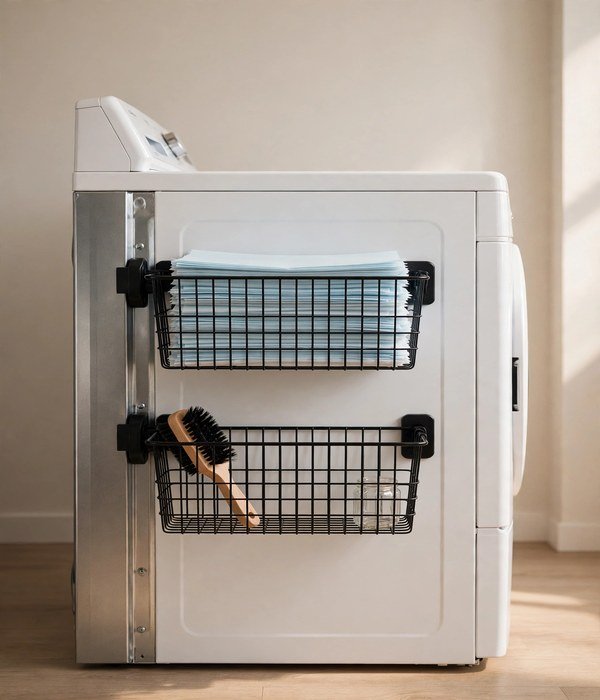
The steel side of a washer or dryer is 27-plus inches of magnetic real estate that costs nothing to use. Magnetic baskets and caddies, 4 to 6 inches wide, 10 to 12 inches tall, hold dryer sheets, scent boosters, the lint brush, and spare change from pockets.
Strong neodymium magnets hold 5 to 10 pounds each, which is plenty for supplies; the side panel is the one surface vibration cannot walk things off of, because magnets grip it.
Where it works best:
- Dryer sheets and wool balls on the dryer’s side, grab, toss, done
- The pocket-change jar on the washer side, empties pockets before they eat the pump
- The lint brush hangs beside the lint trap as a visual reminder
- Small-space rooms where every horizontal surface is already claimed
- Renter-safe: magnets leave zero marks, rearrange in seconds, under $20 typical
Watch out: test your machine’s side panel with a fridge magnet first, some panels are aluminum or have thick enamel that weakens the hold. Keep magnets away from the control panel’s electronics.
10. Pull-Out Ironing Board Drawer: The Ironing Board, Minus the Leaning
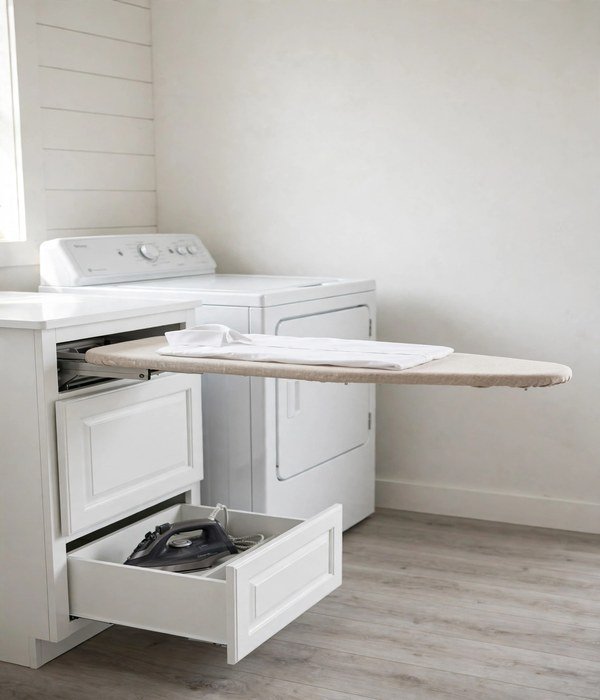
A full-size ironing board is 48 to 54 inches long and lives leaning against a wall, in the way, falling over. A pull-out board mounts inside a drawer cavity or a cabinet, 14 to 18 inches wide, and slides out to 36-plus inches of pressing surface when you need it, then vanishes.
The board supports a standard iron’s heat; the drawer holds the iron and a spray bottle underneath. You go from zero ironing footprint to a real board in ten seconds.
Where it works best:
- Next to the dryer, press shirts straight from the machine before wrinkles set
- In a base cabinet beside the machines, uses existing space
- Small rooms where a leaning board blocks the walkway
- Kits run $80 to $150; needs a 15-inch-wide drawer cavity or cabinet
Watch out: needs screws into the cabinet, so it is a homeowner or landlord-approved project. Not for: heavy steam-press users, the compact board is narrower (14–18 in) than a full board. For a no-drill alternative, see ironing board storage ideas.
Shelves & Walls
Walls are the laundry room’s biggest unused surface, especially the 30 inches of air above the machines. These five ideas put supplies at eye level, tools on hooks, and bottles where hands reach, all sized to real clearances.
11. Over-Machine Shelf Run: The 12-to-16-Inch Power Shelf
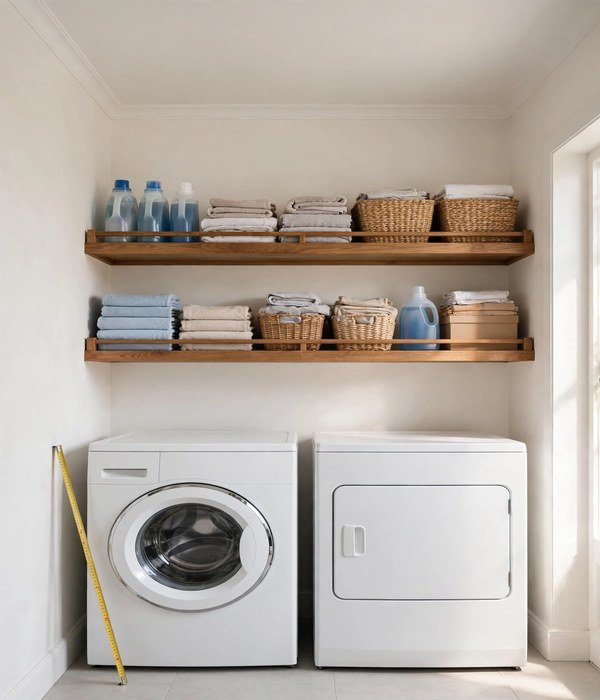
The wall above the machines is the room’s prime storage zone, if the shelf clears the hoses. Mount a 12- to 16-inch-deep shelf (or a double run) at 48 to 52 inches off the floor: that clears a top-loader lid swung fully open (about 45 inches of swing height) and the hose connections behind.
At 16 inches deep you fit full-size detergent jugs front to back; at 12 inches, bottles and folded linens. Anchor into studs, a loaded shelf of detergent is 30 to 50 pounds.
Tips for best results: Measure your lid’s open height before you mount, lids vary 40 to 46 inches. Keep daily supplies (detergent, sheets) on the lower shelf and backstock up top so heavy jugs are never lifted overhead. Put a small lip or rail on the front edge; vibration from the machines rattles items off plain shelves.
Stud-mounted only, drywall anchors will not hold 40 pounds of laundry supplies. Under $40 typical for a 48-inch solid shelf and brackets. For what to stock on it, pair with laundry room storage ideas above and beside the machines.
12. Pegboard Supply Wall: Every Tool Visible, Every Hook Movable
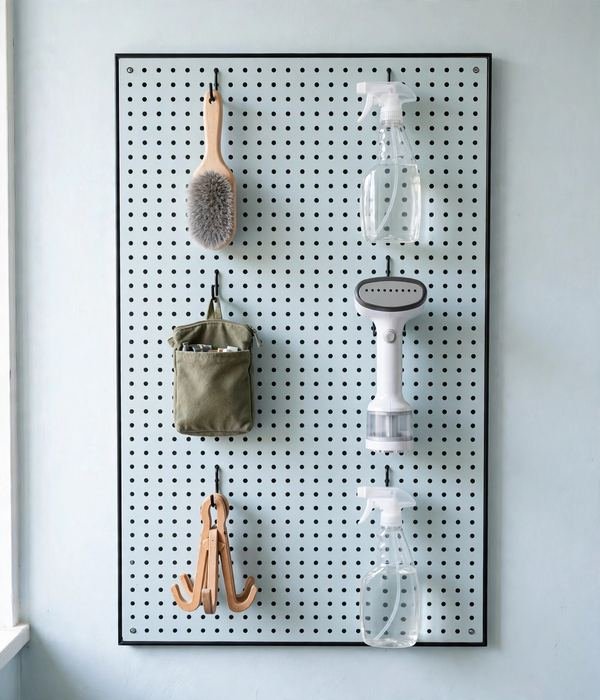
Laundry tools, the lint brush, the drying rack hooks, the stain stick, the sewing kit for the popped button, vanish into drawers. A 24×36-inch pegboard panel with hooks puts them all on the wall, visible and movable.
Standard pegboard holes are 1 inch on center and take ⅛- or ¼-inch hooks; metal pegboard holds 20-plus pounds, hardboard about half that. The power is rearrangement: when the routine changes, the hooks move in seconds.
Tips for best results: Frame it with 1×2-inch furring strips so the back sits ¾ inch off the wall, hooks need that clearance to seat. Metal pegboard survives humidity far better than hardboard, which swells in a steamy laundry room. Hang the heaviest items (the iron, the handheld steamer) on double-prong hooks, not single.
Keep it 12 inches from the machines so vibration does not rattle hooks loose. Renter-friendly versions hang from over-door hooks, no screws, fully removable. Panels run $20 to $40; a hook assortment is under $15.
13. Tension Rod Between Cabinets: Spray Bottles at Arm Height
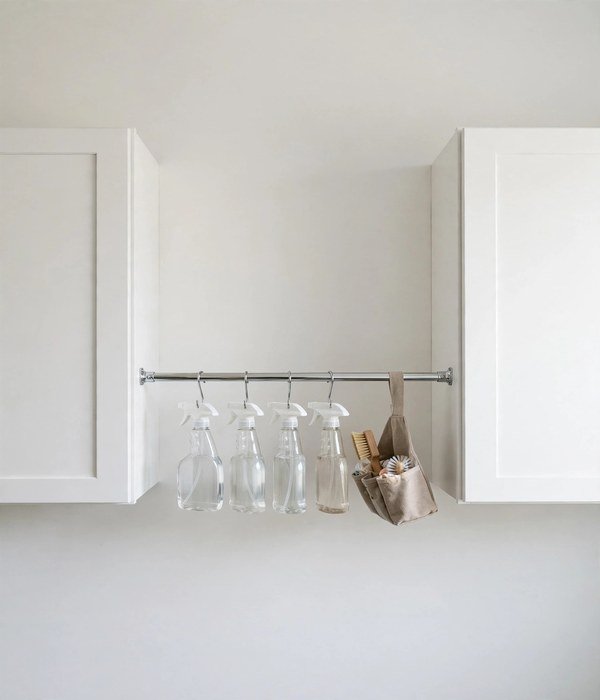
The 20 to 28 inches of air between two wall cabinets, or between a cabinet and the wall, is exactly the height of spray bottles and the stain caddy. A spring tension rod, 18 to 28 inches adjustable and rated for 5 to 10 pounds, spans that gap and hangs bottles by their triggers.
The bottles hang at arm height over the counter or the machine, off the surface, always visible. No screws, no cure time, installed in a minute.
Tips for best results: Buy a rod rated for the span, not the weight, rods fail at long spans, so match the adjustable range to your gap. Twist-lock rods hold better than spring-only under the daily grab-and-hang cycle. Hang no more than 4 to 5 full spray bottles (about 8 pounds) on a standard rod.
Fully renter-safe and under $15. Watch out: tension rods slip on glossy tile or fresh paint, a dab of the rubber end caps’ grip is what holds them, so check the caps are clean. Not for: gaps over 36 inches, where you need a mounted closet rod instead.
14. Floating Shelf Ladder: Storage That Climbs the Wall
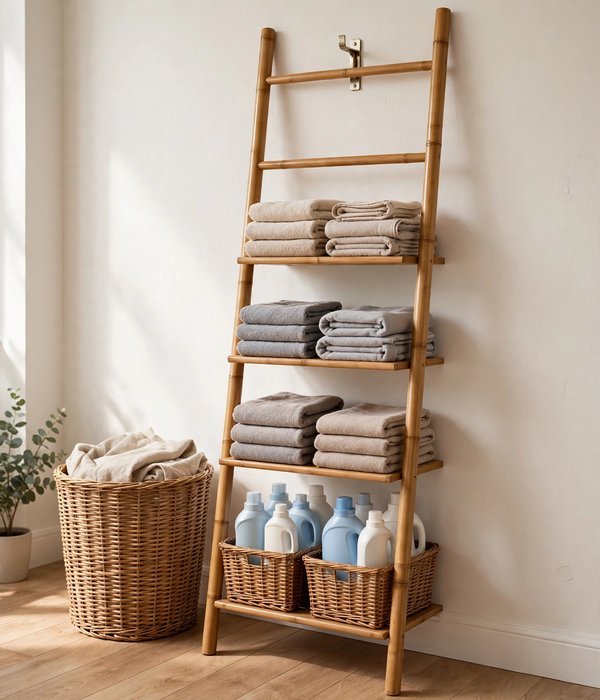
When the wall is tall and the floor is taken, a leaning ladder shelf, 16 to 20 inches wide, 60 to 72 inches tall, climbs where cabinets cannot. The rungs hold folded linens and baskets; the top leans on the wall; the bottom sits 12 to 14 inches out from the wall.
Because it leans, it needs a wall anchor at the top, one screw into a stud, and the angle means each shelf is 10 to 12 inches deep, perfect for folded towels and supply baskets.
Tips for best results: Anchor the top to a stud, always, a loaded ladder shelf is top-heavy and will walk forward on hard floors. Use the bottom rungs for the heaviest items (detergent backstock) to lower the center of gravity. Baskets on each rung keep small items from sliding down the slope.
Under $60 typical for a 5-tier bamboo or wood unit. Watch out: the lean eats 12 to 14 inches of floor depth at the base, in a 5-foot room, that is the walkway, so reserve ladder shelves for walls, not walkways. Needs one screw, so confirm with your landlord.
15. Back-of-Door Rack: Six Inches of Door, Three Shelves of Gain
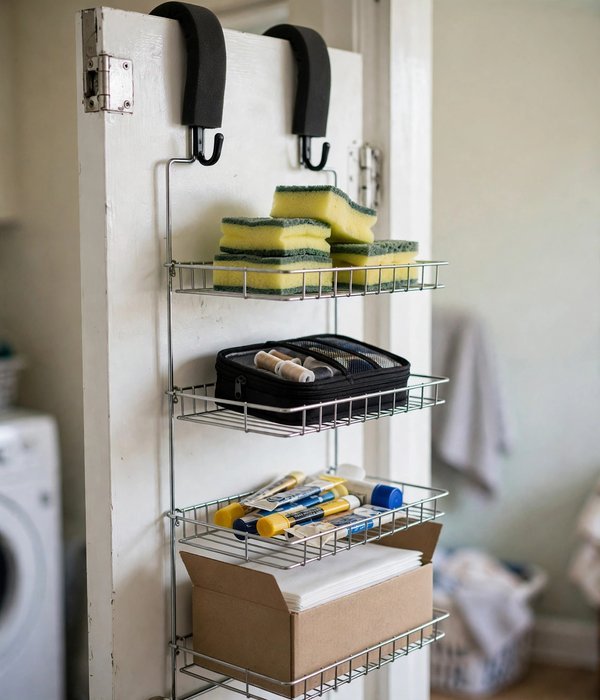
The back of the laundry room door is 24 inches wide and 80 inches tall of storage nobody uses. An over-the-door rack with 3 to 4 wire or solid shelves, each 4 to 6 inches deep, holds dryer sheets, stain sticks, the sewing kit, and spare supplies at eye level.
Total depth off the door is 5 to 6 inches, so it clears the machines as long as the door swing has 8 inches of clearance. Fits standard 1⅜-inch interior doors.
Tips for best results: Distribute weight top to bottom, heavy jugs low, light boxes high, or the door drags and the hinges complain. Tighten the over-door hooks monthly; doors settle and hooks loosen. Keep the rack’s contents under 20 pounds total to protect the hinges.
Fully renter-safe, under $30 typical. Watch out: if the door swings toward the machines, measure the swing arc with the rack on, 6 inches of rack plus the machine front can collide. For bigger door-storage ideas, see laundry closet ideas for small homes.
Folding & Drying
Clean laundry has to go somewhere between the dryer and the drawer. These five ideas give you a folding surface and real drying capacity, in rooms where a permanent table and a floor rack will not fit.
16. Wall-Mounted Drop-Down Table: A Folding Surface That Disappears
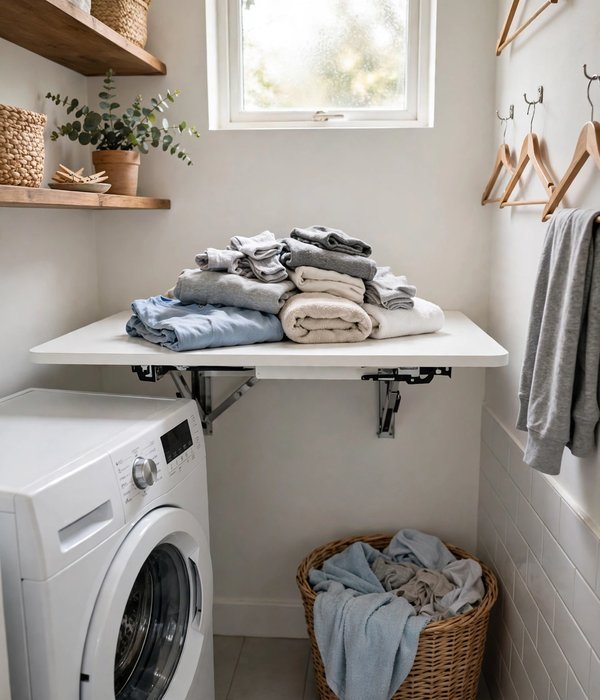
A folding table needs 24 by 36 inches of surface, and a small laundry room does not have it to spare permanently. A wall-mounted drop-down table folds flat against the wall (2 to 3 inches deep) when closed and drops to a 24×36-inch surface on bracket arms when open.
Mounted at 34 to 36 inches high, counter height, it is a real folding station. Rated for 40 to 50 pounds on good brackets, which covers a full warm load mid-fold.
- Find the studs, the brackets must anchor into studs, not drywall; a loaded table pulls hard.
- Mount at 34 to 36 inches: counter height, so folding does not hurt your back.
- Choose brackets rated 50 pounds-plus; cheap 20-pound brackets sag within months.
- Fold it up every time, the habit is the system; a table left down blocks the room.
- Kits run $60 to $120; needs screws into studs, so homeowners or landlord-approved.
17. Retractable Clothesline: 20 Feet of Drying in Zero Floor Space
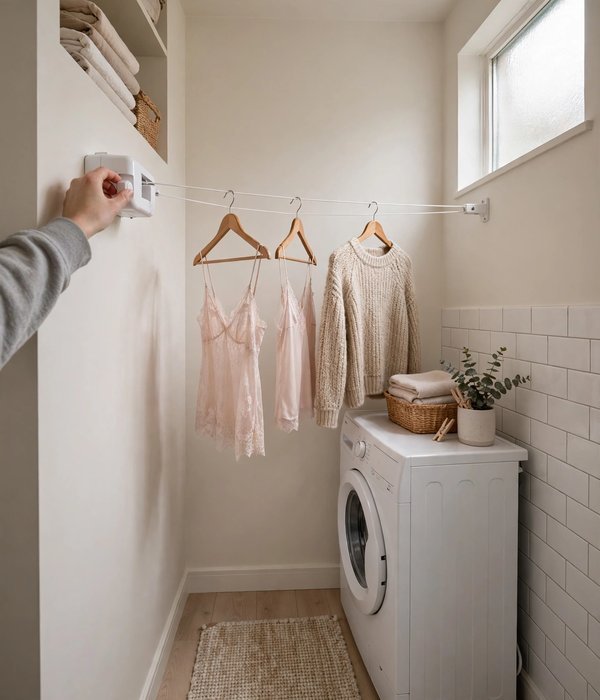
Delicates, wool, and anything that cannot take the dryer need air-drying, and a floor rack eats 10 square feet. A retractable clothesline mounts on one wall, pulls out 15 to 20 feet to a hook on the opposite wall, and retracts into a 4-inch housing when done.
Rated for 10 to 15 pounds of wet laundry, which covers a full delicates load. The line sits at 60 to 66 inches high, above head height in the walkway.
- Mount both ends into studs, wet laundry is heavy, and drywall anchors pull out.
- Span 8 to 15 feet max; longer spans sag under wet weight.
- Run the line over the machines or the tub, not the walkway, drips happen.
- Retract after every use; a line left out collects dust and becomes a clothes horse.
- Under $25 typical; fully removable with two screw holes to fill, most landlords accept it.
18. Fold-Flat Drying Rack: The Sweater Saver That Stores at 3 Inches
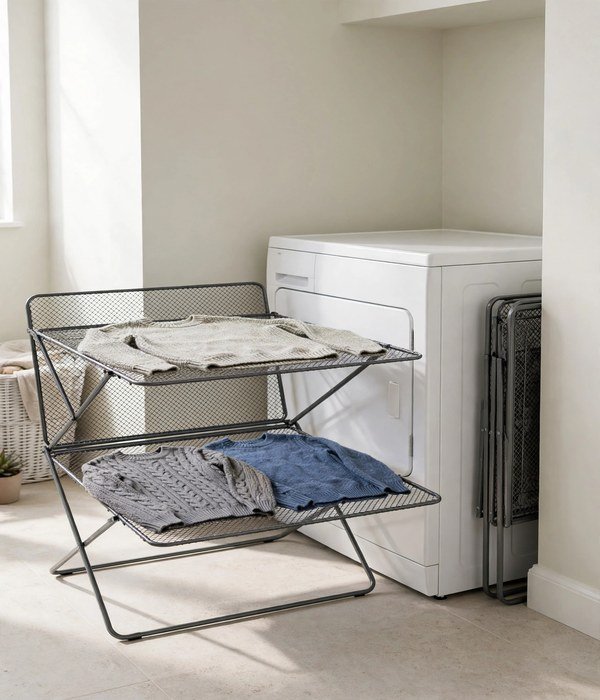
Sweaters, bras, and anything knit must dry flat, and a flat-drying rack is a 24×36-inch footprint you cannot spare. A fold-flat rack opens to a full mesh drying surface and collapses to 2 to 4 inches thick, sliding between the machine and the wall or behind the door.
Holds 10 to 15 pounds of wet knits across two tiers; the mesh lets air circulate underneath so sweaters do not get musty.
- Measure your storage slot first, the 6-inch side gap or the 4-inch space behind the door.
- Choose mesh over solid shelves: airflow underneath is what prevents the damp-sweater smell.
- Load heavy knits on the bottom tier, top-heavy racks tip when bumped.
- Wipe the frame dry after use; even powder-coated steel rusts if left damp in a humid room.
- Under $35 typical; renter-safe since it is fully freestanding. Keep a small fan or the room vent running nearby, moving air cuts flat-drying time for thick knits nearly in half.
19. Over-Door Drying Rack: Dry Shirts on the Door You Swing Daily
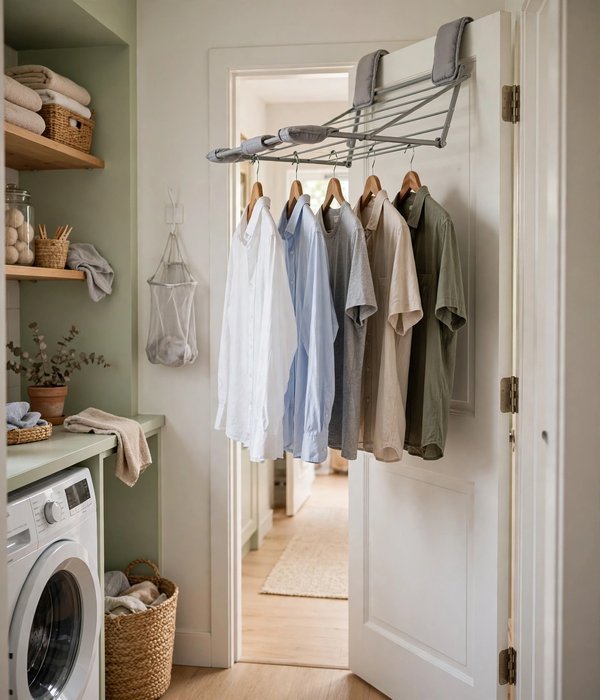
Hang-dry shirts need hangers and air, and an over-door rack turns the laundry room door into 5 to 7 hanger slots. The rack hooks over a standard 1⅜-inch door with padded hooks, holds 10 to 15 pounds of damp shirts, and folds flat when the load is done.
Drying on the door keeps shirts out of the dryer (less shrinkage, longer life) without a rack eating floor space.
- Confirm door thickness and that the door still latches with the hooks on, thick weatherstripping can block it.
- Space hangers 2 inches apart minimum; shirts touching do not dry.
- Keep the rack on the side of the door away from the machines’ heat and steam.
- Fold it flat between loads, an empty rack on the door is visual clutter.
- Under $25 typical; zero holes, fully renter-safe. Button the top button and smooth the placket before hanging, shirts dried on the hanger this way often skip the iron entirely.
20. Rolling Garment Rack: Hang-Dry, Then Roll It Away
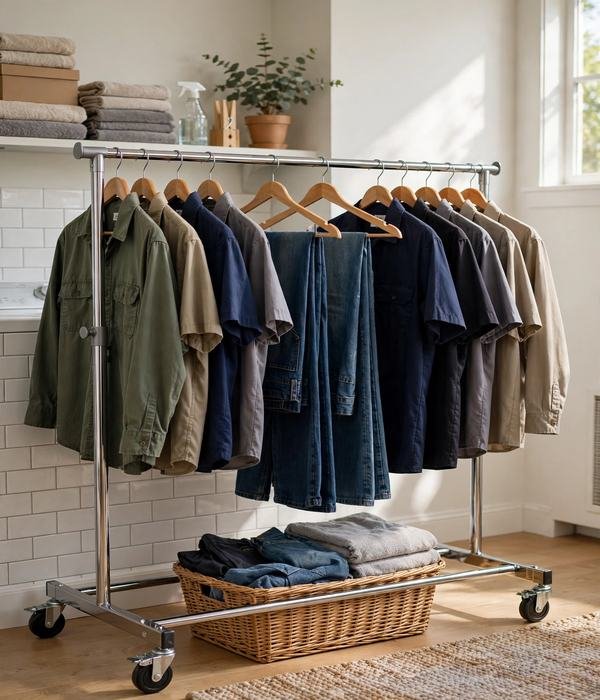
For the big hang-dry loads, the week’s work shirts, the kids’ uniforms, a rolling garment rack gives you a full 48 inches of hanging rod on locking casters. Standard single-rail racks are 48 inches wide, 18 to 20 inches deep, and 60 to 64 inches tall, holding 30 to 50 pounds of damp clothes.
Roll it out of the closet or corner on wash day, load it up, roll it back when everything is dry.
- Buy a rack rated 50 pounds-plus; cheap 20-pound racks bow under wet denim.
- Lock the casters while loading, a rolling rack plus wet jeans walks across tile.
- Hang the heaviest items (jeans, hoodies) in the center to balance the load.
- Store it in the 20-inch gap beside the machines or in a closet when empty.
- Under $40 typical for a sturdy single-rail; the double-rail upgrade doubles capacity for small rooms that hang-dry everything.
Supplies & Backstock
Detergent, softener, stain treatment, and the bulk buys, supplies are the category that silently eats every shelf. These five ideas give them a system: decanted, labelled, reachable, and safe.
21. Decant Into Airtight Jars: Powder, Pods, and the 30-Day Rule

Bulk detergent bags are floppy, ugly, and impossible to pour. Decanting powder into a 1- to 2-gallon airtight jar (glass or BPA-free plastic) with a scoop turns measuring into a one-scoop motion, most powders dose at 1 to 2 tablespoons per load, and a marked scoop ends the guessing. Pods go in a latched jar, out of reach.
The mechanism is visibility: you see the level drop, so you never run out mid-load.
What you can do with it:
- A 2-gallon jar holds about 100 loads of powder, roughly a 3-month supply for most households
- Mark the jar with a fill line and the date opened; powder clumps after 6-plus months in humidity
- Pods in a latched, opaque jar, light degrades them and the bright colors attract kids
- Keep the scoop in the jar, not the drawer, the system fails the week the scoop vanishes
- Under $20 for jars and scoops; the labels are what make it stick
Watch out: never decant pods where kids can reach, pods look like candy and poison control data backs the danger. Keep them latched and high, or skip decanting pods entirely. See the spoke on supply storage: cleaning supplies storage ideas.
22. Turntable Under the Sink: Spin to the Bottle You Need
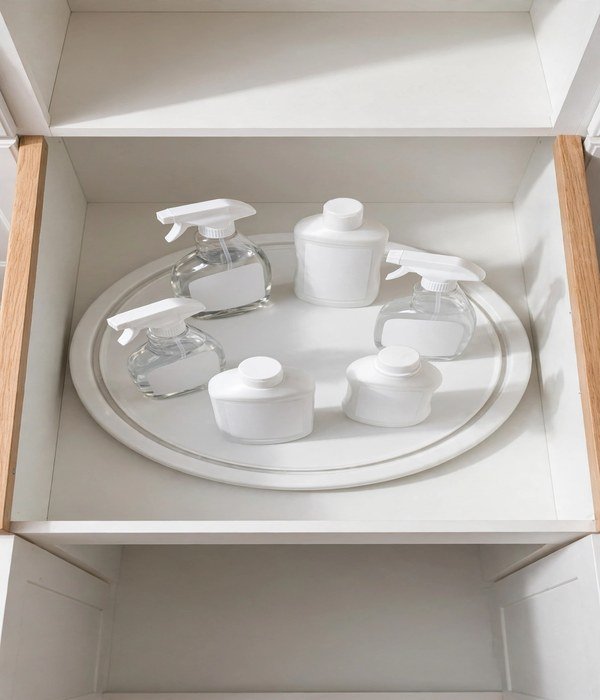
Under-sink and low-shelf supplies die in the back row, you buy a third stain spray because you could not see the two you own. A 10- to 12-inch turntable (lazy Susan) on the shelf or in the cabinet spins the back row to the front. One spin replaces digging.
Raised-edge models keep bottles from sliding off; 2-tier turntables double the capacity in the same 12-inch footprint.
What you can do with it:
- One turntable per category: stain treatment, fabric care, machine cleaners
- The 12-inch size fits standard 14-inch-deep laundry shelves with room to spin
- Raised edges are non-negotiable, flat turntables shed bottles when spun fast
- Wipe it monthly; detergent drips get sticky and seize the bearing
- Under $15 each; two turntables organize a whole supply shelf
Watch out: measure shelf height, a 2-tier turntable needs 10 to 12 inches of vertical clearance, which low shelves often lack. Renter-safe: it just sits there.
23. Labelled Backstock Bin System: Buy in Bulk, Find in Seconds
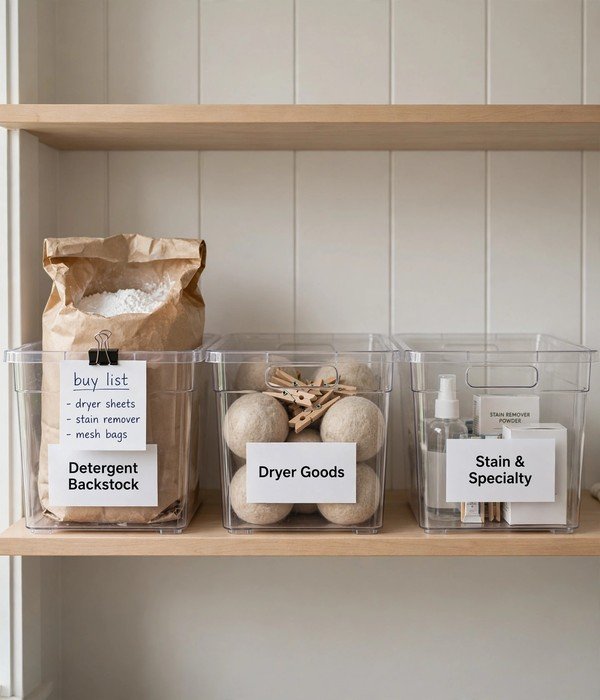
The bulk detergent, the 3-pack of dryer sheets, the spare stain sticks, backstock without labels becomes a mystery pile. One 12×16×8-inch bin per category, labelled on the front, stacked two high on the top shelf or in a closet: detergent backstock, paper and dryer goods, stain and specialty. The label faces out; the bin pulls like a drawer.
You shop your own backstock before you shop the store.
What you can do with it:
- Standard 12-quart bins stack two high under a 16-inch shelf gap
- Label the category AND the date opened, backstock goes stale (sheets lose scent in a year)
- Keep one “buy list” card clipped to the front; when a bin empties, the item goes on the list
- Clear bins beat opaque, you see the level without opening
- Under $25 for a set of three labelled bins
Watch out: backstock belongs up high or in a closet, never at toddler height, and never where pods are reachable. Rotate stock: new buys go behind, old stock fronts the bin.
24. Lint & Vent Cleaning Kit Station: The 2,900-Fires-a-Year Fix
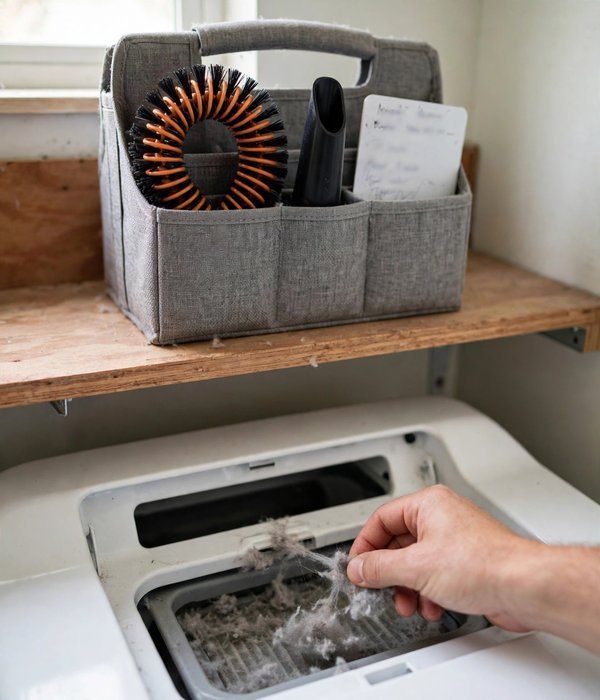
The U.S. Fire Administration attributes about 2,900 home clothes dryer fires a year to lint buildup, and the fix is a $20 kit kept where you will actually use it.
A vent brush (a 20- to 30-foot flexible brush that snakes the duct), a crevice tool for the lint trap housing, and a reminder card live together in one caddy on the shelf above the dryer. The trap gets emptied every load; the housing gets vacuumed monthly; the full duct gets brushed yearly.
What you can do with it:
- The caddy sits above the dryer, visible, grabbable, impossible to forget
- A 30-foot brush covers most residential duct runs; measure your run first
- Vacuum the trap housing monthly, the tablespoon of lint hiding below the trap is the real hazard
- Write the last full cleaning date on the caddy with a dry-erase marker
- The whole kit runs under $25; the reminder system is the actual product
Watch out: if the duct run is over 25 feet or has multiple bends, hire a pro for the annual clean, brushes cannot clear long crushed-foil runs. Never use a leaf blower on the duct; it packs lint tighter. For faster wash days overall: laundry room hacks that make wash day faster.
25. Stain Treatment Caddy: Pre-Treat at the Machine, Not the Sink
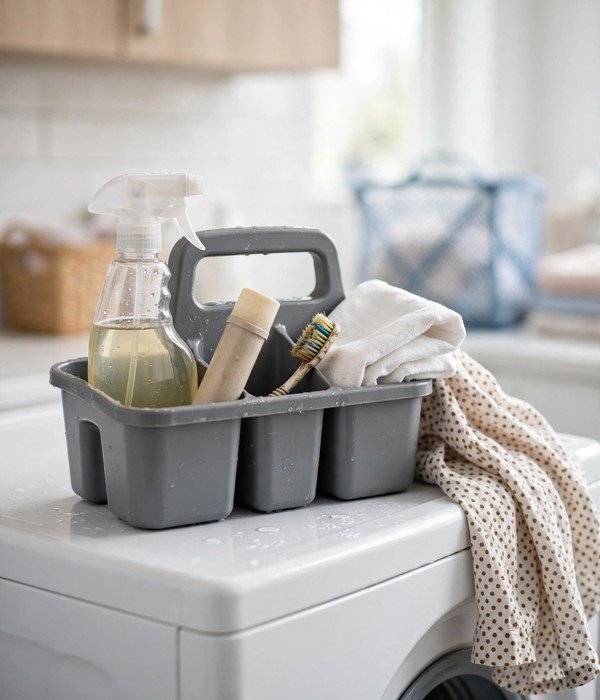
Stains set while you hunt for the spray, the pre-treat has to live at the machine. A handled caddy (12×8×6 inches) holds the stain spray, the stain stick, an old toothbrush for scrubbing, and a white cloth for blotting, parked on the machine-top tray or the side-gap cart.
The workflow: spot the stain at the hamper, toss the garment in the caddy’s path, treat it while the machine fills. Pre-treating within minutes beats pre-treating tomorrow by an order of magnitude.
What you can do with it:
- The toothbrush is the secret weapon, agitation plus chemistry lifts what spray alone will not
- Keep a white cloth, not paper towels, you need to see the stain transferring
- Restock check monthly: the caddy fails the week the spray runs dry unnoticed
- Park it on the machine-top guard (point 8) or the side-gap cart (point 6), never inside a cabinet
- Under $15 for the caddy and tools; the sprays are what you already own
Watch out: test stain treatment on a hidden seam first, some fabrics (silk, wool) react badly. Never mix bleach-based and ammonia-based products in the same caddy; the fumes are dangerous. And do not put the caddy where small children play, stain chemicals are not toys.
Conclusion
If your laundry room is 5×7 feet or a converted closet, the inches are the whole game, and the side-gap cart, the over-machine shelf run, and the drop-down folding table are the three moves that win it. But if I had to name one best first upgrade: the three-bin sort station (point 1).
It costs under $60, needs zero tools and zero landlord permission, and it attacks the actual bottleneck, the unsorted pile, instead of the symptoms. Everything downstream gets easier the week sorting becomes automatic: wash day is loading, not triage.
Buy the sorter this weekend, measure the side gap while you are at it, and let the cart be upgrade number two.
For the bigger picture, these ideas connect to the rest of the laundry cluster: the machine-zone deep dive laundry room storage above and beside the machines, the small-space playbook small laundry room ideas for top loaders, and the hamper-by-hamper breakdown laundry basket storage ideas for small spaces.
If your laundry shares space with the bathroom, the moisture-zone rules in 30 bathroom storage ideas for small and large bathrooms apply here too, and the existing guide to small laundry room organization ideas that reduce clutter is a solid companion read.
Frequently Asked Questions (FAQ)
How do I organize a very small laundry closet?
If your laundry lives in a closet, stack the machines if they are front-loaders, that single move reclaims 27 inches of width. Then work the three surfaces a closet gives you: the door (over-door hamper or drying rack), the side gap (a 5- to 6-inch slim cart), and the wall above (a 12-inch-deep shelf at 48-plus inches).
Skip anything that needs floor space, including full-size hampers, use the over-door bag instead.
What is the best way to store laundry detergent safely?
If you have kids or pets, keep detergent, especially pods, latched, opaque, and above 48 inches or behind a latched cabinet. Pods look like candy to toddlers, so a latched jar on a high shelf is the minimum; many families skip decanting pods entirely and keep the original child-resistant tub.
Powder and liquid are lower risk but still belong out of reach, never under an open sink a crawler can access.
How much clearance do I need around my washer and dryer?
If you are buying to a measurement, use these: 1 inch on each side for vibration and airflow, 4 to 6 inches behind for hoses and the dryer vent, and 24-plus inches in front for the door swing and loading.
A top-loader lid needs about 45 inches of vertical clearance when open, measure that before you mount any shelf above. Stacked units need an 80-inch ceiling.
Can I organize a laundry room without drilling any holes?
Yes, if you stick to the no-drill toolkit: tension rods between cabinets, over-the-door racks and hamper bags, magnetic organizers on the machine sides, a slim rolling cart in the side gap, freestanding sorters and ladder shelves (the ladder needs one anchor screw, so swap it for a freestanding etagere if your lease is strict).
Adhesive hooks work for light items if you clean with rubbing alcohol and respect the cure time. You can do roughly 80 percent of this guide with zero holes.
How do I keep a laundry room from smelling musty?
If the room smells, the cause is almost always moisture plus poor airflow: leave the washer door and detergent drawer open between loads so the gasket dries, run the exhaust fan or crack ventilation during and after wash day, and never leave wet clothes sitting, move them within a few hours.
Wipe the washer gasket monthly (front-loaders grow mildew in the folds), and choose ventilated hampers and cabinets over sealed ones so damp laundry breathes.
Should I store cleaning supplies in the laundry room?
If your laundry room has the space, it is the natural home for them, but apply the same safety rules as any storage: chemicals up high or behind a latch if kids are in the house, never decant bleach or ammonia into unlabelled containers, and never store them where they can tip onto the machines’ electronics.
A labelled bin system on a high shelf (point 23) plus the turntable (point 22) keeps them sorted and visible. For homes with no storage closet at all, see ideas, laundry closet ideas for small homes.
What is the one laundry room upgrade worth the money?
If you can only do one project, mount the over-machine shelf run (point 11), a 48-inch solid shelf at 48 to 52 inches off the floor, anchored into studs. It costs under $40, takes an afternoon, and converts the room’s biggest dead zone into its primary storage.
Pair it with the sort station (point 1) and you have solved the two problems, nowhere to put dirty clothes, nowhere to put supplies, that make laundry rooms feel broken.