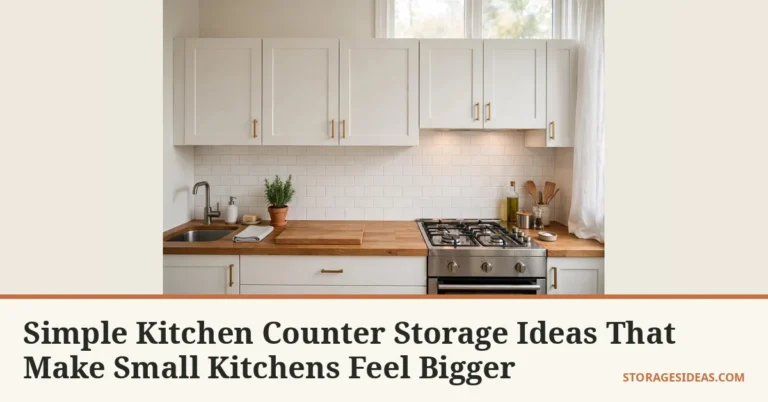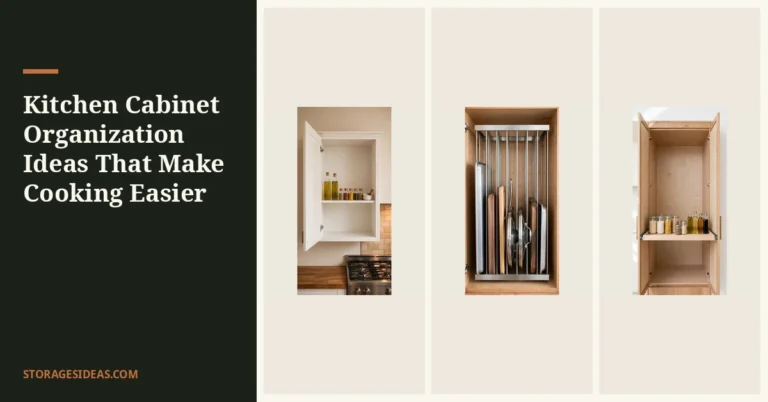
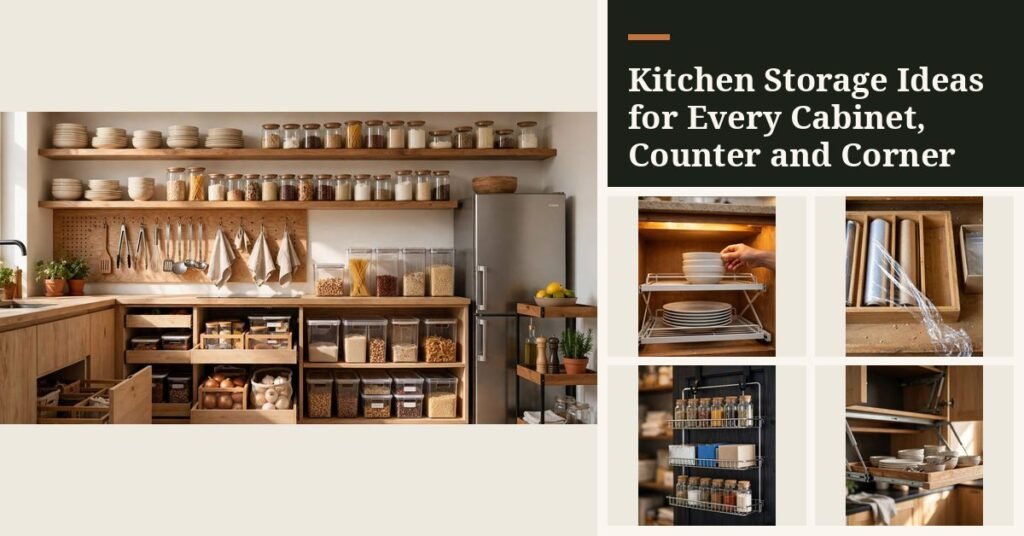
Before you buy a single bin, grab a tape measure. Most kitchen storage ideas fail on one thing, and it isn’t clutter, it’s fit: the riser that’s half an inch too wide for the shelf, the turntable that can’t spin because the cabinet door frame steals an inch.
Standard kitchen base cabinets are 34.5 inches tall (36 with the countertop) and 24 inches deep, with widths in 3-inch steps from 12 to 48. Wall cabinets are only 12 inches deep and hang 18 inches above the counter.
Write those numbers on a sticky note and measure every cabinet, drawer interior, and gap before you shop, including the dead zones like the 6-inch gap beside the fridge and the space under the sink around the pipes.
These 35 kitchen storage ideas are organized by zone, so you can fix the worst spot first. Each one carries exact dimensions, real load limits, and what to buy, the specs that make the difference between an organizer that fits and one that gets returned.
No custom carpentry, no contractor: most of these are renter-safe, and every one that needs screws says so. Let’s start where the chaos lives, inside the cabinets. Cooking in under 100 square feet?
See ideas.
Your measurement cheat-sheet (pin this):
- Base cabinet interior: 24″ deep × your width − 1.5″ (walls eat ~3/4″ per side)
- Wall cabinet interior: 12″ deep, bottom shelf 54″ from floor
- Drawer interior: measure below any narrowing near the top, trays must clear it
- Gap beside fridge/stove: often 5–7″, a 6″ slim cart was made for this
- Under-sink: measure width and height around pipes, they’re never centered
- Counter-to-cabinet clearance: 18″ standard, anything you mount underneath must fit in it
Why Kitchen Storage Ideas Start With Inches, Not Inspiration
Here’s the thing nobody tells you: a kitchen doesn’t feel small because of its square footage. It feels small because of its dead space, the back 8 inches of every 24-inch-deep base cabinet, the 6 inches of vertical air above every stack of plates, the corner cabinet you avoid opening because things fall out.
Standard cabinets were designed for an average kitchen in the 1950s, and the organizers sold today are sized in half-inch increments that either fit your boxes or don’t. That’s why measurement is the whole game. A 12-inch turntable spins freely in a 12-inch-deep wall cabinet only if nothing else shares the shelf; a 15-inch one needs a base cabinet.
Expandable shelf risers stretch from about 12 to 23 inches, perfect for a 30-inch cabinet, useless in a 12-inch one unless you check first.
Good kitchen storage solutions work by reclaiming specific, measurable volume: vertical air between shelves, the swing zone behind cabinet doors, the floor of deep drawers, the 18 inches of backsplash wall everyone ignores. The ideas below are kitchen organization ideas built around those zones, each with the dimensions that decide whether it works in your kitchen.
Measure once, buy once.
Cabinets: The Deep, Dark, and Fixable
Your base cabinets hold the most volume in the kitchen, and waste the most of it. A standard 24-inch-deep cabinet means anything past the front 12 inches is a reach-and-hope zone. These seven ideas pull that dead space forward, upward, and into use. For the room-by-room cabinet method, see cabinets.
1. Expandable Shelf Risers: Double Your Shelf Space Without Drilling
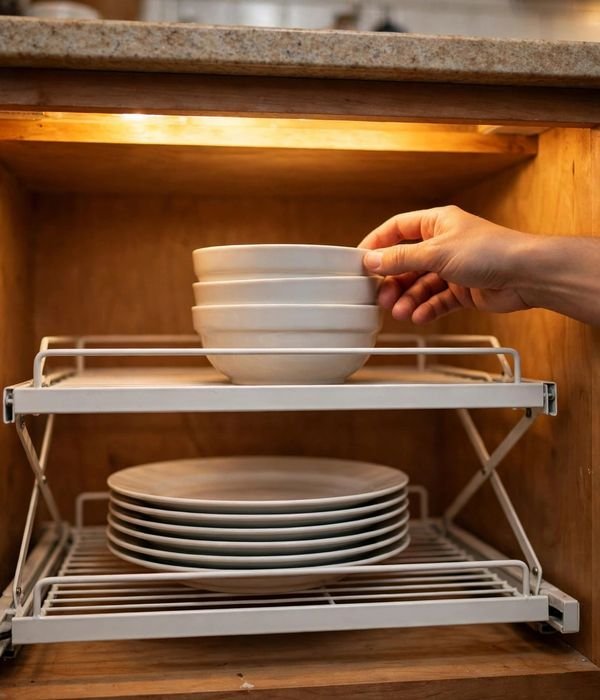
The average cabinet shelf holds one layer of dishes and wastes 5 to 8 inches of air above them. A shelf riser is a freestanding metal shelf, typically 8 to 8.5 inches deep, that sits on your existing shelf and creates a second level: plates below, bowls or mugs above.
Look for expandable models stretching 12 to 23 inches wide, with legs adjustable to three heights (common: 5.3, 7.3, 9.3 inches). Set the height to clear your tallest stack, dinner plates on edge run 10 to 11 inches, so leave finger clearance above.
Metal risers carry 30 to 60 pounds depending on width (less fully extended), handling a full stoneware stack. Stack two to triple a shelf, but check the shelf first; particleboard sags past 40 pounds.
What you can do with it:
- Plates below, bowls above in a 30-inch base cabinet, one riser, two full layers
- Mugs on top, coffee supplies underneath in a 12-inch-deep wall cabinet
- Canned goods below, boxed mixes above in a tall pantry cabinet
- Slide one over the coffee maker zone to hold filters and pods above the machine
- Use the 5.3-inch setting under low shelves to split short glasses into two rows
2. Clip-On Under-Shelf Baskets: The 10-Inch Gap You Already Own
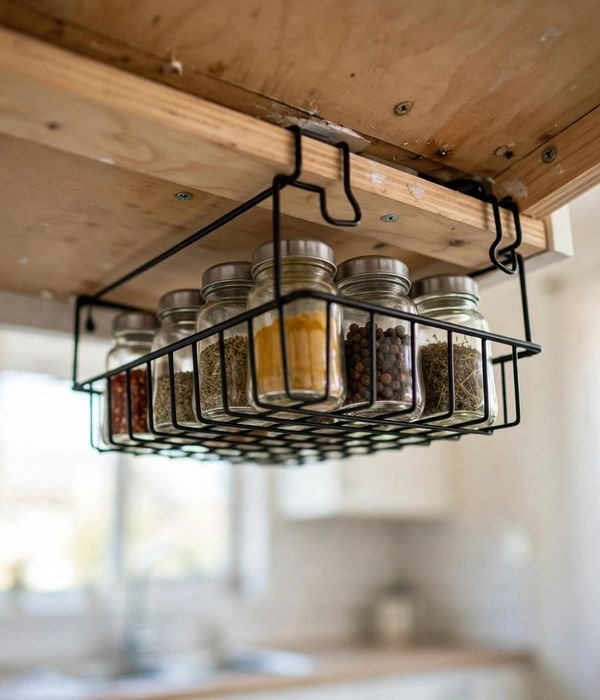
Every cabinet shelf has 3 to 6 inches of wasted air under it, between the shelf above and the tops of whatever sits below. Under-shelf baskets are wire baskets with hooked arms that clip over the shelf edge and hang beneath it, no tools needed.
Standard sizes run 10 to 14 inches wide, 4 to 5 inches tall, holding about 10 pounds, a row of spice jars, a stack of lids, or cleaning rags. They need shelves at least 3/4 inch thick with a clear gripping edge, and enough clearance below that the basket doesn’t collide with items underneath.
In a 12-inch-deep wall cabinet, one basket per shelf adds roughly a third more usable surface, fully renter-safe. The wire grid keeps contents visible from below, so nothing hides.
What you can do with it:
- Spice jars in a wall cabinet, labels visible from below, no more stacking
- Pot lids under the shelf above the pots, lids and pots finally reunited
- Cleaning supplies under the sink shelf, off the wet cabinet floor
- Snack bars and packets in a tall cabinet, hanging above the cereal boxes
- Wrap boxes (foil, plastic wrap) clipped under a pantry shelf for grab-and-go
3. Pull-Out Cabinet Trays: End the Deep-Cabinet Kneel
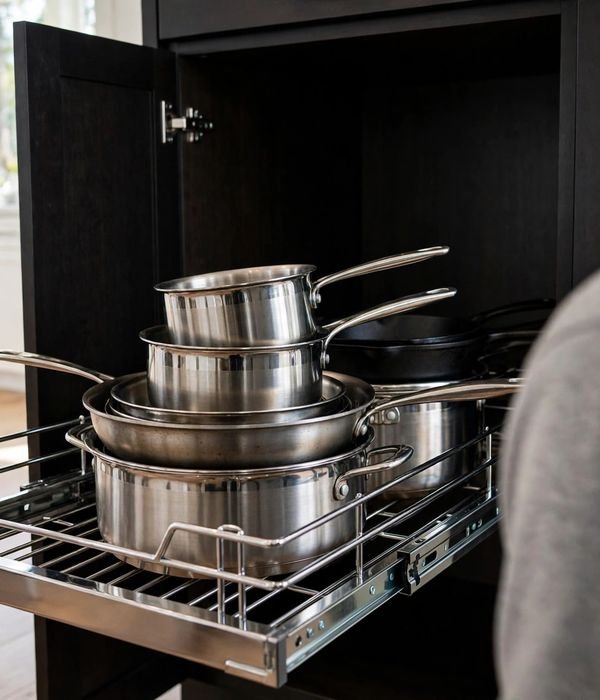
If your base cabinets are the standard 24 inches deep, the back half is where containers go to be forgotten. Pull-out trays are sliding wire or wood baskets that mount inside the cabinet and glide forward on rails, bringing the back row to you.
Common no-drill versions expand 12 to 20 inches wide, run 15 to 17 inches deep, stand just over 3 inches tall, and carry around 15 pounds, pots, small appliances, or full mixing-bowl sets. Measure interior width minus a half inch for the rails, and check the door opening: the tray must clear the frame when extended.
Screw-mounted versions hold 50+ pounds but need a solid cabinet floor, skip them in rentals or flimsy particleboard, where adhesive rails are safer. Install low for heavy items; your back will notice.
What you can do with it:
- Pots and pans on a bottom pull-out, no more lifting the stack to reach one
- Small appliances that glide out instead of being dragged across the shelf
- Cleaning supplies under the sink, the tray slides past the pipes
- Canned goods in a deep cabinet, the back row finally rotates forward
- Baking sheets and trays stored flat, sliding out like a drawer
4. Cabinet-Door Lid Racks: Corral Lids on the Inside of the Door
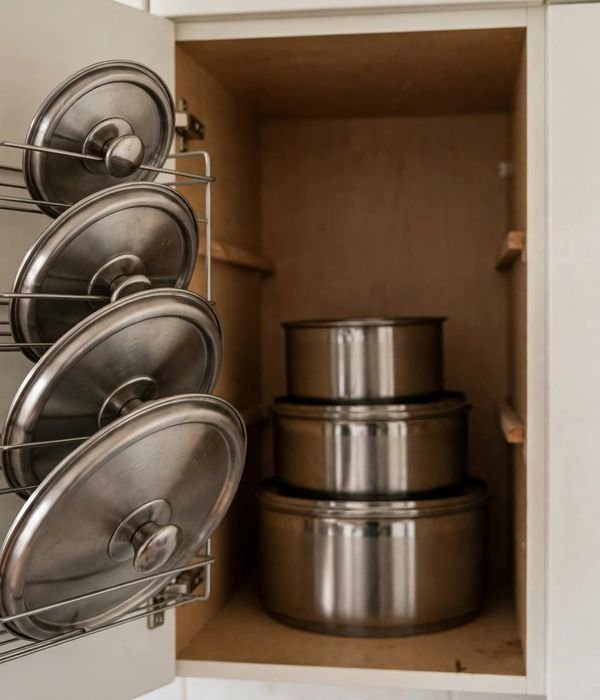
Pot lids are the worst-shaped objects in the kitchen: round, rimmed, impossible to stack. A lid rack on the inside of a cabinet door turns dead door space into a lid filing system. Adhesive racks hold 3 to 5 lids up to about 12 inches in diameter; screw-mounted versions handle heavy glass lids more reliably.
Before buying, check interior door clearance, you need 2 to 3 inches between the door’s inner face and the nearest shelf when closed, or lids jam. Measure your thickest lid (glass lids with knobs run 2.5 to 3 inches deep) and match the rack’s slot depth. Lids stop avalanching, and their pots stay stacked and calm.
For renters, adhesive versions remove cleanly, just check the weight rating against your heaviest lid.
What you can do with it:
- Pot and pan lids filed vertically on the door under the sink or beside the stove
- Cutting boards slotted into a door rack, flat, visible, no more leaning tower
- Baking sheet and cooling rack storage on a tall cabinet door
- Plastic container lids sorted by size on a pantry door
- Trivets and placemats in a slim door rack near the dining side of the kitchen
5. Turntables in Deep Cabinets: Spin Instead of Reach
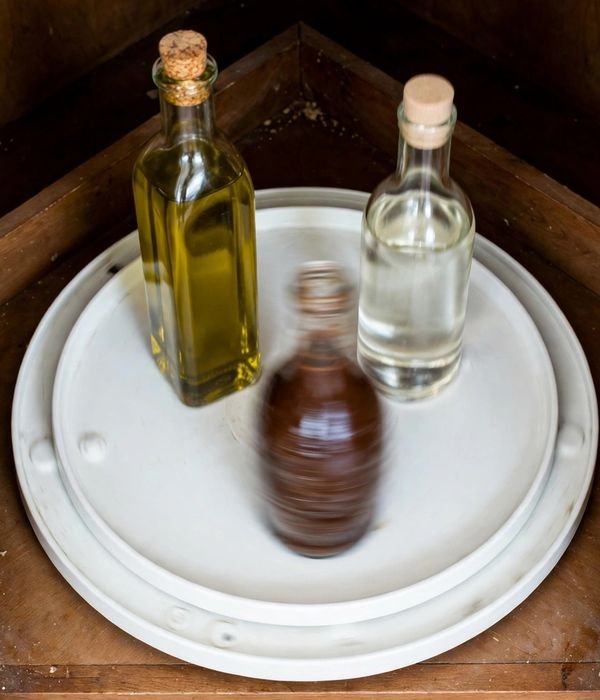
Corner cabinets and deep base cabinets are where items go to disappear, a turntable converts the whole shelf into a rotating display you can spin to the front. The sizes that matter: 10-inch fits 12-inch-deep wall cabinets and under-sink spaces; 12-inch is the sweet spot for standard base-cabinet shelves; 15-inch belongs in deep pantries and wide corners.
Residential turntables carry 5 to 10 pounds, oils, vinegars, sauces, spice jars, not cast iron. Look for a raised rim of at least 1 inch so bottles don’t walk off, and a non-skid base. Measure clear height too: a 12-inch turntable with tall olive-oil bottles needs 12 to 14 inches vertical.
In blind corners, pair one with a pull-out tray and the dead zone practically vanishes.
What you can do with it:
- Cooking oils, vinegars, and soy sauce in a base cabinet beside the stove
- Spice jars on a 10-inch turntable in a 12-inch-deep wall cabinet
- Cleaning supplies under the sink, spin to the bottle you need
- Condiments in a deep pantry, no more expired bottles in back
- Baking extracts and sprinkles in a small turntable near the mixer
6. Tiered Can Racks: First In, First Out, Nothing Expires
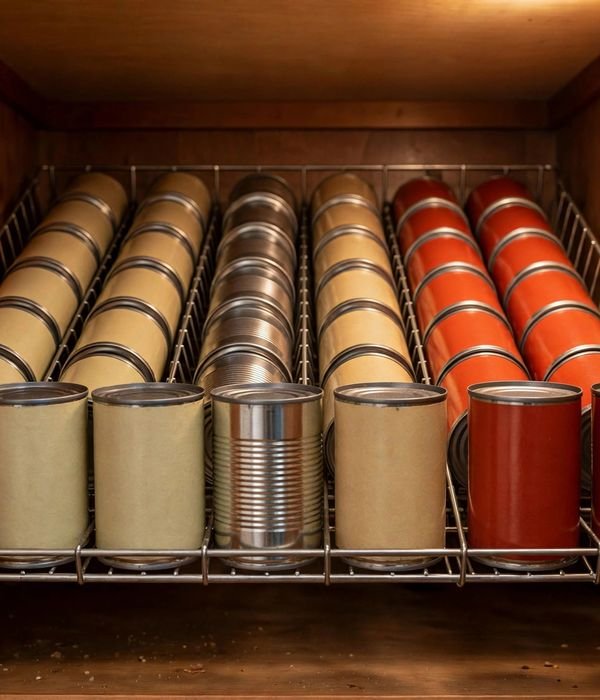
Canned goods are heavy, uniform, and always end up three deep with the oldest can in back. A gravity-feed can rack is an angled, tiered rack, cans load at the top and roll forward as you take from the front, so stock rotates itself.
Cabinet models hold 10 to 36 cans and fit standard sizes from 10-ounce soup to 28-ounce tomato cans (3 to 4.25 inches diameter). Measure shelf clearance: most racks need 12 to 14 inches vertical, with a footprint around 10 inches deep by 14 to 17 wide. Stackable two-tier versions double capacity in tall cabinets.
The real win is waste, when every can is visible and the oldest is always front, you stop discovering expired beans two years later. Keep the rack near your prep zone; cans are heavy.
What you can do with it:
- Soup, tomato, and bean cans in a base cabinet, oldest always front
- A 10-can rack in a small apartment cabinet with no real pantry
- Pet food cans stacked by flavor in a low, reachable cabinet
- Broth and coconut milk near the stove-side cabinet
- Stack two racks in a 24-inch-tall cabinet section for double capacity
7. Tension Rod Under the Sink: Hang Spray Bottles Off the Floor
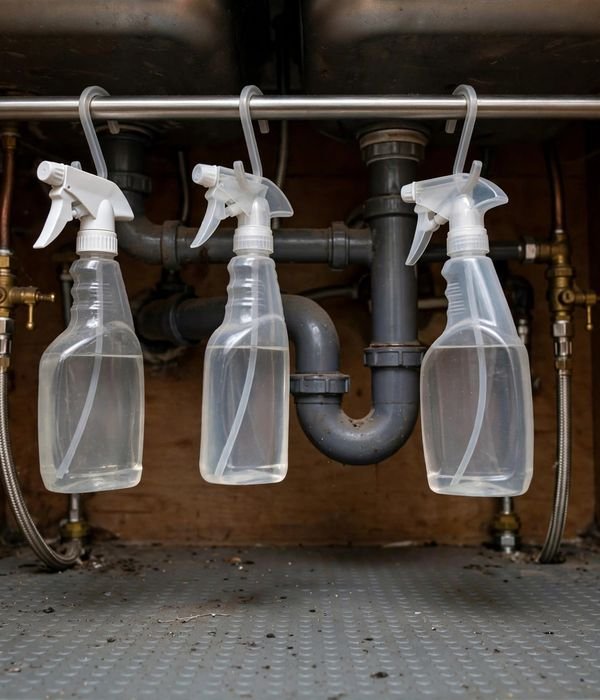
The under-sink cabinet is the most awkward box in the kitchen: pipes eat the middle, the floor gets wet, everything migrates into a puddle-prone pile. A tension rod mounted high across the cabinet turns dead air above the pipes into hanging storage, spray bottles hang by their trigger handles, off the wet floor, fully visible.
Measure interior width first: rods come in ranges like 18–28 and 24–36 inches, and you want your measurement landing mid-range, not maxed out, for solid grip. Mount 10 to 12 inches above the cabinet floor. Fully renter-safe, no holes, removes in seconds.
Only hang smooth, straight-neck bottles; ribbed necks slip. Heavy jugs stay on the floor. For more under-sink strategy, see 13 Kitchen Cabinet Organization Ideas That Make Cooking Easier.
What you can do with it:
- Everyday cleaners hung by triggers, dish soap spray, all-purpose, glass cleaner
- A second low rod 3 inches off the floor to stop bulky jugs tipping
- A small basket hung from the rod for sponges and scrub brushes
- Cabinet floor stays clear so leaks show immediately, not weeks later
- Pair with a waterproof mat under the bottles that stay on the floor
Drawers: Every Inch Earns Its Keep
Drawers are the most accessible storage in the kitchen, no doors, no reaching, which makes them the most wasted when they’re just open boxes. Standard drawers run 3 to 6 inches deep in base cabinets, and the fix is almost always the same: divide, conquer, repeat.
8. Spring-Loaded Bamboo Dividers: Custom Zones in Any Drawer
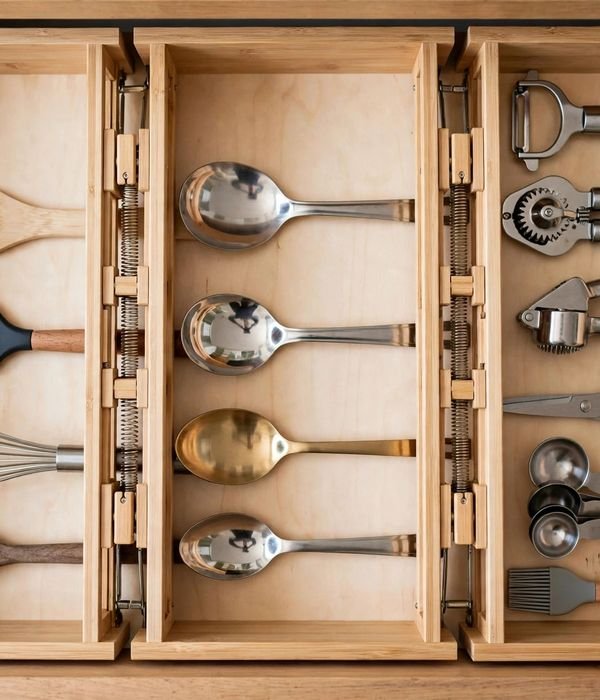
Utensil drawers fail the same way everywhere: one open box where everything slides into a corner. Spring-loaded bamboo dividers are individual slats, typically 2.35 inches wide, 0.6 inch thick, expanding 17 to 22 inches, that press-fit front-to-back, spring tension plus rubber pads holding them in place. No screws, no glue, fully repositionable.
Measure interior depth front-to-back and buy dividers whose range covers it with room to spare, maxing the spring weakens grip. Classic layout: two dividers, three lanes (cooking tools, serving tools, gadgets). Deep drawers 6 inches and up want the taller 4.65-inch dividers (12.5–17 inch range).
Bamboo wipes clean and doesn’t trap crumbs. Six dividers handle a standard drawer.
How to set it up:
- Empty the drawer completely and wipe it out.
- Measure interior front-to-back at the narrowest point, below any top narrowing.
- Compress each divider, set it in, release, it should feel firmly seated, not strained.
- Sort by use (daily cooking, serving, baking), one lane per group.
- Live with it a week, then slide dividers to resize, that’s the point of press-fit.
9. Angled Spice Drawer Inserts: Read Every Label at a Glance
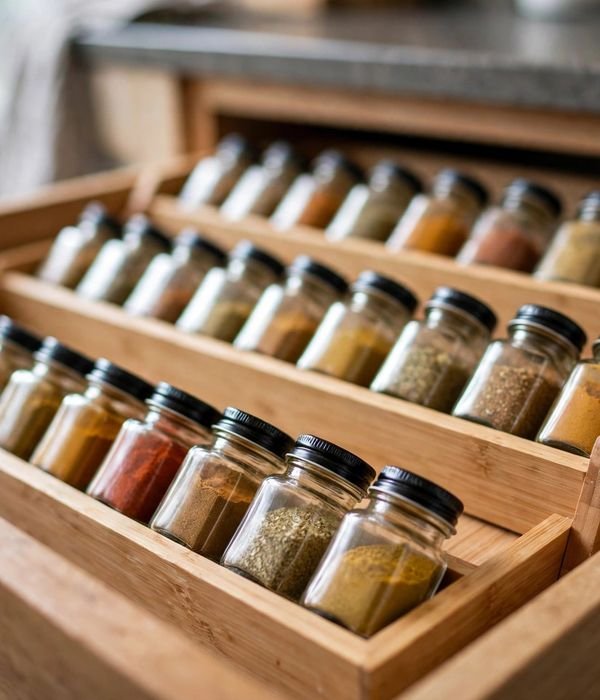
Spice cabinets are where good intentions die, jars two deep, labels hidden, the same paprika bought thrice. A tiered drawer insert fixes it permanently: stepped rows tilt every jar so labels face up and readable. Standard inserts fit 18-inch drawers with 3 to 4 tiers sized for 4-ounce jars (1.75 inches diameter, 4 inches tall).
Measure interior depth, the insert must sit flat with the drawer closing over the tallest jar, needing roughly 4.5 inches vertical clearance. Alphabetize once and the system maintains itself. This is the highest-satisfaction drawer upgrade in most kitchens, cooks rank it above new cookware.
Too shallow? The same inserts work on a cabinet shelf. Full spice system: ideas.
How to set it up:
- Pull every spice from its hiding place, cabinet, counter, that one bag.
- Check dates; toss anything over 2–3 years old (ground spices fade fast).
- Measure the drawer, confirm 4.5 inches clear height with it closed.
- Set the insert in, tallest jars in back, alphabetize front to back.
- Keep a restock list on the fridge, you’ll actually notice what’s missing.
10. Deep-Drawer Pan Dividers: File Pans Vertically Like Records
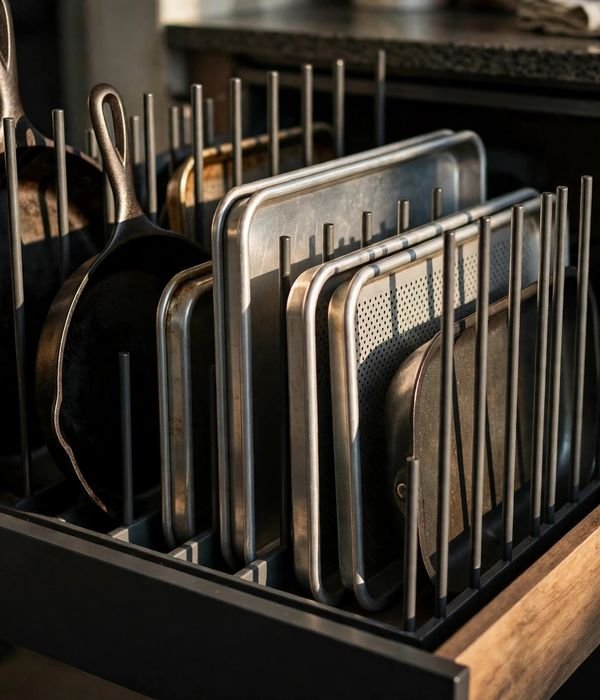
Stacking pans is a young person’s game, the one you need is always at the bottom. Vertical dividers turn a deep drawer into a filing cabinet: adjustable slots holding skillets, sheet pans, and boards upright on edge. Dividers grip items 1 to 3 inches thick and stand about 4.65 inches tall, fitting drawers 12.5 to 17 inches deep.
Measure your tallest pan on edge, a 12-inch skillet with handle needs ~14 inches drawer depth and 5+ inches vertical clearance. Vertical storage means lifting one pan without unstacking five, and heavy cast iron at drawer height beats heaving it from a low cabinet. Leave one wide slot for sheet pans, they never fit standard slots.
No deep drawer? The same dividers stand on a cabinet shelf with a tension rod as backstop. More: ideas.
How to set it up:
- Measure the drawer’s interior: depth, width, vertical clearance closed.
- Pull every pan and sheet, keep only what fits and what you actually cook with.
- Set slots: narrow for lids, medium for skillets, one wide for sheet pans.
- File heaviest (cast iron) nearest the drawer’s center so it glides evenly.
- Test fully loaded, if it drags, redistribute weight toward the middle.
11. In-Drawer Knife Dock: Safer Than the Counter Block
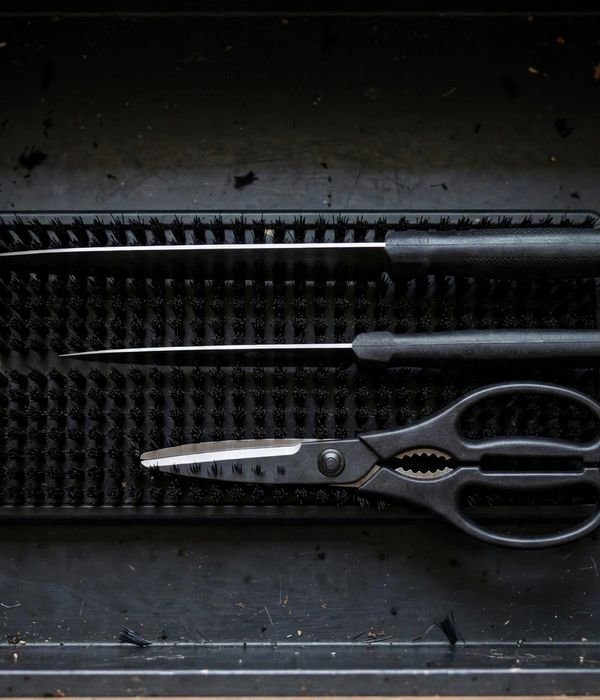
Counter knife blocks eat a square foot of prep space and harbor crumbs in uncleanable slots. An in-drawer knife dock, slotted block or universal bristle dock accepting any blade, lays flat and holds 10 to 15 knives plus shears.
You need 3+ inches interior vertical clearance and 18+ inches depth for full-length chef’s knives (8-inch blade plus handle ≈ 13 inches). Blades stay covered, handles face one way, small hands can’t reach them off the counter. Measure first, the classic mistake is a dock that’s perfect except the drawer won’t close over the tallest handle.
Bristle docks beat slotted wood for mixed sets, gripping paring and bread knives equally. Keep it in the drawer nearest your prep zone.
How to set it up:
- Measure interior height closed, need 3+ inches clear.
- Lay the dock in; confirm the drawer closes with your longest knife inside.
- Insert knives blade-down, handles one direction, largest to smallest.
- Add blade guards on serrated knives that catch bristles.
- Wipe monthly, bristles trap less than wood slots, but not zero.
12. Wrap and Bag Dispenser Drawer: Foil, Wrap, and Bags in One Pull
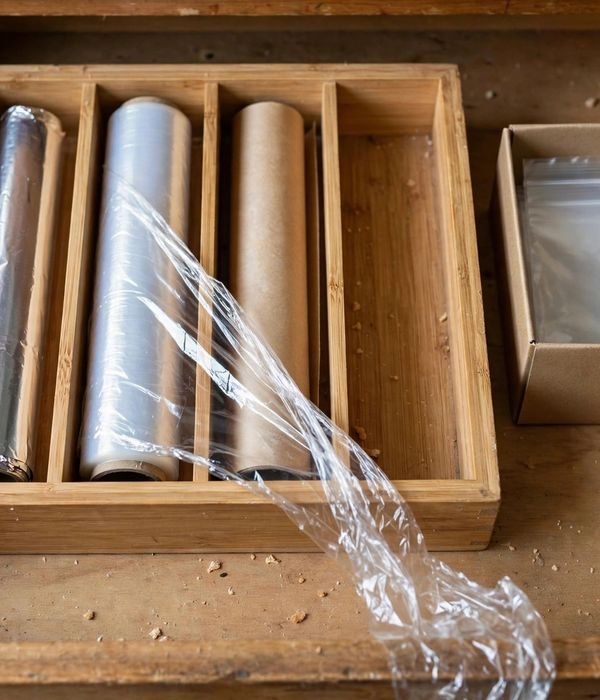
Plastic wrap, foil, parchment, and zip bags live in four spots, in boxes designed to annoy. A 3- or 4-slot dispenser corrals them: each slot holds one standard 12-inch roll box or a bag box, with a cutter edge on wrap slots.
Units run 12 to 14 inches wide, fitting drawers 16+ inches deep, measure your rolls first, since jumbo 18-inch commercial rolls won’t fit. Dedicate one shallow drawer near the fridge or prep area; the packing-lunch workflow collapses into a single pull. Bamboo wipes clean; plastic costs less.
Either way: one slot per product, double up and you’re digging again.
How to set it up:
- Gather every wrap, foil, parchment, and bag box together.
- Measure the longest roll, standard 12 inches; jumbos need a bigger unit.
- Confirm the drawer is 16+ inches deep, closing over the tallest box.
- Load one product per slot, cutter edges up and accessible.
- Recycle the ragged original boxes, they were the problem.
13. Pegboard Drawer Organizer: Plates and Bowls That Never Slide
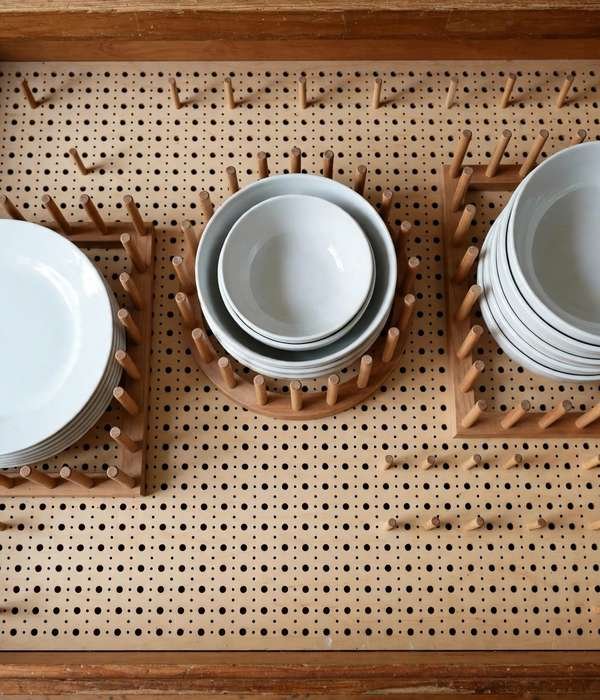
Every drawer slam sends unsecured plates sliding, chipped rims follow. A pegboard drawer system is a hole-grid board plus short dowels: place pegs around each stack to create custom corrals that hold through the hardest slam. Boards trim to fit standard 16- to 22-inch-deep drawers; dowels stand 2 to 3 inches tall, containing a dinner-plate stack.
Measure, cut to the exact interior, sand the edge, drop it in, no mounting needed. Space pegs snug with ~half inch play; too loose and things slide, too tight and you can’t lift a plate. It looks custom because it is, and costs less than one replacement plate.
How to set it up:
- Measure the interior exactly; trim the board to fit, test dry.
- Stack plates and bowls where they’ll live permanently.
- Place 3–4 pegs snug around each stack, ~half inch clearance.
- Slam-test gently; adjust any peg that lets things shift.
- Leave one zone unpegged for odd-shaped serving pieces.
14. Expandable Cutlery Tray: One Tray for Any Drawer Width
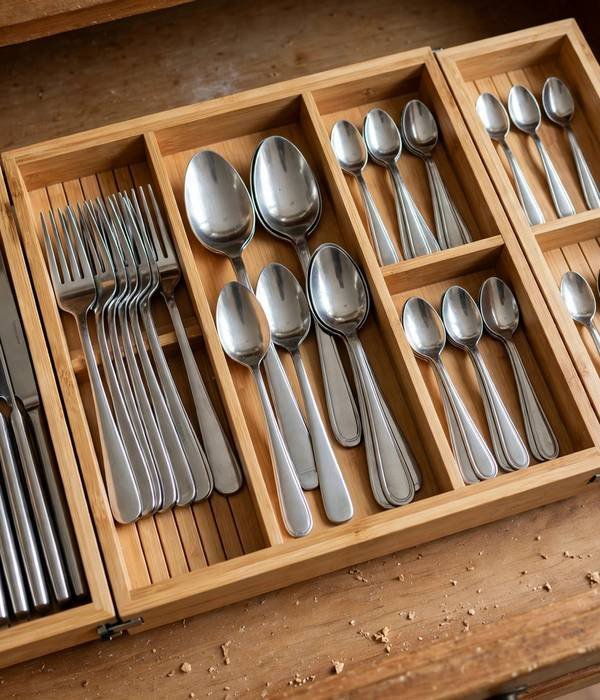
Fixed trays leave dead strips on both sides, or sit crooked, an inch too wide. Expandable trays fix it with sliding side panels: standard bamboo runs ~13 inches deep, expanding 11 to 16 inches wide, with 2-inch compartments sized for real flatware (the long slot fits serving spoons and chopsticks).
Measure interior width; pick a tray whose expanded range covers it at ~80% extension, fully maxed panels wobble. Count categories first: you want five slots minimum (teaspoons, forks, knives, serving pieces, gadget overflow). Bamboo resists moisture; plastic costs half.
Expanding to fill the drawer is what stops sliding, friction is the mounting hardware.
How to set it up:
- Measure interior width at its narrowest point.
- Set the tray in collapsed; expand sides until snug (~80% of max).
- Confirm the drawer opens and closes without catching.
- Daily flatware front and center; serving pieces to the sides.
- Outer expansion slots take the long utensils that fit nowhere else.
Counter: Prime Real Estate, Spend It Wisely
Counter space is the most expensive square footage in the kitchen, every item that lives there permanently should earn its spot. The rule: daily-use items stay, everything else finds a home in the zones above.
15. Two-Tier Corner Counter Shelf: Claim the Dead Corner
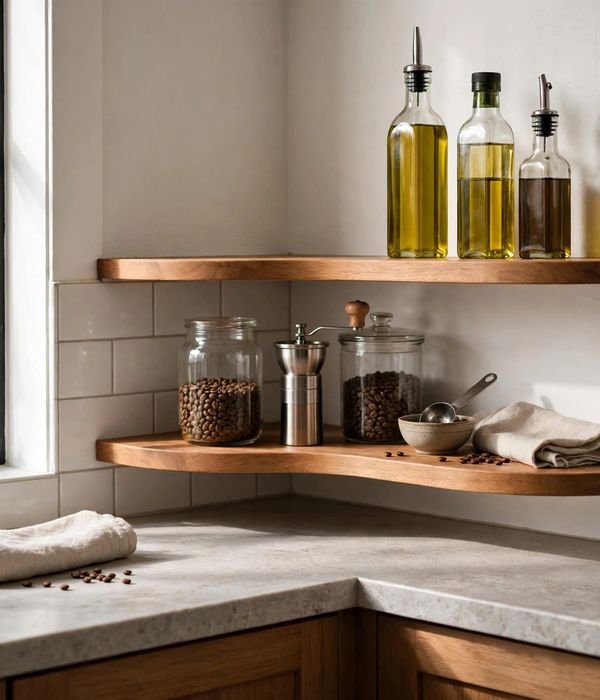
Kitchen corners collect the appliances you use twice a year. A two-tier corner shelf, quarter-round or L-shaped, typically 12 to 16 inches per side, turns that dead corner into a display-and-storage station for the things you actually reach for: coffee supplies, cooking oils, the salt cellar.
Measure your corner’s clear footprint first; the shelf must sit fully on the counter without overhanging the edge or blocking the outlet. Look for 10 to 12 inches of vertical clearance between tiers so standard olive-oil bottles (about 10 inches tall) fit underneath.
The mechanism is sight lines: elevating small items stops them from visually disappearing behind the toaster, which is why corners feel cluttered even when they’re half empty. Tips for best results: put the heaviest items on the bottom tier for stability; keep the top tier to lightweight daily grabs; choose a wipeable surface, corners collect grease. Watch out: don’t build it so tall it blocks the under-cabinet light or the outlet behind it.
16. Appliance Garage: Hide the Toaster Behind a Door
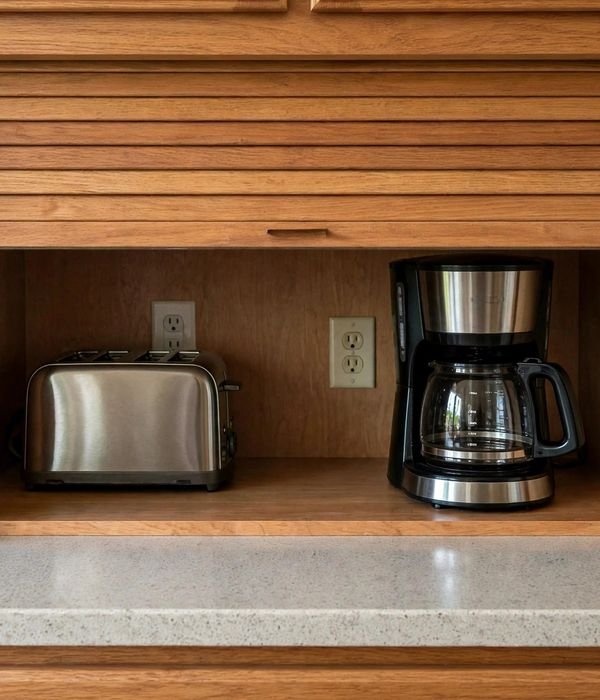
Small appliances are counter squatters, the toaster, the coffee maker, the stand mixer each claim a square foot permanently. An appliance garage is a countertop cabinet, typically 16 to 24 inches wide, 12 to 16 inches deep, and 16 to 20 inches tall, with a tambour (roll-top) or hinged door that hides everything and opens for use.
Measure your tallest appliance with its lid open or parts attached, a stand mixer with the bowl runs about 17 inches, and buy the garage to clear it.
The critical spec everyone forgets is the outlet: the garage must sit against an outlet, or you need an electrician to add one inside (never run cords under the garage where they can pinch). Tips for best results: roll-top doors need zero swing clearance, perfect for tight counters; hinged doors are cheaper but need 12+ inches of open space; ventilate, toasters and coffee makers need airflow, so don’t seal them in. Watch out: measure the door swing against upper cabinets; a garage under a 12-inch-deep wall cabinet works, under an open shelf it shines.
17. Slim Rolling Cart: The 6-Inch Gap Beside the Fridge
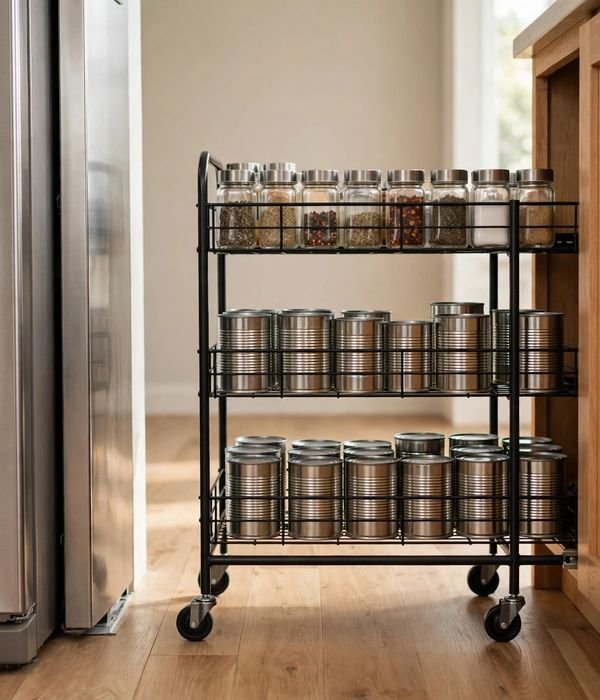
Almost every kitchen has a dead gap, beside the fridge, between the stove and the counter, next to the pantry, usually 5 to 7 inches wide and completely wasted. Slim rolling carts are built exactly for this: about 6 inches wide, 15 inches deep, 30 to 40 inches tall, with 3 to 4 tiers on casters.
Measure your gap’s width and depth, and check for baseboards, a 1-inch baseboard at the bottom can block a cart that fits fine at counter height. Each tier holds roughly 10 to 15 pounds: canned goods, spice refills, cleaning supplies, or the overflow pantry.
The wheels are the whole point, roll it out, grab what you need, roll it back. Tips for best results: put the heaviest items on the bottom tier so it can’t tip; lock at least two casters if your floor slopes; label the tiers so the household actually uses it. Watch out: the fridge side radiates heat, don’t store chocolate, wine, or anything meltable in a fridge-gap cart.
18. Under-Cabinet Hanging Rail: Mugs and Tools Off the Counter
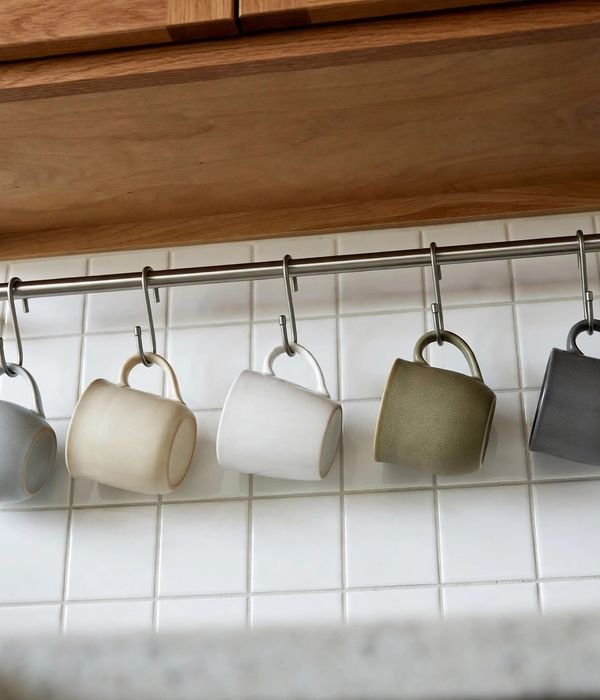
The 18 inches between counter and wall cabinets is prime hanging territory that most kitchens leave empty. A mounted rail, typically 16 to 24 inches long, with S-hooks turns it into storage for mugs, utensils, and small tools, freeing a full drawer or shelf elsewhere.
Mount it on the underside of the wall cabinet, set back 3 to 4 inches from the front edge so hanging items don’t collide with the cabinet doors above or the backsplash behind. Standard mugs need about 4 inches of hook spacing; measure your widest mug handle and space accordingly.
Screw-mount into the cabinet’s bottom panel (it’s usually 3/4-inch material, plenty for light loads), and keep total hanging weight under 10 pounds per rail. Tips for best results: hang daily mugs here and store the occasionals in the cabinet; use it for measuring cups and small strainers too; keep hooks uniform so it looks intentional. Watch out: this is a screw-mount project, not renter-friendly, renters should use the tension-rod trick from point 7 inside a cabinet instead.
19. Countertop Turntable: Oils and Vinegars in One Spin

The bottles you cook with daily, olive oil, vinegar, soy sauce, the salt cellar, migrate across the counter until the whole prep zone is a bottle farm. A 12-inch countertop turntable corrals them into one spinning station beside the stove.
Look for a raised rim of at least an inch (bottles walk during enthusiastic spins) and a 10-pound capacity, which covers a full working set of oils and condiments. The 12-inch diameter is deliberate: it holds six to eight standard bottles with finger room, and it fits the standard 18-inch counter-to-cabinet clearance with room to spare.
Wipeable surfaces only, cooking zones collect grease, and a fabric or raw-wood turntable becomes a sticky artifact within a month. Tips for best results: decant tall skinny bottles into shorter ones if clearance is tight; keep only the daily set here, the occasionals live in the cabinet turntable from point 5; place it within arm’s reach of your main burner. Watch out: keep it 6+ inches from the burner edge; olive oil beside high heat is a splatter and safety issue.
20. Tiered Produce Stand: Fruit Off the Counter, Still in Sight
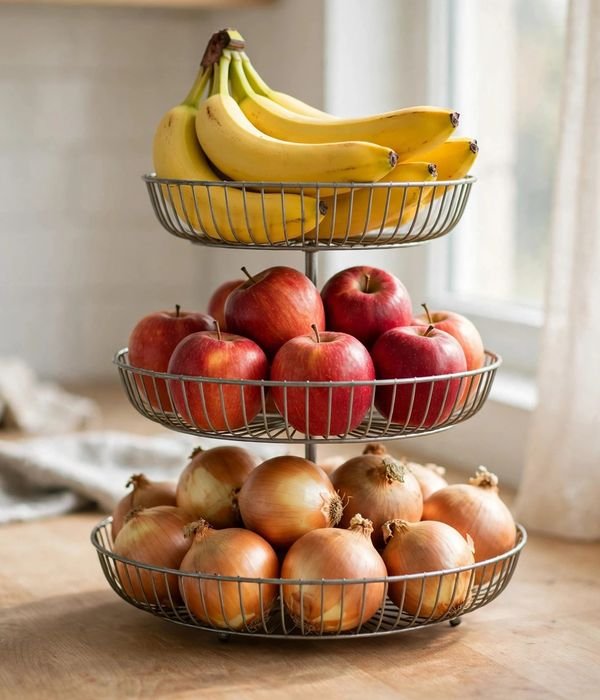
Fruit in a bowl goes uneaten because the bottom layer bruises unseen; fruit scattered on the counter eats prep space. A 2- or 3-tier stand, each tier 12 to 14 inches in diameter, total height 18 to 24 inches, holds produce vertically: bananas on top, apples in the middle, onions or potatoes at the bottom.
The vertical footprint is a single 14-inch circle, less counter than a cutting board. Keep ethylene producers (bananas, avocados) on the top tier away from ethylene-sensitive produce below, or everything ripens at fast-forward.
Wire or open tiers beat solid ones, airflow is what keeps produce from sweating and spoiling. Tips for best results: one tier per produce type so nothing crushes; wash fruit before it goes on the stand, not after; the bottom tier is perfect for the onion-and-potato pair that shouldn’t refrigerate. Watch out: don’t overload, a 3-tier stand with 15 pounds of produce gets tippy; keep heavy root vegetables on the bottom and light fruit up top.
21. Stackable Airtight Canisters: Decant the Top Five Dry Goods
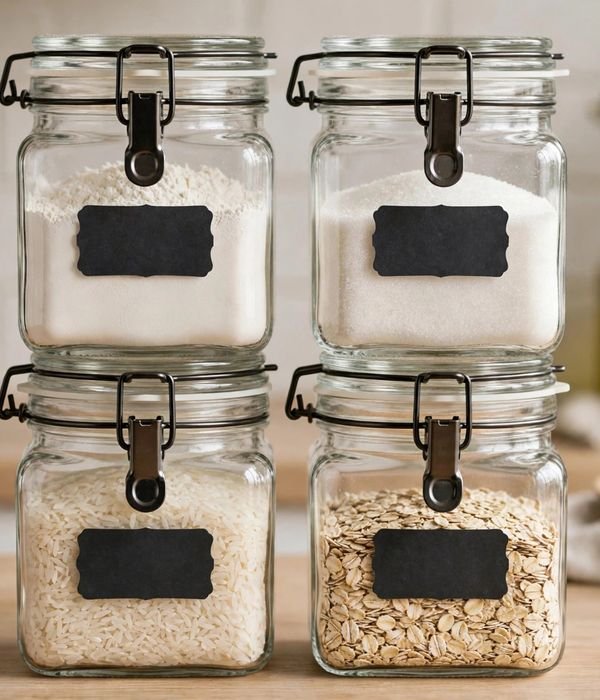
Half-open bags of flour, sugar, rice, and coffee are a spill and staleness problem wearing a packaging disguise. Decanting the five dry goods you use most into square, stackable, airtight canisters, sizes from 0.5 quart for baking powder to 2.5 quarts for flour, seals out moisture and stacks into a neat tower.
Square beats round here: squares use about 25% less shelf space for the same volume, and they stack without the wobble. Look for silicone-gasket lids with a locking clamp; snap lids lose their seal within a year.
Label everything with contents and the date decanted, flour keeps 6 to 12 months, whole grains less. Tips for best results: decant only what you use within 3 months; keep the original cooking instructions (cut them out and tape inside the lid); uniform canisters photograph beautifully if you care about that. Watch out: don’t decant oils, nuts, or anything with a short shelf life in bulk, the big pretty jar encourages buying more than you’ll use.
Walls & Doors: The Vertical Goldmine
The average kitchen has 30+ square feet of usable wall and door surface doing absolutely nothing. Walls hold the items you grab mid-cooking, knives, tools, spices, closer than any cabinet can.
22. Pegboard Wall: A Tool Wall in Two Square Feet
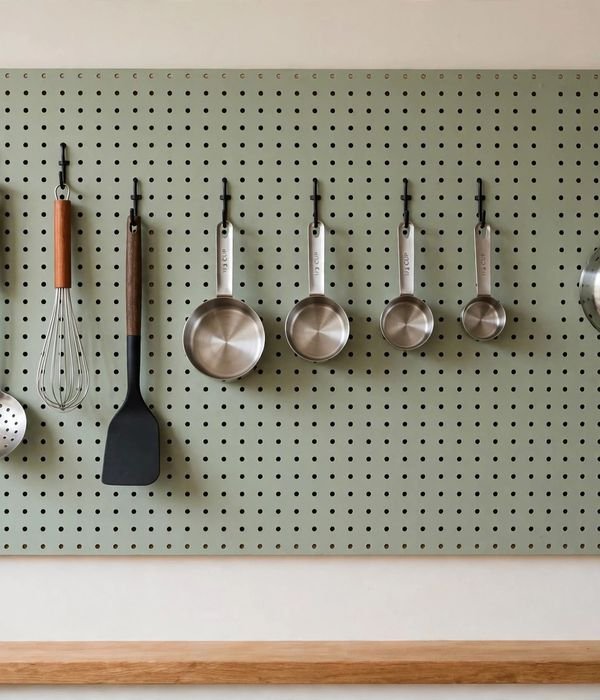
A 24-by-36-inch pegboard on a free wall section, beside the fridge, at a cabinet run’s end, holds every daily tool at arm’s reach: utensils, measuring cups, mitts, even small pots on heavy hooks. Standard pegboard has 1-inch hole spacing and needs a 3/4-inch standoff (furring strips) so hooks seat.
Mount into studs, a loaded board runs 20 to 40 pounds; drywall anchors alone eventually fail. Map it on paper: daily tools at 48 to 60 inches, occasionals higher, heavies on double hooks low. Reconfigurable in seconds when cooking habits change.
Paint it wall-color and it reads as design, not workshop.
What you can do with it:
- Daily utensils on hooks at eye level, no drawer diving mid-sauté
- Measuring cups and spoons nested on one row of small hooks
- Small saucepans on heavy-duty double hooks, lids on the neighboring peg
- Oven mitts, aprons, towels on the bottom row where hands fall
- Spice jars in clip-on baskets, a wall spice rack for the price of hooks
23. Magnetic Knife Strip: Free the Whole Knife Drawer
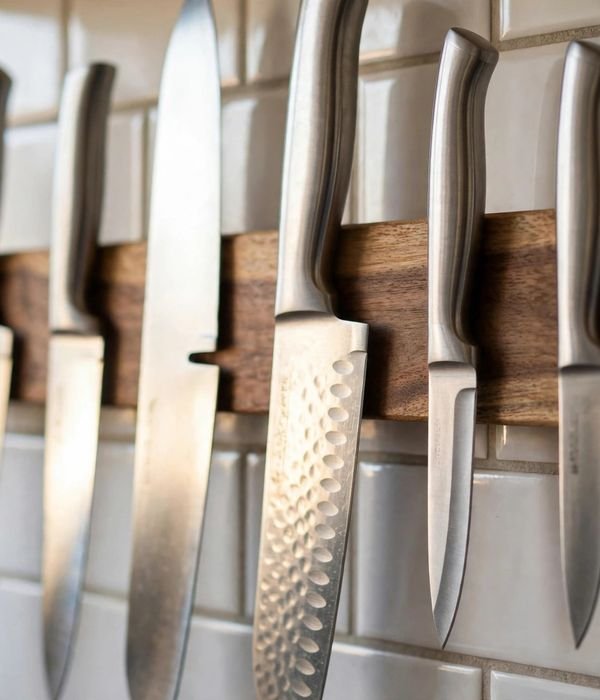
Knife blocks hide blades and eat space; a magnetic strip keeps every knife visible, reachable, and dry, which also keeps edges sharp (no rattling against steel). Standard strips run 12 to 18 inches, holding 6 to 10 knives; 18 inches covers a full working set.
Mount at 54 to 60 inches from the floor, above the counter, in easy reach, above small hands. Screw into studs: a loaded strip pulls 5 to 8 pounds outward, and you don’t want it coming down mid-reach. Place spine to strip first, then roll the blade on, slapping flat dulls edges.
Keep it clear of stove heat and sink splash. One strip typically frees an entire drawer.
What you can do with it:
- The full daily set visible and grabbable mid-prep
- Shears and honing steel on the same strip
- Small metal spice tins on a second strip, a magnetic spice wall
- Metal measuring cups nested on hooks beside the strip
- Keep it near the cutting-board zone, not across the kitchen
24. Over-Door Wire Racks: Storage on the Back of the Door
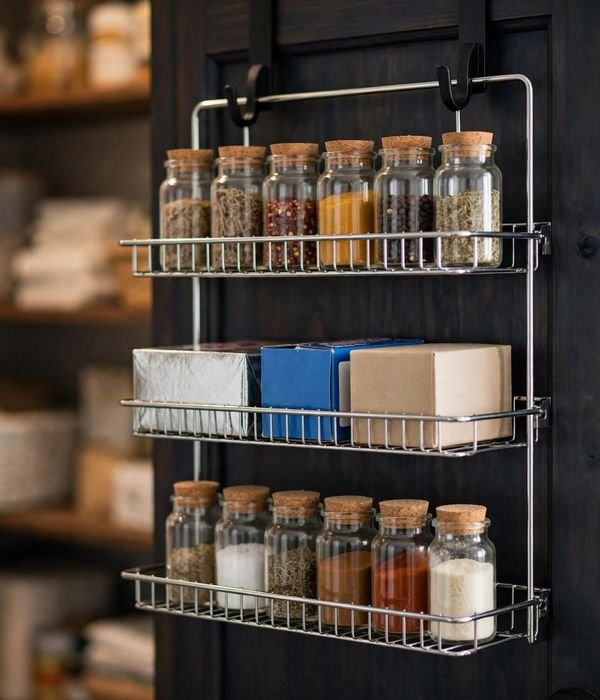
The back of a pantry or cabinet door is 4 to 6 square feet of ignored storage. Over-door wire racks hook over a standard 3/4-inch door, no screws, adding 2 to 3 tiers about 2.5 to 3 inches deep.
Check two clearances: the door must still close (measure inner-face to nearest shelf, need rack depth plus half inch), and hinges must take 10 to 15 extra pounds without sagging. Made for light, flat, frequently grabbed items, spices, wraps, cutting boards, spray bottles. Heavy cans warp racks and strain hinges.
In rentals, this is the top no-drill upgrade after the tension rod: installs in a minute, zero marks.
What you can do with it:
- Spices in a 3-tier rack on the pantry door, the collection at eye level
- Cutting boards and sheet pans filed vertically on a tall cabinet door
- Wrap boxes and zip bags on the door nearest the fridge
- Cleaning supplies on the under-sink door (light bottles only)
- Snack packets in a pantry-door rack the kids can reach
25. Inside-Door Spice Racks: Two Inches of Dead Space, Used
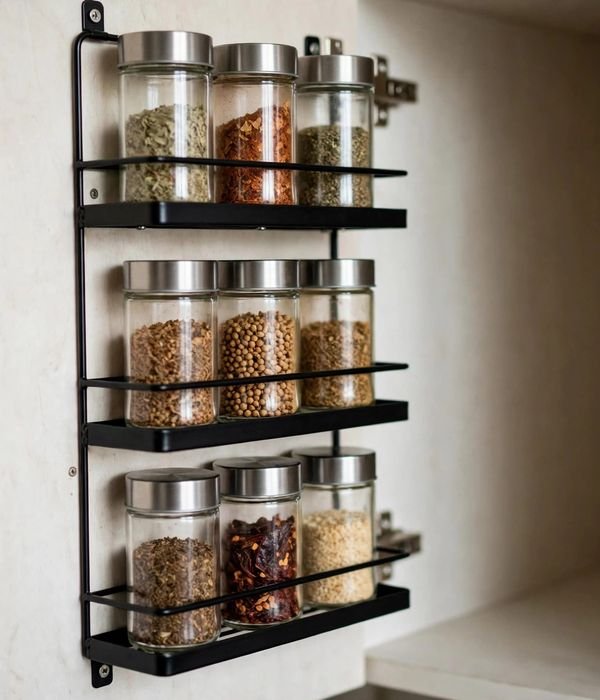
Standard spice jars are ~2 inches in diameter, so a 2-inch-deep rack inside a cabinet door holds a full collection in what was air. Narrow door racks come 3- to 4-tier, each a shallow shelf with retaining rail for 4-ounce jars.
Critical measurement: with the door closed, the rack’s 2-inch depth plus jar diameter must clear cabinet contents, measure inner face to the nearest shelf’s front edge. Adhesive-mount for renters (check rating against full glass-jar weight); screw-mount for permanence. Alphabetize or group by cuisine, the system only works if the household finds cumin without a search party.
Pairs with the drawer insert (point 9): everyday spices in the drawer, the full collection on the door.
What you can do with it:
- The complete collection visible the moment the cabinet opens
- Condiment packets and sauce sachets corralled by type
- Tea bags and coffee pods sorted in shallow door tiers
- Baking extracts and food coloring in the baking-zone door
- Keep one tier empty, the collection always grows
26. Floating Shelves Above the Counter: Open Storage That Breathes
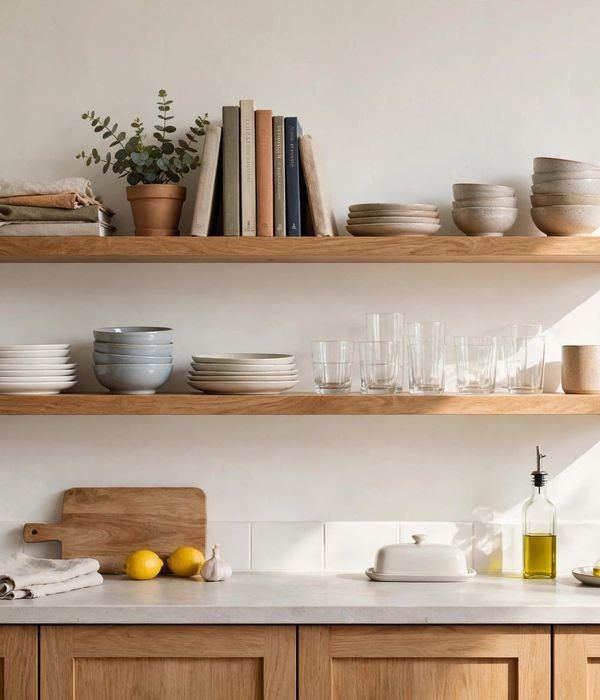
Replacing one wall-cabinet run, or filling a cabinet-less gap, with floating shelves opens the kitchen visually while adding real storage. Boards run 8 to 12 inches deep (match wall-cabinet depth at 12 for a built-in look); mount the first shelf 18 inches above the counter, the standard clearance.
Brackets must hit studs every 16 inches, a dish-loaded shelf runs 30 to 50 pounds, and toggle bolts are a distant second. The open-shelf contract: everything displayed gets used weekly, or it’s dust-collecting decor.
Two 24-inch shelves hold a full daily dish set and make a small kitchen feel twice as wide, the eye travels past where cabinet boxes would stop it.
What you can do with it:
- Daily dishes and bowls lowest, grab without opening a door
- Glasses and mugs mid-shelf, grouped by type
- Cookbooks and the tablet stand up top, out of the splash zone
- Decanted dry goods in matching jars, the working pantry on display
- Keep one shelf strictly functional; style the other if you must
27. Wall-Mounted Pot Rail: Cast Iron Without the Cabinet Tetris
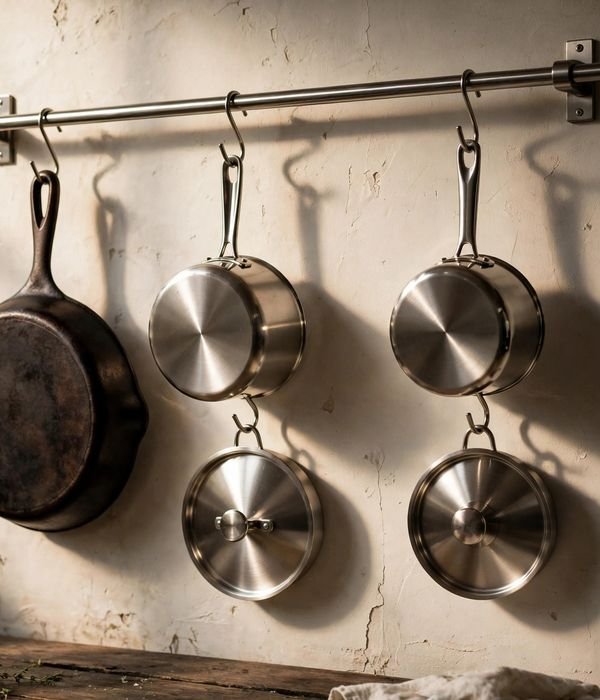
Pots and pans are the bulkiest items and the worst to stack, a wall rail gets them out of cabinets entirely. A 30- to 36-inch stainless rail on heavy-duty brackets, into studs, holds 8 to 12 pieces on S-hooks with a 50- to 100-pound rating.
Mount at 60 to 66 inches, lowest pot clears the counter by 6+ inches, yet you can lift a Dutch oven off without a stool. Large hooks for pot handles, small for lids and utensils. Honest trade: hanging pots collect kitchen grease and need a wipe before use, but the accessibility is overwhelmingly worth it.
The professional-kitchen move works in a 100-square-foot apartment too.
What you can do with it:
- Daily skillet, saucepan, Dutch oven, grab, cook, hang back
- Lids on small S-hooks beside their pots, the lid problem, solved
- Utensils with hanging holes on remaining hooks
- A small basket on the rail for garlic, shallots, ginger
- Heaviest cast iron nearest the brackets, never mid-span
28. Three-Tier Hanging Baskets: Produce and Snacks Off the Counter
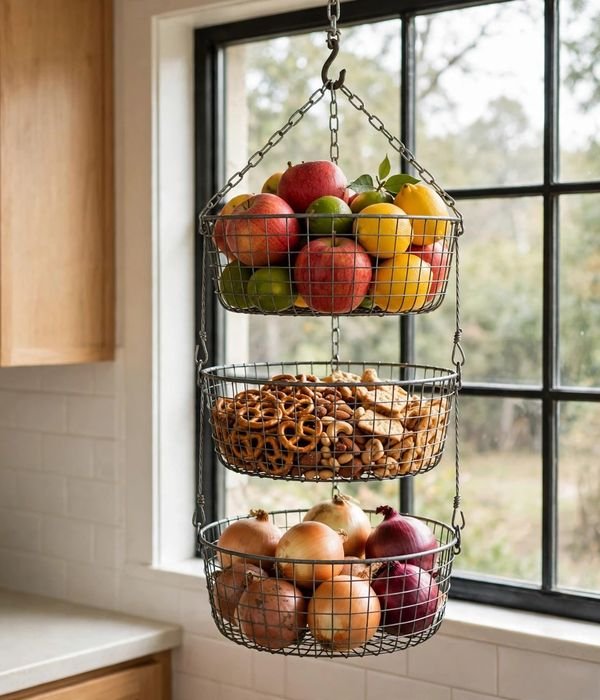
A three-tier hanging basket chain, 12-inch wire tiers on one hook, stores a week’s produce in a 12-inch circle of air. Hang from a ceiling hook into a joist (a loaded chain runs 10 to 15 pounds, not drywall alone) or a heavy-duty wall bracket near prep.
Separate by type and ripeness: fruit up top where you see it, onions and potatoes in the darker bottom tier. Wire beats solid, trapped moisture speeds spoilage. One tier can become the household snack station: visible, self-policing.
Chain length adjusts (typically 24 to 36 inches), set the bottom tier at comfortable reach, not knee level. In a tiny kitchen, this replaces a produce drawer.
What you can do with it:
- Weekly fruit up top, alliums and potatoes below, the classic setup
- A dedicated snack tier the household can see and reach
- Bread and rolls in one tier, wire airflow prevents sogginess
- Small towels or produce bags clipped to the chain’s side
- Herbs in a small pot set into the top tier, garnish at arm’s reach
Pantry & Fridge Corners: Cold Zones and Deep Shelves
Pantries and fridges share the same failure mode: deep shelves where the back row becomes a science experiment. The fix is visibility, clear containers, rotation, and everything pulled forward. The whole-pantry method: ideas.
29. Clear Stackable Pantry Bins: See Everything, Touch Nothing Twice
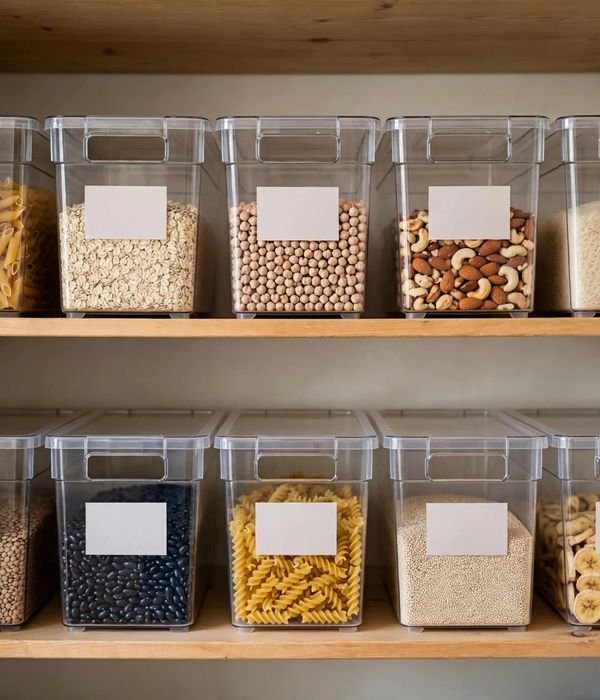
Opaque boxes are where pantry items expire unseen. Clear stackable bins, typically 10 to 12 inches long, 6 to 8 wide, 6 to 8 tall, with handles, turn each shelf into labeled pull-out drawers. Transparency is the mechanism: you see pasta levels drop without opening anything, and the household puts things back because each bin’s outline is obvious.
Measure shelf depth, standard pantry shelves run 12 to 16 inches, and bin plus handle must clear the edge. Stack two high max; three gets wobbly and the bottom bin goes inaccessible. One bin per category, labeled on the front, labels stop the slide into one big ‘miscellaneous’ bin.
For narrow pantries, see 12 Smart Narrow Pantry Storage Ideas That Use Every Inch of Space.
How to set it up:
- Empty the shelf completely onto the counter, all of it.
- Measure depth and height; buy bins leaving half inch clearance.
- Sort into categories; discard the expired (check every date).
- One bin per category, heaviest on the lowest shelf.
- Label each front; stack no more than two high.
30. Tiered Can Risers for Pantry Shelves: Three Rows, Zero Hiding
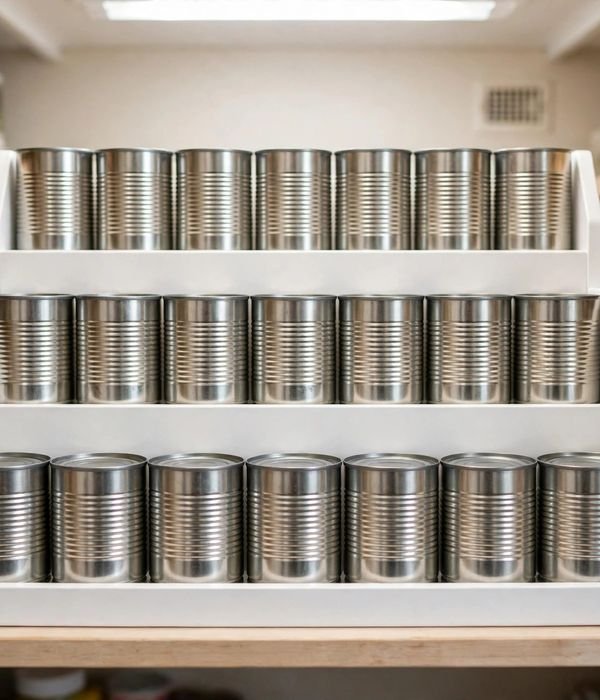
Pantry shelves run 12 to 16 inches deep, deep enough for cans three rows deep, with the back two invisible. A 3-tier can riser is a stepped shelf, typically 14 inches wide with 3- to 4-inch-deep tiers, elevating each row so every label shows.
Measure vertical clearance: riser plus tallest can needs ~12 inches, soup cans are 4 inches, 28-ounce tomatoes 4.5. The steps enforce rotation: new cans go in back on top, visibly marching forward. Freestanding risers lift out for cleaning, the underrated maintenance win.
For shelves over 16 inches deep, use two risers side by side, more stable, and you can pull one without disturbing the other.
How to set it up:
- Measure clear height, need ~12 inches for riser plus cans.
- Pull all cans; check dates; toss the past-prime.
- Set the riser back against the shelf’s rear wall.
- Heaviest cans (28-ounce) bottom step, lightest up top.
- Household rule: new cans go behind, the steps make it visual.
31. Fridge Turntable: Stop Losing Condiments in Back
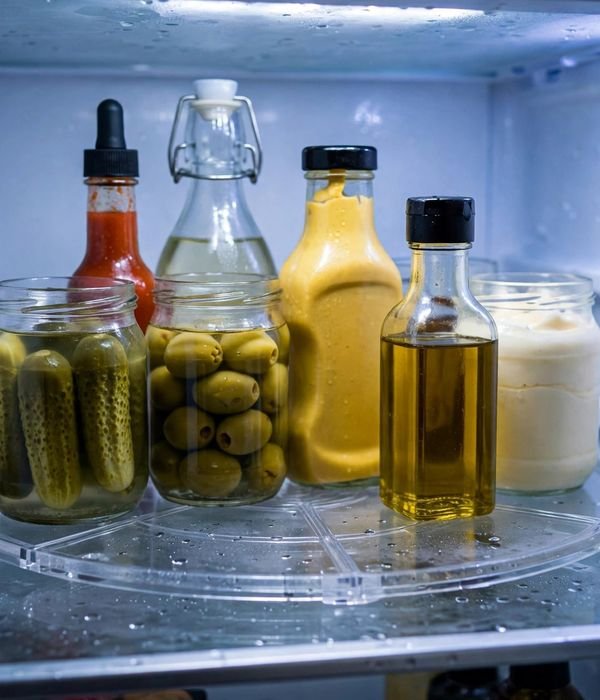
Fridge shelves are the worst for lost items, cold, deep, poorly lit. A 15-inch turntable spins the whole condiment collection to the front: mustards, hot sauces, jams, six half-used dressings. The 15-inch size fits standard 14- to 16-inch-deep fridge shelves; measure width too, because a turntable that can’t fully rotate is just a tray.
Get wipeable BPA-free plastic with a raised edge, fridge turntables live in the spill zone; fabric or raw wood is a mistake. Ten-pound capacity covers a serious collection. Clean monthly, a sticky turntable that won’t spin defeats itself.
It pays for itself in prevented duplicates: everyone has bought a second Dijon hiding behind the pickles. Full fridge map: layout.
How to set it up:
- Measure shelf depth and width, confirm full 15-inch rotation clears.
- Pull every condiment; check dates (door items expire too).
- Wipe the shelf, set the turntable, test-spin it empty.
- Tallest bottles center, short jars around the edge.
- Monthly wipe-down on the cleaning rotation, sticky kills the spin.
32. Fridge Door Bins: Corral the Small Jars
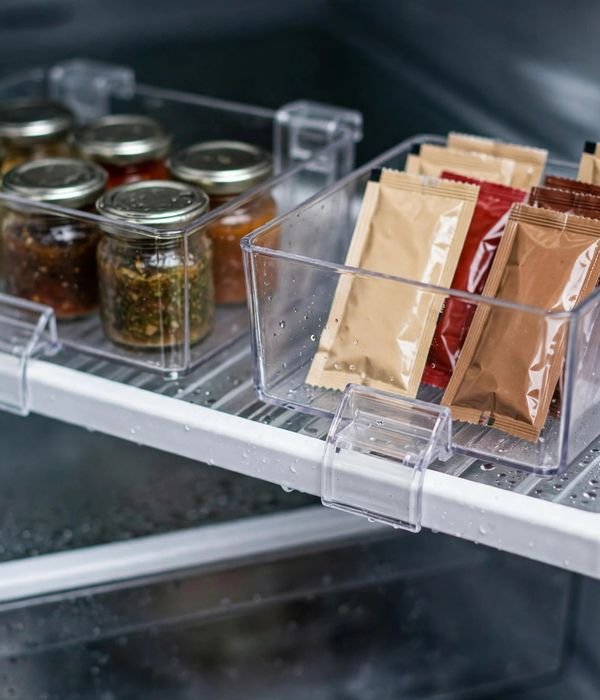
Fridge door shelves are deep, narrow, lawless, small jars tip, packets slide, one grab avalanches the row. Clip-on door bins, 4 to 6 inches wide with a lip hooking the shelf edge, divide the door into corrals: small jars, butter and cheese, sauce packets.
Measure door-shelf depth and closed-door clearance to interior shelves, bin plus contents must clear, or you’ll rearrange every close. Keep dairy and eggs off the door (warmest zone, most temperature swing); bins suit condiments, jams, sealed items. Compartmentalizing stops the domino effect.
Two to three bins per door is the sweet spot, more subdivides space that was fine.
How to set it up:
- Measure door-shelf depth and closed-door clearance.
- Pull everything off; toss expired and mystery containers.
- Clip bins in: 2–3 zones by item type.
- Heaviest jars low, toward the hinge side, less swing stress.
- Eggs and milk stay on interior shelves, temperature, always.
33. Narrow Pull-Out Pantry Tower: The 6-Inch Gap, Monetized
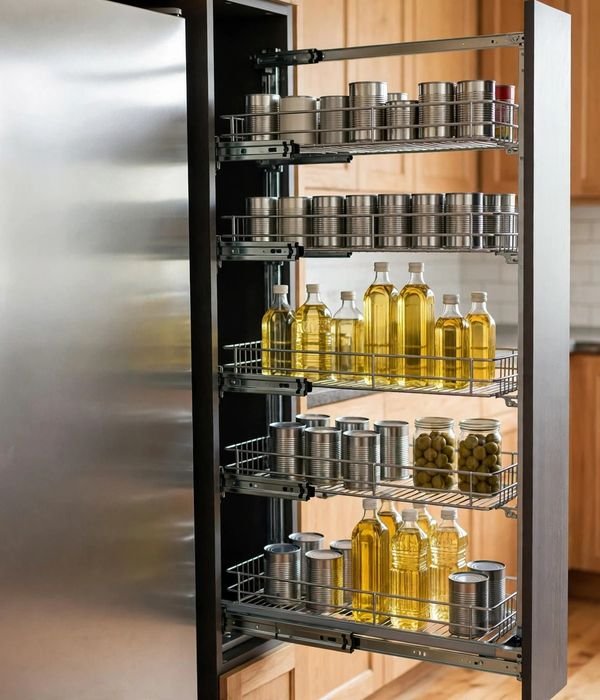
Between fridge and wall, beside the oven, most kitchens have a 5- to 7-inch dead gap running floor to near-ceiling. A narrow pull-out tower is built for it: ~6 inches wide, 14 deep, 40+ tall, with 5 to 6 wire tiers on full-extension slides.
Measure the gap at three heights, floors and walls are never straight, and buy to the narrowest minus half inch. Each tier holds 10 to 15 pounds: cans, spice refills, oils, the overflow currently atop the fridge. Full-extension slides matter most: half-extension leaves back tiers unreachable, recreating the problem.
Screw-mount into adjacent cabinet or wall, an owner’s upgrade, not renter’s, but the highest-density storage per square inch in the kitchen.
How to set it up:
- Measure gap width at floor, middle, top, buy to narrowest minus 1/2 inch.
- Confirm adjacent cabinet or wall takes screws for slide hardware.
- Install slides level, a tilted tower binds.
- Heaviest items on the bottom two tiers.
- Keep a step stool handy, the top tier at 40+ inches needs a boost.
34. Decanting Station: Uniform Containers, One Label System
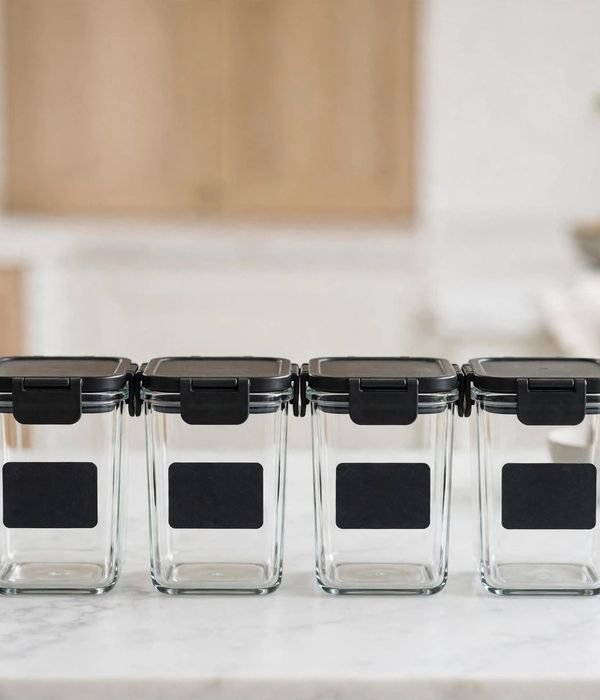
The pantry looks chaotic because every product wears different packaging, visual noise makes it feel fuller than it is. A decanting station is uniform airtight containers, typically 1.5- to 2.5-quart squares, with one label system (chalk, label maker, or tape and marker, commit to one). Squares tile shelves with minimal waste; uniform heights stack cleanly two high.
Decant only what you use in 3 months, flour, sugar, rice, oats, daily cereals. Labels must carry contents and decant date: uniform containers are identical-looking, and nobody distinguishes baking soda from baking powder by sight. The payoff isn’t aesthetic, uniform containers make inventory visual.
How to set it up:
- Size by your most-bought dry good (2.5 qt covers a 5-lb flour bag).
- One label system; containers for the top 8–10 dry goods only.
- Decant, label with contents and date; note shelf life underneath.
- Daily items at eye level; baking supplies together.
- Bulk refill bags live low, the station is display, not warehouse.
35. Pull-Down Shelf for High Cabinets: Upper Shelves Without the Step Stool
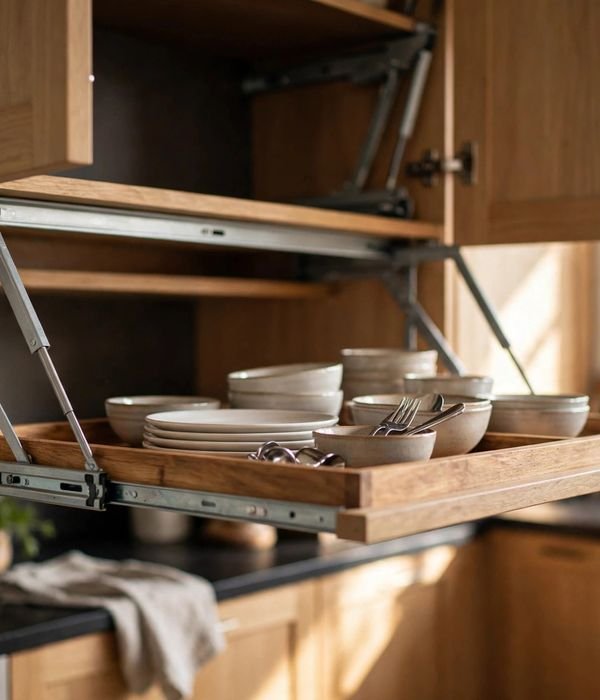
Top wall-cabinet shelves, anything above 60 inches, are dead space for most adults: step-stool-only, so they become storage for things never used. A pull-down mechanism mounts inside and swings the shelf down and out, lowering contents 10 to 14 inches into reach.
Standard units fit 24- to 36-inch cabinets, carrying 20 to 30 pounds, dishes, glasses, daily spices, not cast iron. Measure interior width and the door opening: the mechanism needs full opening width to swing through and must clear the frame at the arc’s bottom. Screw-mount into solid wood or plywood, particleboard won’t hold.
An owner’s upgrade, but for anyone under 5’6″ with 42-inch uppers, it’s the difference between using the top shelf and pretending it doesn’t exist.
How to set it up:
- Measure interior width; confirm the opening clears the swing.
- Verify solid wood or plywood box, particleboard won’t hold screws.
- Mount per template, level, a tilted mechanism binds.
- Load 20–30 pounds max, evenly, test the swing fully loaded.
- Keep the step stool for back corners, physics has limits.
Conclusion
Thirty-five ideas, five zones, one tape measure. If your kitchen could only absorb three of these this weekend, here’s the order that pays off fastest: a pull-out tray in the worst base cabinet (point 3), a turntable in the deepest shelf (point 5), and spring-loaded dividers in the utensil drawer (point 8).
Each one attacks a different failure mode, depth, visibility, and chaos, and together they change how the kitchen feels to cook in.
Best first upgrade: if you buy one thing, make it two expandable shelf risers and one 12-inch turntable, typically under $40 total. The risers reclaim the wasted vertical air on your most-crowded shelf, and the turntable ends the deep-cabinet reach forever.
Measure the shelf width and the cabinet depth before you order, install both in twenty minutes with zero tools, and you’ll feel the difference at the very next meal you cook. Everything else on this list is optimization; those three pieces are transformation.
Before-you-buy checklist (save this):
- [ ] Measured every cabinet/drawer interior (width, depth, height with doors closed)
- [ ] Noted which cabinets are renter-safe only (no screws) vs. screw-friendly
- [ ] Counted what you actually own in the problem category (cans, spices, pans)
- [ ] Checked weight ratings against your heaviest items (cast iron, full can loads)
- [ ] Confirmed door clearances, organizers must clear contents when doors close
- [ ] Picked one zone to start, not all five at once
Small kitchens reward the measurers. Take the tape measure, pick your worst zone, and start there, the rest of the kitchen will follow.
Frequently Asked Questions (FAQ)
What are the best kitchen storage ideas for small kitchens?
Start with the highest-density wins: a 6-inch slim rolling cart for the gap beside the fridge, under-shelf baskets in every wall cabinet, a 12-inch turntable in the deepest base cabinet, and spring-loaded dividers in the drawers.
If your kitchen is under 100 square feet, skip anything that needs floor space, the walls, doors, and cabinet interiors hold more volume than the floor ever will.
How do I measure my kitchen cabinets for organizers?
Measure the interior width, depth, and height of each cabinet, not the exterior, and not the door opening. Subtract about 1.5 inches from the width for the cabinet walls, and measure height with the doors closed so organizers clear the contents. For drawers, measure below any narrowing near the top.
Write all three numbers per cabinet on one sheet before shopping.
What kitchen storage works for renters without drilling?
Tension rods, clip-on under-shelf baskets, spring-loaded drawer dividers, expandable shelf risers, turntables, over-door wire racks, slim rolling carts, and adhesive-mount lid racks are all fully renter-safe. Avoid magnetic knife strips, pot rails, floating shelves, pull-down shelf mechanisms, and narrow pantry towers, those need screws into studs or cabinet boxes.
How much weight can cabinet organizers actually hold?
It varies widely, so check every product: expandable shelf risers typically carry 30–60 pounds, pull-out trays around 15 pounds (50+ for screw-mounted), turntables 5–10 pounds, under-shelf baskets about 10 pounds, and pull-down shelf mechanisms 20–30 pounds. When in doubt, load the heaviest items lowest and never exceed the rating, a failed organizer dumps its load at the worst moment.
How do I organize deep kitchen cabinets I can’t reach into?
Combine a pull-out tray (brings the back forward) with a turntable on the shelf above (spins the back around). For corner cabinets specifically, this pair eliminates nearly all dead space. Keep only lightweight, frequently used items in deep zones, heavy items belong where you can lift them safely, which is never at full arm’s extension into a dark cabinet.
What’s the best way to store spices in a small kitchen?
If you have a spare drawer, an angled tiered insert is the gold standard, every label visible, nothing stacked. No spare drawer? Use 2-inch-deep racks on the inside of a cabinet door, or a 10-inch turntable in a 12-inch-deep wall cabinet.
Alphabetize once and maintain it; decanting into uniform jars helps but isn’t required.
How do I keep my pantry organized long-term?
Use clear bins (one per category), label everything with contents and date, and enforce two rules: new items go behind old ones, and nothing enters without a labeled home. Do a 15-minute date-check every couple of months, expired items are what turn organized pantries back into chaos.
Uniform containers help, but the labels and the rules matter more than the containers.
Should I decant everything into matching containers?
No, decant only the 8–10 dry goods you use within 3 months (flour, sugar, rice, oats, daily cereals). Decanting slow-moving items wastes containers and risks staleness, since you lose the original packaging’s date and instructions. Uniform containers earn their keep through visibility and stackability, not aesthetics, if it doesn’t make inventory easier, skip it.