
My laundry room didn’t become messy all at once.
It built up slowly. One item was placed temporarily. Another left there for later. Something I planned to organize but never got back to. Over time, those small decisions started stacking into something harder to manage.
What made it frustrating wasn’t the clutter itself.
It was that every time I cleaned it, the result didn’t last. For a few days, everything felt fine. Then things started shifting again. A bottle moved slightly out of place. Clothes stayed longer than they should have. New items came in without a clear spot.
And before long, I was back where I started.
At some point, I realized the problem wasn’t how often I cleaned.
It was that the space didn’t have a system that could hold.
Once I started applying a few small laundry room organisation ideas, the room didn’t just look better. It stopped falling apart as easily.
I had seen the same pattern before in small spaces that never seemed to stay organized, especially in setups like small apartment storage tricks.
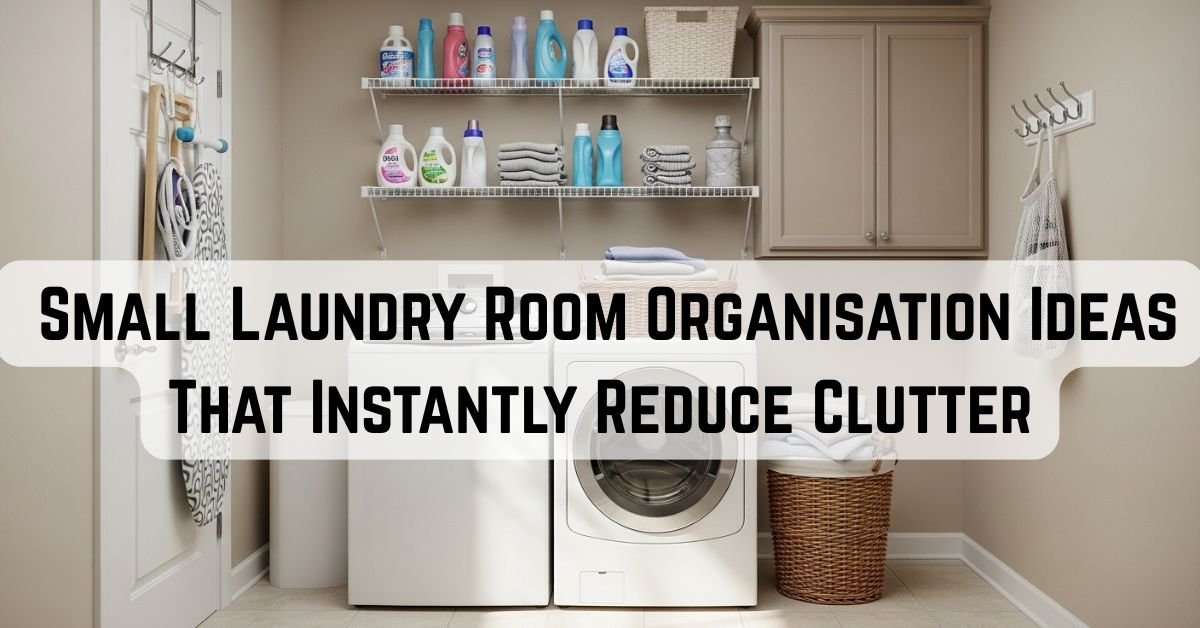
1. Vertical Storage That Clears the Most Visible Surface

The first place things started building up was the top of my washer. Not because I planned it that way, but because it was the easiest place to put things down. Anything I used regularly stayed there a little longer than it should, and over time, it became the default spot for everything.
At first, I tried keeping that surface organized. I rearranged things, reduced what I could, and tried to keep it neat so it wouldn’t get out of control again. But it didn’t last. Every time I used something, it went right back to the same place.
The problem wasn’t how I arranged it. It was that I was using the most visible surface as storage. Once I moved those items upward onto the wall, the surface stayed clear longer.
I noticed a similar shift when I started using wall storage ideas in the living room, where moving things off surfaces changed how the entire space felt.
And because it stayed clear, I stopped using it as a drop zone without even thinking about it.
2. Narrow Gap Storage That Stops Items From Drifting

After that, I started noticing where things were going instead. They didn’t disappear, they just moved. Most of them ended up near the side of the machine, in a space I had always ignored.
That narrow gap didn’t seem useful at first, but it quietly created a problem. Items without a proper place kept drifting toward it, moving between surfaces, edges, and eventually the floor. I tried managing those items where they already were, adjusting and rearranging them, but nothing really held.
Once I used that gap intentionally, the pattern changed.
That’s when I started treating small unused areas differently, especially after seeing how effective narrow wall storage ideas can be in tight spaces.
It didn’t take much, just something that gave those items a consistent place to go. And once that place existed, they stopped drifting. Not completely, but enough to keep the space from slipping again.
3. Fold-Away Drying Setup That Removes Constant Interruption

That’s when I started paying attention to what stayed out all the time. One thing stood out immediately: the drying rack. It wasn’t messy, and most of the time it wasn’t even in the way, but it never left the space.
Because of that, everything else had to work around it. I didn’t question it at first. I just treated it as part of the room and adjusted everything else instead. But the space still felt tight, even after I tried to improve other areas.
It reminded me how much of a difference hidden storage ideas can make when you reduce what stays in view.
The issue wasn’t what I added. It was what never moved. Once I replaced it with something that could be folded away, the difference was immediate. Nothing else needed to change. The room simply felt lighter, and that constant interruption disappeared.
4. Hidden Storage That Reduces Visual Pressure

Even after that, the space still felt busier than it should. Not because things were out of place, but because too much was visible at once. Different shapes, colors, and packaging created a kind of visual pressure that made everything feel more cluttered than it actually was.
At first, I tried organizing those visible items better. I lined them up, grouped them, and tried to make everything look clean. But it still felt busy. The problem wasn’t the arrangement; it was exposure.
Once I moved some of those items out of sight, the shift was immediate. Nothing was removed, but the space felt calmer. That’s when I realized not everything needs to be visible to be organized.
5. Clear Containers That Reduce Visual Noise

A big part of that visual pressure came from packaging. Different labels, colors, and sizes made even organized shelves feel inconsistent. It created a constant layer of distraction that made the room look more cluttered than it actually was.
At first, I ignored it because everything was technically “in place.” But the space still didn’t feel settled. That’s when I started changing how things looked instead of where they were.
Switching to clear, consistent containers didn’t change what I had. It changed how everything appeared. And once that visual noise was reduced, the space started to feel more controlled without needing any major adjustments.
6. Open Shelving That Keeps the System Easy to Maintain

I considered adding cabinets at one point because it seemed like the easiest way to hide everything. It felt like the cleanest solution was just to close the doors, and the clutter would disappear.
But I realized something before going that route. When things are hidden too well, they also become easier to ignore. And once they’re ignored, they start building up again without notice.
Open shelving worked differently. Everything stayed visible, but not overwhelming. It made items easy to access and, more importantly, easy to return. That small difference reduced hesitation, and once hesitation was gone, the system became easier to maintain without effort.
7. Grouped Storage That Controls Small Item Movement

Once the larger areas started holding, I noticed the clutter wasn’t coming from big items anymore. It was the smaller ones. Things that didn’t have a fixed place kept moving around, slowly spreading across different surfaces.
At first, I tried organizing them more carefully. Arranging them neatly, placing them where they “made sense.” But they didn’t stay there. The problem wasn’t placement; it was that nothing was actually holding them.
Once I started grouping those items instead of organizing them individually, the movement slowed down. Simple containers were enough. They didn’t need to be perfect, just consistent. And once those small items had a defined place to return to, they stopped drifting across the space.
8. Door Storage That Reduces Pressure on Main Areas

Even after that, some areas still felt slightly crowded. Not overloaded, but just enough to make the space feel tighter than it should. That’s when I started looking at what I wasn’t using at all.
The back of the door had always been empty. I never considered it part of the storage system, so everything else had to carry more than it needed to. I tried rearranging shelves to make space, but that only shifted the pressure around.
Once I started using the door itself, that pressure eased. It didn’t add much storage, but it redistributed it. And that was enough to make the rest of the room feel more balanced without changing anything major.
9. Hidden Hamper Setup That Stops Laundry From Spreading

Laundry piles were the one thing that kept breaking the system. Even when everything else was in place, clothes had a way of spreading. Clean or dirty, it didn’t matter; they rarely stayed contained.
I tried managing them more carefully. Folding faster, sorting sooner, keeping things in order. But that required consistency, and that’s what kept failing.
What worked instead was giving those piles a place that didn’t rely on timing. Once they had a fixed spot that stayed out of sight but was easy to use, they stopped affecting the rest of the space. The clutter didn’t disappear completely, but it stopped spreading.
10. Under-Shelf Storage That Uses Overlooked Space

At that point, the space was working better, but small items still didn’t always have a place. Not because there wasn’t storage, but because I wasn’t using all of it.
I was relying on the obvious areas, shelves, and surfaces while ignoring smaller spaces that could have handled those loose items. I tried reorganizing within the same areas, but that only made things more crowded.
Once I started using those overlooked spaces, like the area under shelves, the balance changed. Small items were moved out of the main zones and into places that didn’t compete with everything else. That reduced the pressure without adding anything new.
11. Consistent Styling That Reduces Visual Clutter

Even when everything started staying in place, the room still didn’t feel fully settled. It looked organized, but something about it still felt slightly busy.
At first, I thought it was a storage issue. But it wasn’t. It was an inconsistency. Different colors, different materials, different visual patterns all competing at once.
I didn’t fix that all at once. It happened gradually as I replaced things over time. But as those elements became more consistent, the space started to feel calmer. Not because there was less in it, but because there was less visual conflict.
And once that was settled, the room finally felt controlled without needing constant effort.
What Actually Makes Small Laundry Room Organisation Ideas Work
What took me time to understand wasn’t how to organize the space. It was why nothing stayed organized.
At first, every setup seemed to work. I would clean, arrange everything, and assign places. For a few days, it held. Then small shifts started happening. Something didn’t go back exactly where it belonged. An item got placed somewhere “for now.” New things entered without a clear spot.
Nothing failed all at once.
But the system slowly loosened.
That’s what most people don’t notice.
Clutter doesn’t come from one big mistake. It builds from small moments that repeat. And once those moments stack up, the space starts slipping again.
What made the difference for me was removing friction.
What made the difference for me was removing friction, a concept often discussed in habit-building research like this guide on building better habits.
If something takes effort, it gets delayed. If it gets delayed, it gets skipped. And once that happens a few times, the system starts breaking.
When things are easy to use and easy to return, they stay in place without needing attention.
That’s what makes these small laundry room organisation ideas work.
Not because they’re perfectly arranged, but because they hold even when things aren’t done perfectly.
Final Thoughts
I used to think my laundry room needed more storage.
More shelves, more containers, more ways to fit things in.
But the real problem wasn’t capacity.
It was stability.
No matter how much I added, the space kept slipping back into clutter. Not because I wasn’t trying, but because the system didn’t support how I actually used it.
Once that changed, everything else followed.
The room didn’t stay perfect, but it stayed consistent. It didn’t need constant fixing. It didn’t demand attention every few days. It simply held its structure, even when I wasn’t thinking about it.
That’s the difference a working system makes.
These small laundry room organisation ideas aren’t about making your space look clean for a moment.
They’re about making it easier to live every day.
If your laundry area keeps getting messy no matter how often you clean it, the solution isn’t to try harder.
It’s to adjust the system so it works with you instead of against you.
Start with one small change.
Because once even a part of the system begins to hold itself together, the rest starts to follow.
