
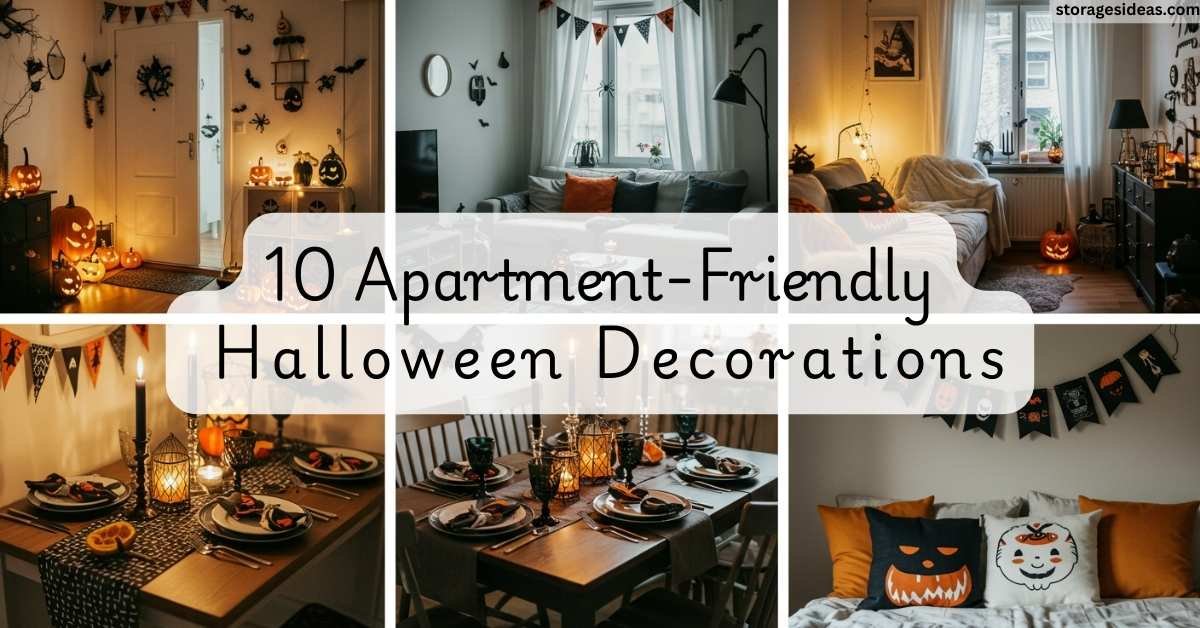
Halloween is one of those times I really get to flex my creativity, but when I moved into my tiny apartment, I quickly realized that decorating isn’t as simple as it looks. There’s barely enough room to swing a broomstick, let alone fill every corner with creepy props. I had to get clever, learning how to make the most impact without turning my living space into a fire hazard or tripping over everything.
Over the years, I’ve experimented, failed spectacularly a few times, and discovered tricks that let me bring Halloween spirit into even the tiniest apartments. If you’ve ever wondered how to decorate for Halloween without sacrificing precious floor space, this guide is for you.
Even if you live in a studio or a one-bedroom, these ideas will let you go all out on Halloween without feeling cramped. I’ll also share DIY hacks, renter-friendly alternatives, lighting tricks, color and texture advice, and safety tips.
1. Transform Walls with Flying Bats and Ghosts

Walls are often overlooked, but they’re a goldmine for apartment-friendly decorations. I like to use wall-mounted stickers, decals, and temporary posters to instantly bring in the Halloween vibe.
I recently found a set of black bats and ghost decals that I could arrange along my living room wall. Instead of laying them flat, I staggered the height so it looked like they were flying. This gave my small space a sense of depth, and I didn’t need to touch a single inch of floor space.
DIY Tip: Cut bats and ghosts from black and white cardstock and arrange them in a swirling pattern up the wall. You can even tape them over a canvas or frame to create a mini Halloween mural that looks professional.
Advanced Idea: Add glow-in-the-dark paint or reflective stickers so they appear subtly when the lights are off. I did this last year, and it looked like my living room wall was alive with flying creatures at night—it definitely surprised my friends!
Budget-Friendly Tip: If you’re short on money, print free bat templates from the internet, trace them onto black paper, and cut them yourself. You can create dozens in an afternoon for nearly no cost.
Pro tip: Peel-and-stick decals are perfect for renters. Removing them is painless, and you can reuse them year after year. I also like to swap patterns annually to keep things fresh without buying new decorations.
Safety Note: Keep decals away from any areas with cords or appliances; overlapping heat sources can damage the decals.
2. Hang Ghosts and Lanterns for Floating Fun

Hanging decorations are my favorite because they don’t take up any floor area. I’ve made paper lanterns and ghosts out of tissue paper and string, then suspended them from my ceiling hooks.
Mixing different heights and sizes adds movement and keeps the room from feeling static. In a small entryway, these floating decorations can surprise anyone walking in.
DIY Hack: Add small LED tea lights inside lanterns for a flickering glow without the risk of fire. You can also use glow-in-the-dark paint on the ghosts for an extra eerie effect after the lights go out. I even tied some lanterns near the windows to cast subtle shadows on the walls.
Advanced Tip: Hang a few strands of fake cobwebs around the lanterns for texture. The combination of floating lights and webs instantly gives the room a haunted, yet stylish vibe.
Variation: Try using colored tissue paper for lanterns in orange, black, and purple. You can make small paper bats or spider silhouettes stick out of them for extra visual impact.
Light humor moment: I once walked straight into a dangling ghost and nearly screamed. Hanging height is key; just above head level works perfectly.
Safety Note: Make sure the lanterns are lightweight and securely fastened to avoid them falling on your head or worse, a candle. Battery-operated LEDs are safest.
3. Mini Pumpkins for Maximum Cuteness

Pumpkins are a Halloween classic, but in small apartments, I stick with mini pumpkins and gourds, arranging them on trays, baskets, or shelves.
I added battery-powered tealights to make them glow at night. The effect is cozy, festive, and safe—no worries about open flames in a small space.
DIY Tip: Painting tiny pumpkins with metallic, white, or black paint gives them a chic look that feels more adult than traditional jack-o’-lanterns. You can also write short Halloween messages or puns on the pumpkins. I like writing things like “Boo!” or “Spooky Vibes Only.”
Space-saving tip: Use tiered trays or stacking crates to display multiple pumpkins without taking up much horizontal space. I stacked three crates in my corner last year, and it looked like a mini pumpkin patch!
Extra Idea: Add small autumn leaves, cinnamon sticks, or faux spiders around the pumpkins for texture and seasonal scent. I swear that adding a few leaves instantly makes the display feel more complete.
Pro Tip: If you want to reuse pumpkins year after year, consider using foam or ceramic mini pumpkins instead of real ones. They last indefinitely and can be painted repeatedly.
4. Create a Magical Floating Candle Effect

Ambient lighting is a game-changer. LED floating candles are perfect for small apartments because they don’t clutter surfaces. I hang them at varying heights using clear string or fishing line, creating the illusion of candles “floating” in midair.
Pro Tip: Mix orange, purple, and even green LEDs for a Halloween color palette. I sometimes program flickering sequences so it looks like real candlelight.
Advanced Tip: Place floating candles near reflective surfaces like mirrors or glossy frames. It amplifies the glow and makes a small room feel larger and more mystical.
DIY Hack: You can make DIY floating candle holders using paper cups, LED tealights, and clear string. Just punch holes in the cups, thread the string, and hang from the ceiling. I tried this last year, and it looked professional without spending a dime.
Light humor: I hung a few too close to my ceiling fan once, let’s just say it ended in a funny, slightly chaotic dance of floating candles! Lesson learned: check ceiling clearance.
Safety Note: Avoid real candles if you have low ceilings or children/pets. Battery-operated lights are the safest option.
5. Make Your Entryway a Tiny Haunted Spot

Even if your apartment is small, doors and windows are prime spots for Halloween impact. I hang a mini Halloween wreath on my apartment door and drape faux spiderwebs across the window frame.
A small mat or a few tiny pumpkins by the entrance completes the look. Visitors immediately get a festive vibe before they even step inside.
DIY Tip: Add a small string of battery-operated orange lights around the doorframe. You can also make a simple “Welcome to the Haunted Apartment” sign using cardboard and markers.
Extra Tip: Don’t overcrowd the entryway. One well-curated wreath, a mat, and a few accents are enough. I always rotate my décor annually so my entryway feels fresh without feeling cluttered.
Variation: Use small black feather wreaths or autumn leaves in combination with a mini skeleton hand for a high-impact but small-space display.
6. Corners Become Mini Haunted Vignettes

Corners are often wasted space, but I turned one into a mini haunted scene. I stacked small pumpkins, a battery-operated candle, and a plastic skull on a side table tucked in the corner.
I sometimes add a tiny black cat figurine or a faux spider web to tie everything together. Even in a studio apartment, corners can become your Halloween focal point.
DIY Tip: Add height with candle holders or small decorative boxes. You can also hang a single fake bat from the wall above the corner to create a layered effect.
Pro Tip: Rotate items yearly or add small new elements. I added a tiny DIY ghost last year, and it made the vignette feel brand new.
Extra Tip: Add faux moss, leaves, or mini gravestones to give your corner a “spooky graveyard” feel without taking up any space.
7. Seasonal Textiles and Spooky Scents

Textiles and scents are underrated tools for small apartments. I swap one or two throw pillows with Halloween-themed designs or drape a festive blanket over my couch.
Then I light a pumpkin spice candle or plug in a scent diffuser. The smell alone makes the space feel like autumn, and the textiles add subtle visual cues.
Advanced Tip: Use a small Halloween-themed rug or runner in the hallway or kitchen. I added a tiny spiderweb rug near the sink last year, and it was both functional and festive.
Sound Hack: Add soft, spooky sounds in the background. A loop of wind, howling or distant creaking, instantly boosts the atmosphere. Just make sure it’s subtle, nothing too jarring if you’re home alone.
DIY Hack: Make your own scented sachets using cinnamon sticks, cloves, and dried orange slices. Place them around the apartment for a festive smell without using open flames.
8. Tabletop Witchy Corners

I created a tiny witch-themed tabletop corner on my coffee table using a small cauldron, miniature broomstick, and a couple of potion-style jars. It doesn’t take up much space but instantly feels magical and Halloween-y.
DIY Tip: Use a black cloth as a base, sprinkle faux cobwebs, and add battery candles. You can even make a small potion with colored water in jars for a whimsical touch.
Extra Tip: Swap out the figurines weekly for different mini scenes. One week could be a haunted forest, the next a witch’s potion lab. The best part? Your small apartment never feels stagnant.
Pro Tip: For added texture, sprinkle black sand or glitter on the table base to give the illusion of mystical dust.
9. Window Silhouettes for Dramatic Effect

Windows are excellent space-savers for dramatic décor. I cut out spooky silhouettes of witches, bats, and cats from black cardstock and taped them to the inside of my windows.
Pro Tip: Place a small LED candle or string light behind the silhouette at night. It casts an eerie shadow outside, creating instant curb appeal even in a small apartment.
Extra Idea: Layer multiple silhouettes for depth. I placed a cat in the foreground, a haunted house in the middle, and a full moon cutout behind. The layering made the window display feel professional without taking up a single floor space.
DIY Hack: Print free templates from the internet for more intricate shapes like witches riding brooms or haunted trees. Trace them onto black paper and cut them out for a professional-looking result.
10. Floating Shelves with Mini Spooky Scenes

Finally, I use floating shelves to create mini Halloween displays. One shelf holds a row of tiny pumpkins, another a skeleton hand holding a candle, and a third features miniature figurines like black cats or ghosts.
Because they’re off the floor, I get maximum décor without losing walking space. Plus, you can rotate items year to year. I added a tiny DIY haunted house on one shelf last year; this year, it’s a miniature graveyard scene.
Pro Tip: Use small LED fairy lights across the shelves to highlight your mini displays. It makes a tiny apartment feel festive and magical.
Extra Tip: Add texture with small faux moss patches, tiny autumn leaves, or even little strands of spiderweb around figurines. It gives dimension and feels like a miniature Halloween world in your apartment.
Final Thoughts
Decorating a small apartment for Halloween doesn’t have to be stressful or overcrowded. By using vertical space, small props, floating decorations, textures, lighting, and clever DIY tricks, I’ve been able to bring the festive spirit into even the tiniest rooms.
Try a few of these 10 ideas this year, mix and match them, and don’t be afraid to add your own personal twist. Even small spaces can feel fun, spooky, and fully Halloween-ready without cluttering your apartment or creating hazards.
If you do try these, I’d love to hear about it. Drop a comment or share a photo. Let’s celebrate apartment-friendly Halloween creativity together!
